I Stopped Resealing My RV Roof 2 Years Ago & This is How it Looks Now

HTML-код
- Опубликовано: 3 июн 2023
- 👇 Click “SHOW MORE” below to open the full video description! 👇
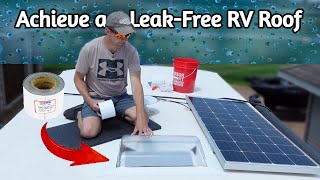
This is What Eternabond Tape Looks Like on an RV Roof After 2 Years This episode is a quick review of how the Eternabond tape we applied to all of our RV roof seams and seals has held up over the last 2 years. Please check out the original application video along with the other videos in this series. We will continue to post an annual review of how the Eternabond Roof Seal has held up each year. DON’T forget to like, comment & subscribe so you don’t miss any of our future videos.
✨⭐ PRODUCTS FEATURED IN THIS VIDEO ⭐✨
🔹 Eternabond 2" Roll amzn.to/3wuLTJI
🔹 Eternabond 4" Roll amzn.to/3wtgozy
🔹 Eternabond 6" Roll amzn.to/3Nsl1zI
🔹 Camco Water Brush amzn.to/3MugKeJ
🔹 Eternabond Cleaner amzn.to/3NsqCpF
🔹 Eternabond Primer amzn.to/3G43Fqm
🔹 Dicor Self-Leveling Lap Sealant amzn.to/3wBE4Av
🔹 Roller amzn.to/3wGCail
🔹 RV SNAPJACKS & SNAPPADS DISCOUNT LINKS rvsnappad.com/discount/RVTT10
🎥 The Original Eternabond Video • I Stopped Resealing My...
🎥 The 1 Year Update Video • The RV Eternabond Roof...
#rvlife #rvliving #rvtips #eternabond
✨⭐ OUR FAVORITE RV ACCESSORIES ⭐✨
ESSENTIALS:
✅ Camco Rhino Flex Sewer Hose & Elbow Kit amzn.to/3wxaiyG
✅ Camco 90 Degree Clear Sewer Elbow amzn.to/3eezBe7
✅ Camco RV Water Filter amzn.to/4aPw8hL
✅ Rubber Wheel Chocks amzn.to/3v0lL5I
✅ Hughes Watchdog 30 Amp Surge Protector/EMS amzn.to/3hAmgCy
✅ Hughes Watchdog 50 Amp Surge Protector/EMS amzn.to/3HKrpm1
✅ Liquified RV Tank Treatment amzn.to/3ksg1Ck
✅ Tire Minder TPMS amzn.to/3mjuBg0
✅ Water Pressure Regulator amzn.to/3m3ZFzZ
✅ Rubber Gloves 6 Mil amzn.to/3XNo7Dc
✅ Collapsible Water Hose amzn.to/3SvNubw
MAINTENANCE:
✅ Boeshield T-9 Rust Preventative & Lubrication amzn.to/3sjcjMx
✅ Eternabond Roof Tape amzn.to/3Ad290J
✅ Geocell Proflex Sealer amzn.to/3Fh4UTj
✅ Road Tool Kit amzn.to/41NIQKj
INTERIOR:
✅ Camco Cross Bar Door Handle amzn.to/3o8WWS5
✅ Shower Caddy amzn.to/3bdU80W
✅ Soap Dish amzn.to/3pKheSn
✅ Oxygenics Shower Head (White) amzn.to/3nhDMYW
✅ Oxygenics Shower Head (Brushed Nickel) amzn.to/2O8YcYC
✅ Perfect RV Paper Towel Holder amzn.to/3tZxd1K
✅ Dimmer Switch amzn.to/3rQdfFD
✅ Sliding Door Latch amzn.to/3EkpTT0
✅ Puppy Paw Hook amzn.to/2N9JaRV
✅ Foldable Storage Bins amzn.to/3tIp01f
EXTERIOR:
✅ X Chocks amzn.to/3m3ck2i
✅ Carmtek 10 Digit Keyless Entry System amzn.to/3t4IMpB (see the video here: • This RV Keyless Entry ... )
✅ Low Point Drain Valves amzn.to/3Jd6adb
OUTDOOR GEAR:
✅ Blackstone Griddle 22” amzn.to/3MDDiL0
✅ Blackstone Griddle 28" amzn.to/3eBnOuD
✅ Outdoor Gravity Chairs amzn.to/3Sb1p4M
✅ Ground Mat amzn.to/41u3wXg
✨⭐ MORE RV ACCESSORIES ON AMAZON ⭐✨
www.amazon.com/shop/rvtipstra...
💥 NEW TO OUR CHANNEL? Check out our catalog:
/ rvtipstravels
🙏 If you found this video helpful & want to support our channel with a small donation click here:
www.paypal.com/donate/?hosted...
✨⭐ DISCOUNT CODES TO SAVE MONEY ⭐✨
🔨 Learn how to repair & maintain your RV like I did w/ this COMPREHENSIVE training course:
rvtechcourse.com/?ref=rvtips&...
🚐 10% off RV Snappads! rvsnappad.com/discount/RVTT10
🛌 Get 25% off your RV Mattress by Brooklyn Bedding at rvmattress.com/rvtips
Use discount code: rvtips
📡 GPS Tracking for your RV! www.wheresafe.com/rvtipsandtr...
Get 10% off by using discount code: RVTIPS10
If you find a dead link, let us know & we’ll send you an RVTT sticker!
📺 Want to see more RV videos? Please SUBSCRIBE & CLICK THE BELL ICON 🔔 so you're notified when we release new videos!
Follow us on social media:
📸 Instagram / rvtipsandtravels
🕺 Facebook / rvtipsandtravels
We may receive a small commission for purchases made through the affiliate links above. There is NO additional cost to you when purchasing from our links & it helps cover some of our material and equipment costs to make these videos. We GREATLY appreciate your support!


✨⭐ *PRODUCTS FEATURED IN THIS VIDEO* ⭐✨
🔹 Eternabond 2" Roll amzn.to/3wuLTJI
🔹 Eternabond 4" Roll amzn.to/3wtgozy
🔹 Eternabond 6" Roll amzn.to/3Nsl1zI
🔹 Camco Water Brush amzn.to/3MugKeJ
🔹 Eternabond Cleaner amzn.to/3NsqCpF
🔹 Eternabond Primer amzn.to/3G43Fqm
🔹 Dicor Self-Leveling Lap Sealant amzn.to/3wBE4Av
🔹 Roller amzn.to/3wGCail
🔹 RV SNAPJACKS & SNAPPADS DISCOUNT LINKS rvsnappad.com/discount/RVTT10
🎥 The Original Eternabond Video ruclips.net/video/mKMlr4cP9Oo/видео.html
🎥 The 1 Year Update Video ruclips.net/video/f4YXYYWWtbA/видео.html
*This is What Eternabond Tape Looks Like on an RV Roof After 2 Years* This episode is a quick review of how the Eternabond tape we applied to all of our RV roof seams and seals has held up over the last 2 years. Please check out the original application video along with the other videos in this series. We will continue to post an annual review of how the Eternabond Roof Seal has held up each year. DON’T forget to like, comment & subscribe so you don’t miss any of our future videos.
#rvlife #rvliving #rvtips #eternabond
✨⭐ *OUR FAVORITE RV ACCESSORIES* ⭐✨
*ESSENTIALS:*
✅ Camco Rhino Flex Sewer Hose & Elbow Kit amzn.to/3wxaiyG
✅ Camco 90 Degree Clear Sewer Elbow amzn.to/3eezBe7
✅ Camco RV Water Filter amzn.to/3VzcMqi
✅ Rubber Wheel Chocks amzn.to/3v0lL5I
✅ Hughes Watchdog 30 Amp Surge Protector/EMS amzn.to/3hAmgCy
✅ Hughes Watchdog 50 Amp Surge Protector/EMS amzn.to/3HKrpm1
✅ Liquified RV Tank Treatment amzn.to/3ksg1Ck
✅ Tire Minder TPMS amzn.to/3mjuBg0
✅ Water Pressure Regulator amzn.to/3m3ZFzZ
✅ Rubber Gloves 6 Mil amzn.to/3XNo7Dc
✅ Collapsible Water Hose amzn.to/3SvNubw
*MAINTENANCE:*
✅ Boeshield T-9 Rust Preventative & Lubrication amzn.to/3sjcjMx
✅ Eternabond Roof Tape amzn.to/3Ad290J
✅ Geocell Proflex Sealer amzn.to/3KGMOyb
✅ Road Tool Kit amzn.to/41NIQKj
*INTERIOR:*
✅ Camco Cross Bar Door Handle amzn.to/3o8WWS5
✅ Shower Caddy amzn.to/3bdU80W
✅ Soap Dish amzn.to/3pKheSn
✅ Oxygenics Shower Head (White) amzn.to/3nhDMYW
✅ Oxygenics Shower Head (Brushed Nickel) amzn.to/2O8YcYC
✅ Perfect RV Paper Towel Holder amzn.to/3tZxd1K
✅ Dimmer Switch amzn.to/3rQdfFD
✅ Sliding Door Latch amzn.to/3EkpTT0
✅ Puppy Paw Hook amzn.to/2N9JaRV
✅ Foldable Storage Bins amzn.to/3tIp01f
*EXTERIOR:*
✅ X Chocks amzn.to/3m3ck2i
✅ Carmtek 10 Digit Keyless Entry System amzn.to/3t4IMpB (see the video here: ruclips.net/video/KcEUgsDw6kk/видео.html)
✅ Low Point Drain Valves amzn.to/3Jd6adb
*OUTDOOR GEAR:*
✅ Blackstone Griddle 22” amzn.to/3MDDiL0
✅ Blackstone Griddle 28" amzn.to/3eBnOuD
✅ Outdoor Gravity Chairs amzn.to/3Sb1p4M
✅ Ground Mat amzn.to/41u3wXg
✨⭐ *MORE RV ACCESSORIES ON AMAZON* ⭐✨
www.amazon.com/shop/rvtipstravels
💥 *NEW TO OUR CHANNEL?* Check out our catalog:
ruclips.net/user/RVTipsTravelsplaylists
🙏 *If you found this video helpful & want to support our channel with a small donation* click here:
www.paypal.com/donate/?hosted_button_id=J2KKM9NR3BJJA
✨⭐ *DISCOUNT CODES TO SAVE MONEY* ⭐✨
🔨 Learn how to *repair & maintain your RV* like I did w/ this COMPREHENSIVE training course:
rvtechcourse.com/?ref=rvtips&travels
🚐 *10% off RV Snappads!* rvsnappad.com/discount/RVTT10
🛌 Get *25% off your RV Mattress* by Brooklyn Bedding at rvmattress.com/rvtips
Use discount code: rvtips
📡 *GPS Tracking for your RV!* www.wheresafe.com/rvtipsandtravels
Get 10% off by using discount code: RVTIPS10
If you find a dead link, let us know & we’ll send you an RVTT sticker!
📺 Want to see more RV videos? Please *SUBSCRIBE & CLICK THE BELL ICON* 🔔 so you're notified when we release new videos!
*Follow us* on social media:
📸 Instagram instagram.com/RVTipsAndTravels
🕺 Facebook facebook.com/RVTipsAndTravels
We may receive a small commission for purchases made through the affiliate links above. There is NO additional cost to you when purchasing from our links & it helps cover some of our material and equipment costs to make these videos. *We GREATLY appreciate your support!*
Our local RV tech told us he’s been using Eternabond for 15 years. He also said if it’s applied correctly and treated with something like armor all or a UV protectant it will outlast the trailer. The few failures he’s seen were because it was not applied correctly and not cleaned.
Thanks for the info!
Hi Ross. I’m glad to see you found my photos useful. The Eternabond I applied is still doing the job. FYI, I too had heard comments that it was a good idea to apply Dicor on the leading edge of the Eternabond tape so I experimented and used Dicor on some leading edges and not others. In my experience there is no difference. The tape without Dicor on the edge has not lifted at all. Also in my experience, Eternabond absolutely works as advertised and it is a long-term if not permanent solution to sealing intrusions in an RV roof. Keep posting your great videos!
Thanks bud! Good to hear from you again, and thank you for the input my friend!
As a very long time RV owner (we're on our 7th now), it is great to see a video show what those in the know......already know....and one that explains it so well. I have had to completely rebuild the Class C over cab portion of one of my RVs because of the incidious slow leak rot that occurred before I bought it. I knew of the damage, so I got the Class C at a huge discount. Applying the eternabond tape, as Ross explains in the prior video is crucial. It must be applied properly! If you have cracks already in the old sealant, seal them first and let cure. Every RV I've had since that Class C years ago has received the same treatment. I have never had a leaking roof on that RV or any RV since. Never! The cost benefit is clear and straight forward and a no brainer. Keep a roll of 6" with you while on the road. That low hanging tree branch you hit at night, while it's raining, is no longer traumatic event. Wife and I just picked up our 7th, and it is over 2 years old.......guess what I start next weekend?
thanks for the informative comment and adding to the video Russ.
Ours looks the same after I think 6 or 7 years now.
Good to hear, thanks for sharing Linda.
Lap sealant won't fix the sides. What people don't realize on the roofs is that the manufacturers in a hurry pull the rubber membrane over the sides tight, then put the side trim pieces in place and basically call it done. Over time the rubber membrane rubs on the edge of the roof plywood which will open up the membrane and you won't know it until the wall is already soaked opening up a whole can of issues. Soooo putting the tape down the side edges like you did is a HUGE piece of mind while using the camper.
Excellent point Justin, thanks for sharing.
Really been wanting to do this and I've waited TOO LONG as I now have some delam. I probably won't repair the delam but do you guys think it would be better to fully cover the screw seals on the sides rather than covering just the top half?? Mine are flimsy and have a lot of play...
Another perfect video explaining everything while being straight to the point with no fluff. Good job!
Thanks bud, appreciate that.
Honest review with proof to back it up. Something you don’t see a lot on youtube.
Thanks for watching Dave
If you really want it to last, apply a small bead of non leveling lap sealant to the edge of the eternabond tape. Commercial roofers do this for 50 year rubber roof installs
Thanks Eric
I think you’ve just about convinced me! 🤣 Seams like a good project in the fall.
I used double sided Eternabond to put 3 solar panels on the roof of my RV a few years ago and it still looks good :)
Thanks for the videos. I have been thinking about doing this to my rig and your videos helped me decide to do it.
Let me know if you have any questions.
I love seeing how things have held up over time, not just new installs.
Glad to help
Thanks for the update, another great video
We appreciate the updates. Thank you for all the info!
You bet!
Good Update and great job. I imagine the Eternabond will last you a long time. It is some great stuff.
Thank you Jared, been watching you a long time. Love your content. Thanks for stopping in.
Interesting information, and clear and to the point. Thank you for making it.
Glad it was helpful!
Great video, thanks for posting.
Thanks Mark
I have performed this on my 2670MK last year. So far so good👍👊Thx for the info!
Great to hear!
Right on Ross everything is looking great I’m going to look into getting those snap pads thanks
I got a sticker for you... email me your address.
I'd have no idea how to be an RV owner if it wasn't for your videos. ❤🎉
that means a lot, thank you and glad to help!
Just purchased my very first RV yesterday, picking it up Saturday. Ordering Eternabond today. Thank you very much for this into! We’ll get some snap pads from your link later this season
Welcome aboard!
Took me a day to complete but happy I did it.
Nice!
Solid information thanks. Also thanks for putting up the 9 year pics. I have had some on for two years with zero issues. Planning to cover all seems this spring,
You bet!
Russ, perfect timing! Just got my rolls of Eternabond to apply on our Imagine TT and have wondered how your application has worked out. Obviously very well so up on the roof I go to clean, prep and then apply the Eternabond (with rounded corners of course 😉)
Good timing!
Another great video! Thank you for the follow ups.
Thank you for watching Robert!
Thanks for Updating!
You bet Joe!
I love Eternabond tape. My camper is 35 years old, with the original roof and half of the roof is 12” wide Eternabond tape. Someday, the entire roof will be Eternabond tape and will last my lifetime.
nice, thanks for sharing!
Ross, Great youtube! I just finish my Imagine pull trailer and I'm really satisfied on how it looks and sticks to the surface. May need a youtube on how to peel off the plastic membrane on the sticky side. HA! Heading south next year so I will inspect the roof a couple of times. I did apply Dicor self leveling on areas where I thought was needed. The thumb was my main tool to press in areas and I did use the roller. Making sure you have a good clean surface is a must.
I know, its a pain to get that plastic off. I usually poke the edge with a razor and pull it up.
Thanks for the update.
You bet
Sealed the rear cap on our Class A 10 yrs ago, looks new Eternabond is great stuff.
thanks for the info Bill, 3 year update is being released next Sunday.
Thank you for the validation I replaced a broken vent fan on my RV with a new Fantastic Fan in 2017. I did not have access to lap sealant at the time and the eterna-bond I used is still in place and sealing better than the existing self leveling sealant installed by manufacturer.
Glad to hear!
Hi Ross! Thank you for all yours videos. It’s very helpful. Do you have a video about walls sealing?
you're welcome, and sorry nothing on walls yet.
I used two full lengths of Eterna bond on my RV awning, where when rolled up it, rots from the sun, and it worked perfectly. I did not have to replace my awning, and I am a happy camper.
Thanks for sharing!
13 years ago I went all in on a 1974 Holiday Rambler roof stripping all caulk and cleaning the bare aluminium. It was a little work but in the long run the Eternabond is still there and I have not had to touch it. Do it right and it will treat you very well.
AWESOME! Thanks for sharing!
It's been on my travel trailer for 5 years. It looks as good today as the day I applied it. Man, it really is nice not having to worry about my roof seals. I go up there twice a year to clean the roof and inspect. As some have mentioned though, if you ever need to replace something attached to your roof and sealed with this stuff, lord, it's not going to be fun removing it.
Hey bud, the 1 year update video talks about replacing parts a little bit. Not too terrible to do using the method I talk about.
@@RVTIPSANDTRAVELS Good tips in that video. Definitely applicable if you applied over the dicor. For me, I did my eternabond on a hot weekend and was able to remove 90% of the old lap sealant easily prior to applying the eternabond. You'd be surprised how much lap sealant doesn't stick to things when it's hot and soft. It peeled right off the TPO cleanly. Plus there was no way my max air vent cover was going to fit with eternabond over the lap sealant.
Nice, I’ll be removing the sealant on my next rv too.
Thanks! This is my next project. Thanks for the Snapjack link.
thanks for the nice comment, let me know if you have any questions during the mod.
@@RVTIPSANDTRAVELS I will for certain. Thanks.
hopefully we see year 3 soon.
i've never heard of this before but now im really thinking about doing it to my trailer.
should be out in a week or so
@@RVTIPSANDTRAVELS Sweet!
that last picture is what i would likely do, just run a bead along the tape edge. Looks like a good product
Yep, perfectly fine to do.
Well done! ☺
Thank you! Cheers!
Looks good to me!
I have had RVs for 16 years and used eternabond on two 5th-wheels and now a super-c front and rear cap seams and never had a leak or problem.
Thanks for the info Karl!
I've been using eternabond on my RV's sense 2015. Now when I buy a new RV I put the tape on all the seams, I have never had any issues using the tape. Rounding the corners is an obvious suggestion, wish I thought of it before I applied the product.
same here, however have not had any of the hard corners peel up, but will definitely be rounding the corners on the next rig.
I just spent many hours cleaning all the sealant off my cargo trailer and will be using eterabond on the aluminum and galvanized steel roof. Sure hope it will be worth the effort.
Good luck!
Great update! Love your videos. When you say "round the edges", are you talking about the edges of the tape itself? If so, how do you do that? With a roller after it is applied? Thanks for the help!
Just cut the corners so they aren’t a 90 degree turn.
I’ve watched your videos, I’ve watched others videos. I’m still 50/50 if I want to do. Talked to an RV tech and he says it’s a great product but, if you need repairs where you need to remove the tape they charge a massive amount to do it. And removing it apparently can cause damage like tearing the rubber layer. But I love the idea of no lap sealant yearly lol. I do have a 4” roll I keep in the camper.
It’s definitely tough to get off, but that’s why application is important.
Cut the eternabond through to the Dicor past the edge of the item (sunroof, vent whatever) that needs removed and leave the rest of the eternabond on the roof. Once you repair/replace problem then seal it with dicor and let it cure. Once cured you can put new eternabond over the old and the repair. Make sure you clean the old eternabond surface before aplying the new over the top of it.
Just wanted to follow up on this. After watching your videos on sealing with Eternabond tape, I decided to dive in. Did all the same steps to clean and prepare including using the Eternabond cleaner. Well, that was a mistake. After cleaning around my skylight with soap and water as you did, I used the Eternabond spray cleaner to eliminate any residue. The plastic outer cover of the skylight immediately cracked in several locations. In disbelief, I spayed the other side; it immediately cracked the plastic again.
Tape is great but DO NOT USE THE ETERNABOND SPRAY CLEANER ON ANYTHING PLASTIC. IT WILL DESTROY IT.
Glad to post pics of the carnage if anyone wants to see. Awaiting my new skylight cover
Thanks for sharing John. I did not use the cleaner in my application because it’s essentially acetone in a can. I didn’t think it was necessary. Glad to hear the rest of the mod went well. I’d like to use your pics in my 3 year review. Send me pics to management@rvtipsandtravels.com
@@RVTIPSANDTRAVELS I'll take some pics and send this afternoon. Was amazed that the Erternabond cleaner did that. That said the tape is awesome.
Thanks my man. I will let everyone know.
Pics as I said I would post.
where?
I am absolutely thrilled that I came across your videos on taping your lap sealant with Eternabond! I love the idea of less maintenance! One thing I didn't see in your videos and am curious about is what about your slide outs? Did you tape your slide outs as well or are you still replacing the sealant on those each year?
theres no sealant on my slide outs, just some thin tape on the seams but its definitely not eternabond. hasnt failed yet so i havent put eternabond on my slides but it has been done.
@@RVTIPSANDTRAVELS Ah got it. Ours has sealant on the edges of the slides and on top right against the outer wall so I guess I will put some tape there too. My only fear would be damaging either the slide gaskets or the Eternabond tape with the slide going in and out
Hello. Have you ever considered going over the existing TPO membrane with a new membrane and using TPO tape on the seams instead of removing the old skin & all the services? I've been considering this as my RV is parked at a resort now and I have no plan to pull it ever again.
i have not considered doing that
Hello. We have a new to us 2020 imagine 2250rk. We are going to put eternabond tape around the top and vents. Here is my question. The trim molding that covers the screws along the sides above the gutter does NOT stay on, we constantly pull it out of the rain gutter and put it back on. Would you put the molding back on and tape over it, or would you take the molding off and tape over just the track with the screws in it. Thank you for your video’s. They are fantastic!!!
if the trim is covering, i would not tape onto it, but i think the application is better with it on the removable trim... what is causing it to come off? is it sliding back?
I see it is holding up well
My question is can you remove it to make repairs to sky light and vent covers will it harm the roof coming off
the 1 year review talks about replacing roof components. ruclips.net/video/f4YXYYWWtbA/видео.html
Our 2019 Rockwood got a wrinkle at the front cap and Forest River said it was poor maintenance as they said it is the original factory sealant. I told them that you do not take all the sealant off if there are any cracking you add sealant to the factory sealant. We have told this by the dealer and the roof membrane mfr. says the same thing. If you are replacing the curb on a vent then you would take off all the sealant, I have not heard back from the guy as he prob knows that I am right and Forest River is having a mfg issue on a lot of their RV's. I have been calling around talking to different shops on how this should be repaired. When I took it apart the screws in my opinion are wrong size and wrong type as they are for metal with a self drilling tip. They were one inch but then you lose about 3/16 or 1/4 inch due to the self drilling tip for metal. Other shops say they use 1 1/2 in wood screws. If you use the one inch screw and then you have to go through the trim molding then go through the 1/4 inch or 3/16 inch fiberglass front cap and then the 1/8 inch membrane how much is the screw holding into the wood roof? Hardly anything!! I think that the fiberglass was flexing in the middle of the roof where the wrinkle was and the screws pulled out. The sealant had no major cracks just the normal small weather cracking Aas it is only 4 years old, so I added sealant to it. I have fixed the wrinkle and now I am debating on doing the eternabond tape to everthing or use Henry 887 roof coating on all the lap sealant. The RV dealers are worse than car dealerships and what about the techs are they trained or have to be certified like an automotive mechanic?
We are leaving this weekend for a 3-4000 mile trip so I will see what my repair looks like when I get back and if nothing has changed, I am going to cover the repair I did with eternabond tape or the Henry.
sorry to hear that, hope you get it figured out.
Henrys tropicool ontop of the whole roof, eternabond included...... Sure makes a difference
i'd agree.
I noticed the eternabond tape applied down to the middle of the plastic trim that covers the screws for the trim. I have had to replace that trim before. Is that going to an issue in the future? Looks like a great process. i'm going to do it, just wandering about applying over the trim covering the screws.
thanks, keep up the good work.
the trim can still be peeled up and out, i would cut the eternabond where it meets the old trim, and put the new trim right in. heres something else to consider, if youve already replaced the trim, covering it with eternabond will increase its life by removing the elements and sunlight off of it. the trim will probably outlast the trailer.
Fantastic video. Thanks so much for sharing. I do have one question. I have been the owner of a 2022 2400BH Imagine travel trailer for approximately a year now. However, I am a bigger man approximately 300 lbs and I have been super nervous about getting on the roof of my trailer. I totally understand that the ladder is not rated for a guy my size, but i can use a separate ladder to get up on the roof. In your opinion is the roof rated for a guy my size?
Good question
Zach, Every RV is different, first place to check is the owners manual. If you dont have it, they are available for download on GD's site.
You can always use an old tecnique to ditribute the weight out more. Take 2 pieces of 1/2 inch plywood (about 2x2 or bigger if you want) up with you that you can walk/ kneal on while up there. moving one in front of the other to move across the roof.
Hey! I merged a seam on my squaredrop's roof (aluminum composite) with just silicone. I was thinking of going EternaBond as more of a sealant. With that silicone-related post on EternaBond's website...do you recommend I remove the silicone bead before placing the EternaBond on? Thanks!
Yes, remove and clean the area with a solvent like mineral spirits. Things don’t like to stick to silicone, even after it has been removed.
Would it be a good combination to add the liquid rubber coating to the roof over top of the eternabond? Or is that just over kill?
That’s something you can definitely do, I just haven’t gotten there yet.
Do you feel like the 4” is too thick on the sides? I was wanting to do the 2” tape on the sides and 4” around the vents and front/back. This stuff held up a chunk of the fiberglass side that broke off when someone crashed into the back corner. Literally we just needed something to hold and it wasn’t safe to mess around with it on a busy street. It held for about 2 years lol.
for my rv the 4" on the sides would have been overkill.
If i were to liquid rubber the roof, should i do it before or after eternabonding lap joints?
Does eternabond stay maliable enough to "tape" sunroom to trailer as they will raise and settle differently through the seasons?
TIA
i would coat after applying eternabond. as far as a sunroom, i dont know the answer... it would probably stick but is going to be a bear to remove it.
Thank you for this video, if I understand correctly, you put ethernabond over your old lap sealent ? So, no need to remove and clean old stuff? It sure looks good. !
you definitely need to clean the old sealant... watch this: ruclips.net/video/mKMlr4cP9Oo/видео.html
@@RVTIPSANDTRAVELS Great, thank you, just did not have time to watch all for now, I'm on the road, I have to re-do all my solar pannels and antenas caulk, this is very helpful. . Love your videos, super full of little details well explained.
I havent been able to find much info on this: if i were to use a roof coating (like RV roof magic) for the whole roof and eternabond on the seams, should I coat or tape first? Should i overlap the sealant layer on top or under the tape a bit?
On my rv I removed all lap sealant, cleaned to where my tape edge is gonna be, then applied very small bead of Sikaflex 221 in place of the lap sealant, smoothed beads (wearing nitrile gloves). I waited 2 hours for a good skin, then applied eternabond tape. Cleaned the roof the next day with dawn dish soap, rinsed well (a must). Rolled on a roof coating including the edges of the tape. I used 2 coats of rubber coating. If you use a silicone based product like Countryman Coatings, any repairs will require a product that sticks to silicone. Good Luck. BTW...3 years later...looks like new
you can do either, but i would tape first.
Sort of new here. Would you suggest to put this on a brand new RV ?
you can, the age doesnt matter, as long as the lap sealant that you're going over is healthy.
Like your RV the gutters/trim are black. I would think black tape on the sides would look better because it wouldn't stand out as much. But everyone seems to apply the white tape. Any particular reason?
White reflects heat, black absorbs it.
If you put EB around the entire outer trailer roof, doesn't that create a lip so the rain puddles all around the roof instead of easily running off. I know that EB is not very thick but right now rain easily runs off and with EB it would have the evaporate?
Excellent question and in theory it makes sense. However eternabond isn’t that thick, and more importantly for that water to remain there the camper would need to be perfectly level, which is is near impossible to do. Rvs are hand built, I’d be surprised if even if your interior floor was level the roof was exactly the same. Still a great question nonetheless. I can say this, I have not seen any difference on that small area next to the eternabond vs everywhere else on the roof. And the eternabond is stuck fast and looks like it was installed yesterday. Tpo is fairly resilient, it holds up to water well, if there is a small bead next to the tape I don’t think it could ever rest there long enough to do anything, be it rolling off due to not being level or evaporating. I also think the benefits of covering the top of the drip rail far outweigh a little water on the membrane, of which it’s designed to handle. Think about it this way, if it rains all day, the membrane is seeing water anyway for hours. A little water left on the membrane for that time won’t hurt anything at all. Plus it’s only ever going to be as high as the thickness of the tape, after that it rolls off. It’s 20 mils thick, that’s half a millimeter. That’s probably close to waters cohesion breaking point. Just not a concern in my honest opinion. Thanks for the great question!
Should I do this on my brand new camper or give it time to age a little bit?
new is fine if you dont want to reseal with lap sealant. remember lap sealant is still fine to use, just requires resealing
How do you get the etern bond off when you have to replace a skylight or a vent
That’s addressed here:
ruclips.net/video/f4YXYYWWtbA/видео.html
Do you have to take off the old lap sealent or can you just go over it with the tap
watch this: ruclips.net/video/f4YXYYWWtbA/видео.html
Much is covered by EB on the roof surface and ends but I’m needing to know about the side length channel trim. Where the screws are in a channel covered by a plastic trim . Here it’s shown only covering the top of the plastic screw cover. Why is that ? Everything on the roof was completely sealed over with EB . Has anybody covered over the whole channel trim/screw railing ? I would like to see & hear the results. I’m trying to ensure a sealed up 9 year old travel trailer -& screws holding it all together staying dry . Mine is like a large Teardrop so that trim runs the top length in one piece , all the way to the back end bumper area .
didnt cover the entire channel because if i ever need to get to those screws i can peel the cover out from the bottom and up since the eternabond remains pliable. covering the entire channel isnt going to prevent anything that covering half the channel did.
When you say "Round Your Edges," are you talking about cutting rounded corners rather than corners that meet at a 90 degree angle? I just wanted to make sure that I understood what you meant.
sorry for the late response, but yes, you are correct round the edges with scissors so there is less of an edge to peel up.
Do you think Eternabond would work on the vinly on a sunsetter awning? The last 24 inches of my18 ft, 20 year old awning is cracked and weathered. Was thinking of running 2 of the 12 inch strips acrossthe end. Or is this tape too thick and heavy?
i have never tried it so i cant say, but i would probably not do it. eternabond stays somewhat malleable, so constant movement might push this around a little. it doesnt do well on vertical surfaces either.
@@RVTIPSANDTRAVELS Thanks for the quick reply. I imagine the ends could also stick to bottom when being rolled up.
youre probably right about that too... it could be a messy situation... might want to bite the bullet and get the fabric replaced, or you can just buy one of those EZ up pop up canopys to keep stuff outside dry 😉
One your side application, I see you came half way down the vinyl insert that fits in the metal rail. that vinyl is loose and May shrink. Are you worried water will get behind the bottom of the vinyl insert, sit on the rail channel and rust the screws? Any reason you didn’t cover the entire vinyl insert and go a bit into the rail trough?
great observation Terry. i coat that piece with 303 aerospace protectant 3-4 times per year. My rig is 7 years old, its hasnt shrunk at all, and its left in the sun year round, no cover. I only went halfway down so that if i ever do need to access the screws behind it that hold the membrane down, i can just flip it up and out since the eternabond is pliable. im not worried about the screws, that was never a water tight seal to begin with. the gutter systems on rv's are terrible to begin with. the vinyl insert piece still sits well behind and below the metal rail, but its not a waterproof seal, water can get behind that very pliable vinyl if it wants to. if anything, the eternabond from the roof to the middle of the vinyl stops more water getting in than it did from the factory because, well, it blows my mind these gutters are not 1 piece gutters. they clue them together and run some sealant on the joint, doesnt last though. also, by going halfway down on the vinyl, should i ever need to replace the vinyl insert, i can just cut it where it meets the eternabond and replace the vinyl. hope that makes sense.
@@RVTIPSANDTRAVELS thanks for your quick reply! Yes, your answer makes sense. I have a one year old trailer and may do this instead of touching up the lap sealant. Thanks for the videos and annual follow ups.
Josh the RV Nerd in his Brinkley factory tour video says they use Eternabond, must be under the sealant. ???
something i will look into
I am in Florida . It`s hot hot hot, would you recommend putting this off until it gets cooler or wait for it to get cooler in October`ish ?
Billy, I am in Florida too. The application temperature range for Eternabond is -20F to 150F. My limiting factor was my tolerance of heat. I worked from first light until it got too hot. I covered the roof of my 38 foot Class A early evening to keep it dry from the settling dew so I could work/start early without waiting for the area to dry. Be careful, if you start really early the dew will continue to settle as you uncover the seams you plan to seal. If it happens, a hair dryer handy can dry it quickly. Took 3 days to get it done. I can't handle the heat like I used to.
thanks for helping
There is so much controversy about doing this. Would you do it again? Any problems with it since you made this video? Thanks for the great info, I enjoy your videos.
no problems at all, i will be doing this to every trailer i ever own.
I am not a roofer, so what do you mean by round the corners / edges? Thanks for the update.
He means cut the corners round instead of leaving it square to square as it will coming off the roll
round the corners instead of leaving them at a 90 degree angle.
thanks for helping out.
Will using the Eternabond tape decrease the value of the RV when it comes time to sale or trade?
Don’t see why it would, it’s specifically made for this purpose, but I’m not an appraiser so I couldn’t say for sure.
How do you round the edges? 🤔
with scissors or a razor knife.
I am very close to doing this on my 2022 Coleman since it is fairly new......should I? Push me over the ledge.
haha, that needs to be your decision my friend. I'm happy I did it, its holding up for me. I will do it on all my future trailers.
@@RVTIPSANDTRAVELS
haha I just read down many of the comments. I am filling my amazon cart right now! I am not sure though if i need like (2) 4"x50'-0 wide rolls around my perimeter and slide (about 60 linear feet) or the 6" wide rolls for the perimeter and 4" wide rolls for the interior coverage....with maybe an extra 4" and 6" roll as backup. Can you tell me your opinion on the widths and what/where you used it?
Thanks for the knowledge sharing! Awesome!
id stick with the widths i originally used, 4" on rear, 2" on side, 6" i think on front. I know I mention them in the first video. ruclips.net/video/mKMlr4cP9Oo/видео.html
@@RVTIPSANDTRAVELS
great! thanks.. I';ll go back and hit the original and year 1 vids again
How would you round the edges.
with scissors or a razor knife.
Does extreme cold effect this product?
No. www.hbfuller.com/-/media/files/resource-library/tds/structural-marine-bonding/bus/eternabond-10-aug/eternabond-eternabond-roofseal-tds_en.pdf
How do you round the edges?
Cut them so they are round edges instead of leaving them at a 90 degree angle
Can you apply Eternaban tape on RV awning for repair?
Ive never tried it, but I would not use eternabond on an awning.
I am looking for awning protection from UV and sun. Because little bit separation. I know some people use gorilla tape. But I was wondering what about Eternaban tape.
👍👍👍👍👍
GOOD AFERTERNOM ! IT COFEE TEESTI A RED!ONZE 23 OK.😊
yep amzn.to/3KheTuz
Yet ANOTHER Eternabond RUclips.
Kris, the title clearly explains this is “another Eternabond video.” You know that when you click the video. Nobody’s forcing you to watch. Lol.
The spots where it looks like the eterna bond is lifting..... thats the tape shrinking, scrunching up the TPO roof and pulling it. that is not good. the same happens with shrinking of the lap sealant. Do not Stretch tight the eterna bond when applying it will shrink over time and grab the TPO roof and pull it up from the plywood it is glued to. Just imagine super glue on your hand and palming the TPO roof then closing your hand and lifting.
No, that is not whats happening. the TPO was lifting by the lap sealant before the eternabond was applied. This was a known issue with some of the Grand Designs during that time using Dicor instead of Alpha. I show this lifting before the eternabond was even applied in the 1 year review: ruclips.net/video/f4YXYYWWtbA/видео.html
If you watched the first video in this series you would see that the back piece was not stretched on while being applied, it was laid on. Also, very clear in the video: ruclips.net/video/mKMlr4cP9Oo/видео.html
@RVTIPSANDTRAVELS "the same happens with the shrinking of the lap sealant"
correct, lap sealant can shrink, but with no UV light or elements on it (covered by eternabond) that shrinking is so minimal that the eternaond conforms to it. I'm glad I did it though because the lifting was getting worse each year before the Eternabond was applied. Once applied, the TPO does not continue to lift out further. I will say this, the glue they use under the membrane is garbage. Im ready to see more fiberglass roofs.
@RVTIPSANDTRAVELS can literally see how the eternabond you put on has shrank up.
its a free country my man, if you want to think the tape has considerably shrunk, then thats all you. If it were true, you would see the microsealant smeared on the TPO membrane at the edge of the tape where its retracting since that stuff does not come off without a fight. But there is "literally" no microsealant past the edge of the tape. The only area you may see some residue at the edge of the tape is on the sides of the camper, but thats not from shrinking. its just a little dirt where rain water collects before it evaporates since the tape is higher than the membrane. Not really sure what video you're watching but there is very clear video proof against the things you are saying in these 2 videos. The TPO was lifting long before Eternabond was applied, that is CLEARLY shown in the 1 year review. The lifting has stopped continuing to spread after it was applied, evident in the 2 year review. Thanks for watching and have a great weekend!
👍🇺🇲
I will rather remove the lab sealant
I will probably do that on the next RV.