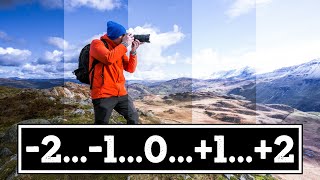
HOW and WHY to use BRACKETING and FOCUS STACKING

HTML-код
- Опубликовано: 7 сен 2024
- FREE Gear Guide & Exposure CHEAT SHEET www.viewfinder...
In this video we will tell you everything there is to know about both bracketing and focus stacking! We will tell you both the how and the why to use both of these advanced photography techniques, and we will walk you through all the tips and tricks we know for creating the image in the field, as well as editing it in Lightroom and Photoshop. Watch now to revolutionize your landscape photos!
Subscribe to our channel for more exciting photography tutorials, useful photography tips and fun shooting ideas. / viewfindermastery
Download our FREE Gear Guide & Exposure CHEAT SHEET www.viewfinder...
Follow us on Instagram:
/ viewfindermastery
Follow us on Facebook:
/ viewfindermastery
Check out our Online Membership!
www.Viewfinder...


3 braceleted for foreground, middle ground and distance. use a single shot of your finger between each set. When Finished with bracketed sets use two fingers to start a new set Now you have separation of files when they are loaded into your editor,. this allows you to know where one set starts and finishes.
good suggestions! 👍🏼
Thanks for demystifying why to avoid deghosting!
You're very welcome! 🎉
Edit > Auto-Blend > Stack Images in Photoshop now does it automatically I think, no need to manually brush. I do it that way for macro stacking where there are 100+ photos.
thanks for the tip!
I have always wondered how to properly take bracketing and focus-stacking shots and merge and blend them together properly. This video was very helpful in solving that puzzle. Although I auto-blend to produce a sharp image from front to back. Thanks
Great to hear that it was helpful for you! Keep at it! 👍
Excellent explanation. Thanks.
Glad it was helpful! 👍
Thanks for this well explained video about image stacking. Will try it on my next proj.
Glad it was helpful! Best luck!
Excellent 👍👍
thanks for your feedback! 🙏🏻🎉
Excellent explanation of a complex topic! I'm excited to try this out.
Jeffrey! So glad you like it 👍📷
It's surprisingly easy the 2nd time you do it. Bumping through the 1st one is a little fiddly, but you'll nail it I'm sure!
Great Video !
Glad you enjoyed it!
Thank you a lot
Our pleasure Moha! Please consider subscribing if you haven't already. More fun content coming soon! 🙏
I am so glad my Hasselblad does this all automatically.
that's handy indeed!👍
„This all“ means?
Thanks for a very informative video. I was wondering, how did you exposure bracket? Did you vary aperture or shutter speed or ISO? Thanks!
Glad you enjoyed this one Tony.👍
This was a case of adjusting the shutter speed (my usual go-to bracketing method for landscape photography). Thanks for watching! 🙏🏻
Did u have issues with focus breathing? If not, what camera n lens were u using to avoid focus breathing?
great question @tahchengable. I don't recall it being a big problem in this case. I was using the Sony 14mm G Master lens, which is a high performance wide angle lens. It probably breathes a bit (like all photography lenses) but didn’t cause me any real issues. 👍
@@ViewfinderMastery tnx for responding. appreciates. im trying to find a solution for focus breathing for product shoots. Client wanted sharpness from front till end of product. He cant understand y i cant do it while he can on a phone. I cant explain that too. haha. oh dear...
Without showing the technicality of how to take the pictures, this video will not do any justice
The full length lesson is available to paid members over on our website. This is just an excerpt. thanks! 👍