BMW E60 E61 Comfort Seat Thigh Support Repair Tutorial by PROCESS

HTML-код
- Опубликовано: 7 окт 2019
- This video will explain why BMW E60/E61 models (equipped with Comfort Seats) seat thigh extender support stops functioning and how to easily repair it yourself. With some patience, an inexpensive replacement all-metal drive gear and basic hand tools, you can fix this common issue and address the flawed original design with a permanent solution.
To complete the repair, you will need: the following supplies and tools:
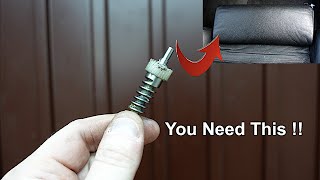
• Replacement all-metal thigh support gear (Can be found online for about $12 USD, look for part number: 52 10 7 068 045)
• Torx 15, Torx 20, and Torx 30 drivers
• Nylon panel removal tool
• A pair of gloves
• Synthetic grease
If this video helped you - please LIKE, SUBSCRIBE, and turn on NOTIFICATIONS to stay updated on new content from PROCESS.
Also, while you're at it, follow @processcarcare on Instagram for more car culture and detailing content: / processcarcare
Also, follow @5wagoon on Instagram if you're in to wagons!
And of course, if you have any questions or comments, please feel free to leave them below, we'll do our best to respond to them.  Авто/Мото


There’s nothing more satisfying than watching a video like this and knowing you now have the knowledge to fix something yourself and save a heap of money.
Thanks for this video. Was very helpful for me when changing the worm gears on my ‘09 F01 740i. Took about 1,5 hours to fix both seats
Wow extremely indepth and thorough. Thank you so much. Now I just gotta get that metal worm gear. 👍🏻👍🏻👍🏻
Thanks for the kind words!
Awesome video!! Great detail in a non-annoying presentation. Good work. This is one of my projects coming up this week and this helped me a lot to understand and visualize the process.
Excellent video sir! Thank you for the time invested so you could share with us!
Awesome job! Very helpful, thank you for this.
Great video. Thanks for the solid instructions!
Thanks mate, just ordered the parts 💪 will be coming back to the video when it arrives
Thanks very much for this video! I just repaired both front seats, it took only half an hour / seat after seeing this. I think it would've taken like a day if I hadn't seen this :D
This was very helpful! Thanks for sharing this video!
Exactly what I needed! Thank you so much!
Thank you so much for this clip. I can fix it via this clip. Thank you form my heart
That’s a great video. Very clear and informative. Thanks!
Thank you, was very detailed and informative!
Very detailed tutorial, thank you very much
Thank you! Such a helpful guide. Much appreciated.
Thank you man. You really know how to make DIY videos
I like this video. It's helpful. Thanks~
Great video, finally can fix the gears on my x5
Best video so far 👍 thank you
Thank you so much for your video! Very helpful
Thank you so much for your help. I fixed this!
Amazing, my driver side broke yesterday and then I tried the passenger and that was broke too. I was so confused how both seats broke at seemingly the same time. I feel much better knowing it's a known issue, pretty sure the hot/cold temp swings we had recently put the finishing move on the brittle plastic.Thanks so much!
9:10
When I got the outtermost side out, I pulled it down, and counter-clockwise so that the other side would rotate out.
Great job, good tutorial!
Amazing job. My next maintenance at E60 530i. Well done. 🇧🇷🇧🇷
Awesome video buddy ,thank you
Super description, just fixed my problem in 1 hour, but I am not that talented like you :-)
I just want to say thank you so much!!
GREAT video! I'm about to do this repair, definitely going to be a lot easier with your tutorial.
Glad to hear that, thanks!
@@process1393 Ok so I've done it and actually the hardest part is disassembling the motor housing where the gears are. Those clips are crazy strong, but still somehow managed to not break any of them. I have just one advice - when reinstalling the whole mechanism it is easier if you connect the motor first so you can adjust the whole assembly if needed since the "extending" parts don't slide freely anymore :) Again, great video saving a lot of trouble and really easy DIY once you've done it.
Great video. Thanks a lot!
Great video. Thank you.
great video!
Nice one ! Thumbs up!
thank for detail info. great!!!
Very good, heelped me alot
Thanks for this video I fixed mines on my 530xi touring..
Cheers! Worked like a charm. Will add, some gears need to be modified slightly. Damn aftermarket. Also note, it’s much easier to slide motor side out and in first.
Great video thanks bro,,,,! merci beaucoup
Wow . . . this is a really terrific (and very helpful) video. Might you know of a mechanic in the New York Metropolitan area (other than a BMW dealer!) who
could do this repair? Thanks so much for posting . . .
hey! i'll be doing it in near future. do you expect some computer faults after detaching the heat seating pin?
Ty
Nice :)
Thanks! Hope the video helped you out
TY
Good job mate.
What's the link for the part?
Thanks
best LIT!!!
Hello good video🤩 but how to found in ebay this part ? Wats is name of part?🙃
i have this same issue with my 2008 e60 535i
Thanks
Glad you found the video helpful!
Excellent video. Thank you. I have the same issue on my x6 M e71. Do you think it s the same procedure and the same part to be changed ? Do you have the part number please ? Where do you purchase it ?
Exactly this happen to my e60
Will this throw a seat calibration code?
Mine won't clear, but I have this issue.
Anyone know where I can replace the cushion/assembly. The stitching on mine is destroyed
After all..........God Dammit today's BMW brand/////
Nice video and Good job, it was very interesting. Thank you ////////////////////
Hello. Do you know the part number as I am unable to locate the worm gear for a E60
Thanks
I ended up with his same seat for the current project I’m working on. You wouldn’t happen to know which pins/wires would need power to be able to use the switches to adjust the seat would you?
I’ve tried almost every combination I can think of other than just ramping up the voltage I’m applying and seeing if that works
I'm sorry I do not know
What with overheating? Dont wanna turn by self heating and can burn all and maybe fire the car..
Great video, thank you. I have the same issue with my 2011 550i. But mine seems to have a package next to the motor under the seat. Is that an air bag?
I couldn't tell you for sure Benson Chan. To my knowledge there's no airbag under the seat. But if said package has an explosive charge label on it, then chances are it is an airbag.
@Benson Chan I have that white "package" also. Maybe it is related to seat massage function. Did you found out how to remove it?
It just refuses to line up for me. Insists on coming up 1cm to the right of where it should be to line up and nothing seems to work.
Would this method work with the M sport seats.
I can't say for certain but you may be able to check via newtis.info which actuator assembly your vehicle uses. Assuming it is the same one, this DIY's instructions should still apply.
Hello there! Thx u for the video
Now the hard part is to find a good retail , the 2-3 ones available from e-bay cone from the same seller “seachan autoparts” either $9.99/$10.99/$12.99 they all have 1STAR reviews ,so can u plz provide me with the link that u purchase it from ? So it will be PNP so i dont have to do any adjustments to fit it in. Per review”””i had to mill out almost 1mm extra depths between the treads”””i would love to know were i can plz get one as. Perfect fit as yours
Thx u
👍👍
Can I just switch the driver side to the passenger side since I don’t use mine
You can, but since you'd be going to all the effort to remove the assembly, it's probably better to just do the full repair!
My thigh support wont manually pull put either. Its stuck in the closed position and wont budge. Any ideas??
The mechanism has gears on either side that drive the two tracks underneath the thigh support itself. These can become stuck or misaligned. In any case, you should disassemble per the instructions in the video and determine where the exact failure is.
My button makes no noise. Maybe mine are just hand operated.
You have a ebay link? Or aliexpress?
I don’t, but search that part number I provided in the description and you’ll be able to find a few options.
Where did you buy the piece from?
I posted the part number in the description. Try eBay
Damm you started in the morning and end at night
Genau Gleiche Problem habe ich auch beide Seiten wie heißen die Teile bei eBay ? Bravo 👍 👍👍
Where the hell did you find it for $12? Everywhere online is > $200
I know this is an older video, but it has to be one of the best very clearly described approach I have ever seen online, THANK YOU.
My nick name is JTM745i Sach with the Roundel wrote an article on me many years ago about helping people Thank you again.
One question you May have a solution please, 535i x drive 2010 LCI installed new water pump consistently getting 2E85 communication code, no engine light but I have a P3 which tells me codes any time I turn the car on, also pump physically works.
Thank you Jens
bro this is more complicated than doing rod bearings