How to Install and Use the Reed Plane No Slop Yoke

HTML-код
- Опубликовано: 5 сен 2024
- Find Them Here: www.woodbywrig...
Install Instructions: drive.google.c...
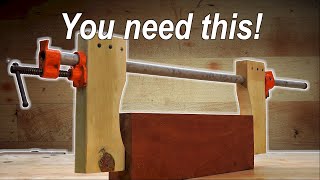
The no slop yoke is a fantastic way to remove all the slop between the adjustment knob and the iron moving. the two versions of no slop yoke from REED tools allow you to make all the adjustments you need for your plane to really feel nice!
Tools Used
Punch Set: amzn.to/3Eak6ip
Center Punch set: amzn.to/3EdeJze
Calipers: amzn.to/2XH7q3d
Drill Set: amzn.to/30QRFHX
File: amzn.to/3GhULVD
countersink: amzn.to/3GhULVD
Join the Hive mind where I bounce Ideas around: / discord
Join this channel to get access to perks:
/ @woodbywright
--Tools I Suggest--
www.woodbywrig...
--Find Antique tools near you--
www.HandToolFin...
Top Patreon Supporters:
DFM tool Works: dfmtoolworks.com/
Staff - helpatmyhome.com
Andrew Wilson
Alan Smith: www.flourishing...
JT BelKnap: dfmtoolworks.com/
Brian Suker
Bruce Rose
Tom West
Kenny-Anjanette Horn
Aaron Fenn
Blair Svihra Jr
Brandon Lauer
////Help this channel grow\\\\
www.woodbywrig...
////You Can find me:\\\\
www.woodbywrig...
Intro music: Tim Sway timsway.net/
background music: Udo Stehle www.upwork.com....
Instagram: @udostehle


Find Them Here: www.woodbywright.com/shop
Install Instructions: drive.google.com/drive/folders/1opA6wdRsJZdNe9ixLq9nHef65SEcFlyV?usp=sharing
У меня была старая некомплектная основа от рубанка. Я купил на ebay за бесценок лягушку от старого Stanley со сломанной yoke. У нее была отломана одна половинка. Немного подумав, я взял небольшую пластину стали толщиной в 3 миллиметра, которая была у меня в сарае. Я вырезал из нее две половинки yoke как делают на современных дешёвых рубанках. Согнул их, склепал вместе, подогнал напильником к adjuster и пазу в стружколоме, просверлил отверстие и даже покрасил, чтобы изделие имело законченный вид. Все это заняло у меня около двух часов. Уже пару-тройку лет рубанок радует меня отличным строганием.
It took a while to get the Reed parts (I live in Malaysia) and have just completed the replacement Yoke on my no 5 and it's working real well - thank you for making this video I followed it exactly.
Thanks for the feedback. Glad they made it to you
These are the parts that I've been waiting for. Thank you for helping to bring them into reality!
More than one way to skin a cat, found it easier to open up the adjuster nut to fit the yoke. Perfect fit.
I love skinning cats!
Thanks For the video. I have 5 of thr DIY version to install this weekend. Backlash begone!
Sounds like a fun time in the shop.
I’ll second the advice not to drill out the hole with a 1/8” bit. Go with a 7/64” or letter size. Now I have just a little too much slop in the pin hole, but it’s not so horrible. If I get tired of it I may replace the pin with a 1/8”, but likely not so I don’t drill into cast iron.
It should be a couple hours of work at most to file and fit the yoke and install the new depth adjuster. One of the reasons I was so excited to upgrade to the yoke and new depth adjuster was the screw on the old depth adjuster was chewed up. And this allowed me to reuse a questionable frog and give it new life. I’d highly recommend these upgrades.
Harry Potter guy?! Glad you're making wood working videos too!
LOL yup. got to love all kinds of things.
Eagerly awaiting my kit - My trusty No 4 1/2 is already a fine tool; I can't wait to see the improvement.
THIS
@@James_T_Kirk_1701 Hey captain. 🖖😊
Looking forward to hearing your thoughts on it. Got to love a plane that feels fantastic when you use it.
@@MCsCreations Good evening crewman, as you were.
Awesome, James! Thanks a lot! 😃
Stay safe there with your family! 🖖😊
Excellent!
when word of these gets out to the hand tool wood working community as a whole you wont be able to keep these in stock. these upgrades takes all together can upgrade any quality antique to the level of modern high quality planes with the exception of the cast iron vs ducktile
I'm not sure if this would work or not, but maybe you could set up your vice to be the same distance as the slot in your nut with sandpaper adhered to both sides and wiggle it until it fits. It could possibly make things a little more foolproof or....it may not work at all lol who knows
That would be fun to try.
How about bushing and drilling the original yoke? Half way there. I find the huge backlash annoying on my Stanleys but I have a couple of high end planes without it so much. I tend to have two or three Stanley planes each set for different thickness. I think I’ll try the Reed yokes.
I'm in the midst of repairing an old Bailey No. 4 that is bizarre. It might be a chimeric frankenplane. Not sure. The problem with it is that the blade would not fully retract. You had to keep a tiny gap with the chip breaker and pull the blade up the frog before latching down the lever cap. Forget about any camber across the blade. I found that the yoke was wonky. It was too fat and was interfering with the back of the depth knob so you couldn't run the knob all the way in. I filed it down and this fixed half of the problem. Still not enough, though. Comparing to other planes, I found that the nose of the yoke (that engages the cap iron) was too skinny on the top side...it was too tapered. So, it could not lift the blade back far enough. A JB Kwik Weld patch didn't hold. I'm going to buy one of your yokes and see if all will be well.
Based on all of this, I want to make a couple comments:
- At 4:11you file the frog side of the lobes. I think this is important. If one files the knob side, you might run into the problem I had with the Bailey.
- At 8:51 you file the underside of the nose, then go back and forth. I guess based on what I encountered with the Bailey, I'm inclined to file the top as little as possible to maintain as much retraction as possible.
I'm wondering if you've ever had trouble with not having enough retraction after installing one of these? I could see the filing I just mentioned being one cause. I could also imagine that the pin hole location could affect the retraction, but am guessing that there is enough meat at the nose that maybe this isn't a real worry?
That sounds like a problem with the chip breaker. different companies put the hole for the yoke in different places. and if the wrong chip breaker is on there then it will not retract or Engauge all the way.
@@WoodByWrightHowTo That was my first thought, too, but I have 4 sets of blades and chip breakers and three Bailey planes (#4, #4, #5), and all the blades / breakers behave the same. All fine in the other planes. None quite enough retraction in this plane. All breakers measure the same, etc. Also, the depth wheel couldn't be spun all the way home against the frog similar to the other planes because the adjuster fouled against the yoke (even without a blade mounted). I have suspected chip breakers, blades, gremlins for a long time and finally noticed this interference and noticed the narrow nose on the yoke.
@@WoodByWrightHowTo Just finished replacing the yoke with one of the Reed yokes: Problem solved. Now, the blade fully retracts. I really think there was a wonky yoke before. It was narrower than any of the other Bailey planes. Narrower means in the push-pull direction.
These look great! I have a few planes with those annoying split yokes. But I probably won't be able to get these until after the new year.
Does Reed have any plans to convert the traditional frog into a movable frog like a bedrock?
Hi James, thank you for such instructive video. It encourages me to finish the repair of my no 5. I just wonder, will you makeover all you planes?
I'm doing this to four of my planes. My number 3, 4, 4.5 and 5. Those are the ones I use the most often and want the most attention. I may end up doing it on the rest but we'll see.
@@WoodByWrightHowTo the only downside is the yoke alone costs nearly as much as I paid for any of my planes. Not that I’m saying it’s overpriced; it’s actually about where I expected it to be. It’s just hard to justify a $15 yoke on a $25 plane.
@@warkitty3426 I'm looking at it as $15 to get my plane adjustment like the $$$ planes. It's the part you fiddle with the most,
@@warkitty3426 The way I look at it that's very easy to justify, if you can take a $25 plane and eliminate any play from it for $15, that's incredible value. I just received my yoke, I'm going to try upgragind my Record No 05 that cost me 27€ :) The yoke itself was 20€ with shipped+taxes
I've never had any issues with backlash on depth adjusters. Having to wind an extra spin of the adjuster takes a second, no problems.
I've been thinking of it, and for the micro adjustment, could you use a planetary gear system?
That would be fun for sure. But would probably be very expensive. Be interesting to try though.
Hola , me gusta. Mucho tus vídeos y los veo muchas veces , son muy buenos ,
Necesito comprar esas 2 partes , estoy restaurando una garlopa # 7 , marca Stanley , y en mi país no co sigo las partes ,
Saludos desde Costa Rica 👍🏾👍🏾👍🏾
Gracias. Suena como un proyecto divertido
Si es muy divertido , el único problema es que en mi país , no encuentro las partes que necesito cambiar , y por eso no logro avanzar en el proyecto !
Great video and great information !
Can't wait to get my new yoke so I can try to get my Ohio 5 1/2 to accept hock iron and chip breaker. I'll let you know if it works
Looking forward to seeing what you do with it.
Hi Mr. Wright. Out of curiosity, have you installed this yoke on your Taytools plane? I purchased a scratch-and-dent one from them (big mistake) and there's a lot of play in the yoke. I'm wondering if this will alleviate some of the issues I've been having with it. Thanks!
I have not installed it as I don't use that one much, but yes it will work there and eliminate most all of the slop.
Could you take your original yoke and mushroom it out to reduce the slop?
Unfortunately no as it is cast iron. it will just break rather then mushroom.
My biggest worry is hole placement on the yoke, not necessarily drilling it out. How do I tell I have it placed in the ideal position?
File the lobes, position it in the frog with the wheel installed. You should see a good range of motion on the yoke when dialing back and forth.
If the knobs on the yoke are on either side of the adjustment nut, the adjustment nut is on the adjustment stud halfway, and the yoke is sticking out at 90° to the frog. Then the pinhole will be lined up precisely with where it should be drilled.
One of the major benefits to having the hole in the yoke placement by you guys is when it is at 90 degrees is that it then allows for you to more easily remove the blade and chip breaker.
Bought one each of the yokes and they have a lot of extra meat on them, more than I feel comfortable trying to remove. Spent a good while carefully filing to see if I could get the portion that engages the adjusting nut perfectly round. Got them to within .001 of round but need to remove about .040 to fit the nut. Came up with a better way, make an adjustable, adjustment nut. Need a 9/32-24 left hand tap to fabricate it, anybody know of a source in the USA for this tap?
Be back. We have to leave a lot of meat on there as many of the adjuster nuts spread over time and some people only have to take a little bit off to make them fit. As to finding the taps I do not know of any. To cut these ones we had to use a thread cutting lathe.
i need one of these for a miller falls smoother, do you know if they are the same?
Yes they are the same threads.
@@WoodByWrightHowTo thanks for that, the smoother is nice plane but has 2 full turns of backlash
Any chance that these parts can work on a Record plane?
The wedges will work on most any plane. And same with The yoke. But the adjustment knob and stud will only work on about 60% of the record plans. They changed the threading on theirs late in the production. If you have a Stanley plane you can unscrew the stud from that and see if it threads into where the depth adjustment stud is on your record plane. If it works then these will work.
comment
Number bits 1- 60 not letter bits are the proper way to go.
You are correct.
Quit yoking around!
Lost comment
Excellent !