Thank you for the compliment! I try to mix in some of these straight to the point "quick demonstrations" because I've always disliked finding a RUclips tutorial that's 15 minutes long. Hope it helps or entertains you!
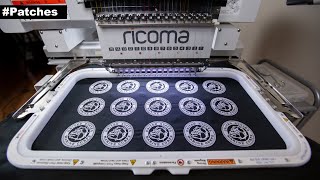
Hi! I use plastic sheeting to support the stitching in the hoop. To attach the patch to the plastic, I use basting spray which is safe on embroidery needles and will not make them sticky. Links are in the description. Thanks for watching 🙂
I don't remember exactly in this video but typically I keep the presser foot 2 clicks up from the bottom. I try to make sure the pressure foot is just barely touching. I believe Melco's instructions put the presser foot all the way down, adjust it up until it comes off the fabric, then put it one click down from there.
You may want to try a non adhesive Velcro option and attach it like an applique so you would have to cut the excess after a tack down stitch to make sure it leaves a clean edge
I just recently subscribed because I like your videos, but a couple of questions about this one: 1) Doesn't that basting spray gum up your needles over time and can't it get into your bobbin casing? 2) Wouldn't it be more efficient to embroider a patch first, then attach it using the method you showed?
Hi, welcome and thanks for subscribing! 1) I haven't had many issues with this specific basting spray gumming up the needles or causing any issues. It is designed for sewing/quilting so I believe it should work fine on most embroidery machines. I've seen people use 505 as well, but SpraynBond brand just works best for me. 2) Unfortunately, I did not have a design so I just made a blank patch. Ideally, I would do the design embroidery between the tack-down and final stitches when producing them. If you do it this way, I wouldn't add the Velcro until the finish stitches to make the back as clean as possible. Hope this helps!
Its a mix of the Velcro being a bit thick and the hoop not having any weight on it. It wasn't an issue for these patches but I sometimes add a clamp on the end to remove the bounce and to add weight
I would do this similar process but without the Velcro (ruclips.net/video/yNJFjJTOqV0/видео.html) and when you are done, you'll end up with a fabric patch which you can then adhere the HeatNBond onto!
I’m starting to make patches of my own and was wondering if (when using velcro thinner than the design) you could place it the same as normal, but make sure the edges lined up, and have it turn out well?
The fabric I used in this video was Twilly Tackle Twill Fabric from Gunold. It works great. They also have a few other options available on their website: www.gunold.com/fabrics/
I don't believe he sells the EMB file, but you can get the DST and other ones that should work on all machines and it's only $5 from the fuller website: fullerembroideryworks.com/shop/ols/products/fuller-fanning-border-set

![[Quick Demo] Embroidery Patches Made in Less Than 6 minutes](http://i.ytimg.com/vi/OoVDNG3W7vE/mqdefault.jpg)
![[Quick Demo] Embroidery Patches Made in Less Than 6 minutes](/img/tr.png)


BEST! How To on RUclips!!! THANKS!!!
Hopefully it helped 🙏 thanks for watching!
Super clean patch!
Thank you! Just needs a design on it now 😊
Top content on this channel
Thx a lot for all the educational stuff
I greatly appreciate the feedback. Hope you enjoy!
Thanks a lot!!! This video is really very helpful!🤩🙏
Glad it was helpful! Thanks for watching!
You Are New Rare Breed Style Of Embroidery Sir! Thanks
Thank you for the compliment! I try to mix in some of these straight to the point "quick demonstrations" because I've always disliked finding a RUclips tutorial that's 15 minutes long. Hope it helps or entertains you!
Hello good job what foil you take to fix patch on the hoop .
Hi! I use plastic sheeting to support the stitching in the hoop. To attach the patch to the plastic, I use basting spray which is safe on embroidery needles and will not make them sticky. Links are in the description. Thanks for watching 🙂
Ist das Klett auf der Rückseite, und wenn ein Motiv auf den Patch soll wird da die Rückseite nicht zerstört?
Thank you for posting the video - May I ask what setting you have the presser foot at? Thank you
I don't remember exactly in this video but typically I keep the presser foot 2 clicks up from the bottom. I try to make sure the pressure foot is just barely touching. I believe Melco's instructions put the presser foot all the way down, adjust it up until it comes off the fabric, then put it one click down from there.
That is an awesome video! BTW, how did you make the Merrow Replica edges? Do you have a video how to digitize the edge?
I bought the premade file from fullerembroideryworks.com/ but if you look up Faux Marrow Edge Embroidery, I'm sure you can find some other options!
The stick on adhesive Velcro gunks up my pe800 needle and makes the thread nest
You may want to try a non adhesive Velcro option and attach it like an applique so you would have to cut the excess after a tack down stitch to make sure it leaves a clean edge
Thanks!
I just recently subscribed because I like your videos, but a couple of questions about this one:
1) Doesn't that basting spray gum up your needles over time and can't it get into your bobbin casing?
2) Wouldn't it be more efficient to embroider a patch first, then attach it using the method you showed?
Hi, welcome and thanks for subscribing!
1) I haven't had many issues with this specific basting spray gumming up the needles or causing any issues. It is designed for sewing/quilting so I believe it should work fine on most embroidery machines. I've seen people use 505 as well, but SpraynBond brand just works best for me.
2) Unfortunately, I did not have a design so I just made a blank patch. Ideally, I would do the design embroidery between the tack-down and final stitches when producing them. If you do it this way, I wouldn't add the Velcro until the finish stitches to make the back as clean as possible.
Hope this helps!
Why is there so much gap between bottom Velcro and your needle plate?
Its a mix of the Velcro being a bit thick and the hoop not having any weight on it. It wasn't an issue for these patches but I sometimes add a clamp on the end to remove the bounce and to add weight
Hello, So I would like to run this process, but use HeatNBond Ultrahold instead of velcro. Any suggestions for doing so with precut twill?
I would do this similar process but without the Velcro (ruclips.net/video/yNJFjJTOqV0/видео.html) and when you are done, you'll end up with a fabric patch which you can then adhere the HeatNBond onto!
I’m starting to make patches of my own and was wondering if (when using velcro thinner than the design) you could place it the same as normal, but make sure the edges lined up, and have it turn out well?
Yes as long as everything lined up I don't see why this wouldn't work. The process can definitely be changed to fit different styles!
What kind of fabric do you recommend for the patch front where the design would go? Newbie here 👋
The fabric I used in this video was Twilly Tackle Twill Fabric from Gunold. It works great. They also have a few other options available on their website:
www.gunold.com/fabrics/
how did you manage to get the merrow edge like that ?
Its a faux border to make it looks like a merrow edge!
Hi, Is there any chance to buy it the emb file? I don´t see it in the list. thank you so much
I don't believe he sells the EMB file, but you can get the DST and other ones that should work on all machines and it's only $5 from the fuller website:
fullerembroideryworks.com/shop/ols/products/fuller-fanning-border-set
How did you get the merrowed edge
This merrow style edge is done with the files created by Jeff Fuller at Fullerembroideryworks.com. I would highly recommend!
Where did you get your Velcro from?
❤😊❤
Thanks for watching :)