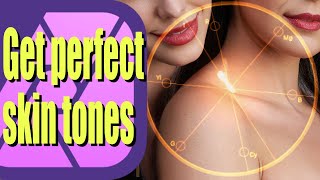
How to Retouch Skin in Affinity Photo | Graphic Design Tutorial

HTML-код
- Опубликовано: 1 авг 2024
- In today's video I show my tried and true 3 step process for quick and easy skin retouching in Affinity Photo. How to retouch Skin in Affinity Photo is for people who want to make changes without hours of work.
Remember to Subscribe goo.gl/6vCw64
Stock Photo - unsplash.com/@erik_lucatero?p...
Affinity Photo File - www.jesseshowalter.com/assets/...
Retouching skin can be a time-consuming endeavor, but good news me and Affinity Photo are here to bring you some awesome solutions that will get you retouching skin in no time at all.
The 3 steps I show here today will work on other programs like photoshop but Affinity Photo makes it so easy you gotta check it out. Now I am sure there are people out there that could do a much better job at retouching skin than i can, but this video isn't for them. This video is for people who are on a deadline, making websites or graphics and need to know how to do a little bit of retouching without breaking the bank of time.
Step 1: Frequency Separation
basically splitting the image into varying levels of definition
Step 2: Image Correction
using all the amazing tools that Affinity/Photoshop has to offer you can start retouching the photo pretty quickly to get the result you want. Blemish removal tool, clone stamp tool, etc...
Step 3: Color Correction
This is the equivalent of putting foundation on the subject and evening out the skin from those red splotchy areas. Just use lots of color adjustments, layer masks and be aware of the contrasting colors.
That's it!!! I know so simple right :)
------------------------------------------------------------------------------------
////////// Want to support my content and get extra goodies? Become a member and get perks like member-only content, behind the scenes, design files, and more...
designchamps.io/hip
////////// Connect with me here 👍🏼
Instagram: / imjesseshow
Twitter: / imjesseshow
Anchor: anchor.fm/imjesseshow
Medium: / imjesseshow
////////// Sign up for my Monthly Newsletter 📫
jesseshowalter.com/newsletter
////////// Music is from Musicbed click below for a free trial 👇🏼
share.mscbd.fm/imjesseshow
////////// Equipment 📸
www.amazon.com/shop/jesseshow...


Excellent tutorial. I especially appreciate that your explanations include what you're trying to accomplish and how and why the particular techniques work. And thank you for zooming through the parts where you actually do the detailed work. Well done.
I am now really starting to see how powerful this software really is and how simple to use. Thanks Bro.
Another excellent presentation, thank you.
Good tutorial, clear short and to the point, I LOVE affinity
Thanks, glad you liked it
I like how you actually put the finished product next to the non edit. Im thinking on buying this. More of a landscape person myself. Well done.
Thanks for watching, let me know if there are any other topics I could cover that would be helpful 👍
Wow great tutorial. You are THE BEST
No you are the best 😄
Congratulations man :D Thumbs UP! And Subs.
Thanks so much!
Thank you I enjoy these videos and learned a lot. This is carried out using one layer only. Say you have carried out a few adjustments and have several layers. In this situation, the frequency separation does not appear to work!
love the channel 📸
Thanks so much 👍🏼
Found affinity not that long ago. Moved away from photoshop, and it already feels faster, + it's cheap :D
Thank you 👍👍
Thank YOU 🤙🤙🤙
got you, although color adjustment good for the overall image think it is unessesary for getting rid of those final small blemishes
You omitted mentioning when you were using the healing brush that the opacity was set to 55% and the flow to I believe 35% and the hardness to 0% to permit the effect to be added smoothly. That is an important step to avoid blotchy results.
Great point 👍🏼
Hi . First congratulations for an easy explanation of affinity photo contrary to photoshop & Lightroom. Make life easier and away from jargon . But I have a question for you. Did you use photo on jpeg or raw format. All my photo are on raw format.
Thanks in advance for replying.
Great tutorial, thank you.
(Personally I think I would've removed the color adjustment from the eyes, so they have that beautiful green like the original. Not a complaint, just my opinion.)
Thanks! I actually love that suggestion.
Freckles aren't blemishes. Removing them took character away from the subject. Though overall I enjoyed the tutorial and your edit. Thanks for providing links to the image and project files.
Maybe this young guy wanted the freckles de-emphasized.
just showing what the tool can do
Question: did you actually need the layer mask on the color adjustment layer? Could you not just have inverted the layer and THEN painted in the adjustments?
I was reading comments to find just this question
Great tutorial but found music distracting
Sorry to hear that
great tutorial!! Are you using a mouse or a pen like a wacom tablet on your computer for you photo edits?
I own a Tablet but usually use my mouse
📸
😎🔥
Capture Ones skin tone uniformity tool would propably take care of the discoloration in a second
Hey Tommi, thanks for the tip!
How i can make a water mArk in affinity photo on ipad ?
You can create it separately or directly ontop of the image itself. I would recommend creating it one time in a separate file and then dropping it on top of photos for continuity sake. It can be whatever you want really, your logo, your signature, slightly transparent, etc... the sky is the limit. If you want to add that watermark in batches I would recommend something like this itunes.apple.com/us/app/watermark-pro/id535496284?mt=12
Color adjustment is a mask right when you use it. No need to add extra mask to it
Thanks for the tip and feedback 👍
Jesse Showalter No problem. It's the case for all adjustment layers in Affinity btw
@@ScorpiusBF And... there is no need to paint it black. CTR+I inverts mask and then you can paint white those areas which you want to show.
Jesse looks like my blemish tool is not working, any tips on what I can do to fix it?
not sure
before you began I was lost you guessed we would know how you "selected the image" I don't..... soo before I could settle down to listen and learn im lost. Please explain all thank you
I think I still prefer Ezras Gaussian blur technique
Can you not invert layer masks?
You can, I was trying stick to the simplest of techniques to focus on masks and brushes, but you totally can 👍
Was this image taken RAW or just standard JPEG?
Standard JPG
No way. How tedious. Is there not a high pass like in Photoshop? It's my number one 3 second tool for smooth skin.
There is, this is just one of many techniques that are possible 👍🏼
omg im so mad, followed this tutorial and bam 4:12 he added a 3rd layer magically. -_- how do I get the 3rd layer? ahhhhhhhhhh
Duplicated the original layer and started working off that
@@JesseShowalter thank you lol appoligies for frustrated comment 😅😂
@@JesseShowalter how did you duplicate the original layer? The original one was split into LOW and HIGH FREQUENCY layers. There was no original layer anymore.
Bye freckles !!
I think that will not produce good results. I always use a wedge filter, i.e. a combination of two frequency separations, so I can cut out a spectrum of frequencies from the image while leaving the low and the high frequencies. That will produce a much more natural result.
Thanks for the feedback, I'll try it out
@@JesseShowalter Apply a second frequency separation on the lower frequencies, so that in the end you have tw frequency layer and you can simply deactivate the middle one. The problem is finding the right two frequencies. I created a makro for that where I can simply enter the frequencies and since Affinity Photo does a live preview I can see, what the result would be.
I know this was a few years ago but this video showed u in my feeds... Bad ass video no doubt BUT ... NEVER remove NATURAL elements of a subject's face/body. If you were taking this model shot and did that, submitted it to an agency and then they see him. They will question you and you can cost his job. Freckles are 100% natural, never remove based on personal preference.
Thanks so much for your feedback and support! Have a great day!
You never REMOVE Freckles...
it's just an example of what the tool can do