Build an Arduino Pistol-grip Transmitter for RC Cars with 1KM Range!

HTML-код
- Опубликовано: 8 июн 2024
- Learn Electronics by building Interactive STEM Kits (CODE: MAX10) - circuitmess.sjv.io/5gQoGD
Read the transmitter's blog post tutorial with more info on Elektor Labs: www.elektormagazine.com/labs/...
-------------------------------------------
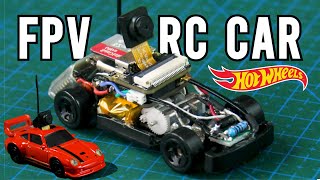
In this video, we build an Arduino-based Grip-style (Pistol-grip) Radio Transmitter for controlling custom RC vehicles.
This 3D printed hobby-grade radio transmitter has a comfortable feel and grip while being straightforward to build and use for anyone looking to control cars, boats, or any other vehicle that takes throttle and steering input with the adaptability of Arduino hardware.
This home-built RC transmitter is ideal to make if you're looking to use up some spare components and your 3D printer. A great DIY alternative for controlling Arduino-based DIY RC vehicles with lots of flexibility in programming and peripheral options.
Original code credits go to @ELECTRONOOBS
Want to instead build a transmitter for drones/planes? Watch Electronoobs' transmitter video here: • 3D printed Radio Contr...
------------------------------
🛠 PROJECT RESOURCES:
🔫 3D design of transmitter's parts: cults3d.com/en/3d-model/game/...
♾️ Code files: drive.google.com/drive/folder...
🔌 Wiring diagrams: drive.google.com/drive/folder...
🧵 Materials, Parts, & Components list (TRANSMITTER):
(x1) Arduino Nano - amzn.to/3x9lRyE
(x1) NRF24L01 + PA + LNA - amzn.to/4egUEuO
(x2) Joysticks - amzn.to/3yTXOo1
(x2) Potentiometers - amzn.to/3RfDiEw
(x2) Toggle switches - amzn.to/4ef1MYh
(x5) Pushbuttons - amzn.to/4eclBzE
(x1) OLED - amzn.to/3Vzdd67
(x1) Buzzer - amzn.to/3KzZyFj
(x4) 3mm LEDs - amzn.to/3XfCtPU
(x2) LEDs for charge indication - amzn.to/45cXL2F
(x1) 5V boost converter - amzn.to/3XbuQd9
(x1) Power switch - amzn.to/3yTaKdK
(x2) 18650 cells - amzn.to/4bNmdKz
(x1) Connector Pair - amzn.to/3yWjTlW
(x6) 10K Resistors (all found in resistor kit) - amzn.to/3ViIRmX
(x1) 3.3K Resistor
(x1) 2.2K Resistor
(x1) 2K Resistor
(x1) 1K Resistor
(x1) 330 Ohm Resistor
(x1) Female header row - amzn.to/3KFX1JH
30AWG wire - amzn.to/3KylmRO
24AWG Wire - amzn.to/4aVleGX
(x18) M3 Threaded Inserts - amzn.to/3Kz4MRL
(x18) M3 screws - amzn.to/3XehJbp
(x2) 5mm Neodymium Magnets - amzn.to/3VwQszx
(x1) Primer Bulb - amzn.to/4c6XQHg
PRINTING:
(x1) Matte Black PLA Filament - amzn.to/4c6wr8g
(x1) Matte Dark Grey PLA Filament - amzn.to/4c8KeLI
3D Printer I use: Creality Ender 3 V2 - amzn.to/45igolH
🧵 Materials, Parts, & Components list (RECEIVER):
(x1) Arduino Pro Mini (5V) - amzn.to/3RiAFC6
(x1) NRF24L01 - amzn.to/45nt2jp
(x1) AMS1117 3.3V - amzn.to/3yRNBbL
(x1) 100nF (104) Capacitor - amzn.to/3yQ7nEm
(x1) 100μF Capacitor (Optional) - amzn.to/3X8ktHc
(x1) 10μF Capacitor - amzn.to/3X8ktHc
(x1) 3mm Red LED - amzn.to/3XfCtPU
(x1) 220 Ohm Resistor - amzn.to/3ViIRmX
(x2) 1 Female and 1 male headers - amzn.to/3KFX1JH
(x1) 4x7cm Perforated Board - amzn.to/3z0CwF2
30AWG wire - amzn.to/3KylmRO
PROGRAMMING:
FTDI USB to Serial Converter with Cable (For Pro Mini) - amzn.to/3Rk70rU
As an Amazon Associate, I earn from qualifying purchases with no added cost to you.
----------------------------------------------------------------------
👉 Tools/equipment I use: sites.google.com/view/maximag... ----------------------------------------------------------------------
☕ Buy me a coffee: www.buymeacoffee.com/MaxImagi... ----------------------------------------------------------------------
Instagram: @max.imagination - max.imagina... Instructables: www.instructables.com/member/... ----------------------------------------------------------------------
Tags:
Max Imagination, DIY, How to, How to make, 3D printed, arduino, arduino-based, transmitter, receiver, RX, TX, radio, controller, radio control, remote control, remote, controller, RC, controlled, arduino nano, arduino pro mini, nrf24l01, rf24, nrf24l01 + PA + LNA, 1KM range, antenna, rc car, rc boat, electronic, battery powered, oled display, 8 channel, 8CH, steering, throttle, pistol-grip, grip, grip-style, gun-style, vehicle, model, 3D, nrf24, hobby grade, long range, tutorial, wireless, custom, long distance, build guide, PWM, proportionate, joystick, wheel.
#arduinotransmitter #rccars #nrf24l01 #arduinoreceiver #Uppbeat  Наука
Наука


One of the best transmitter projects on RUclips !!
I appreciate that you think so! 😁
agree, the explain in short and easy to understand
Yesterday, i was watching a video of an Indian who made a similar transceiver using ESP NOW protocol. And here, today you’ve made similar thing with long range. Awesome project brother. 💪💪
Yeah, he's an acquaintance of mine here on RUclips. I assume you're referring to Pro Know.
Thank you for your comment! 🙂
@@MaxImagination yepp.. it's pro know
Dream comes true video
Thank you so much for making this video ;)
Most welcome 😊
Thanks for your comment! Stay tuned for more videos like this!
Max... When I want this type... Of video... But u make exactly at the correct situation... That's insane bro... 😮💨
Thanku... Lot 🙃
I'm glad you've found my video at the right time while it being helpful. Cheers!
@@MaxImagination at... Every time.... U do this... Thanks a lot🙃.... Bro...
Wow, max is back with a great project. I love this, you're incredible
Thank you, Mercbeck! 😁
@@MaxImagination can we use Arduino nano in receiver and nrf adaptor instead
Very impressive project 👏👏
Thank you! Cheers!
This is the kind of thing that I find simply impressive, congratulations, long live electronics... ⚡BR
I appreciate that! Thanks! Stay tuned for the next video by enabling the notification bell 😊
It's a fantastic project max!
i always likes your Creativity
I appreciate that! Thanks :)
Stay tuned for the next one!
@@MaxImagination Absolutely : ) Max!
Brilliant, Max! Fantastic work!!! 😃
It works great!!!
Stay safe there with your family! 🖖😊
Thank you, MC! Will do!
Great video, Max
Well done project, excellent videography & editing.
Only slight problems with sound levels in different sections. Although that might have been intentional, since it was an ad, lol.
Keep up the excellent work. You're going places!
👍👌🤪
Thanks for your constructive feedback. I'll further check for sound levels in upcoming videos. Thanks for your comment!
fantastic work splendid job !
Thank you! Cheers! Stay tuned for more videos like this :)
Hey Max, since 6 months I'm following you and also made some cool projects of yours.
Ever since I've seen you, you're doing your circuits in prototype veroboards. Now you are a proffesional in this field. So you can better design your own project PCB's to make your projects easy and more effecient. Hope you'll do it soon. Cheers!
Hey! Thanks for your comment!
I will consider using PCBs in my next and upcoming projects.
Thanks for your input 🙂
@@MaxImagination 😀😀🙂
Hey max! Wonderful video as always! Keep it up ❤
Hey, Ramanan! Thanks for your kind comment! Will do 🙂
Amazing project Max, excellent 👍
I appreciate that, James! I wish you a great start to your week 🙂👍
Wow awesome. Gonna have to make this one probably. I have many RC airplane style radios, but not a pistol grip one. I like this idea because it is more customizable and probably work better with some of my upcoming projects.
Thank you for your comment, Asher! I'd be excited to see you make it!
This is the best project. I was waiting for this 🔥
Glad to hear you've found my video helpful! Thanks 👍
Awesome 😎 still watching though
Thanks for watching!
I just watched a fantastic video on Pistol Grip Radio Transmitter and Receiver, and it truly inspired me to enhance my own transmitter and receiver project. Thank you, Max, for the informative video! 🎥👏
I have a suggestion for improving the transmitter's performance. It would be great if you could consider using higher-quality joysticks, as the ones in the video seem to change values suddenly when moved. I recommend using a high-quality PS4 joystick for better results. 🎮✨
Best wishes for your future projects from a fellow creator,
- Vishal Sharma 😊
Hey, Vishal! Thanks for your comment!
I appreciate your tip about the joysticks. I will consider changing them out for Playstation versions.
I do however mention this is in the video so others can improve upon their transmitters.
Have a nice week ahead!
That's really good for the budget.
@@MaxImagination Hi Max,
I'm glad you found my suggestion helpful. I must have missed the part where you mentioned it in the video-I'll go back and watch it again. It's great to see creators like you always striving for better quality and sharing valuable insights with the community.
Looking forward to seeing more of your projects. Have an amazing week ahead!
Thank you, buddy! Keep up the good work with your high-quality content and awesome projects too!
I look forward to seeing your next one 🛠
Have a great weekend ahead 🙂
Your video is best
1 In the quality
2 In its research
3 your skills and self investment
DHANYAWAD BHAI 🎉
From INDIA (BHARAT)
Thank you so much!
Question, would you be interested in building it? I've got the resources to assist you.
@@MaxImagination dhanyawad(thankyou) for asking me ,so I'm interested but how can I build it and what?
You are making videos and also engage your viewers thats awesome 👍
@@MaxImagination Can you please suggest me a free course or something on yt or any book for my knowledge?
Finally done, really a great video to watch and learn, my opinion on what to control with the transmitter and receiver module would be good controlling a helicopter 😊 just suggesting
Much appreciated!
P.S. The transmitter is not intended for aircraft originally, but thanks for your suggestion anyway :)
@@MaxImagination OH, about that I think you should go with a boat this time
Impressive work man!
I appreciate that! 👍
great project max! 😃, i love it
Thank you! Cheers!
Cool bro
That's just impressive man. Good Stuff 👍🏻
Glad you liked it! Thanks! Would you be interested in building it? I've got the resources to make it easy for you.
@@MaxImagination I already have a "dumboRC" receiver from amazon that works just the same, so I will probably not be making it. But, I did bookmark this video in case I come across a project that would require a special functionality that would require a customizable controller. Cuz your design rocks!
Also, my soldering skills are NOT quite there yet. I'll keep practicing on those xt60 connectors haha.
Your Projects excites me a lot!>>>
I'm very happy to hear that! Stay tuned for the next one :)
Это именно то, что я искал... Спасибо за видео! Ты лучший!
Glad you found my video helpful! Thanks
Awesome! 🎉
Thank you! Cheers!
Awesome project ❤
Thank you 🙌
Are you interested in building your own transmitter? Consider purchasing the 3D model of it here: cults3d.com/en/3d-model/game/arduino-grip-style-transmitter-for-rc-cars-and-boats-8ch-radio-controller
the primer bulb button is soo smart 😲
Thanks, Astr0! It was my own idea 🙂
Hello max!
Awesome build ever buddy, really it's looking like a pistol 🔫 and i thought that a Hollywood actor is coming at the outro buddy, your intro was next level crazy and great promotion at the end
Have a great day and productive week ahead and god bless you with this type of successful projects... 😊
Can you control your fpv drone
Hey, Kumar!
Thank you as always for your kind comments on my project... I wholeheartedly appreciate that!
P.S. This transmitter is not intended for planes nor drones, maybe for a simple plane or ornithopter at the most, but primarily for RC cars, boats, and hovercraft.
Cheers!
Oh 😯, I got it buddy 😁
Super ❤
1km range is absolutely insane man😱.
With a power-amplified module on both ends. Yup, 1KM is nice :)
Hey! I love this and have been curious for a very long time for how to build one of these.
Would you happen to know how to add a custom turbo boost function? I feel like thats dependent on the ESC, but i havent been able to find any infromation on the topic
Hi there! Thanks for asking. I don't know about any turbo boost functions. You may need to ask someone who deals more with modifying higher-performance RC cars. Cheers.
جميل جدا وفيديو فريد من نوعه في هذا المجال ارجو توفر مخطط التوصيل عن قريب
This particular NRF24l01 module has a maximum range of 100 meters in open space and limited transmission to 256kb/s. There must be a good antenna for this. To obtain 1 km of range as you write, you need NRF24l01 modules described as 500mW. Five years ago I made a radio using this module and a micro receiver on NRF24l01+ in the SMD version.
Okay, well I muse have exceeded the maximum range as the transmitter had the power amplified NRF24 module and I was in an environment with very little interference.
I've actually heard of people achieving 1KM+ with just two regular power amplified NRF24L01's.
Great project bro👏how old are you and what is your country?
nice
❤
Nice video. Anyway is it possible to make receiver and transmitter for drone controller? The flight controller of the drone using pixhawk
Thanks. That is possible, but a pixhawk system might need some conversion if used with an Arduino-based transmitter. For a basic drone, you can use 100% Arduino hardware including the receiver.
Hello Max, I hope that this i not a rude question. But are you doing all by yourself? Or do you have assistents in for exmaple video editting. Because your quality (not just your projects, your videos too) improved so much over the years. I can't imagine that this is all possible alone. Very cool project! have a great day!
Hello there! No worries, I'm glad you asked! Yes, I do everything myself that goes into making these projects/videos. I edit them too from A to Z. Thanks and have a nice weekend!
Hey Max! What drivers should I use before programming the arduino, CH340 or CH341? Also, can I use joysticks from a flysky transmitter without altering the code?
Hey, Kytherus! From what I've read, the CH340 driver works for the Nano. Read more about how to install drivers here: bromleysat.com/arduino-nano-ch340-drivers-installation-guide
You can use any joysticks with potentiometer values between 5K ohms to 100K ohms. I would assume they can work.
Thanks@@MaxImagination
❤❤❤
Hi, I already made this project, but I have a little complaint about using the nano, or uno.
Don't you feel like the pwm or the analogread functions, increase too fast using those joysticks / potentiometers?
In my case I feel like I don't really have to much control, as the pwm signal goes up/down really fast.
Also is the same thing with the servo, like you just need less than the middle capacity of the potentiometer to get full drive or speed...
I tried to stabilize it using map or calculating the average value, with 20 to 50 (i++) in for cycles. And yes the more iterations you add, less time to response you have, but it responses better.
Is there any way to increase the performance of analogreads itself? Like a way to get better "resolutions" when reading them?
Hi there. I also have the same complaint. My servos and other motors tend to ramp up and down too quickly and in a jittery way due to the low resolution. I haven't yet tried adjusting the PWM values, but will give it a shot in my upcoming project to see if this can be solved.
Hi bro
Awesome video bro ❤
Loved it
In next video. Using this transmitter can u make a miniature toys like rc truck. Car. Excavator. Dump truck. Using (3d printer) please
Hi, Jeevan.
Thank you!
I will keep your idea in mind. Thanks 🙂
Good
Thanks, bro!
❤❤
@MaxImagination can we use Arduino nano in receiver and nrf adaptor instead
Yes.
I used something similair for controlling servo's but if I switch really fast with the PWM to turn, it burns out.
That is most likely due to you exceeding the rated pulse width in ms (milliseconds) of your servo. Generally, the minimal pulse will be about 1 ms wide, and the maximal pulse will be 2 ms wide. However some servos have a max pulse width of 1.8 ms. You may have exceeded it.
I'm making one rn. How can I mix two channels to have tank-like steering with this transmitter? I'm making a surveillance rover for my school project.
Awesome! To mix channels and adapt this transmitter's controls to a tank, you'd need to make more changes in the code than anything. E.g. When you press the throttle trigger, 2 variables in the code to drive both motors forward needs to be activated and same but reversed for when you steer. I suggest you research this topic further on forums, there are people who can help further. Hope this helps guide you to the right answers. Cheers.
Thanks@@MaxImagination
I linked ❤️
Does A7 pin available in Nano?, as per my knowledge Atmega328 in Nano has A0-A5
Yes, there are a total of 8 analog pins in the Nano while only 6 in the UNO.
What model of soldering iron do you use?
I currently use the TS101 smart soldering iron.
can you make a case for the receiver
Sure. Stay tuned for the upcoming RC project implementing a PCB version of this receiver with a case, making it easier for you to build and use.
can you make a drift car using this transmitter and receiver
Sure. Stay tuned for the next video!
Which size wires do you use for connecting components
Check the materials list with product links below.
For some one looking young you are quite smart
I appreciate that! Stay tuned for the next video 😀
Excuse me max, could you be able to make such an rc car that has a pair of receiver and one more transmitter onboard the car so where the range gets over, the car can release its sender and extra receiver so they can receive and retransmit the signal to the car, and hopefully DOUBLE the range [and the best part is that would be soooo COOOOL). I know you can do that. You'll surely get some quite lot of views on this Survival car or something.....
Please
Hey there! I assume this would be possible with the existing transmitter-receiver setup if a second transmitter is introduced.
I've never tried this before, but I'd assume it's possible if the radio line codes are the same for the receiver to decode.
That way both transmitters could simultaneously control one receiver. (Maybe).
Cheers.
ขอบคุณมากครับกับสาระดีๆ❤❤❤
You're welcome!
I love it ❤❤❤❤❤❤❤😊😊😊😊😊.
I appreciate that! Which vehicle would you like me to control with it?
@@MaxImagination plz now make a mini rc drift car using your new transmitter and receiver
Will see what I can do :)
@@MaxImagination OK now set this on your mind to 😁😎😍👍
@@ragibhasan8099 Stay tuned. You're gonna like this one :D
acho que vale pelo conhecimento... porem com o valor do projeto da pra comprar um controle com receptor ja pronto de boa qualidade. obrigado pelo video.
Thank you. Keep in mind that the point of making your own thing is for the knowledge and experience in making projects. Plus, it's more enjoyable making your own devices/toys and using them.
Can i know the details about your soldering iron type 🥰
Sure. I use the TS101 and TS80P Smart Soldering Irons from miniware. Consider visiting "Max's Workshop" linked in the video description - my storefront for tools and parts I use, you will see it there.
Interesting project. Also a lot cheaper to make than the cheap alternatives found online like FlySky GT3.
Hey and thanks! Yes, as the transmitter itself costs only $55 USD to make and a total of $65 including the receiver and programming equipment.
@@MaxImagination It cost even cheaper here in India. Around $40-$50 USD total. I made one following Electronoobs video in 2022.
Well done 👍
Again super project👍.Can i use this for rc airplane? How can i do?
Thank you! This transmitter is not intended for planes unless you want to build a very simple plane with only throttle and rudder control.
@@MaxImagination thanks. Can i copy oled display codes. ex- battery display, axis details etc.to your previous rc plane transmitter code?
@@user-qv6gm2rv9q You don't need to. This transmitter's code is compatible with planes if you look at the type and number of available channels. The transmitter itself physically isn't viable for planes as it uses up less joystick pins for inputs.
@@MaxImagination ok thanks max.
First person to comment
I also made an arduino based transmitter, but I'm facing a problem that the servos are fluctuating very much when I move the joysticks. Can you tell me the possible solutions for this?
Hey! I had this issue too when I was testing the prototype circuit on a breadboard. The issue was because of loose connections at the joysticks. It could be because your analog inputs aren't solid, they may be fluctuating, causing the servos to behave that way.
I suggest you keep all connections soldered and firm while having your peripherals connected well with their connectors - sometimes this can be because of a faulty connector.
@@MaxImagination I made soldered connections and also checked the connections with a multimeter. All connections are good. Any other ideas what could be wrong?
@@MaxImagination I sent a video on Instagram. May you see that
@@MaxImagination I tried a lot but couldn't resolve it. Finally ended up in frying one of my nrf pa modules. I have a spare nrf module without antenna. Might continue trying with that one. But couldn't find any solution till now. Should I give up this project and start working on another one or continue this?
but why haven't you used the Arduino input_pullup mode instead of adding those resistors 8:55
Arduino's don't offer input pull-down in software, so I added the resistors physically. I preferred to use 4 resistors instead of altering the code which is working fine displaying the toggle switch status from 0 to 1.
Can we use Arduino nano instead Arduino mini in receiver
Yes, they are almost the same boards.
@@MaxImagination bro can you pls make a drone with Arduino Nano and gyro, bldc motor
Hey max can i change my old transmitter to this?
Yes you can. Connections are the same in regards to the 2 joysticks and NRF24L01 radio module. All the rest are extras.
can we use this same for rc planes?
For very simple planes that only use throttle and rudder control, maybe. In your case, I suggest you build a Electronoobs' transmitter as it's made for planes.
It is the best transmitter but it would be better if you would have spray painted the enclosure
Thank you! I would have if I didn't have more than 1 color of filament. I actually prefer leaving my prints unpainted as the natural color-contrast seems more appealing.
Having used NRF24L01+ modules myself, the range on them is never as good as claimed, especially not if they are random clones.
Random clones can have loads of issues with how they work.
If you just need to control a vehicle I would recommend looking into Express LRS (ELRS) which is commonly used in RC transmitters and is open source and has very good range (50-100 Km for high powered transmitters) but even low power ones will get very good range and transmitters and receivers are available cheaply. If you decided to go for ELRS then the majority of the project could stay the same, just swap the NRF24 for the ELRS transmitter and then use a normal PWM receiver.
Thanks for your insights and suggestions, Conor. However, I have no issues using the NRF24L01 modules and they work reliably as long as I'm supplying stable power to them, I personally can't complain about their range for hobby-grade use.
For controlling drones, I may consider upgrading to ELRS. Would you know how such receiver connects to an Arduino-compatible board?
Cheers.
What did you study computer engineering or electronic engineering?
Electronics engineering.
Another question what is the difference between the two disciplines because I see them as very similar
Your prints are stringing probaby because your filament has absorbed moisture, use a filament drier.
Could be the case. Currently, it is very humid where I live. Will consider obtaining one, cheers.
Bro I tried but I'm not getting reading in serial monitor and on OLED display and motor is not running pls help bro
Hey there. Have you identified the core issue yourself? Please be more specific with what is not working.
I have the dumbest theory that those who print on the Ender 3 fabricates the better overall projects.
It ain't so bad of a printer after all :)
That's because you have to have good mechanical and electrical skills to keep an Ender 3 printing reliably. 😂
@@GoingUpNorth THIS! The one thing I like about my E3v2 was it was so horrible that I had to learn everything about it and 3D printing, and it got me into it deeper.
I'm quite happy with my Ender 3 V2, not much maintenance is needed at all except for a bit of bed leveling.
@@MaxImagination Hello Sir,,, I couldn't understand where is your fpv drone's reciever and transmiter code ,, because there is many number of files, so please send that actual reciever and transmiter code🙏🙏🙏🙏
Hyy you can make drone using this transmitter or receiver
Please make an video ❤
Hey there. This transmitter is not designed for drones. However, you can check out my last video when I made an Arduino mini drone using a compatible transmitter.
@@MaxImagination yeah i wach this video thanks 🥰
can u build cheapest fpv drone ( 4" or bigger ) with controller? everything for 100-120$
5" FPV drones is a expensive hobby. Don't expect to get anything more than a brushed tinywhoop for that price if it includes everything needed to fly. For example my battery charger that I use for charging my 5" drone battery cost ~$80 alone. You can get ones for like $25 but goggles are $50+ for trashy ones and $150+ if you want to get anything decent. Not trying to discourage you, FPV is an awesome fun hobby and can be very profitable when you do it for work, but wait until you can afford it otherwise it won't be fun
Great advice, Asher! @vax_ta, listen to him, he has a point.
@@MaxImagination yes but for 200$ budget one isnot possible?not pro type I mean just for jun which won't be much slower
For $200, it's possible with cheaper motors and cheaper flight controller-ESC stack.
@@MaxImagination can u tell me which one is best for 200$ I do not know much on this parts and so on ...
Add mpu6050 gyro on it please
With the extra space inside the transmitter, you can add one if you wish.
Bro pleasemake receiver and transmitter our of esp 32 and make high speed rc car using brushless motor and with out 3d printer please it's my request
Will take a look at what I can make :)
I am telling you you are one step closer to your being mark rober
Please i really need transmitter and receiver 🙏🇳🇬
Well, you have the video tutorial to help you make it. Best of luck!
Using a single current limiting resistor for multiple LEDs is not a good idea, the current will be split between the LEDs so if you have one LED on it will be full brightness, two on will only be half brightness, four on will be a quarter brightness. Resistors are cheap enough you could have used one resistor per LED.
You have a point there. Indeed, the LEDs do dim down when a second one turns on - not by much. However, it's not that big of a deal.
Max i have a challenge make a electric bike but there is a catch you can only use 775 motors you can 3d print anything hope you see this comment ❤❤❤
Nice challenge. I will think about it!
Make a hobby grade rc drift car now
Will do!
@@MaxImagination are u sure about that?
Hey can you make me an favour as I want esp32 cam to make Integrating an ESP32-CAM with GPT-4 to assist blind individuals involves capturing images with the ESP32-CAM and transmitting them to a cloud-based server. The server processes these images using machine learning models to generate descriptions, which GPT-4 refines into user-friendly feedback. This processed information is sent back to the ESP32-CAM, which uses a text-to-speech module to convey the descriptions to the user.
I cannot help you with that, unfortunately. However, as I delve more into AI and the implementation with my projects, I'm sure you can learn something from that. Cheers.
That's a bit too much
Yes, it is possible. I also created a voice-controlled image annotator using Python and TensorFlow. It is also feasible with the ESP32 CAM module. If the ESP32 is processing the image very slowly, consider using the XIAO ESP32.
This transmitter looks similar to the one made by electronoobs.
It is, just in pistol-grip form with extra features 🙂
@@MaxImagination Right. I commented this before you just actually told that later in the video.
Now, make a rc drift car
Will think about how I can make it. Stay tuned for the upcoming video!
YAY
Fly a plane with it in electronoobs channel he didnt use it for a plane which was dissapoiting
I could try, but I would probably need more inputs like that from 2 joysticks (X and Y axis) to control a plane with all the control surfaces. If I ever do an updated Arduino drone/plane transmitter, I'm sure you will know about it. Cheers.
Thank you very much Bro asked you for this only in your comments once
Can you please give me the 3d design for free please
You're welcome!
And by paying only $25, you're saving 3+ weeks of focus and time designing your own one. I believe it's a good trade for my effort.
Make a ardunio based rc plane in the next video (hobby grade )
Hey there! I will keep the idea in mind. Cheers.
Bro will you pls make a mini robot cat or dog by servo moter and Arduino Uno pl
Will consider doing something similar. Cheers!