Walnut Burl Veneer Box

HTML-код
- Опубликовано: 8 сен 2024
- Dont forget to subscribe! / @simplecove
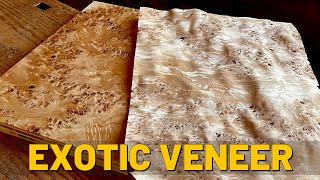
This walnut burl veneer box measures 6" wide x 8" long and has an awesome walnut burl veneer lid. I show how to flatten veneer, apply the veneer and how to pore fill both the box and the veneer.
Supplies used(affiliate links):
Titebond veneer glue: amzn.to/2guyJ9E
Titebond hide glue: amzn.to/2g99Ko3
Spray shellac: amzn.to/2guEaWj
Veneer supplies: www.veneersuppl... (Not an affiliate link)
Free plans and in-depth video: www.simplecove....
Techniques covered:
- Pore filling
- Flattening Veneer
- Making a veneer press
- Making a mitered box
- Use a shellac finish
Connect With SimpleCove:
Website: www.simplecove.com
Twitter: / simplecove
Facebook: / simplecove
Pinterest: / simplecove
Instagram: / simplecove


I appologize, did not think I was being negative. I did ask a question. why the filler. However i have used laquer on walnut and it looke great. have a good day .
Hey Sean, really nice step by step instructions. Made it clear so anyone could follow and end up with a positive outcome. Great job
Thanks! I'm glad to hear that.
Sean this looks awesome I'm a big fan of walnut to begin with but with the walnut burl veneer WOW that takes it to a whole other level of awesomeness
Thanks! It's the first time i've used walnut burl veneer and it wont be the last. Just sweet looking stuff.
I like the clarity of your videos and all the topics covered from beginning to end. Very helpful!
I appreciate it!
Great looking box! Also, a great tutorial. I did notice the finish was a little orange peely. That is a common problem with spray can finishes. Aerosol cans just don’t do a good job of breaking up the material and laying it down evenly. A decent HVLP or even wipe on poly would help greatly. An oil based wipe on poly like General Finishes would really bring life to that figured walnut. Just my 2 cents.
+Robert Melrose thanks for watching. I typically get that type of finish from the can but follow up in about a couple of weeks with steel wool and paste wax to flatten it out. For boxes I don't like a poly or anything oil base because they tend to smell bad for a long time since the box stays closed and traps the smell in. One thing you can do, however is hit it with boiled linseed oil and once that's dried, apply shellac for a top coat.
Good tip! I like to use lacquer but don’t on boxes for the same reason. That smell stays with it for a long time. I suppose a water based poly would work too, it just doesn’t have the chatoyance that a good oil based product has. Great info, keep up the good work. Lots of good content here.
Thanks, Robert. I really appreciate it!
Love the burl top! Great project Sean!
Thanks Guy!
Great burl. The final finish could be a bit smoother and it would be perfect!
cant go wrong wth walnut burl. looks good sean!
Thanks Joe!
SimpleCove always!
Great looking box!
Looks amazing, thanks for sharing! Could you clarify what purpose the wood filler in between the first shellac coat and the rest serves? Is it just to makes it that much more smoother?
Great looking box and good video!
Beautiful box, Sean! I enjoyed the work process, nice video.
Thank you, I appreciate it!
You don't appear to have allowed for the cross grain expansion of the substrate timber of the lid. This lid will move as the moisture content of the room changes.
I like the way you show how to apply the wood filler to the box and the burl veneer. First time I have seen this, and I have been searching everywhere, because burl is usually full of tiny pinholes and cracks.
finally, have you found that wood filler to eventually shrink or crack? Most water based ones do
The panel is small enough that it's not going to move much if at all. I've got the box in my living room and the veneer is just fine.
Beautiful!
I love the knob you put on the box could at the link to the company so I can get the same knobs. Thanks
Nice work, that veneer looks great! 🤓👍🏼
Appreciate it!
Awesome work, sir!
Nicely done.
Thanks!
What brand of wood filler did you use?
Nicely done!
Thank you!
2 questions. Have you/can you notice a significant difference using the wood putty to fill the pores? It seems as if you would be sanding out anything you filled in. Secondly, What do you have on your roll of masking tape around the 8:45 mark?
The wood filler stays deep in the pores when I sand because I sand the surface with 180 grit and I don't sand that long, just long enough to remove the excess. 2: I have an "X" to mark the center of the panel. I used a ruler to find center and marked it with a pencil.
Great looking box, and great tips for veneer! Question: what is that huge chuck on your drill for? I've never seen anything like it used on other channels.
Thanks! The drill didn't come with a chuck so it's an aftermarket chuck. It's a pain to use and I have since purchased another drill lol.
Did the splines get larger at the end? After the shellac is cured try rubbing wax over the whole thing with 0000 steel wool. It is amazingly smooth after that.
Yeah. I had an issue where my miter key jig moved which caused me to have to make wider keys. I use 0000 wool when I wax to finish my finish. It is indeed very smooth. Thanks for watching!
Could you guys please tell me what type of wax you are using after you shellac? Do you apply it with the steel wool? Thanks
Did I miss something or did you spray shellac on the lid then add wood filler?
won't the shellac have sealed the pores making a coat of wood filler unnecessary?
Yeah I sprayed the lid with shellac to make sure the wood filler didn't dye the lid or change the color in any way. The shellac is super thin and wouldn't seal the pores.
nice 👍
Thank you
I see your point about time. but why wood filler? walnut is beautiful on its own
Walnut is an open pour wood. When you put a high gloss finish on it, it looks awful as the pours stand out. Google pour filling and french polish. And I would ask questions instead of being negative in comments. There's no need
@@Simplecove I believe that Nicholas did ask a question and it didn't sound negative to me. I have used Walnut on many projects and used Shellac as a sealer for both top and end grain. Then used high gloss finishes with no problems what so ever and never had to use a wood filler to fill the pours.
You don't have to use filler. It's just a personal preference on what looks good and what doesn't look good. I must have commented on the wrong comment because his comment isn't negative. I got several negative comments that I deleted over time. People love being smart asses on youtube lol.
9:08 My knobs going in crooked !!
Covering beautiful walnut with vaneer and wood filer is a waste .... might as well use plywood instead and save alot of money
Yeah I guess labor is free. Using plywood would require edge banding and then flushing. That takes time and would still require walnut for the edge banding. Makes sense to just use solid walnut. That panel is tiny anyways so I used less than a half a board foot which was $2 in materials. To edge band it would take me over an hour. My time is worth more than $2 an hour.