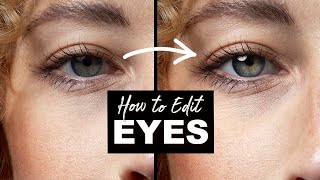
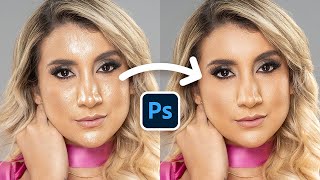
Eliminate Dark Circles and Brighten Eyes in Photoshop
HTML-код
- Опубликовано: 2 июн 2024
- Learn how to effectively eliminate dark circles under your eyes in Photoshop.
Download the Sample Images and PSDs:
phlearn.com/eliminate-dark-ci...
Join PHLEARN PRO (Save 10%):
phlearn.com/youtube
Join this channel to get access to perks:
/ @phlearn
―
What is PHLEARN PRO?
◦ 200+ In-Depth Courses on Photoshop, Lightroom & Photography
◦ 500+ Actions, Brushes, Presets & LUTs
◦ Master Retouching, Compositing, Special Effects & More
◦ Monthly & Annual Subscription Options
SAVE 10%: www.phlearn.com/youtube
―
Follow us on social!
Instagram: / phlearn
Facebook: / phlearn
Twitter: / phlearn


![KFF Singapore Badminton Open 2024 | He/Ren (CHN) vs. Alfian/Ardianto (INA) [7] | F](http://i.ytimg.com/vi/an7AykjOaAA/mqdefault.jpg)


Pretty simple but powerful and useful tutorial - no AI, no fancy-shmancy tools, not overcomplication. Great video as usual, thanks a lot, Aron 🙏
Another great tutorial! Thank you so much for giving concise, clear instructions!
Lots of useful tricks shown, really appreciated
Excellent tutorial Aaron - you are the best !
Awesome, awesome!! Thanks so much !!!!
Thanks for the tutorial... very helpful! 👍
Very nice tutorial Aaron. Thank you.
Great tutorial. THANKS!
Yay! Love this! Thanks 🎉❤
Excellent tutorial- simple and effective
Really nice Aaron!
I love this. Simple and effective technique, thank you!
Great technique , thanks a lot !
This is a great explanation, thanks !
Excellent tutorial thank you.
very excellent tutorial, thank you
so useful, thanks.
Very useful. Grazie
accurate!! thank you
Thank you😊
THANK YOU! THANK YOU! THANK YOU! I've been doing this the caveman way for years (and it looks like it in my photos). I have an immediate need for this and will try it now!
powerful and useful
Straight to the point as always. I always enjoy your tutorials. Smashing the LIKE Button.
thanks for smashing that button and phlearning with us! 🤗
Hehehe ... I have followed your awesome channel since the early days of its inception. Have been smashing the LIKE Button ever since. 😁😁
@@phlearn Hello Phlearn! Please send me the link to the original image you used to edit the Day 1 of photoshop video. The link in that videos' description is no longer working. Thank you
This is a great tutorial! Thanks for explaining things in a clear, understandable way and showing different examples! You are the best Photoshop instructor on RUclips! I’ve learned so much from your channel.
Thanks so much for your kind words and for phlearning with us!
Muchas gracias.
de nada!
nice!
Your way of working is very pleasant and easy to understand. You are a true educator. Thank you!
Thanks so much!
@@phlearn 🙏
@phlearn Great tutorial Aaron! I’ve always loved how you teach and provide reasons why and examples of what not to do. This is better than what I was doing which was using the clone stamp set to lighten and 18% opacity. The only advantage to my prior method was you don’t lose the natural texture. When you use the paint brush you get smooth non grain texture. I’m now using your method but with the added step of either clipping a grain layer above the retouch layer set to overlay or soft light. Or clipping an add noise layer at very small amount like 0.9% this really helps blend in the retouching even though your already reducing the opacity, it makes it look even more natural.
We're glad you enjoyed our tutorial!
Hi!!
Thanks a lot for this video!!
A question, is it possible to do the same procedure but put the layer in color mode and using lighten for the brush so you don’t lose texture in the skin?
Thanks a lot!
super
That's a mindblowing tip that works so well, thank you so much. Now you have created a monster, I'm retouching all the portraits I have in my archives
that's amazing!! we can't wait to see what you'll do with these new tips 🤩
Nice work sir love from Afghanistan 🇦🇫 I have learn so many things from your videos ❤ thank you again ❤
ty,now i know how to use photoshop
Your voice got deep!
Thank you for PHLEARNING me❤
thank you for phlearning with us!
Thanks, great tutorial. Is there a reason you dont have the brush in Color mode (instead its in Normal)?
good sir
You could start in quick mask mode and paint with a soft edge brush your selection
The step at the end of ctrl-D is super important to deselect the selection. So many times I would forget that when the selection is hidden.
Came back to check on after a long time. Thought you stopped. But good to see you posting again. Whenever I look at you brings back memories from 2015 when I was just starting out.
Thanks for the amazingness Aaron. I feel you got a bit grumpy maybe it's the age. So have I.
Love you Aaron. Thanks for the amazing learning days ❤️
Could frequency separation touch-up work? Moderation!
The success of using frequency separation on this particular area of the face will depend on the image's complexity. We always suggest trying a few different techiques/tools, to see what works best for you 🤗
Like the way you are presenting. Like that, there is no AI solution. It can be used in older versions. For this situation, I use patch tool, especially when I want some wrinkles to stay. But, I learned something which I can use. Thanks.
If you did frequency separation first and added the new layer mask above the color layer would that still work while preserving the skin texture?
Hey there! if you send us an email to support with a screenshot of your PSD file and layers our team will do their best to assist you
If I do the same after Frequency seperation? That will give me more control over colour and texture. Correct me if I am wrong.
Hey there! the success of using frequency separation on this particular area of the face will depend on the image's complexity. We always suggest trying a few different techiques/tools, to see what works best for you 🤗
Can we get some skin retouching techniques for iPad?
Hi, any possible way to convert jpeg to AI vector (not image tracing in illustrator- we don't get curves properly) may be in PS or AI or any other software
As you said, Cmd+H is hiding Extras or Photoshop. It will be good to say that on Windows, Ctrl+H is hiding Extras only. There is no hide Photoshop (or any App) with Ctrl+H. It will be good that you think about all users, not just on Mac. You will have more subscribers. 😊
GOAT
THE GOAT! 😁
Hi please could you consider showing how to do a gritty joel grimes styled photos thanks
Hello sir can you change all subject skintone with get equal skintone please make tutorial 🙏🏻🙏🏻🙏🏻
Why not dodge and burn using curves??
You mean retouch using local dodging and burning? It's definitely possible and it looks the most natural when done well imo, but it does take a while. I guess it depends on how much time you're willing to spend on it.
How do I do this in real life?
Please share image download free link
Another great tutorial, Aaron. But I noticed you saying "OK?" a LOT in this video. I've never noticed that in your previous tutorials - it wasn't annoying, just noticeable.
Aaron does not age
thanks a lot for the efforts, the quality of the sample images are a bad quality
I have to admit, with the steps and time, I'm going to wait for generative AI or neural filters to take care of this.
where is the difference with AI , where is the sphere after brushing this way ) it actually works if not over clicking
Actually, the bags are fat tissue with veins which cause the the dark color...no biggy.
Challenge: talk 5 min straight without saying „like“
😂
Or okay.
Rude!
Why talk so much? Just show me what you've been doing.
Geez, you don't need to repeat everything. If someone doesn't understand on first listen, they can go back and rewatch!!! This has taken way too long.