One Jig To Rule Them All REED Planes Honing Guide

HTML-код
- Опубликовано: 1 май 2024
- Find The Honing guide here: www.woodbywright.com/shop
Plane Iron test: • The Best Plane Iron Ev...
Sharpening on concrete: • Can you Sharpen With C...
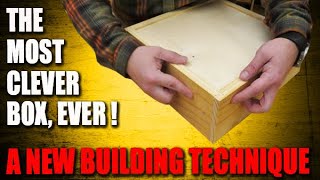
The REED Planes Honing guide sharpening jig
Join the Hive mind where I bounce Ideas around: / discord
Facebook Hivemind: / 233277323895597
Patreon: / woodbywright
Join this channel to get access to perks:
/ @woodbywright
How To Channel
Wood By Wright 2: / @woodbywrighthowto
--Tools I Suggest--
www.woodbywright.com/tool-sug...
--Find Antique tools near you--
www.HandToolFinder.com
THE MAN
"C"
Top Patreon Supporters:
DFM tool Works: dfmtoolworks.com/
Andrew Wilson
Rich Dodson
Sherlock
Brett Lance
Michael Kelewae
Daniel McGrath
Ian McElcheran
Christopher Brown
Kenny-Anjanette Horn
Russell Gough
Brian Suker
Brian Suker
JT Belknap: dfmtoolworks.com/
////Help this channel grow\\\\
www.woodbywright.com/support/
////You Can find me:\\\\
www.woodbywright.com/contact-me/
TikTok: / woodbywright
Instagram: / woodbywright
Facebook: / woodbywright
Intro music: Tim Sway timsway.net/
background music: Udo Stehle www.upwork.com/freelancers/~0...
Instagram: @udostehle  Хобби
Хобби


Find The Honing guide here: www.woodbywright.com/shop
Plane Iron test: ruclips.net/video/kKn5_WNv4DI/видео.html
Sharpening on concrete: ruclips.net/video/PUcgI6AMnRU/видео.html
If I were a full time wood worker and used my chisels and planes every day I’d take the time to work on freehand sharpening. I may need to sharpen a plane iron or chisel two maybe three times a month so there is no way I’m ever going to get proficient at freehand sharpening. I will always use a guide. Besides, I do this as a hobby, if I am in such a hurry that the added 60 seconds it takes me to attach the guide is just unacceptable I probably need to go do whatever has me in a rush and stay away from sharp tools.
hi, I’m a blind woodworker and have repurposed bench dogs to help me sharpen, bench guide dogs 😁
It seems to me that parrallel to the edge scratch patterns would weaken the very edge by creating fracture lines near the edge. Of course, perpendicular sharpening creates teeth that can break off more easily on hard woods and knots. Which damage takes longer to grind past, and repair, is the real question. ❤ The quality and strength of the steel would likely make a bit of the difference in the results of an opposing test on edge damage with hard/knotty woods. Finer stones/polish, and the parallel would probably come out ahead in mind.
I hope you do a grit and direction test for us.
OK, firstly, more spreadsheets are always going to be good.
Secondly, I really like the look of that cast bronze sharpener. Jeff has done a great job again.
I was a freehand sharpener for more than forty years and I was good at it. Alas that is one thing among many which, over those forty years, gave me one gawdawmighty case of arthritis--make that two cases--at the base of my thumbs. So now I've converted to jigs because, unless I get my wrists rebuilt, I'm not going to be sharpening at all.
As a fan of Lee Valley/Veritas from their earliest days (I'm proudly Canadian, let me avow), I fitted myself out with the Veritas system-- 'tout le kit' as we say en français. Lots of parts, a bit fiddly, as everyone remarks, but does it do the job? Absolutely. And is the price right? Sure is, by golly, eh?
And now REED comes along with this wonder that you're demonstrating. I mean, those three little pins are a stroke of genius. And as for the hardened runners, they look like HSS dowel pins to me. If I'm right, then the day they do develop flats, all you'll need to do is loosen them with a tap of a hammer, rotate them a couple of degrees, and all will be like new again. How do I convince myself not to buy this? Anybody want to bid for my Veritas set?
You mean your Veritas backup set? :)
I came up with a way to use a vertical operating jig in the horizontal direction by placing a flexible Teflon cutting mat under the wheel. It allows the wheel to slide effortlessly side-to-side, I found mine in a discount store for a very cheap price. It came in a package of 2 so the lady of the house also got a cutting board sheet that can be easily formed into a funnel. The size is 11 X 14 so this $1.50 investment will last a lifetime. The sheets are about 1/100" thick (I couldn't find my micrometers so I used a caliper to measure the thickness) so the micro bevel it creates is all but insignificant.
James, I really appreciate all your input into this design. It was a really fun journey to get this honing guide to do what I wanted and to bring this to the market. When I hone the 2nd bevel freehand I am aggressive and fast. I grind the primary bevel. This guide allows me to have the same approach with a platform that is in the same plane around the stone. Thanks everyone for your comments.
Jigs are great for restoring old plane irons when the are ground really badly to get back to a proper angle, then you can free hand from there.
If I didn't already have the Veritas jig, for both plane irons and chisels, this would be the way to go.....looks like a great jig
I'd love to see more on that sharpening direction difference! Spreadsheets with that sharpness tester of yours would be fun and informative I think.
I think even for an experienced sharpener such a jig can be useful to get a blade back to a flat and square edge when hand sharpening has added it's own unique profile to the blade.
I love the fact that it alllows to center non parallel irons.
yes more spreadsheets please. Another really cool tool by Jeff Reed! I like to use a jig to reprofile blades, especially when restoring junk that I find and putting it back into use. After that, I'm ok freehanding to keep it sharp, which is easier once I have a good bevel. That said, $144 is more than I want to spend on a jig based on how I use it. It looks awesome, but I can establish a bevel pretty easy with the jigs I have and then freehand from there.
I have a honing guide because I buy old tools. Freehand is great until you have to restore the edge to the right geometry. That's when guides or power sharpening are better.
Agree, I use a guide whenever I’m resetting a bevel. Buying a new or used tool, or just after a long time. I freehand between.
I buy a lot of used tools, often with chinks or poorly sharpened blades. I have an estate sale habit that’s about to send me into selling tools. I just can’t pass up a good price on something interesting and I really love restoring a neglected tool to working shape.
I'm sure anyone who's been in prison can verify your sharpening on concrete method 😂
I sharpen on a Tormek. Then finish with a rock hard felt wheel with diamond spray. I enjoy sharpening. Pretty much everything in our house and shop is stupid sharp. But I know most people don't want to invest that much into a sharpening system. That dose look like a very well though out and versatile jig.
I like your sideways technique. Maybe I can replicate something similar on the side of a Diamond wheel. Thanks for the tip. I'm off to the shop to play !
i really like the 3 points of contact idea!
I like it! Jeff is a very "Sharp" guy!
I have a lot of old wooden planes with old irons which are rarely perpendicular so I learned to freehand.If this jig had been around before I went freehand I would have definitely of bought one .I tried many but was never happy with them.
Need more spreadsheets!! As for sharpening I have gone through most of them out there. Even have the MKII with the narrow blade. I finally just forced myself to learn the feel of free-hand. Now that I have it mostly understood (don't want to use the word mastered), I'm reluctant to going back to the jigs.
I eagerly look forward to a sideways sharpening test. I've sharpened parallel to the edge as my main method for the last year or so and I like the ability to hold an angle visibly instead of by touch since I'm hardly in the same place twice when I sharpen. Though I've heard it claimed that perfectly parallel weakens the edge somewhat, so I've tried to adopt a tiny skew. Maybe something for the test?
Glad you clarified your financial stake in it. Looks like a great tool!
Omg, I need this jig. This addresses all the reasons that I didn't already purchase the Veritas Mk. 2, and I will be acquiring it in the next 10-15 minutes.
I use both methods depending on what I’m trying to accomplish. When reestablishing the edge, I usually use a jig to make sure I get the angle set properly. Otherwise, I normally freehand except for very small chisels. I just can’t seem to feel the bevel on them. So I would use this and actually have wanted once since I saw Jeff’s 1st video on it
Great stuff. Will look forward to seeing the spreadsheet for soon. 🤙🏼
Hello, Mr. Wright;
"THANK YOU!", this looks really good.
I've always called inline edge sharpening "sword sharpening".
Because it didn't &/or doesn't seem practical to sharpen across the edge on swords.
When I saw videos of Japanese sharpening samurai swords it was always inline w/ the edge.
I've seen a video where a guy sharpens an iron inline, too.
So this jig is very interesting.
I'm learning freehand & jig sharpening, tho I freehand knives pretty good.
I'm interested in Reed's jig but $145 is too rich for me.
BTW, I've used concrete blocks to flatten plane soles.
It's fast, works really well, gives a good finish, lasts forever, just brush it off by-&-by.
I'm a simple man so I really like your simplistic approach, keep it up.
Have a GREAT day, Neighbor!
I would flip the threaded rod to the other side so the screw adjuster wasn't between the two guide rods. Like the Richard Kell honing guide.
O.k...."Snide remark"...LOL...LOVE THE CHANNEL...!!!
Really good design- I like the certainty of jig sharpening, so will be making one. Couple of mods- I will use shim brass for the plate to slide on (low friction and hard wearing- I already use this for the 'ruler trick' on plane backs) and I will use embedded ball bearings instead of cylinders for the bearing surface. Sides will either be 10mm brass or aluminium, depending on how the weight feels...
Like you, free hand is the best, everyone should learn to sharpen freehand. One downside, it’s a talent and not one that all can do or learn or wants to learn. So I always say, buy once,cry once. Get the best you can afford even if you have to save for a bit. Then there’s no complaints about what you’re using.
Thank you very much. If you had not shown how, I would never have guessed. I need to figure out how to sharpen “sideways.”
I love the stuff from Reed!
The Veritas is a great jig only flaw is the brass roller it wears out fast mostly on Dimond stones I replaced mine twice already should be made out of steel I'm going to make my own rollers some time
You need to sell your great website more bro!
This looks amazing
I dont use skew chisels, and all of my plane irons are 2" wide so I do not think that I would get much out of this style. I will stick with my Veritas mk. II
Look up "Sharp Skate" for the original side sharpening guide. It's been around for well over a decade (by Harrelson Stanley). The three-point support is used by Veritas in their recent guide, and the basic design resembles the Kell honing guide. Regards from Perth, Derek
Good points. So what is your take on side sharpening? I went there because of larger blades.
@@jeffreywarshafsky6025 Side sharpening rules, not just because the edge is stronger, but because it can be easier to register a bevel when honing freehand. In reality, it is not purely side sharpening one does, but also diagonal sharpening, which presents a wider surface for the most registration.
@@derekcohen1000 Thanks and I appreciate all that you share about your woodworking journey and what works best for you. Great stuff!
Thoughtfull jig’ but crosswise isthe thing…..smart!
snide remark for growth!
Thanks for sharing.
I like snide remarks!
I used my wife's flower pot once to sharpen a knife next day she asked my why are there scratches on my flower pot
Could you replace the pins with grub screws to handle angles, or would they have to much play?
I had not thought about that. I like the idea but wonder if the set up might be too fussy. I will play with this thanks!
Actually a great idea, with loctite. But then you'll need stock in loctite or multiple guides so you can lock in the grubs, or a lock washer to lock in the grubs from the outside with through screws.
Would love to see this in action with the adjustments. A machinist square would be needed to set the bevel/tapered sided chisels or irons 90° to the bronze blocks. But since they slide, not roll, that isn't really nessesary unless you are such a perfectionist that a decimal of a degree off from flat and square bothers you. Pinching a tapered chisel on three points will skeew it, ever so slightly. Please keep James in the loop on R&D and new tweeks, I love where this is taking my brain.
James, Your comments about sharpening with the blade positioned lengthwise on the blade instead of crosswise caught my attention. Am I correct that is as simple as finding the edge in the usual manner with the blade posittioned legthwise, and slidingit back and forth? That should be pretty easy. You might have to make a few postural adjutments to the different motion, but that’s it. Regarding freehand vs jig shapening, I found if diffcult to combine creating hollow bevel when I create the bevel on a CBN wheel with the precise alignment the jig assumes (I’m speaking of the Veritas MKII). Freehand sharpening is much more forgiving as it allows you to adjust if the primary bevel is off from the usual 25 or 30 degrees. I also think many peopleare concerned about precise angles. For the most part it is more important that the blade is sharp rather than sharp at some precise angle. My transition tofreehand was remarkably easy. When I figured out that part of myproblem was that I was creating my primary bevel outside the MKII system I determined to go freehand. Ater a few sharpening sessions I had it down. Now the ability to stop working, take a few strokes on a strop or a couple of stones, and go back without fiddling with a jig is priceless. Just one guy’s experience. Stu
I startied on a workmate if you were wondering
Great idea!!!
Dancin’ a jig!
Thanks
More tools to work on my tools!!!
Once again you remind me of the old, "Why do they have hunched shoulders and sloping foreheads?" routine. "Ask them a question and they shrug their shoulders. When give 'em the answer they slap their foreheads with the palms of their hands". This Reed Jig allows you to sharpen either perpendicularly, along the blade and/or iron's axis, as per a normal sharpening jig or laterally, across it and, as an added benefit you not only get an even sharper, more well honed edge, but you can use your too narrow water stones on your normally too wide for them blades and irons? What's not to like?
What in the World was that giant chisel-looking thing...dont tell me... a giant chisel?! LOL
It's a slick, normally used in timber framing, and instead hitting it with a mallet, you use the weight of your body to do the pressure.
look up slick chisels.
What @joseislanio8910 said
Technically, yes it is a chisel, but it is also more of a plane in the ways it's typically used. Like a bull nose plane with no body, but a long tail handle.😊
I'm a primarily metal working guy, but once you have the skill of free hand sharpening, weather drills, plane blades, chissels etc. It doesn't matter. You learn the feeling of "the contact", then it's just go ahead.
Better tools does not make a better craftsman.
Really interesting jig indeed, James! 😃
Thanks for the review!
Stay safe there with your family! 🖖😊
Wonderful jig. It would be nice if there was a downloadable pattern, printout, or just measures of where the bars are for when I need to make a skew iron jig. I have a Veritas Mk II and an Eclipse honing guide. The Eclipse jig is just that much faster to use compared to the Veritas Mk II.
He does have CAD files if you want to 3D Print the jig. but a PDF drawing might be a good idea. or just a spacing diagram of the shafts. What do you think Jeff?
@@WoodByWrightHowTo A spacing diagram would be great since it could probably be added to any printed instructions or documentation that comes with the guide.
@@WoodByWrightHowTo I will work up a drawing with some thoughts on how best to use it.
I was going to let my comment slide, but then realized that the jig was up 🤷🏼♂🤷🏼♂🤦🏼♂🤦🏼♂🤦🏼♂
The problem with freehand sharpening @WoodbyWrightHowTo it's that if you mess up and round the iron, you can't feel the angle anymore. Having a honing guide helps reset a flat bevel
All of my irons are rounded a bit. I do not feel for the bevel my arms just know where to be. there is no reason the bevel has to be perfectly flat.
If you make the iron perfectly square the there can not be any cant in the iron when you set it in the plane or you will create gouges in your surface. With a slight curve in the iron this gouging will be eliminated from your finished surface.
@@rolandmohler2695 I was thinking of a convex bevel, from tip to front.
This looks like a really good solution to the problems with other sharpening jigs I have problems with muscle spasms in my hands so I can’t freehand sharpen do you know if this would be available to people in the UK
It is available for the uk. Shipping on it is a bit but it's all calculated at checkout.
Thanks for that will it also work on mortise chisels as my current jig would require an additional set of jaws to hold a mortise chisel and will it also work on combination plane blades such as Stanley 45 50 and 55 thanks
Awesome
The idea of sharpening parallel to the edge is interesting, but it seems like it's tied to having a wide stone (which I don't have).
The chick doesn't ride on the stone it rides off of the stone. Jeff uses thin waterstones and has a wooden block beside that he runs it on.
RIP Sinead O'Conner
(This is a Sinead remark)
That kool
Just pricey enough I need to think on it a bit. My old hands just don't tolerate a lot of free hand and when the pain is greatest the quality of the process gets sketchy.
that is something I think about more and more with my tremors.
Comment up above
Is there a slight angle on the three pins so that say bench chisels with tapered edges would be retained and kept referenced to their backs?
no. but the edges will actually fit just under the pins wedging them in.
Snide remark 🧐
Thank you for talking about using jigs…..and not using jigs. I’m in the between mode where I used to use jigs 100% for sharpening but am trying to train my body to sharpen without them. I always look at my edges with a 10x loupe and definitely see the scratches perpendicular to the edge when I use the jig and can only assume that’s bad. That’s enough RUclips now as I’m going to go sharpen the blade for my 125 year old Stanley no5 and your video has pushed me back towards hand sharpening 😂
Commenting below.
I like it. But why bronze and not brass?
I will let Jeff answer that one!
Some kind of quick-feed on the tightening screw would be a nice feature.
Why does the jig have to run on the stone? You can either run the jig on a plywood or other board the thickness of the stone or increase the size of the bronze sides. Everyone has their way of working but I would find that piece of plastic a pain. Is Snidely Whiplash a snide like comment?
you can definitely run it off the side of the plate. the plastic just allows it to run any ware on the plate rather then just the edge.
@@WoodByWrightHowTo I forgot you're to young to remember Snidely Whiplash so the reference means nothing.
Snide remark.
Have you worked out how to do a cambered plane iron with this? I currently use a cheap Eclipse clone and I'm starting to notice the flaws in how it holds the item being sharpened.
I power grind a very very very slight camber for my primary bevel the hone the secondary bevel straight across leaving a very small amount of the camber. This is how I freehand hone and it can be done with the guide.
@@jeffreywarshafsky6025 I'm thinking about an 8" radius, such as on a fore plane.
@@kantarjiev I do not see an easy way to use my guide for this. I would free hand hone. If I come up with a solution I will let you know
Knives are generally sharpened in some combo fashion of 90 degrees on through to parallel with the edge, so the sharpness doesn't surprise me. My knife sharpening jig works entirely in the parallel direction.
For something like this, why not have another bit that the jig rides on next to the stone? Like a channel or sled. Seems to me I'd rather not fiddle with the jig on the stone at all and deal with using a scrap of plastic or whatever. Heck, you could make the entire thing a 'base' with an adjustable clamp that can hold stones of different sizes for a really stable solution. On second thought, ignore this comment, I need to go patent something. :)
If it rides in a channel then you're always going to be sharpening at the same spot on the plate. You need to be able to move it around and hit the whole plate so you don't wear out one space faster than the others.
This design looks like it might apply a camber. Is that easy to control?
It's almost impossible to apply a camber with this one as it references surfaces that are wider than the blade so you really can't tip it from side to side at all.
If your were to grind a very slight camber on the blade and then hone a straight secondary bevel almost all the way across you achieve a similar result. This is not a true camber as that is really not needed. This is how I hand sharpen and hone and the guide will do the same.
Snide remark...
a snide remark
Comment down below
Comment down below the comment just above.
Team freehand sharpen FTW! Unless I need to regrind a primary bevel of course.
I use the traditional cheapo jig when (re)setting a bevel and freehand otherwise. And I use the Taytools drill press thingy for flattening backs…. Sometimes setting the initial bevel on a smaller chisel, but it’s really hard to get even wear with a 3/4”+ blade. I break the bearing or wear out the rollers on jigs every year or so because I buy a lot of estate sale tools to fill out my needs and because I like to restore tools (and need to start selling stuff off), but they’re like $15 and whatever.
I do like to buy from genuine small businesses whenever it’s reasonable. I will buy his adjustment knob when it’s back for a plane I’m hot rodding. And while I’ll never be able to afford them, I do understand things like Bad Axe saws being primo for professionals. But as a jig for people that can’t freehand or for occasional use, I can’t see the price point being reasonable.
I might be wrong. There’s entire lines of guitar gear that sell to “blues lawyers”… people with money to blow on a hobby for bragging rights. Maybe this lands in the woodworking equivalent. And maybe the people that obsess over precise angles and striations will love it. But as constructive criticism, I think this is engineered past the price point of the problem it’s trying to solve.
Not trying to slam the work. It’s objectively awesome. Just maybe too awesome for its mission of being a tool for beginner hobbyists.
It is surprising how many hobby woodworkers that do a few hours a month have large sums of money for their woodworking. just look at golfers.
To anyone interested im tearing down a old house in Oklahoma and it has alot of old rough cut lumber 4x4 3x8 2x6 all kinds of bricks large ones and small one ferris and acme. Also i have a wooden mantle i have taken off the fire place all together it weighs about 300 pounds soild. But its 4 pieces.
wow. that sounds like a fun time!
It looks good and I am intrigued! However, one advantage for me with the Veritas is that I can set it up repeatably (mostly) with the integrated angle guide. For whatever reason, I struggle with getting the angle right without that.
I don't use planes or chisels very often because my shop time is limited, so I'm not very good at freehand sharpening nor do I have the time to develop that skill. I got the Veritas Mk2 but it is very fiddly, as you say. After watching a Stumpy Nubs video, I grabbed an Mpower Fasttrack Mk2 bundle. That is now my go-to for most of my chisel and plane iron sharpening. Like mentioned here, it references off the back of the blade and hones side to side with a very repeatable angle. Just lay the blade on the jig, do a couple swipes with the diamond plate, and you're back to work. Almost as fast as doing it freehand. My only gripe is that the carriage and diamond plate are too small and I have to do too many strokes.
Kinda looks like the richard kell guide just sideways
Kind of. It just has one rod going through the middle and clamps between flat surfaces rather than three points of contact.
The Kell guide is a very fine design. Please hold the wheels and try it sideways and let me know what you think.
@@jeffreywarshafsky6025 lol I'll let you try that first
Shut up and take my money! :D
I suspect I'll be using your remark on sharpening along, rather than across the edge more than a jig.🤟
My two cents:
I like the idea and that it can hold both thin chisels and wide blades. Also (as he tends to) it is well thought through and well made.
I understand the logic of the three pins, but I'm still not sold on them. Especially with narrow chisels, I would be afraid of damaging the chisel.
And if any of them get damaged, it will inadvertently create a slight skew on your edge.
Having said that, i can't think of a better method either. Maybe a series of pins?
I don't see a big advantage.
For the longest time 50 years or so, I did not see the need for a guide and still primarily free hand.. As for advantages vs other guides I think I might have a few because now I have a guide that will work on all my chisels and planes.
Honing guides are usually introduced as being aids for people who want to jump right into sharpening and woodworking without the learning curve of freehand sharpening, as you did here. I wanted to note there's another reason: they are disability aids. After hand injuries in 2018 and a boatload of surgeries, I can still do handtool woodworking, though I have limitations. The main issue is I cannot put pressure on my wrists when the wrists are bent, due to damage to the wrist joint. In line work such as planing and sawing that keeps the wrist straight is okay. That means freehand sharpening is not an option. I've seen a lot of discussion among other woodworkers with hand or wrist issues - including arthritis - and using jigs as a way to avoid joint pain or mobility issues is very common. So you have made what looks like a good tool, but I wanted to let you know your potential userbase is not just folks new to woodworking. There are a very large number of people with wrist injuries who will benefit. (And growing, given all the ergo/computer use injuries these days.)
I can think of one major limitation, and that is for woodworkers who use water stones, as I do. Sideways sharpening would cut grooves into the stones, and the metal feet would scratch them, causing premature wear. My set up is the Lie-Nielson honing guide, which is fantastic, and Japanese water stones. I've been considering moving to diamond plates when my stones are worn down and will revisit looking at your guide at that time. It looks like a well made tool.
Appreciate your comments and I am a water stone user. A simple platform around the stone works great and it is very easy to keep in plane with the surface of the stone. Check the other video
I am right there with you. my hand tremors will just get worse and i am sure there will be a day where I can not longer freehand sharpen.
Na na, na, na, na na na na
Bat Man!
@@WoodByWrightHowTo gettin' jiggy with it
Thank you for recapping that hour video that was horrible to watch. Until I saw the price of the Reed guide, I was considering ordering one.
But now I have the knowledge to build my own. 👍
snide remark...
I sharpen freehand. When I use a jig, it is usually to make a correction, like fixing squareness or resetting a bevel angle that has creeped and gotten fat. Since I often do these corrections on 100 or 120 grit sandpaper (because it cuts so quickly), one consideration for a jig is avoiding picking up grit into rollers, bearings, etc., that might later contaminate finer abrasives. I also like David Charlesworth's comment that too much stability may not be a good thing in that you sometimes want to put pressure on one corner, then the other, to produce a camber side to side. He preferred styles with a central, narrow wheel for this reason.
A problem with this, as I saw after some consideration, is that the jig has two points of contact. Great for narrow blades, where you need to stop it rocking left or right. For wide blades, any inaccuracy in clamping (and we are talking about very small amounts) means that the blade will not contact the stone across the entire width. Extra material will need to be removed, taking time and reducing the life of the blade. For these, you need a single point contact jig. In the middle.
Most commercial jigs compromise with a roller in the middle. Gives some L/R stability, but not enough to override the blade, if wide. This jig has the contact points outside of the blade, and will either force the blade angle, or rock back and forth.
I have almost no experience with jigs that clamp the thickness of a blade but per your hypothesis the same could be said about them if they are not clamped properly. Having side clamping with 3 points of contact would certainly reduce the effect you theoretically propose. Currently my observations when honing do not support you hypothesis.
@@jeffreywarshafsky6025 3 point clamping will certainly help. However, the clamp cannot be on the same axis (blade would be in the way) so the amount of clamp pressure will affect alignment of the bearing points. The very small surface involved with the secondary bevel means even a tiny difference will greatly change the amount of abrasion required.
I have not done a full analysis of the geometry, because I would prefer to design a single point support for plane width blades. This eliminates the issue completely. Plus, most jigs set the angle by moving the blade position- so require very parallel sides. Having height adjustment on the bearing point both avoids this and permits a scale for angle. It will also make forming a camber easier.
The hardened steel on the bottom would not be good for my stones. Mostly well thought out but still has work to do.
The hardened guides are the same hardness as most blades so they will do no damage to stones. You may wear some flats on the hardened guides after a lot of sharpening. Surrounding the stone with a platform that is in the same plane as the stone means the guide does not ride on the stone and or use the provided plastic as well. A bit of experimentation and you will find what works best for you.
I'm going to leave this gratuitous (but not really snide) remark here, just to feed the algorithm.
Since you asked,, I see a couple potential issues.. The need for the slide plate 1) covers most of the diamond hone which will cause uneven wear, the only option would be to turn it around but still not able to use the entire surface evenly..2) the size.. You use large hone's, I use smaller hones so it wouldn't work for me. the hard faced wear points shouldn't be needed if the slide plate was Teflon or a similar low-friction material. I might consider making it a system with hone included and the slide plate(s) on the sides of the hone rather than on top.. Doing away with the hard faced wear points, might cover the additional cost to add the hone.. .. Another thought might be to put it on rails and use linear bushings.. It should be easy to make it universal and able to hone both directions.. AND,, putting one half of the clamp on a swivel and leave the solid could enable it to clamp odd shapes without precision cutting wood blocks to fit.... just my 2 cents.. (5/8 cent under the current administration)..
Seems like any benefit from side to side sharpening could be had on polish stone alone after conventional sharpening. It shouldn't take much at that stage. I will lift my angle a tiny bit and do a bit of side to side on a translucent stone at times.
I like the idea a lot, but the cost is a bit prohibitive.
Spreadsheets - Yes please.
Honing guide - Nice design. Price - Ouchy.
For us Canadian stuck with a garbage currency this jig is 196$ while the Veritas Mk.II Deluxe Honing Guide Set is 179$ so ... yeah.
Looks to be heavily inspired by another honing guide....
I am grateful to be able to make tools that improve on what others have done