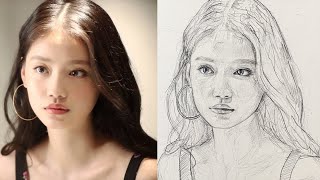
Unbelievable Ease and Beauty: Master the Art of Face Drawing with This Technique
HTML-код
- Опубликовано: 15 авг 2023
- How to Draw a Portrait Using the Loomis Method" is an instructional video aimed at teaching viewers how to draw a portrait using the Loomis method. The video is designed to be accessible to individuals of all skill levels, from beginners to experienced artists.
The Loomis method is a popular approach for drawing realistic and proportionate portraits, involving the use of simple shapes and guidelines to construct the head's structure.
The tutorial then proceeds to the actual drawing process, with the artist demonstrating each step along the way. The artist begins by sketching an approximate outline of the head and then adds in the facial features such as the eyes, nose, and mouth. The video emphasizes the importance of paying attention to the proportions of the head and the placement of features to create a realistic likeness.
Overall, "How to Draw a Portrait Using the Loomis Method" serves as an excellent resource for anyone interested in learning how to draw a portrait using the Loomis method. It offers clear and concise guidance, making it easy for viewers to follow along and improve their drawing skills.
#DrawingTutorial #AndrewLoomisMethod #FaceDrawing #PortraitDrawing #LearnToDraw #ArtTutorial #DrawingLessons #StepByStepDrawing #ArtTips
---------------------------------------------------------------------------
Subscribe to my second channel for more :
/ @onepencilportrait
Subscribe to my second channel for more :
www.youtube.com/@onepencilportrait
thank you so much!
Thank you for this presentation! The side by side format was a brilliant idea!
❤❤❤ thanks so much sir it's Splendid!!!
How do you know where to place the first circle? Every time I watch your video I can't quite get that part
Absolutely! This tutorial will address your question about where to place the first circle. Check out the lesson at this link: ruclips.net/video/YxsYC1YY24s/видео.html. If you have any more questions, feel free to ask. Best of luck with your drawing! 🎨👍
@@onepenciltutorialthe tutorial you recommended is in Arabic and there seems to be no captions for it.
Center of the circle has to coincide with the eyebrows. Then divide the lower part of the circle into 3 other parts, last third's line has to coincide with the lower part of the nose.
Me sorprende que esto no tenga el apoyo que se merece, nuevo sub. Algún día dibujaré como tú lo haces, Saludos!!
por que a surpresa? afinal os mediores e estupidos e idiotas desobriram que sao maioria e dominaram o mundo. kkkk coisas de valor como esse video eles desprezam... estamos em plena era da mediocridade.
❤❤ work is awesome
so thankful for youuuuu
❤love it 😊🎉❤
This is my fav video not just the piece can y’all hear the background music? ❤
awesome work!🤗
Cool
ايوة يا استاذ كريم يا فنان
amazing
Muito bom
Masterpiece ❤❤❤❤❤❤❤❤
Thank you so much for your enthusiastic praise! I'm delighted to know that you consider it a masterpiece. 🎨❤️🌟
❤
Автор молодец ‘ есть кто рисует с натуры и есть кто с фото ‘ каждый берет свой путь развития и делает так как считает нужно а не как сказал кто то
👍👍👍
عادي ترسم اليوتيوبر علي شاكر ❤ +أول تعليق
🥰🥰🥰😍
Bravo!! New subscription. I hate timelapses!
Beautiful aweome worh💛💖💛❤💛💗💛💖💛💖💟💖💛💖💜💜💖💜💖💛💖💛👏💛👏💞💖💜💖💞
Thank you so much for your wonderful and heartfelt words! 🎨🌟💛
You start to draw, I can see the circle on the model, but when I try it at home, I can not guess where is the circle starts, ends. How do you know the first circle where its start and end?
Center of the circle has to coincide with the eyebrows. Then divide the lower part of the circle into 3 other parts, last third's line has to coincide with the lower part of the nose
@@jupiterleak4650 thanks for your information, I will try again as you describe
The initial circle you see on the model starts from the beginning of the forehead and extends to the back of the head. When drawing a face, this circle is placed as a guide for the head's size and directs you towards the facial area. Use light circles and guidelines to help you pinpoint the locations of facial features like the eyes, nose, and mouth.
Remember that starting can be challenging at first, but with practice and experimentation, you'll gradually develop the ability to accurately identify these initial shapes. Drawing is a skill that improves over time, so feel free to continue practicing and exploring different techniques. If you need further guidance or have more questions, don't hesitate to ask! 🖋️🎨🌟
In which program can I draw circles, ovals and lines on top of a photo?
procreate is another app i use to trace photos - tracing its a good way to learn placement and angles.
Hola qué hermoso dibujo cuál es el link del segundo canal
¡Hola! ¡Gracias por tus amables palabras!
Aquí tienes el enlace a mi segunda canal: www.youtube.com/@onepencilportrait. ¡Esperamos verte allí también! 🎨🌟
Excuse me, tell me what kind of paper you are drawing on?
I use a sketchbook from Monte Marte for my drawings🎨📝
@@onepenciltutorial thank you!!!!
Es hermoso pero su cuello es mas delgado y largo.
Hi can you make portraits with grid method?
Absolutely! I'll do my best to provide tutorials on the grid method for creating portraits! 🎨🌟
Please cillian Murphy sketch
j'adore tous ces portraits, j'en ai fait trois, mais je trouve que votre trait de crayons est trop clair, je ne le vois pas merci
Merci beaucoup
the nose was missing being rounded at the tip
Name this model please .
Can you draw my sketch 🙏🙏🙏
Cilian murphy 😢
All good…but. You are depending way too much on the method and not looking at what you’re drawing. The neck is far too thick and the overall sizing of the features needs to be looked at. This is what separates the good from the brilliant.
Thank you for your feedback! You're absolutely right, while the method can help with creating the initial outline, it's important to pay attention to the details and proportions to ensure accuracy. I appreciate your input about the neck thickness and feature sizing - these aspects are indeed crucial for achieving a more realistic and accurate depiction. As you mentioned, refining these elements during the final shading stage can help address any natural errors and enhance the overall quality of the artwork. Your insights on attention to detail are valuable and contribute to creating truly exceptional artwork. Thank you for sharing your perspective! 🎨😊
Wow!! Es increíble, exactamente igual!!!
Yo no me atrevería a hacerte ninguna crítica! A no ser que yo fuese Picasso!!!
Мне кажется черного пожалел.
Прошу прощения, если мой метод преподавания не ясен. Я стараюсь ясно объяснять концепции и приводить конкретные примеры.
Техника интересная , но не совершенная в ней мало опорных точек . Результат на лицо , от оригинала получился совсем другой образ ? Скажу сразу , портретизм не все художники могут освоить в совершенстве , тому большинство художников рисуют пейзажи . Вернемся к портрету , что мы видим в конечном результате ? На фотографии девочка около 14 лет , на рисунку получилась женщина лет 30 . Важно в портрет передать характер , и душу , и девичью светлую юность , чтобы он ожил . Если этого не будет , это будет просто рисунок .
«Спасибо за ваше наблюдение. Мы учтем его при улучшении выражения.
Голова больше прическа меньше, такшто это не 1 в 1
Я очень ценю вашу точку зрения, но эти рисунки предназначены только для тренировки и обучения.
Очень не точный проволочный рисунок, напроч лишенный обьема. Автор демонстрирут как не правильно рисовать, игнорируя принцип от общего к частному. Его работа на троечку с мтнусом. А то что он показывает на видео, есть демонстрация неумения хорошо, и правильно рисовать😮😮😮😮😮😮😮😮😮😮😮😮.
Вы пишете, что рисунок, который я опубликовал, является некачественным и неточным. Вы также говорите, что я демонстрирую, как неправильно рисовать, игнорируя принцип от общего к частному.
Я понимаю, что вы можете иметь другое мнение, но я считаю, что ваш комментарий не имеет ценности. Вы не даете никаких конкретных замечаний или рекомендаций, которые могли бы помочь мне улучшить свои навыки рисования. Вместо этого, вы просто высказываете свое мнение, которое не основано на каких-либо фактах или доказательствах.
Если вы хотите, чтобы ваш комментарий был услышан, я предлагаю вам дать более конкретный и конструктивный отзыв. Например, вы можете указать, какие конкретные элементы рисунка вам не нравятся, и предложить, как их можно улучшить. Вы также можете поделиться своими собственными рисунками, чтобы показать, что вы разбираетесь в искусстве и можете дать профессиональный совет.
Без конкретных замечаний или рекомендаций ваш комментарий выглядит как просто попытка оскорбить меня. Я не считаю, что это полезно или продуктивно.
@@onepenciltutorial Читайте внимательно. Я даю вам вполне конкретные рекомендации, и указываю на наиболее существенные конкретные ошибки, но у вас как у всякого творца, не способного трезво, критически относиться к творческому процессу, и к его результату, доминирует совершенно необоснованное представление о правильности вашего творческого метода, и ни чем не обоснованная уверенность в непогрешимом совершенстве Ваших довольно сырых, не достаточно точных, абсолютно тонально не смоделированных работ. Но вы предпочитаете не видеть их недостатки и не пытаетесь устранять их, а обижаетесь на мою конструктивную критику, обвиняя меня в некомпетентности. Любой крепкий мастер строгого академического рисунка, оценив не предвзято результаты Вашего весьма скромного творчества, без всякого сомнения, безусловно присоединится к моему мнению о нем, если будет честен перед самим собой.
👍🏻🥰❤💚🌹