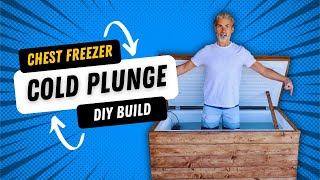
Cold plunge DIY - Ultimate cold plunge set up Under $100

HTML-код
- Опубликовано: 16 окт 2024
- Cold plunge DIY-Ultimate cold plunge set up-inexpensive ice bath-pricey cold plunge-cold plunge makeover-DIY Cold plunge, cold plunge diy-How to make a cold plunge, chest freezer cold plunge-cold plunge tub.
Materials
www.homedepot....
www.homedepot....
www.homedepot....
www.homedepot....
www.homedepot....
www.homedepot....


Awesome job. Thank you. This is what I was looking for.
Glad I could help, it definitely gives a nice fancy look.
Very clean great job
Thank you... I appreciate it.
Great video man, I really appreciate you going into detail on the materials you used. My one question is: Now that you've had the box/cover on it for a while, have you found that the spacing between the planks and the freezer is big enough to not cause any heat issues? I think I read somewhere that you're supposed to have 3 inches of space around the freezer to allow the exterior to cool off. This looks great, and I would like to match what you've done, but I thought I would ask about the heat issue first. Thanks again for the great video and information!
Hey what's up Xtreme. Thank you for the thumbs up. Yes it's been about 6 months since I made the framing for the cold plunge and I haven't had any problems with heat that I know of. There are very small gaps between the boards so it isn't completely enclosed. I have it set now to about 37 degrees and it turns on about once every other day. It's in my garage and my garage is not insulated nor does it have any type of cooling system. If you are worried about that just double the 2x4's and you'll get 3 inches or use 4x4's. Either way it will look super nice. Since then I attached the lid to the wall so I just fold it up and I made some matching steps. Going to make a video on that soon.
@BIKEFIT78 That's great! Thanks for the quick response man. I'll be buying materials and building it like you did. Thanks again.
@@xtreme8541 Nice. Just make sure you don't use screws that are too long so you don't damage the freezer...
Looks good! Where are you getting your cedar planks? In my area a 6' length of the same is $17!
I bought all the cedar pickets from Home Depot. Just my local big box home improvement store. They run about $3-$4 a plank. They are not a top of the line high end plank, they are your regular cedar fence pickets. I still had to sand them down a bit and I made sure I picked the straightest boards.
$17 dollars is insane price. I think that might be for some premium cedar wood. You could even use regular pine or even a sheet of plywood and cut it the long way at 6" wide. That might be cheaper.
Your vent is blocked. That's going to strain compressor, no? Maybe cut a hole for the vent.
I cut an opening for the vent and the on off controls… I still have my plunge and everything still works and looks great.
What did you do to seal the inside of your chest freezer?
To seal the inside of the freezer I used JB Water Weld. They were kinda pricey at $6 a pop and I need about 7-8 of them. However it hardens rock solid and it's meant for water applications. Don't use marine silicone, it won't last.
L I K E 👍👍👍👍👍🍀🍀🍀🍀🍀🤩🤩🤩🤩🤩
Sickkkk
What color stain did you use?
Let me check. The color I bought was not the color I originally wanted. I did not shake the stain like i was supposed to so it came out very light the way you saw it in the video. I made some steps to add to the plunge and I shook the stain up and it came out way darker. I didn’t like it. But let me check for you.
The brand is Varathane and it's called Early American... However remember i didn't shake it up so it came out very light which I liked. When I finally shook it up it was too dark. You might wanna try and look for a lighter one.