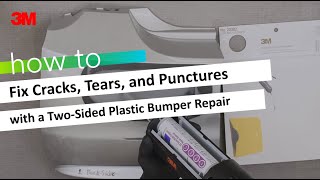
HOW TO: Finish a Bumper Repair After Plastic Welding

HTML-код
- Опубликовано: 6 апр 2020
- Ryan Marrinan, 3M Application Engineer, talks about how to cosmetically finish the bumper surface after plastic welding.
How to prep the surface (00:30)
For plastic repairs, make sure to use a quality epoxy product that's designed for bumper repair. Polyester-type materials often don't stay flexible for the life of the vehicle, meaning they dry out over time, they start to shrink. They don't perform as well in cold or hot climates and could lead to delamination or cracking. So cosmetically, it’s important to use our 3M™ 05887 EZ Sand Multi Purpose Repair Material. Along with that, make sure to use our 3M™ 05907 Polyolefin Adhesion Promoter. This gets the surface ready to properly adhere with the cosmetic repair material.
How to finish the surface (01:42)
You want one wet coat, and you’re just going to put in the material so you get the repair done. If you have to reapply a second coat, it’s important to also reapply the Polyolefin Adhesion Promoter. After you do the sanding procedure and you’ve feathered it out, you’ll have cut back into the raw material - so you need to prep the surface again to properly adhere the bumper repair material. Once your initial sand is clean and you’re ready to put on your second coat, give it another spray.
Best practices (02:23)
You’re looking for just one wet coat to wet the surface, you don't want to bury it. If you put too much on, it won't give you any adhesion and the material will pull up. And if you don't apply adhesion promoter at all, you run the risk of the material rolling back as you sand it. So if this is a common problem for you, make sure you’re applying an adhesion promoter beforehand so you get a really nice, good feather transition edge. Then when you prime it and paint it, the repair disappears and it looks like it did originally.
Important note:
There are of course many factors and variables that can affect an individual repair, so the technician and repair facility need to evaluate each specific application and repair process, including relevant vehicle, part and OEM guidelines, and determine what is appropriate for that repair.
Products used in this video:
3M™ 05887 EZ Sand Multi Purpose Repair Material
www.3m.com/3M/en_US/company-u...
3M™ 05907 Polyolefin Adhesion Promoter
www.3m.com/3M/en_US/company-u...
For more advanced tutorials, check out 3M Collision Repair Academy
www.3m.com/3M/en_US/collision...
You’ll find courses that will expand your knowledge, deliver practical procedures that you can use right away, and, in many cases, earn you I-CAR credits.
Website: 3MCollision.com
Instagram: 3MCollision
Facebook: 3MCollision  Авто/Мото


Ideal content for a “tool box” session at a panel shop. Awesome stuff.Couple it with a onsite demonstration, you have got yourself a great learn8ng experience. Shop technicians everywhere will appreciate this and other updates from 3M.
What type of grid did you used before apply filler
Hi there. Ryan used 180 grit DA prior to filling with 05887.
Cool I do spray work at jamaica