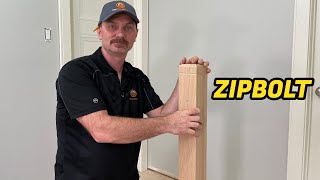
How to determine stair newell post height.

HTML-код
- Опубликовано: 16 сен 2019
- In this illustration I try to convey how to properly figure the installed height and multiple obstacles in which to account for when living and installing interior stairway newel post. Typically the angle of that handrail is approximately 37 degrees. And to meet the requirements of code I prefer to install the handrail at 35 in height from the top of the handrail Plum down to the nose of the step tread.
BTW this house is located in the community of Parker's settlement Southern Indiana


Thanks for the knowledge man. I haven't done a set of stairs in 15 yrs and was a green horn then. Now I got a project on an 1930 home and was having an aweful time getting my height right so the rail would be same as one goes up the stairs. TOTALLY forgot about the continuing of the angle. Thanks again
I found this video very helpful! After staring at my newel for two hours and being really confused I now have a plan!
Thank you. More importantly than anything else my hope is to at least Inspire. Realizing that not all stairways are the same and minor differences can make some of this video non-applicable. Still hopefully I can inspire you with some ideas and you can figure it out from there. Thanks for the comment. It's quite the contrast from that previous fool that made the negative comment about me. named Tommy
Thanks, just the info I needed
You're very welcome. Realizing that every stairway can be different with even the most smallest changes. Still hoping to give the aspiring Craftsman some tips and at least get you pointed in the right direction, where you can figure the rest out. Thanks for the great compliment
Good info!
Unless it is just me, you didn’t show how you actually got the angle of the rake of the steps. U held your sliding bevel up to one step, but it obviously is not long enough to reach the next step, so how did you find the angle to cut your railing at?
i used a long straight edge object...like a level or wood strip to connect those steps...and lay my bevel square on that
Why would you cut all the way to where the nose is, the second vertical line in from the left side? Especially if the nosing on the tread is cut in, wouldn’t that push the post to far to the left? I followed this for my post and ended up cutting it too far in.
I DON'T recall saying that I actually did cut the post to the pencil line where the front edge of the tread nosing is.
Watch the video again. In the video where the post is laying down and I'm using my pencil to show the cut out marks on the bottom of the post. The far-left vertical pencil line is my actual post cut line ( that will actually glue to the face of the step riser). However The far-right vertical pencil line represents where the tread nosing is intended on lining up after installation is complete. That far right vertical line is absolutely NOT the cut line. It's only there as an illustration to help me see where the tread nosing will hit when I install the post. Aside from any particular lines that I tell you to cut on, the reality is each stairway has its own unique placement of the newel post. On this particular stairway I establish how far away from the finished tread end that I want the post to be placed. And in most of the circumstances that can be whatever you prefer. However once you establish that, you have to find the center point of that post running parallel with the tread ends) as well as the opposing right angle Center Line of the separate run of steps that continue running up to the upstairs Landing. When you determine those center lines, they will create a right angle, and where those lines intersect will determine where that corner post will be placed. You have limited control over where that corner post ultimately is placed at that point. My reason for describing this is because typically I prefer the front face of the post to be fairly flush and in-line with the front Leading nosing Edge of the tread, BUT because of placing that post where those center lines intersect, it will not allow me to have the face of the post line up with the nosing of the tread that I might have otherwise preferred. It's just the rule of physics at that point
hotrods woodshed This makes a lot more sense, I wasn’t clear on which line you were going to cut, I cut mine the same way you described and was actually OK I was just overthinking it. Thanks for the reply!
@@tstaur6052 overthinking it. Yeah that's very easily done! It's also way too easy to get in a hurry and start cutting up. It's always best to go back and double-check or even triple check your measurements and what side of the line you're supposed to be cutting off. Stair parts are expensive and it's always good to stop and consider it everything hopefully you come up with the same answer every time you consider. That means you are going in the right direction. I've been doing stair work for 20 years. And each one is unique and different and many ways. So even with my experience I still have moments where I need to stop and really think about what's going on and how all the parts interact. Otherwise I also can get confused. Even making videos of the process is a learning curve in itself, trying to figure how to convey in words what I figure out in my head. Glad I could be of some assistance
Also, how do you find the length of the rail as well after you put the post at the top or if there is a oval instead? I’ll end up laying everything out in AutoCAD step by step and set back by set back, along with the thickness of each step and then it tells me what the angle is after I offset my lines between 34 and 38 inches off the front of the nosing.
not easy to give you a quick awnser at this moment.. ill think about this, and respond at a later date
@@hotrodswoodshed7405 it’s been 5 days….do you really need to take that long to “think” about it? Why do RUclips videos to “teach”, yet leave out critical information, say you have to think about it and then never respond. Seems kinda pointless 🤷🏻♂️
there may or may not be an oval(called a rosette). as i said in the video, it depends on your particular situation... and my video is NOT made to cover all situations! the handrail aspect is a complete DIFFERENT chapter in the lesson. i was NOT including nor instructing handrail installation. i was simply accounting for WHERE the handrail would intersect the newell post for height reasons. but as far as the angle or "rake" on the handrail, it is SIMPLY determined by laying ANY straight edge on the nose of 3 or 4 steps at least, and then placing the BEVEL square on that straight edge while placing the other side of the square on either the step...OR the riser, which ever is appropriate... determined by YOU. THAT will be your handrail cut angle. typically it's approximately 37⁰-38⁰. cut you a scrap piece of 2x4 or similar aprox 3ft long to replicate AND check the angle by ,once again, laying it on the step nosing. you can use those pieces to help determine the handrail length. but THAT (handrail) lesson is in the other instructional video...the one you never paid for. so you'll have to figure THAT out on your own. i made my video VERY CLEAR in that.. each stairway could be ...and probably will be different...depending on your unique situation. I'm NOT at all "vaque".
as far as your foolish statement about me collecting money for my videos...let say with utmost clarity...i simply DO NOT get ANY benefits from posting any of my videos! your a FOOL for implying that i do, at least at this time. ive NEVER took that position. im simply here to offer up some help for those that are in need of it...or maybe just some inspiration. personally when i look at videos that dont quite capture what I'm lookin for, i jus simply move on... i dont make ass head bitchy comments to people like u did to me. as far as waiting 5 or 6 days for a reply.... you're lucky i even replied at all. if i was commenting on others post, i would consider it normal to get a response back in 5 or 6 months!
let me remind you ....im NOT getting paid to do any of this. so if my response does not suit you...please send me a personal $$$$$ payment so i can give you more lessons. you can leave that computer turned off if your doing a stairway with me..
I've got plenty of other thankfull, appreciative comments regarding my video... i KNOW EXACTLY where i stand as far as Competent, solid, throughly, good, well defined craftsman. your opinion is Miniscule in the landscape. just as your LACK of content on YOUR page is all the proof that i need. let your works speak for you. but in your case, while asking for help... your words of ignorance are loud and clear. now go put your handrail up...and leave me alone!
@@hotrodswoodshed7405 wow, just wow. That is all I can say to that posting. You surely have a lot to learn about tact and business. If your business name has anything to do with your screen name, I can assure you that you are going to lose business by being such an asshole. In my 27 years of being a high-end custom cabinet maker/furniture builder, I haven’t needed to do and learn good methods of figuring out the length of railing, etc., as I can just use AutoCAD and be a lot more accurate than you are able to be. Best of luck to you and your endeavors being a dickhead.
@@mim2046 best of luck with your cabinet shop
There is only one "h" in height !
I have done very similar with Woodglut designs.
Like many of these videos, your explanation is too vague. If you can't understand why, then you really need to stop wasting people's time, as well as your own.
You dont have time for the full investment of details. That requires advanced schooling...schooling that you didn't pay for
@@hotrodswoodshed7405 You're a fraud!
Says the person with NO videos on his own page😆... NOTHING to offer
@@hotrodswoodshed7405 You are a very naive person, who acts without knowledge. Which is pretty much normal in our present world. So, you're just another average guy. Instead of acknowledging your shortcomings, adjusting, and doing better, you attempt to belittle others. Videos are not synonymous with knowledge, experience, and skill- there are multiple ways to do the same thing. And when the videos are vague , they are no more than bait. It's about money, under the guise of benevolence. You should be ashamed of yourself, but your motives speak for themselves. Just another average guy.
@@tommy-gy3gw I had the exact same experience as you. The video is very vague in regard to how he found the rake using a sliding T bevel and only having it hit one step. When I questioned him about it, his response to me was, “ I need to think about it and get back to you at a later date”. Five days later, not one response. He is a typical poor tradesmen who baits people into getting them to like his videos, so he can hopefully make money off of RUclips one day and yet offers nothing to help people with details.
It’s another classic individual who wants their five minutes of fame on RUclips. 🙄🙄
This time I will do it manually with the help of Stodoys designs.