How to Find Hidden Storage Space in Your Home - Do It Yourself

HTML-код
- Опубликовано: 16 апр 2020
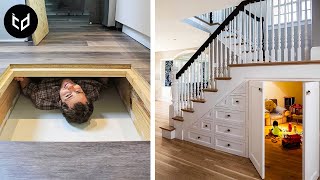
- Throughout your house are hidden spaces waiting to be transformed into practical and decorative gems. With a little imagination you can see them and with a little work you can create them. Inside your walls are 2 x 4 studs set 14 ½ inches apart; there is plenty of room there for shelves or display cases, perfect places for books or knickknacks.
The 14½ inches between the studs sets your width. The length is limited by the floor or ceiling. The first thing to do is to find the part of the room where you want the bookshelf or display case to go. It is best to use only inside walls because outside walls will suck out your heat in the winter and cool air in the winter. Before starting any measuring or cutting check for electric outlets, gas lines, or water pipes. Once you are sure there is nothing behind the Sheetrock but insulation you can proceed.
The tools needed:
-Stud-finder amzn.to/2OXpCgP
-Tape measure: amzn.to/32XXmDe
-Level: All about levels • Types of Levels - Choo...
-Drill
-Keyhole saw: amzn.to/3g4b1vY
-Power saw
-Hammer: Hammer basics • Hammer Basics with Sup...
-Putty knife
-Paint brush
MATERIALS NEEDED:
1) Wood for the box frame
2) Trim
3) Finishing nails
4) Screws
5) Putty
6) Caulk
7) Paint
The first step is to decided what size area you want for the shelf or the case. Once you have a pretty good idea mark the parameters and start to work.
CUTTING THE HOLE:
1) Using a stud-finder (or your knuckles) locate the studs at the top and mark.
2) Locate the studs at the bottom and mark.
3) Using a level, draw straight lines from point to point.
4) Take a keyhole saw and punch through the middle of the Sheetrock.
5) Saw one direction until you find a stud, then saw the other direction.
6) Using the stud as a guide saw the length of the board to the lower mark.
7) Saw horizontally to the other stud.
Once the Sheetrock is cut set it aside and remove all the insulation from inside the wall. Be careful not to damage the Sheetrock on the opposite wall; that Sheetrock will be the back part of your display case or bookshelf. Now measure from inside the studs to get the width of your box. When measuring for the length, compensate for the width of boards on the top and the bottom. In other words, if you are using 2 X 4’s for the frame, subtract 1 ½ for each board. So if the length measured 30 inches, cut for 27 inches.
After the measurements are made cut your wood and build your frame. Use finishing nails, three on each end, to secure your box. After the frame is built you can add shelves if you like. If the frame is going into an odd-shaped wall you need to add a backboard.
Once the box is finished, place it inside the hole in the Sheetrock to see how it fits. If all sides are flush with the Sheetrock secure in place. You may want to use screws because if you make a mistake you can just back the screw out and start over. To make the job easier, drill a pilot hole first and then use a slightly larger bit to countersink the head of the screw. Use 1½ drywall screws and place at least two per side.
Once the screws are in place take some putty, fill the holes, and then paint. Paint all four sides and the back Sheetrock or backboard. You don’t have to be all that careful around the outside since trim will eventually cover the area and any painting mistakes.
After the paint dries, measure the area for the trim. Again, measure the width and the length from inside the frame. Once you get the dimensions add a ¼ inch for the reveal for the top and the bottom. When cutting the trim you can use straight angled cuts, depending on the style of your home. The trim should be three inches or more so that both the both the frame and part of the Sheetrock will be covered. It is best to paint the trim before cutting.
ATTACHING THE TRIM:
1) Use 2 inch finishing nails to attach the trim.
2) Start at the top and nail in the first piece then match the rest of the trim to it to make sure everything fits flush.
3) If no adjustments need to be made, nail all the trim in place.
4) It is easier to drill pilot holes and then hammer in the finishing nails.
5) When everything is in place set the nails and putty over the holes.
6) Caulk any gaps or cracks in the frame and then finish touching up with paint.
This project takes less than a day and costs less than a $100 to build. With little time and effort you can add character to a dull spot and turn an unused, hidden area into a display case.
MORE FROM YOUR NEW HOUSE
Featured videos:
• YNH Featured Videos
Great DIY Projects from Your New House:
• DIY - Do It Yourself w...
Quick Tips:
• Quick Tips - Great, ye...
Choosing and Using Tools with Carmen Ciricillo:
• Choosing and Using Too...


Mu wife bakes cakes which is great but I sure wish she was a carpenter instead
I love this lady. Very talented communicator. I would add that I would have checked the level of the top and the baseboard and used that to mark my line. If these two elements have a slope, it will make the resulting shelf look crooked.
I Can listen to your explanations all day ,your voice is hypnotic ,and amazing.
She sure is beautiful 😍
Beverly Alejos Rocky Hawkins.
If my house was that big I wouldn't need to find extra storage space!
What is that trim called?
I was fairly certain I knew exactly how to build recessed shelving in multiple different ways but wanted some confirmation and looked through RUclips videos and this is easily the best simple video on it with a great design and finish
where sure this was some home improvent show from the 80s that is OFC because she is using nails .. yea sure that will last :D
Simply makes life easier for people like me who really need use of some awkward spaces Art ledges in the house. Thanks
Not being a carpenter/house builder, I have to ask: Why not cut the stud out & reinforce the opening? One thing I do know is the Diff. between load bearing/non-load bearing walls, and this certainly looks like a non-load bearing wall, since it doesn't go to the ceiling for one thing. Sure, I could be mistaken; I refer U back to my opening sentence.
Wonderful work. I like how you incorporated some unexpected elements during the install. 👍
So amazingly natural and beautiful.
Thanks for the video. I am doing this in my bathroom wall now, but only half the size as yours. I'm excited about it and want to do more. But next time I think I will paint the self before I put it into the wall ,then touch up if I need to.
You are so amazing! It's the first time I saw a woman using hammer manually!
You make this look so easy!
How great you are. Thanks
Thank you!
👍🏻
Smash for sure holy