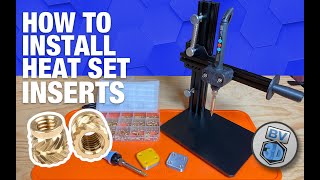
Working with Threaded Brass Heat Inserts and 3D Prints

HTML-код
- Опубликовано: 9 ноя 2020
- Working with Threaded Brass Heat Inserts to make connecting 3D printed components stronger and more reliable.
This video will show you how to install and remove the inserts from 3D printed parts.
Parts and tools used in this video:
- OCR M2-M5 Threaded Brass Insert Kit - amzn.to/3fsOtXW
- Rework station w/Soldering Iron and Heat Gun - amzn.to/3kp4T2K
- Soldering Iron Brass Insert Tips - amzn.to/3lpN3xZ  Наука
Наука


The ones you got are for injection molding parts with the shorter straight grooves. The twisted ones are for 3D printed parts.
I don't have a soldering iron handy so what I did was to heat up the insert with a lighter and push it in with a pair of tweezers, works just fine.
Thank you for the guide. I have been using them for a while and usually buy them from McMaster-Carr and using a heat press. I appreciate the complete package guide and shared it with my local 3D group. Again - thank you for your efforts and community suppport.
Very thorough and complete tutorial. Thank you very much this, it just contained all the questions I had when trying out heated brass inserts for the first time. Kudos
Man! Really appreciate the info that soldering tip temp should be around glass temperature of the material.
I just had the material popping up along the brass insert perimeter and was about to ask this issue to the community.
Thanks for uploading this video!!!
I love them things. I knew about them but never used them until earlier in the year. So awesome!
I'm from Brazil here and thanks for the tips! 👍
Threaded inserts are amazing. I think most printed parts should use them. Inserted nuts are good for anything that really has to handle a lot of stress.
Thanks! Appreciate your heat set insert video!
I need to use these on some of my projects.
Thanks, Joe Mike. Great tips
Quick and simple, nice one thanks.
That beard is looking fresh! Thanks for the tutorial.
Great tips!
Thank you! Very well done.
Thank you, that is a very good video!
To remove inserts I put the soft jaw covers on my vice and grip my mole grips in there and place the screw head in to lock it and then start heating whilst at the same time applying a little pull force, this way I never overheat the plastic as when it becomes just soft enough it just pulls out.
Another method if not mentioned is to use the iron heat insert tip to heat up the plastic again, remove the tip and quickly screw in longer screw and pull. Not always the cleanest but that's my method and works pretty well to recover the heat inserts.
Good video, thank you.
Thanks I will get some.
Some links to the items you described would be very cool.
One other thing, most people won't have an adjustable temp solder iron so we'd be using a fixed temp for melting lead/tin solder.
Links are posted now! Thanks for the reminder! You can use a fixed temp iron, you just need to be careful to not expose the insert to too high of heat for too long. Just might have to work a little faster depending on the wattage of the iron.
@@JoeMikeMakes Thanks!!
I don't use a soldering iron - I use the nozzle on the printer! Use the manual positioning controls on the printer to get the nozzle an inch or two above the hole - make sure it's pre-heated to the right temperature for the plastic you're using. Put the slightly tapered end of the insert into the hole - then lower the nozzle on step at a time so it centers the part under the nozzle and gently forces it into the hole as the plastic melts perfectly around it. For M3 inserts - I use a 5.5mm hole and the 3D part will break before the insert comes out.
Setting the nozzle to the right temperature guarantees it's perfectly going to melt the plastic - and the force you're applying to the insert is precisely vertical.
Excellent video. Thank you!! I want to use these threaded inserts for HDPE(plastic) that comes in sheets and I'll machine.
really good these inserts, if you screw up a bit so to speak use a couple of drops of loctite super glue to help hold the inserts in, they dont works as well as they could so dont over tighten them, I wish the flutes on them were longer and sharper for better adhesion or insertion, also check what hole size is needed for what insert , details online somewhere ion google.
Do they make a reverse insert so a bolt type iv done a search but couldn't find anything
Hello, I like your video and explanation very much, but I contacted you for business consultation emails, and the delivery failed, why? How can I contact you? I very much look forward to you seeing our B1 products and working together. Also look forward to your reply, thank you
Isn't that particular insert design designed for injection molded plastic and not 3D?
Do you now want is going on with mrrf 2020 or 2021
I’m not sure anyone knows at this point. A date has been set, but it’s optimistic at best :/
6:48 Thats what he said
and
6:58 Thats what she said
No offense but this video was useless, came just to hear a tip on insert sizing like "if your insert is 3.5mm in outter diameter make the hole 0.3mm smaller, or 3.2mm in this case" instead it was 13 minutes of literally useless information that could just be inferred from common sense. Thank you for taking the time to make a video to help people but in my opinion someone who has worked with these any amount could make a recommendation like that and that would be the most useful thing.