How To Replace Bike Wheel Hub Bearings

HTML-код
- Опубликовано: 6 мар 2014
- I show how to overhaul a cup and cone hub on a rear bicycle wheel. I take apart the hub, clean all the parts, install new ball bearings, repack the races with marine grease, reassemble the hub and adjust the cones. I also show removing and install the freewheel.
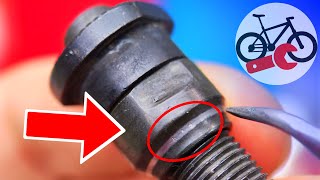
Most front hubs use ten 3/16" balls on each side; Most rear hubs use nine 1/4" on each side.
▶ SUBSCRIBE & HIT THE 🔔 bit.ly/SubRJTheBikeGuy
👍 And please give my video a thumbs up 👍
▶FACEBOOK.com/RJTheBikeGuy
/ rjthebikeguy
▶TOOLS
www.rjthebikeguy.com/tools
▶SHIRTS
bit.ly/RJBikeGuyShirts
▶WEBPAGE
www.RJTheBikeGuy.com  Хобби
Хобби


![Sean Rii, Karyon, Sharzkii - Taungule [My Love] (Official Music Video)](http://i.ytimg.com/vi/eJoMuypbSzQ/mqdefault.jpg)


For more bike repair videos hit the subscribe button 🛑 and click the notification bell ► bit.ly/SubRJTheBikeGuy
Sir, is it possible to replace it with a sealed bearings? That particular hub?
@@haldyordan2316 No.
@@RJTheBikeGuy Thanks Sir 👍
RJ I NEED HELP
@SuperFutureTrunks1 Yes, and they are not a generic part. They are specific to the hub.
Thanks so much!! Mother of a distressed 14 year old. I was able to fix it while he was at school, took me no time at all following your excellent instructions xx p.s. didn't use my eyebrow tweezers, used needle nose pliers 😁😉
best mom ever
Coolest mom ever
Best Mom Award 2020!
Motherhood. Doing it right...
i had to use needle nose as well. The tweezers didn't seem to hold the ball bearings in place very well.
This is the most accurate step by step guide to overhauling bike wheel hub. Thank you so much.
Glad it was helpful!
For sure.... total step by step. Great tutorial!
When a simple video makes your bike 5 times better! Thanks for the video man, helped a lot!
This is a great video. Bicycles are simple , repairable machines that can last a lifetime and your film helps people do this... good work BikeGuy
RJ you're the man. Thank you. Stuff like this is so valuable. Saved me $80 in bike servicing.
Nice video. When loosening a freewheel. I put the tool in the vice, put the wheel over the tool and turn the wheel using it as leverage. Easy peasey.
Thanks a lot to people like you for taking the time to film, explain and upload this information. Very helpful and easy to understand. I'm about to finish my first entire bike restoration and I this is the step I'm about to face now. Again, thanks a lot!
this was so darn straight forward and easy to understand. WOW! others should learn from this
i have done this countless times and have never removed both nut/cones except when an axle needs to be replaced, you only need to remove one side just to get it out, the 2nd one can be cleaned great without removing it. that's gonna throw a lot of people off and give people problems with reassembly.
but kudos to reassembling with wrenches and not a vice. i see people overthinking how to get it tightened correctly and you did it exactly how i do it - hand tighten, get it snug, adjust/tighten a little more with wrenches, check, final tighten...
also sometimes you can get the axle out of a freewheel just by removing the non-drive side nuts and cone and sliding the rest out of the freewheel, without removing the freewheel. sometimes the cone is too big to fit through the freewheel, sometimes it isn't, but it works often enough that i do it on a regular basis. cleaning out the drive side race on the hub is a little more difficult but not much - just don't let solvent get into the freewheel. as long as you aren't replacing a spoke it works great. also works good if you are just trying to poach axle/nuts/spacers out of an old junk wheel where the freewheel ain't coming off, or want to grease the hub on a wheel where the freewheel won't come off.
Great video, nice detail and clear camera angle, very informative, thanks for sharing
I do fixing bikes daily for the kids in the neighbourhood just like my dad did in the past..but still I watch your videos even if I know already.. it really feels like I am learning again.. thank you for sharing all the videos.
Thanks to your video on replacing twist grip shifters with trigger shifters, I have had an enjoyable Saturday morning replacing the ones on my old mountain bike. Now I have found this video, I am almost excited by the fact that I noticed that there is a lot of play in the rear axle. Now I really need to get me some marine grease ! :-)
This was a fantastic tutorial. You were clear and concise with your explanations and straight-to-the-point with everything. I appreciate you skipping past repetitive points and explaining things so well.
I absolutely love your videos!! Thanks so much for sharing your techniques and knowledge!
I used this video to redo the bearings in my front wheel. Worked like a charm, no binding in the wheel. Thanks!
Thanks RJ The Bike Guy, Pretty useful for me, looked for such a guide for a while over the internet and now just made it. Thumbs up!
Nice job! Very clear. Tip for the tightness adjustment on the balls: there may be absolutely no friction at the time you're still adjusting them. When you fasten all the later nuts, the pressure is only going to increase. When the balls are under pressure and being heavily used, temperature will go up, balls will expand a little bit. That makes them more prone to failing.
As long as you hold the adjustment nut when you tighten the locking nut, nothing will get tighter (technically it might go one way or another, like when you adjust valve lash).
the title should be "man replaces wheel bearings without getting grease on hands"
YOU WON'T BELIEVE
Don’t know what video you watched but he had grease all over his hands.
Benjamin D Minor I think the point is he has the grease gun. I don’t even know it existed
@@realkk yes the part where he puts the bearings in he doesn't get any grease on his hands because he uses a grease gun and tweezers to place the balls in position
@@albr4 I just did the same thing with my kid's bike and I need to use my finger to put the grease on.
Hi RJ, this video had helped me solve the issue on my rear hub. GREAT!!
I found out that my rear hub has lots of free play last time. Was trying to find replacement hub online but they are just too expensive. So I chance upon your video and immediately realised that was the problem. After tightening the nut, the freeplay is gone. Thanks mate!
Thank you! Local bike shop said it would take 2 - 3 weeks to fix my wheel wobble and squeak, no way! With this video I did it myself and no more wobble or squeaking! Everyone on the trail thanks you so they don’t have to hear my wheel screeching!
Massive thanks RJ, I've been into bikes for a very long time yet I've never really got into the advanced mechanics of bicycles but the last few years but after studying your vids I've been getting involved, just overhauled F+R hubs and i'm very happy.
As always, clear, simple but informative. BTW I've done 7 wheels on various size bikes this week. Process pretty much same as you show RJ. Now got happy kids and happy wife = happy life 👍Cheers mate 👍
Nice work!
MY DUDE ~!!!
You made that look simple . I think I'll try it first chance I get .
It won't be for over a week but i'll save the video and watch it again .
Your channel is gold . Thanks for making it .
I have an 80's Panasonic, and I find your channel invaluable.
This video is a good example of why switching to metric makes sense.
Before: a bit more than 2/10th of an inch
After: 6 mm
+alantus 11:14 he says 2/10ths of an inch and measures with a metric ruler.
alantus vvkhip
alantus l was thinking exactly the same : the producer presentes two different measurement systems : foot / meters _ inches / centimeters ; at one point we don't know which one measurement sistem is he refering to . ( Left-side steering-wheel or right-side steering-wheel ?? Clock-wise turning wheel or counter-Clock-wise bolt ?? Screw or unscrew to the left /right ... ?
alantus lmfao indeed. How about the Lb scam where the units are sold in smaller portions vs the kilo . Tell someone hey that is $30 / kg for sliced ham and they freak out lol since they are buying it with imperial weights.
Or just a good example of how Imperial is for measuring with you’re eye vs metric that’s for detailed measurement. You do you tho
great video man
Very nicely done tutorial. Just what I need because I have a Klein that I've noticed free play in the rear wheel. Been awhile so this video refreshes my memory nicely. Thank you.
I love this very detailed step by step foolproof video for complete beginners. Thank you!
Very well put together video, thanks for putting your time in to shows much appreciated :)
agreed
Yes, i know this operation, have done it many times. My problem is damaged bearing race inside the hub, the hub is nexus gearbox. Can you make video about how to change the bearing-race inside the hub? It is advanced, so I'm interested studying it and my bicycle is hanging without gearbox now.
Also how to install brake on nexus roller-brake-hub would be interesting, because i could build new wheel if have brake for 8-speed rear-wheel.
Just rebuilt my hub! Thanks RJ, always great info/tutorials on your channel!
best, Joel-
Well I kept overtightening the cone and locking up the wheel. Thanks for the video; now it rolls like butter and not loose at all. Had to get a cone wrench, but the right tool for the right job.
Nice job... Good explanation of what is important.
sauroman1, generally the cups are not replaceable. If the cups are damaged, it's time for a new hub.
Your grease gun is hella cool
hey RJ, I managed to bend the frame of my vintage schwinn at the point where the rear deraiuller and wheel attaches to the frame. I bent the axle and the deraiuller. any ideas of what I should do?
If it's a steel frame, you might be able to bend it back. Replace the bent axle and bent derailleur...if it is the derailleur that's bent. It could just be the derailleur hanger that is bent. And that might be able to be straightened or replaced. Hard to give you a definitive answer without a hands on examination.
Well I believe your right, the frame is in fact steel. And I'm certain the axle is also bent, so I suppose my only option is to have it replaced. I'll have to figure out how to straighten the frame. Thank you for your help
They make special tools to straighten and align bike frames. If it's a major bend, then you might want professionals to fix it.
Great video, subbed! I just bought a $45 road bike that needs a lot of work, but I wanted to do it myself. Thanks for this video!
A bearing gauge! You learn something new every day! Thank you so much
Why dislike? All the steps are perfect
all the dislikes are from bike shops :)
Probably because he used crescent wrenches instead of real wrenches. Throw those dam things in the recycle
Kenneth Mark Gonzales dislikes are from people who are stupid cause you can't fix stupid.
diver dave he removed it to clean it 🤷♂️
Could be because he begins every step with ' ....then go ahead....' :)
oh my god, i am so glad you went over the axle and how to put it back on and how it should fit and spin... i've been trying to figure out my problem for a few days now and this should definitely help
THANK YOU
There is no death.
Well done. I appreciate how you took your time with this. Thanks again for all your insightful instructions
Thanks to your video...I fixed the side to side movement on my rear wheel. And had a good day on the trails. Thanks.!!!
im trying to learn to help fix up kids bikes as a volunteer good deal
I like that grease gun. Very manly. Looks like it could last a lifetime. Hard to get in Europe though.
SoopaFlyism not really they sell it Evans for 12 quid. www.evanscycles.com/dualco-grease-gun-00103452
They do last a lifetime....mine is 60 plus years and going strong
Thanks RJ. I made one mistake reinstalling the axle backwards and figured that out after watching this video again.
RJ you are the God of bike overhauling!
Say a “friend” already removed the axel without measuring the distances, what would you recommend?
If it's quick release it will be about the same as in the video.
@@RJTheBikeGuy How about if it's a bolt on? My "friend" also removed the axle without measuring the distances
@@TAKESHIRONORIMITSU Then guess and adjust.
@@RJTheBikeGuy thanks RJ
Thank you, all those years since and this video still does its job.
Excellent video. I'm machanically inclined and like diy. This will probably save me $50-60 in labour charges. So thanks again for taking the time to put this together.
does your wife know you borrowed her eyebrow tweezers?
Either that bike was for her or he is getting a new one (tweezers that is), because, once u get grease on a tweezer, one can never pick off those fine hairs.
6 years late but that is actually an anti-static precision tweezer
Blimmy I took center nut off and through bolt and bearings fell out packed with silicon greese and managed to put back in with magnetic screwdriver. No longer have a wobble wheel. So chuffed.
Very clear and informative- and not disturbing background music at all- thank s a lot!
RJ Love The Way you Do Business! GREAT a New Fan.
Before I watch this, I know a marine grease will be involve.
Lol I put a motor on my bike and I've gone through so many bearings because I'll pump it fill of greece but they never survive the 65 mph mark
I wouldnt even dream going 65 kph on a normal bike, let alone 65mph
I put a 50cc 2 stroke kit on mine lol !
@@joshdoeseverything4575 is it still working?
Thanks for the post, with the help of your vid was able to fix my own bike and save a few a bucks! Cheers
thanks for this. The principal idea is key here no matter what type of wheel system you have(cassette or freewheel). My issue was my hub became loose somehow. Both cones and lock washers seemed tight so taking it apart and finding that one bearing on one side fell into hub and additional bearings were out of place was the key. Took a lot of adjustments and tinkering to get just right. Don't want the non drive side cone too tight but just enough play so it spins freely but doesn't wobble. My drive side cone is recessed into hub so it can only be serviced before placing into hub. Thanks again!
It always amazes me how rugged these old bike parts are. Don't buy the expensive and lightweight stuff! I still have a freewheel on my road bike.
Yeah U keep riding the old crap, most of the new stuff is far more hard wearing and lighter not to mention better in general, or don't you watch the races and other shows that pit the old technology against the new. I'd rather an aluminium frame to steel any day of the week, I'd rather titanium cassettes and chains, oh wait don't let me forget your v or caliper brakes oh you can definitely keep them I'd rather disc brakes any day of the week even just mechanical disc shit on v and caliper brakes, yeah I'm spoilt I spent $900 on an entry level hardtail, 10 speed aluminium frame, I'd still rather spend the extra 200 and get the modern tech and modern geometry and be able to enjoy riding. So yeah you can keep the old crap as far as I'm concerned the only thing technology has been good for is making things lighter and more durable. It's funny how bearings have hardly changed over the years though.
Do you know what size ball bearings a 24 inch bike needs.
Has nothing to do with the bike, just the part where the bearings are coming from
Ok
Yes, I do. Next question.
Another excellent video from RJ. Informative and detailed. Well done.
This is EXACTLY what I was looking for! Perfect :)
You put 10 ball bearings into where you took only 9 out! You don't need to take apart the second cone and nut or spacer off. Leave it attached to the axle; then there is no need to measure anything. Just clean and check for tightness. It is unecessary. Also count out nine balls for each side and put them aside, pack with grease, push the axle up through and it fills the axle hole negating the need for tedious tweezer work. Overall, a good vid, though.
Exactly where are you seeing 10 bearings being put into the hub? No, you don't have to remove the second cone from the axle, But sometimes it is good to take it all apart and clean everything, so I was showing how that is done.
shyflirt1 the 10th one fell under the wheel watch the video again
So if I dropped a bearing, that counts as installing 10 bearings? If I drop a bearing, I just grab another and retrieve the dropped one later. I only installed 9 bearings.
True, You save a lot of time by only removing the nut, spacer and cone off one side.
Yes, it does. And if to do it in front of a mirror, double it. Not hard to understand, or oversit for that matter.
Such a crystal clear video! Thank you!!!
Super vid. Well done. Doesn't get much clearer than this!
I love watching your videos. Thanks for this tutorial.
Really great article. Concise, clear and full of good tips.
Thanks for the great easy-to-follow instructions!
Thank you! That was really helpful. Keep up the great work!!!
You saved me a trip to the bike repair shop. I think I can DIY this on my bike. Thanks for the video.
you did a great job man! im actually learning every videos you made thanks for these i got a lot of tricks from you! also you earn new subscriber
great vid on this subject. i find it quicker to leave one side complete, as opposed to removing both cones and lock nuts from both sides, you can still check if the axle's bent. i love the way you get it perfect when you're locking up the drive side, mine (m495 shimano) are a ************** nightmare between binding and being loose (fractionally). Never the less, a clear and precise guide. Excellent
Thanks RJ, superb video, that’s given me the confidence to do it myself.
thanks! your video was very well put together.
Thanks for a great walk-through!
Love your videos! I got a free bike and they are allowing me to be able to clean and grease everything!
Nicely explained. Very much appreciated!
Thank you very much for the information. You explain it very well!
Thank you for this very detailed video. You gave me the solution to my problem.
Great video! Thanks for helping me out.
Thank you! Very clear and descriptive.
Your Video has helped me a lot, Thank you so much for this easy to follow Video.
this is really informative. thks for the trouble and making a bike noob less ignorant.
This helps me out a bunch! just did it! thanks!
Cheers for the great video and help. Really useful.
Thanks for the videos RJ the Bike Guy, very helpful. I've got a 32 year old (bought it new) Fisher HooKoo E Koo that I haven't done much regular maintenance on, but I've also not ridden it much during most of that time. My freewheel started lagging while doing a 29 mile ride yesterday. I haven't seen that on any of the troubleshooting videos. Symptoms, while coasting feet on the pedals the sticky freewheel puts slack in the chain. If I backpedal it'll come off the front cogs. If I start to pedal I get that ga-chunk when the slack is taken up and it jerks the gears into motion. While walking my bike the pedals were always turning.
So I started taking apart the back hub. No tools to get the cogs/freewheel off, but squirting some Teflon lube into the the freewheel (the gap) it started spinning freely again. Being lazy, I figured, good enough for now. Had I known, I would'd done this instead of dismantling the hub.
Taking apart the back hub, I need 18 and 19mm sockets. The cog side cone didn't come loose, so I left it. Makes putting it all back together easy.
There's some scoring in the cones, they should be replaced.... but anything I do on this old bike is like having a brand new bike.
Tightening the second cone about 13:00 in the video. I found that if I finger tighten the cone until it slows the wheel from free spinning: so just a bit too tight, and then spinning the whole wheel while holding the axle gave me a really good feel for when it's correctly tightened. Either the scoring in my cones or just normal I got some rumble feeling, but 1/8 th turn off, no rumble, free spinning. I remember repacking my hubs years ago and having no clue about this.
Also I was surprised at what 'good' shape the hub was in. The grease was filthy, but still working. I should probably replace the cones and the bearings, but they're good enough. I was surprised because my bottom bracket, which I replaced with a cassette a few weeks ago was like stirring wet sand. I figured the wheels had to be as bad.
Thanks again. I remember as a kid getting the 'bike repair book' that everybody had and not getting much out of it. RUclips is perfect and your channel is one of the reasons why.
Extremely useful video, thanks!
Thank u so much,!!! Took me 2 days until I found this video!
Really helpful, I thank you for your video.
Brilliant. I learned so much from this. Thank you!
Excellent explanatory & demonstration video, thank you for making this video & posting it on youtube.com! :)
Thank you for a very put together instructional video
Now i can replaced mine,thnx dude &🍻for a good video.
awesome , with that kind of info i feel confident enough to get it done myself Thanks.
hanks for the video it really helped me a lot to tune my bike wheel, great explanation!
Tremendously helpful. Thank you.
Very clear and helpful. Many thanks.
Great video. Clear instructions and really good quality.
you need to get out on ya bike more mate and get off that setee son
I realy don't know how to replace bearings, and because of you i know how to replace it
great video, hub fixing is the only thing i haven't dared to do yet, this makes it look doable!
Thanks for the video, helped me a lot. Job done! :)
thx RJ my favorite bike mechanic