Get your tools and parts here: Parking brake shoes: amzn.to/2YMzthF (US) amzn.to/3hyGJnP (Canada) Parking brake tool: amzn.to/2XcHwUh (US) amzn.to/3hunlII (Canada)
I've done this job before but I still needed a reference. You sure do know what you are doing! The diagram was nice and naming all the parts was educational. If you do a Rev 2, my suggestions are 1) make sure people know that this is a very frustrating project. All those springs under pressure cause many minor mishaps and "start over"'s. 2) Go slow on the parts where you need to be careful which direction a part needs to be inserted. Like the parking shoe strut/compression spring, the parking brake cable (if you put that in backwards, it is a BEAR to get it off), the shoe hold-down springs (this is a tedious Houdini maneuver), the "washers" (have a flange that needs to go into a hole on the hub) and the adjustment knob wheel (again-which direction? answ: so that the adjustment increases tension when you turn the wheel cog in an upwards motion). Also, on my Lexus RX, I found that it was much easier to install the retention springs first, THEN the shoe hold-down springs because the entire assembly wants to fall off if I didn't and then, I have to start all over, find the springs that fell out, etc. Anyhow, thanks fo doing this, just some suggestions for and from a bozo who doesn't have a lot of experience with this.
This is the most complete video I've seen dealing with the Toyota parking brake. This saved my hide because I was having so much trouble, but after watching this video a few times I was finally able to get the job done. Thanks!
There are lots of videos about this but your video is absolutely the most understandable. I have struggled with my 4Runner for days. Unfortunately, my parking brakes were in pieces before I took them apart, so I really did not have a good understanding of how they looked before I started. I'm a visual guy and when I disassemble something I am not familiar with, I take the time to take a lot of photographs. I had my hardware kit as well as new shoes but without the benefit of seeing the brake assembled before hand, I wasn't sure what spring went where. I also had a bad understanding of the sequence of assembly. Thank you.
Thank you so much for a very detailed and well put together tutorial. It helped me reassemble my parking brake assembly on my girlfriends 2004 lexus es330 which is identical to this setup. It was my first time messing with parking brakes and was intimidating until I watched this a couple of times. Cant thank you enough 👍
Great video! My 06 4Runner was similar but way less space to maneuver. Not sure how Toyota expects anyone to replace. Took two of us with angled needle nose and a lot of patience! You're vid helped tremendously. Thank you and God bless!
Thanks. I can imagine with a driveshaft sticking out of the hub you wouldn't have much room, nor the option to remove the bearing completely from the hub.
A great video and right to the point. I'm currently restoring a 1998 Toyota celica and this video is exactly what I need. I had the same problem getting the two 14mm bolts off. (M10 with 14mm head) I had to use a twist socket to remove one of them. On re-assembly of the two shoes, I used a length of thin wire to compress the two springs that are difficult to get back on. The trick is to assemble the retaining pins, springs and slotted caps first. Then using the wire to compress / pull the spring just enough to enable the spring to slide into the slot on the shoe. I replaced the old M10 - 14mm head caliper retaining bolts with new M10x20mm x 1.25mm pitch 17mm head grade 10.9 bolts.
Excellent tutorial video. I have messing with a drum to disc brake conversion kit. I have already gone through three bags of cuss words. After watching your video, I saw a clue on how I can get it done. Thanks again.
The quality of your video is the best I've ever seen for technical instruction videos on RUclips. Everything was crystal clear and in focus and vibration free and the sound and editing was perfect. You are very talented at video production and I suggest you should even make a video on how to make good quality videos as so many contributors on RUclips, although well meaning, do not understand even the basics but you have shown us amateurs how to do a 100% professional job. Very well done.
Axel Kruze Thank you very much for your kind words. While I don't consider my production quality anywhere near professional, other automotive videos focus on getting the job done at what ever cost to production quality, but I try to keep to a clear, easy to understand methodology to my videos for the benefit of the community.
Great video. Super helpful after I had my parking brakes seized up from sitting too long (waiting for parts, lots of rain) and ended up forcing the rotor off. Everything went perfectly well putting it back together thanks to this video. Much appreciated. Except the last step, after adjusting the parking brake on both sides, I found out I had a stud that backed out because of my hammering. Yaya.
Great video... massively helpful.... EXCEPT that you made it look easy. I did ONE side tonight and it took me 4 hours. Most annoying job I've ever done! Getting that pin and the spring and cap in place while holding the stupid shoes in the right place... ARGGGGHHH!!! Very frustrating job, but this video was great.
I had a lot of difficulties holding the spring and cap as I couldn't put a lot of pressure of the pin at the back. I cheated by getting 2 small cable ties and putting the spring in a vise and cable tied both sides of the spring. This meant I didn't need to fight against the spring while trying to get the pin through the cup.
Great Video.. I'm a female and going to change my Parking brake shoes this weekend and was searching for a video that explained the procedure. From other comments you make it look easy and others say its a difficult job. I'm about to find out this weekend. I will have your video with me all the way. Thanks so much for taking the time and posting.
Speedkar.. well the job is complete and your video is exceptional. but must say I am glad I had a mechanic close by.. lol but the problem was my replacement spring kit aside from the pads themselves.. The replacement pins were too long hence the hold down spring and washer kept popping off when I went to replace the rotor.. Grrrr.. :) So found the original pins, cleaned them up, reused and presto. Piece of cake.. But yes a very tedious job and annoying.. I'm glad I won't have to do that again but I did also learn for future how to change my brake pads and that is a piece of cake. Thanks again for your guidance. All the best
I'm not usually one to comment, but thanks so much for this video, I was pretty lost when it came to this job, and most other videos are GM specific. Thank you!
Thank you! I will be doing this on my Land Cruiser and looks like it’s the same process! I appreciate your detailed video and clear step by step guidance
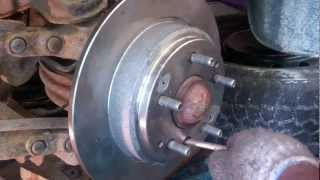
Excellent video. I just used it to try and figure out what my brakes had decided to chew up and throw around the drum. Looks like I've got the folded-up remains of the cable guide seen below the hub assembly at 3:53. Oh, and a pin which I'd wrongly assumed had been bent out of shape by the knackered brakes, which I knocked straight before discovering that it's supposed to be that shape. Oh well, more bits on order.
Toyota brakes- particularly the handbrakes, put me in a theological dilemma. I don't believe in hell. However, I just don't know where the designers of these brakes can go in eternity... I would like them to see the insurmountable amount of wasted time they have caused all over the world and during many decdes because of these pins. How many of us have they brought to sheer desperation almost to a suicidal state?! So, this is my appeal to all of us who deal with this horrible design. Hang in there! There will be a day where the designers get a just treatment for what they have done to us, I am sure of it. :-)
I found it easier to put the springs and retainers together and then stretch them out over the top of the shoes and into place. I also masked off the shoes with masking tape before I started to reassemble to keep them cleaner. Reading down below I see someone else noted this method of getting the springs on. Great and helpful post otherwise.
The reason these are so bad is because they combine disc brakes with drum brakes. Putting back the pins is annoying enough with pure drum brakes, where the pin isn't hidden by the hub. Why didn't they just use the disc brakes for the parking brakes like other car makers do? I forgot to mention that drum brakes are terrible as parking brakes in humid climates. The pads tend to stick to the drum because of the humidity, and after a few times they become loose and you have to replace the brake shoes. If you have a manual gearbox and the brakes are sticking, just keep the first speed engaged instead of using the parking brake.
Exceptionally well edited video. With the average Joe it would have lasted 45 minutes needlessly. Thanks for that, the good video footage, and of course the good tutorial.
Hey brother hopefully you can help me out. I installed new shoes and all new hardware on a 01 highlander. (Pretty much exactly like these) and when I press the foot brake morning happens. I also tightened the cable so it's nice and tight. Still dosent move the shoes. What am I missing?
Thank you so much! Especially like the diagram. You >did< make it look too easy and you're so patient. The comments helped too with the idea to pre-compress the retaining spring + clip with string or wire ties. My fingers found that impossible otherwise. And thanks for reminding us to use anti-seize.
Thank you for very helpful video. With the pins, I am going to try assembling pin, washer, spring and cap prior to putting shoe on, and using string to pull and compress the hold down assembly and slide shoe in under then release. I saw a photo of this method on a toyota forum for 4runners. Same issue as Camry.
Thanks for this speedkar. It looked like alien technology as I removed the hat. Got so frustrated with the spring cups that I got the Dremel out and fashioned my own tool out of a 7mm narrow long socket. Works perfectly with a pair of grips! Job done
Just did this on my GX460, what a pain in the *ss!! Hahaha. To get those blue springs with the pins back took forever. Used twine to hold the lil spring and its caps while pulling to compress and moving the shoe in place. A beer well deserved!
Good, clear video. Takes the mystery out off Toyota style disk/drum type brakes. My only suggestion would be to add torque values during the 'nice and snug' dialog, for caliper bolts.
Good video. I stopped using anti seize on my brakes. I figure it’s good for awhile, but eventually just attracts dust, grime, and it basically just rubs off the contact points quickly. Everyone does it a little different.
@@speedkar99 Not anymore, no. Didn’t use anti seize in the southeastern part of Wisconsin when I lived there though. I never ran into any issues. Maybe it is more useful in other states.
Painters tape! Use it to hold everything together, especially at the top of the shoes and the little clips behind the small shoe springs. Did this on Sequoia with even less clearance than shown here. I don't know how it would be possible without the tape!
what an easier job than on the Prado 120 - the gap between the the hub and the backing plate is is so narrow, one can hardly fit a finger in there, plus the hub hole to work through is about 1/2 the diameter, only about 12mm diameter. I made a couple of special forked tools for the retaining clips plus lots of patience and perseverance. For an old fella with problem knees it would have been great to have it full height on a hoist too! I also had to replace the axle as the oil/grease deflector had rusted out, plus all rotors, calipers and pads front and rear. No need to grind out any blots luckily. The secret to buying sockets is to only get hex ones, not multifit. which can too easily strip either the nut/bolt head or even the socket itself.
Great video, thanks. I only wish you had spent more time on the hold down clips, the hours I've spent trying to install them as I'm sure many out there have as well. I eventually resorted to using a piece of string to compress the three pieces - the two cups and spring - pulled through the adjuster access hole in the hub. The method can be found if you Google "Help to re-install the parking brake".
good tutorial......this parking brake set up is a pain in the butt.......getting the parking brake shoe hold down springs in and out just using needle nose pliers was impossible for me so I made my own tool to do it. Saw a similar tool for a corvette, but mine is sized just for this RX300. I sacrificed a large flat head screwdriver, but I have a ton of them and it is totally worth it. It is really late now, but I will post some pictures of the tool I made and how to use it.......makes replacing those hold down spring soooooo much easier.....and possible for people like me who have old, arthritic hands from years of wear and tear....LOL.
bro, you have no fear in you lol once you got to taking off the shoes i was having anxious moments would be cool to have a parking brake cable adjustment vid to go with this one
+neppy5 Cable adjustment is mostly done at the star-wheel anyway. I think there's a turn-buckle under the heatshield under the exhaust, but I don't want to bother rusty bolts until the cable needs replacing.
Very helpful video! This job was an unbelievable pain though on my 06 Sienna. I had to get someone to hold those long pins in so I could get the spring and caps in place. Phew! I DO NOT want to do that again.
I’m putting emergency brakes on my 2008 Toyota Sienna and my hold down spring is loose but it’s attached to the pin? It’s the pin that is crooked and I can’t figure out why it’s loose? I ordered a new hardware kit and I’m hoping that the new ones fit tighter? Any suggestions will be greatly appreciated! 😕
Hi, I have a 02 highlander and working on my calipers. Now I can't get the rotor over the parking brake. I have not fiddled with the brake either. I adjusted the adjustment bolt as far as it will go to close the shoes. It seems stuck. You did a really good video, well done. Please advise as I'm trying to get this done on my day off. Thank you
Great video as a Certified Ford master Tech and ASE certified I only have one thing I noticed and that was way to heavy on the Anti -Seize don't go to heavy as it can get where you don't want it. A small amount goes along way
I noticed parking brake kits that come with new springs pins and hardware has more more springs and pins I'm wondering if they're extras in case you lost them.
Question: The parking brake cable has a spring on it, how did you get that spring to move back so you could attach the end of the parking brake lever to it? Thanx!!
This is very complicated for me, but the parking brake on my Lexus GS300 is not releasing enough to reverse or forward smoothly. Is that fixable or does it have to be replaced somehow? How Will I Know? Thank you this is great video
On the driver side, does the adjuster tighten going up (counter clockwise) or does it tighten going down on the drivers side (clockwise). It wasn't until I was done with both wheels and putting tooks away I noticed the adjusters were "handed". Makes sense... The way installed mine, they looser going down (from the access hole). I would guess that mine loosens going up on the passenger side. I figure I had a 50/50 chance of doing it right. Wouldn't be too hard to pull the wheel and rotor, but I'd rather not.....
Had to order new Wagner H17267 Parking Brake hardware kit all new springs etc. old ones total rust, but $20 on Amazon worth it. You need mouse hands for this job.
The Rear Caliper mounting bolts are M10-1.25 X 20mm J.I.S. Small Head Hex Flange Bolts Rear Caliper Mounting Bracket Bolts: 35 lb. ft. Caliper Slide Pin Bolts: 25 lb. ft. Wheel Lug Nuts: 76 lb. ft.
thanks for the excellent video. I am trying to change the spring parts for my 2007 sienna xle awd. which has the rear drum with disc . having hard time to find the correct parts. i have doubt on the shoe holding spring pins. which I ordered all four pins are straight pins. but I notice here in your video and somewhere else.. two spring pins are straight and other two are in a different shapes. any idea about this issues? those straight pins will be fit?
Great video, exactly like my 95 Camry. Do you have any thoughts on why my e-brake pedal almost goes to the floor before catching? I've adjusted them so there is just a slight drag when I spin the wheel. Is there an adjustment to the cable somewhere? Any advice is appreciated.
A Lanesey Assuming your cables are intact and not seizing or cut and your parking brake shoes aren't worn all the way down, you can adjust the pedal/ handle with a turn-buckle like device usually located under the center console before the cable exits the bottom of the car.
You missed a couple important details here and made this way more difficult than it should have been. To begin with, all you needed to do was take off the bracket bolts and using a wire hanger to hang the complete assembly up out of the way by way of the strut spring. You NEVER leave the caliper dangling from the hose. Secondly, the pad brackets have an open slot in the middle with a hole just below it . This is to allow us to "push" the shoe hold-down spring and pin set-up off the bracket with a flat head screwdriver, so you don't have to disassemble it, unless you are using new hardware. This makes it much easier to do. Plus, when you re-attach the shoe hold-down spring set-up, you need to insert the tab from the shoe hold-down spring cup into the hole to keep it in place. A "hook" tool works great here. But, remember to always wear a dust mask when working on your brakes!
Hey, listen..... you have no business telling a guy teaching newbies how to disassemble and reassemble brakes. Newbies don’t have the pleasant experience of knowing how to do it that way. So Speedkar is doing a narrative breakdown. Now do the newbs a favor and go away.
@@justchris846 Really,,,and who are you??? Doing a brake job can be hard enough. So if I see an easier way to do something, I'll say it. So, excuse me for trying to help out by simplifying things. And as far as I'm concerned, you have no right telling me what to do or where to go.
RG T I’m a certified mechanic Is who I am, ASE to be exact, 10 years in the shop , this video is great for newcomers, if you have tips a tricks , do a video showing how to do them instead of telling this young man how to do what he clearly already knows how to do
Thanks for the video. Finished one side, took ages. Have a 2004 Sequoia. Everything was going well, I then get to the bit were I'm supposed to re-install the holding spring pin, the side with the crooked pin that resembles a start up crank. What a nightmare! You seem to have a bigger working gap than I did. For the life of me I could not get to damn thing in place. For one thing the hole in the hub is small and does not line up properly with the holding pin so you end up trying to push on the spring and cap at an angle and tools are hard to insert through the tiny hole, it's like a sadistic version of the game Operation. Went to bed very frustrated. Visited an online Toyota forum this morning for possible advice. Saw lots of people complaining about this issue but one guy out of many suggested a different approach, that is put the spring and caps on the pin beforehand, then slide the caliper with the parking brake arm into place, there is a slot in the caliper for the small crank arm to sit. It is still very fiddly but managed it after several tries. Obviously everything else was pretty easy after this. As regards the other side, I think I may just dose it with brake cleaner and grease up the friction points, lol!
good vedio thank you so much, do you have any idear why rear passenger side brake making lightly noise, do i have to change the dis or the pad 2001 camry le
I'm having to grind the bolt heads off the caliper bracket also. Did you get the bolts out of the caliper bracket or get a new caliper bracket? Another video? How to get bolts out of a caliper bracket.
@@speedkar99 I just twisted the head off the lower bolt. For the upper bolt in the video you cut it off with a dremel with the long cut off attachment. I just ordered the Cardone refurbished brakes with the brackets. How are they, ever used the Cardone?
Wouldn't it be so much easier to remove the hub assembly, since all that is needed is to remove the 4 bolts, so that there could be a clear access to the parking brake shoes and all its hardware? Btw, can the same hub assembly that is removed be reinstalled, or once it's removed, is a new one required? Thank you!
@@speedkar99 servicing in what sense? Did you replace anything or you just cleaned and greased? I'm replacing pads on my Toyota and I'll probably clean and grease the parking brake
did mine using those $19 brake best shoes from oreilly..... they just slide even after adjustment....after inspection i noticed some pads have very little contact with the drum....the curvature of the pads may be not as good as they should be..i decided to replace the originals because the front shoes on the right side is thinner than the other 3 but they can stop the car.....ill just put them back
Do I need the parking brake for the function of the wheel? I have one of these as a beater and I can hear everything went to crap inside of there. Is it an option to just delete the parking brake and run it as is? Or is it structurally important?


Get your tools and parts here:
Parking brake shoes:
amzn.to/2YMzthF (US)
amzn.to/3hyGJnP (Canada)
Parking brake tool:
amzn.to/2XcHwUh (US)
amzn.to/3hunlII (Canada)
I've done this job before but I still needed a reference. You sure do know what you are doing! The diagram was nice and naming all the parts was educational. If you do a Rev 2, my suggestions are 1) make sure people know that this is a very frustrating project. All those springs under pressure cause many minor mishaps and "start over"'s. 2) Go slow on the parts where you need to be careful which direction a part needs to be inserted. Like the parking shoe strut/compression spring, the parking brake cable (if you put that in backwards, it is a BEAR to get it off), the shoe hold-down springs (this is a tedious Houdini maneuver), the "washers" (have a flange that needs to go into a hole on the hub) and the adjustment knob wheel (again-which direction? answ: so that the adjustment increases tension when you turn the wheel cog in an upwards motion). Also, on my Lexus RX, I found that it was much easier to install the retention springs first, THEN the shoe hold-down springs because the entire assembly wants to fall off if I didn't and then, I have to start all over, find the springs that fell out, etc. Anyhow, thanks fo doing this, just some suggestions for and from a bozo who doesn't have a lot of experience with this.
Excellent Video!! Most "professional" shops don't do half that good, love it when someone like you does every single step correctly the 1st time.
Thanks for the kind feedback
This is the most complete video I've seen dealing with the Toyota parking brake. This saved my hide because I was having so much trouble, but after watching this video a few times I was finally able to get the job done. Thanks!
+Michael Gulley Thanks, great to hear you got it done.
There are lots of videos about this but your video is absolutely the most understandable. I have struggled with my 4Runner for days. Unfortunately, my parking brakes were in pieces before I took them apart, so I really did not have a good understanding of how they looked before I started. I'm a visual guy and when I disassemble something I am not familiar with, I take the time to take a lot of photographs. I had my hardware kit as well as new shoes but without the benefit of seeing the brake assembled before hand, I wasn't sure what spring went where. I also had a bad understanding of the sequence of assembly. Thank you.
Thank you so much for a very detailed and well put together tutorial. It helped me reassemble my parking brake assembly on my girlfriends 2004 lexus es330 which is identical to this setup. It was my first time messing with parking brakes and was intimidating until I watched this a couple of times. Cant thank you enough 👍
I hardly ever comment but... mate what an excellent way to instruct. Literally 99% is actual content right on point.
Thanks for putting this out there 9 years ago. It made me realize that the hub removal was only 4 bolts and not a cluster.
Great video! My 06 4Runner was similar but way less space to maneuver. Not sure how Toyota expects anyone to replace. Took two of us with angled needle nose and a lot of patience! You're vid helped tremendously. Thank you and God bless!
Thanks. I can imagine with a driveshaft sticking out of the hub you wouldn't have much room, nor the option to remove the bearing completely from the hub.
We need more people like you in this world. Thank you brotha
Welcome
A great video and right to the point.
I'm currently restoring a 1998 Toyota celica and this video is exactly what I need. I had the same problem getting the two 14mm bolts off. (M10 with 14mm head) I had to use a twist socket to remove one of them. On re-assembly of the two shoes, I used a length of thin wire to compress the two springs that are difficult to get back on. The trick is to assemble the retaining pins, springs and slotted caps first. Then using the wire to compress / pull the spring just enough to enable the spring to slide into the slot on the shoe.
I replaced the old M10 - 14mm head caliper retaining bolts with new M10x20mm x 1.25mm pitch 17mm head grade 10.9 bolts.
this is the most simplest video on how to do this thank you
Excellent tutorial video. I have messing with a drum to disc brake conversion kit. I have already gone through three bags of cuss words. After watching your video, I saw a clue on how I can get it done. Thanks again.
The quality of your video is the best I've ever seen for technical instruction videos on RUclips.
Everything was crystal clear and in focus and vibration free and the sound and editing was perfect.
You are very talented at video production and I suggest you should even make a video on how to make good quality videos as so many contributors on RUclips, although well meaning, do not understand even the basics but you have shown us amateurs how to do a 100% professional job.
Very well done.
Axel Kruze Thank you very much for your kind words. While I don't consider my production quality anywhere near professional, other automotive videos focus on getting the job done at what ever cost to production quality, but I try to keep to a clear, easy to understand methodology to my videos for the benefit of the community.
I can’t begin to tell you how helpful this video was to fix my 2003 is300 rear brakes. Thank you so much!
Great video. Super helpful after I had my parking brakes seized up from sitting too long (waiting for parts, lots of rain) and ended up forcing the rotor off. Everything went perfectly well putting it back together thanks to this video. Much appreciated. Except the last step, after adjusting the parking brake on both sides, I found out I had a stud that backed out because of my hammering. Yaya.
Great video... massively helpful.... EXCEPT that you made it look easy. I did ONE side tonight and it took me 4 hours. Most annoying job I've ever done! Getting that pin and the spring and cap in place while holding the stupid shoes in the right place... ARGGGGHHH!!! Very frustrating job, but this video was great.
Thanks for the feedback. Yes those clips are very tedious. I cheated and learned on the other side before making the video.
I had a lot of difficulties holding the spring and cap as I couldn't put a lot of pressure of the pin at the back. I cheated by getting 2 small cable ties and putting the spring in a vise and cable tied both sides of the spring. This meant I didn't need to fight against the spring while trying to get the pin through the cup.
Same here..started at half 8 AM..half 3 pm came and still not finished..so I gave up
Great Video.. I'm a female and going to change my Parking brake shoes this weekend and was searching for a video that explained the procedure. From other comments you make it look easy and others say its a difficult job. I'm about to find out this weekend. I will have your video with me all the way. Thanks so much for taking the time and posting.
+Pam M thanks I am glad my video helped you!! All the best on your brake job.
Speedkar.. well the job is complete and your video is exceptional. but must say I am glad I had a mechanic close by.. lol but the problem was my replacement spring kit aside from the pads themselves.. The replacement pins were too long hence the hold down spring and washer kept popping off when I went to replace the rotor.. Grrrr.. :) So found the original pins, cleaned them up, reused and presto. Piece of cake.. But yes a very tedious job and annoying.. I'm glad I won't have to do that again but I did also learn for future how to change my brake pads and that is a piece of cake. Thanks again for your guidance. All the best
Best video for doing the rear brakes. Keep up the good work, it is appreciated.
James Gear Thanks for the feedback.
Excellent. Clear precise and audible! Instructions with even a diagram! Camara even on a Tripod enabling two handed work!
I changed my timing belt on my 93 Camry V6 for the 1st time thanks to this man right here he explains shit so good..
Awesome, I'm glad this can help
Thank you so much! It was so hard to find something I could even relate to my 2005 camry
nice one pal, got me out of a pickle, forgot which way a couple of my springs went on. lol Lexus SC400 ( toyota soarer In UK) very similar. mick UK
Great instructional video. Very clear and informative. Just what I needed.
You're a star, man. :-)
I'm not usually one to comment, but thanks so much for this video, I was pretty lost when it came to this job, and most other videos are GM specific. Thank you!
cosmo479 Glad it helped!
Thank you! I will be doing this on my Land Cruiser and looks like it’s the same process! I appreciate your detailed video and clear step by step guidance
Excellent video. I just used it to try and figure out what my brakes had decided to chew up and throw around the drum. Looks like I've got the folded-up remains of the cable guide seen below the hub assembly at 3:53. Oh, and a pin which I'd wrongly assumed had been bent out of shape by the knackered brakes, which I knocked straight before discovering that it's supposed to be that shape. Oh well, more bits on order.
Well you have quite the job ahead of you
Thank you for the video. I was fighting to get one of my drums off and your video was just what I needed! Thanks!
Tim Himes Glad it helped!
Cheers for the help doing this on a rav this Saturday.
+poly flanders Thanks hope it goes well for you.
Toyota brakes- particularly the handbrakes, put me in a theological dilemma. I don't believe in hell. However, I just don't know where the designers of these brakes can go in eternity... I would like them to see the insurmountable amount of wasted time they have caused all over the world and during many decdes because of these pins.
How many of us have they brought to sheer desperation almost to a suicidal state?!
So, this is my appeal to all of us who deal with this horrible design. Hang in there! There will be a day where the designers get a just treatment for what they have done to us, I am sure of it. :-)
+Manfred Lemke Yea those pins are a pain. Apparently there's a tool that your supposed to use.
very true
I found it easier to put the springs and retainers together and then stretch them out over the top of the shoes and into place. I also masked off the shoes with masking tape before I started to reassemble to keep them cleaner. Reading down below I see someone else noted this method of getting the springs on. Great and helpful post otherwise.
been working on those springs for 2 hours. my head's about to explode. 04 sequoia and there's almost no room to work them in.
The reason these are so bad is because they combine disc brakes with drum brakes. Putting back the pins is annoying enough with pure drum brakes, where the pin isn't hidden by the hub.
Why didn't they just use the disc brakes for the parking brakes like other car makers do?
I forgot to mention that drum brakes are terrible as parking brakes in humid climates. The pads tend to stick to the drum because of the humidity, and after a few times they become loose and you have to replace the brake shoes. If you have a manual gearbox and the brakes are sticking, just keep the first speed engaged instead of using the parking brake.
Excellent Video ... perfectly explained and with great visuals ... the Avalon is running quiet and smooth
Thanks
Avalon good choice
Thank you sir, this video is very helpful. I Iove how you walk through very clearly and slowly. Thanks again
Exceptionally well edited video. With the average Joe it would have lasted 45 minutes needlessly. Thanks for that, the good video footage, and of course the good tutorial.
Excellent description as you were doing the work and great video angles. Best video that I've seen yet!!! Thanks a million!
LoL, the progression from the caliper bracket bolt being stuck to sawing it off with a dremel is funny.
Yea...things happen you know...not everything is fine and dandy
Dude you're making this look easy . I been struggling on 1 the last 3 hours
Great video - you make it look easy, even with corroded parts! Kudo to you.
Thanks. This car isn't that rusty, there's a lot worse out there. Living in the salt-belt means rusty cars.
Your video is awesome. you are a great teacher and super patient. This was a super blessing to me fixing our sienna. thanks and blessings to you
Thanks for the feedback
Damn dude.....you're good !! You omitted all of the curse words I'm sure I'll be spouting as I attempt this job.
Haha
I take my time and do my job.
If I can't finish, I'll leave it until later.
No curse words needed.
Hey brother hopefully you can help me out. I installed new shoes and all new hardware on a 01 highlander. (Pretty much exactly like these) and when I press the foot brake morning happens. I also tightened the cable so it's nice and tight. Still dosent move the shoes. What am I missing?
Thank you so much! Especially like the diagram. You >did< make it look too easy and you're so patient. The comments helped too with the idea to pre-compress the retaining spring + clip with string or wire ties. My fingers found that impossible otherwise. And thanks for reminding us to use anti-seize.
Awesome
Thank you for very helpful video. With the pins, I am going to try assembling pin, washer, spring and cap prior to putting shoe on, and using string to pull and compress the hold down assembly and slide shoe in under then release. I saw a photo of this method on a toyota forum for 4runners. Same issue as Camry.
Did assembling pin, washer & spring work well?
good video , please make more videos for Toyota car , your video is clear and right to the point , well done . Thanks
This is exactly what an sr5 4runner 2014 looks like. You are a houdini with how quick you got those springs in... OMG 😂
I hate them springs. They make a special tool for it
Thanks for this speedkar. It looked like alien technology as I removed the hat. Got so frustrated with the spring cups that I got the Dremel out and fashioned my own tool out of a 7mm narrow long socket. Works perfectly with a pair of grips! Job done
Just did this on my GX460, what a pain in the *ss!! Hahaha. To get those blue springs with the pins back took forever. Used twine to hold the lil spring and its caps while pulling to compress and moving the shoe in place. A beer well deserved!
There's a special tool for that
Super helpful. Worked like a gem on my 88 supra
Glad it helped on such a unique car. Cool!
Great help for 105 too. Even with the hub off I need a third hand to get the shoe hold down springs and cups on though!
+David Turner I hate those clips!!
very very professional and helpful video. thanks for uploading
Thanks for the feedback.
Having grown up with all 80's GM and Ford junk cars, I think I can do drum brakes with my eyes closed. A plus in this case.
Thank you
I was able to save some money thanks to your video
Glad you did.
Great video, we'll done clear and to the point
+fred pilon thank you
I loved the special Toyota hold down spring tool you used...aka fingers 😅. That'll do.
Thanks for a great video. I'm replacing mine now on a 05 Avalon.
+RareDiamond Ching Glad you enjoyed it
Good, clear video. Takes the mystery out off Toyota style disk/drum type brakes. My only suggestion would be to add torque values during the 'nice and snug' dialog, for caliper bolts.
+Richard M. Thanks, haha I don't use a torque wrench for this kind of stuff...only for sealing surfaces where it matters the most :)
Good video. I stopped using anti seize on my brakes. I figure it’s good for awhile, but eventually just attracts dust, grime, and it basically just rubs off the contact points quickly. Everyone does it a little different.
True. But do you live in the rust belt ?
@@speedkar99 Not anymore, no. Didn’t use anti seize in the southeastern part of Wisconsin when I lived there though. I never ran into any issues. Maybe it is more useful in other states.
Solid video, thanks very much for the help.
You are welcome. Thanks
Painters tape! Use it to hold everything together, especially at the top of the shoes and the little clips behind the small shoe springs. Did this on Sequoia with even less clearance than shown here. I don't know how it would be possible without the tape!
+Kevin Rhoades Good tip
what an easier job than on the Prado 120 - the gap between the the hub and the backing plate is is so narrow, one can hardly fit a finger in there, plus the hub hole to work through is about 1/2 the diameter, only about 12mm diameter.
I made a couple of special forked tools for the retaining clips plus lots of patience and perseverance. For an old fella with problem knees it would have been great to have it full height on a hoist too!
I also had to replace the axle as the oil/grease deflector had rusted out, plus all rotors, calipers and pads front and rear. No need to grind out any blots luckily. The secret to buying sockets is to only get hex ones, not multifit. which can too easily strip either the nut/bolt head or even the socket itself.
Great video, thanks. I only wish you had spent more time on the hold down clips, the hours I've spent trying to install them as I'm sure many out there have as well. I eventually resorted to using a piece of string to compress the three pieces - the two cups and spring - pulled through the adjuster access hole in the hub. The method can be found if you Google "Help to re-install the parking brake".
There's a special tool for that. I struggled with this as well
good tutorial......this parking brake set up is a pain in the butt.......getting the parking brake shoe hold down springs in and out just using needle nose pliers was impossible for me so I made my own tool to do it. Saw a similar tool for a corvette, but mine is sized just for this RX300. I sacrificed a large flat head screwdriver, but I have a ton of them and it is totally worth it. It is really late now, but I will post some pictures of the tool I made and how to use it.......makes replacing those hold down spring soooooo much easier.....and possible for people like me who have old, arthritic hands from years of wear and tear....LOL.
Yes these are a pain!!
I hate dealing with those springs.
There is a special tool they sell for it however.
Which way do you turn the shoe adjustment screw to push the pads towards the drum?
bro, you have no fear in you lol once you got to taking off the shoes i was having anxious moments
would be cool to have a parking brake cable adjustment vid to go with this one
+neppy5 Cable adjustment is mostly done at the star-wheel anyway. I think there's a turn-buckle under the heatshield under the exhaust, but I don't want to bother rusty bolts until the cable needs replacing.
+neppy5 I'm not afraid to take things apart on this car, as this is my secondary "experimental" car where I learn on.
Very helpful video! This job was an unbelievable pain though on my 06 Sienna. I had to get someone to hold those long pins in so I could get the spring and caps in place. Phew! I DO NOT want to do that again.
+Chris Asprelli agreed, drum brakes aren't easy but they make a tool for those pin caps
speedkar99 that's good to know! Do you know what they're called?
I’m putting emergency brakes on my 2008 Toyota Sienna and my hold down spring is loose but it’s attached to the pin? It’s the pin that is crooked and I can’t figure out why it’s loose? I ordered a new hardware kit and I’m hoping that the new ones fit tighter? Any suggestions will be greatly appreciated! 😕
Hi, I have a 02 highlander and working on my calipers. Now I can't get the rotor over the parking brake. I have not fiddled with the brake either. I adjusted the adjustment bolt as far as it will go to close the shoes. It seems stuck. You did a really good video, well done. Please advise as I'm trying to get this done on my day off. Thank you
God Bless you - thank you for this video.
You are welcome
Thank you very much just what I looking for.
Great video as a Certified Ford master Tech and ASE certified I only have one thing I noticed and that was way to heavy on the Anti -Seize don't go to heavy as it can get where you don't want it. A small amount goes along way
I noticed parking brake kits that come with new springs pins and hardware has more more springs and pins I'm wondering if they're extras in case you lost them.
Question: The parking brake cable has a spring on it, how did you get that spring to move back so you could attach the end of the parking brake lever to it? Thanx!!
Looks like your car has alot of rust. Thanks for the informational video!
+Kamran Khan Thanks, no this car doesn't have much rust compared to a lot of other Canadian cars
Kamran Khan that car looks prestine compare to my car at the Jersey shore.
This is very complicated for me, but the parking brake on my Lexus GS300 is not releasing enough to reverse or forward smoothly. Is that fixable or does it have to be replaced somehow? How Will I Know? Thank you this is great video
You need an adjustment
Before doing the replacement job, do you engage or disengage the parking brake?
only your golden hands can fix my car
+Swan Wark Really? What if I break something ?
Your videos awesome brother ... i like the way you explain... its so simple and easy to understand ..
Michael Richards
The adjusters are handed, and you need the correct one for the side you are working on.
On the driver side, does the adjuster tighten going up (counter clockwise) or does it tighten going down on the drivers side (clockwise). It wasn't until I was done with both wheels and putting tooks away I noticed the adjusters were "handed". Makes sense... The way installed mine, they looser going down (from the access hole). I would guess that mine loosens going up on the passenger side. I figure I had a 50/50 chance of doing it right. Wouldn't be too hard to pull the wheel and rotor, but I'd rather not.....
Omg I can’t thank u enuff this also worked on 2010 Toyota Venza 2.7l btw
Very helpful video. The parking brake shoes were paper thin. Why did you not replace them?
Pffft who uses parking brakes 🙈
Thanks! First time doing this....Big Help!!!
+Page Wannabe Glad it helped you :)
Had to order new Wagner H17267 Parking Brake hardware kit all new springs etc. old ones total rust, but $20 on Amazon worth it. You need mouse hands for this job.
dude , you are a life saver , thanks !!!!
Thanks
Thanks for posting! You helped me quite a bit.
+Lewis Preston Thanks glad it could help
The Rear Caliper mounting bolts are M10-1.25 X 20mm J.I.S. Small Head Hex Flange Bolts
Rear Caliper Mounting Bracket Bolts: 35 lb. ft.
Caliper Slide Pin Bolts: 25 lb. ft.
Wheel Lug Nuts: 76 lb. ft.
Thanks for the spec
thanks for the excellent video. I am trying to change the spring parts for my 2007 sienna xle awd. which has the rear drum with disc . having hard time to find the correct parts. i have doubt on the shoe holding spring pins. which I ordered all four pins are straight pins. but I notice here in your video and somewhere else.. two spring pins are straight and other two are in a different shapes. any idea about this issues? those straight pins will be fit?
Great video, exactly like my 95 Camry. Do you have any thoughts on why my e-brake pedal almost goes to the floor before catching? I've adjusted them so there is just a slight drag when I spin the wheel. Is there an adjustment to the cable somewhere? Any advice is appreciated.
A Lanesey Assuming your cables are intact and not seizing or cut and your parking brake shoes aren't worn all the way down, you can adjust the pedal/ handle with a turn-buckle like device usually located under the center console before the cable exits the bottom of the car.
Great guide mate
Thanks
You missed a couple important details here and made this way more difficult than it should have been. To begin with, all you needed to do was take off the bracket bolts and using a wire hanger to hang the complete assembly up out of the way by way of the strut spring. You NEVER leave the caliper dangling from the hose. Secondly, the pad brackets have an open slot in the middle with a hole just below it . This is to allow us to "push" the shoe hold-down spring and pin set-up off the bracket with a flat head screwdriver, so you don't have to disassemble it, unless you are using new hardware. This makes it much easier to do. Plus, when you re-attach the shoe hold-down spring set-up, you need to insert the tab from the shoe hold-down spring cup into the hole to keep it in place. A "hook" tool works great here. But, remember to always wear a dust mask when working on your brakes!
Hey, listen..... you have no business telling a guy teaching newbies how to disassemble and reassemble brakes. Newbies don’t have the pleasant experience of knowing how to do it that way. So Speedkar is doing a narrative breakdown. Now do the newbs a favor and go away.
@@justchris846 Really,,,and who are you??? Doing a brake job can be hard enough. So if I see an easier way to do something, I'll say it. So, excuse me for trying to help out by simplifying things. And as far as I'm concerned, you have no right telling me what to do or where to go.
RG T I’m a certified mechanic Is who I am, ASE to be exact, 10 years in the shop , this video is great for newcomers, if you have tips a tricks , do a video showing how to do them instead of telling this young man how to do what he clearly already knows how to do
@@justchris846 hahhaa the man can say whatever the hell he wants 🤣 😂
Thanks for the video. Finished one side, took ages. Have a 2004 Sequoia. Everything was going well, I then get to the bit were I'm supposed to re-install the holding spring pin, the side with the crooked pin that resembles a start up crank. What a nightmare! You seem to have a bigger working gap than I did. For the life of me I could not get to damn thing in place. For one thing the hole in the hub is small and does not line up properly with the holding pin so you end up trying to push on the spring and cap at an angle and tools are hard to insert through the tiny hole, it's like a sadistic version of the game Operation. Went to bed very frustrated. Visited an online Toyota forum this morning for possible advice. Saw lots of people complaining about this issue but one guy out of many suggested a different approach, that is put the spring and caps on the pin beforehand, then slide the caliper with the parking brake arm into place, there is a slot in the caliper for the small crank arm to sit. It is still very fiddly but managed it after several tries. Obviously everything else was pretty easy after this. As regards the other side, I think I may just dose it with brake cleaner and grease up the friction points, lol!
This video saved me! Thanks a ton :)
Glad it helped
cheers bud these rear handbrake shoes are a pain in the but so thank you
They sure are a pain if you don't have the spring tool
good vedio thank you so much, do you have any idear why rear passenger side brake making lightly noise, do i have to change the dis or the pad 2001 camry le
I'm having to grind the bolt heads off the caliper bracket also. Did you get the bolts out of the caliper bracket or get a new caliper bracket? Another video? How to get bolts out of a caliper bracket.
I think I was able to turn it out with vice grips. You can get a used caliper and bracket at a junkyard if needed
@@speedkar99 I just twisted the head off the lower bolt. For the upper bolt in the video you cut it off with a dremel with the long cut off attachment. I just ordered the Cardone refurbished brakes with the brackets. How are they, ever used the Cardone?
Wouldn't it be so much easier to remove the hub assembly, since all that is needed is to remove the 4 bolts, so that there could be a clear access to the parking brake shoes and all its hardware? Btw, can the same hub assembly that is removed be reinstalled, or once it's removed, is a new one required? Thank you!
Your right, that would help with clearance
👍👍 thankyou im doing this on my cressida tomorrow
Very nice video, the thanks. However may I ask why did you do it? You have not replaced anything, it all went in like it was
I was servicing them and then decided to share with you all the procedure
@@speedkar99 servicing in what sense? Did you replace anything or you just cleaned and greased? I'm replacing pads on my Toyota and I'll probably clean and grease the parking brake
did mine using those $19 brake best shoes from oreilly..... they just slide even after adjustment....after inspection i noticed some pads have very little contact with the drum....the curvature of the pads may be not as good as they should be..i decided to replace the originals because the front shoes on the right side is thinner than the other 3 but they can stop the car.....ill just put them back
A+ quality instruction
Congratulations!! Great Work and nice Video!!
Thanks
Thanks, exactly what I was looking for!
Do I need the parking brake for the function of the wheel? I have one of these as a beater and I can hear everything went to crap inside of there. Is it an option to just delete the parking brake and run it as is? Or is it structurally important?
Yes you can delete the parking brake shoes (as long as you have rear disc brakes). Not recommended though, in case you need that parking brake.