Dutch Pour Fluid Painting in Photoshop

HTML-код
- Опубликовано: 22 авг 2024
- Simulate dutch pour fluid painting in Photoshop.
Dutch pour is a fluid painting technique that used large amounts of paint to create fluid motion. The dutch pour method typically uses an air mover or hairdryer to move the paint around the canvas to create amazing abstract fluid art. You can also use this method to simulate watercolor brushes in Photoshop.
This is a fun and relaxing way to use Photoshop to create digital fluid art similar to acrylic pouring. The digital dutch pour is perfect for abstract backgrounds and digital print pieces or just for fun and relaxation.
These abstract paintings are super versatile, they can be used for virtually any application from branding design to textiles.
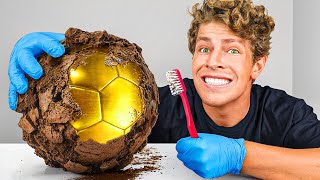
Gold textures mentioned in the video are from Creators Couture on Creative Market:
creativemarket...
IMPORTANT
To get the same effect I achieved in the video you will need a drawing tablet. You can get some very inexpensive tablets. These are the two I mentioned in the video. I own both of these, both are very good drawing tablets.
Wacom Intuos Pro Paper Edition (I recommend this one for Mac users): amzn.to/2Zno9X8
Huion H610 Pro (works perfectly on PC): amzn.to/2DBLqw5
**These are affiliate links which means that I will get a small commission if you click through and purchase. There is no additional cost to you and I will never recommend a product that does not add to the value I work to provide with my content.**


This is one of the best, explained tutorials on this subject. Thank you Mercedes
My pleasure, I’m glad you found it helpful.
Oh my God..this is exactly the reason why I downloaded photoshop!! You answered my prayers...Thank you all the way from Hawaii😍😍😍
I’m so glad this was helpful, have fun!!
@@PrettyWebzMedia 😍😍
another awesome tutorial! Thank you Mercedes : )
Thanks Olivia, I'm so glad you liked it!
one of the best abstract photoshop tutorials i've ever seen...subscribed!
Awe, thank you! I’m so happy to have you as a new subscriber :-)
@@PrettyWebzMedia still coming back to it...u r absolutely spot on with its zen relaxing capabilities...its sooo good!
This was a super fun tutorial. Thanks Mercedes :)
My pleasure, so glad you liked it :-)
Your tutorials are wonderful! This is the type of thing I’ve wanted to do in photoshop but had absolutely no idea how!
Thank you! I glad you liked it 😊
I love your tutorials :) thanks for sharing :)
My pleasure, thanks for watching :-)
Great your tutorial. Thank you very much Mercedes !!
Thank you 😊
Thank you very much! You are the Best!
Thank you!
Who give U to make such good things in Photoshop🤠?
Actually, this one was a request from a viewer so I can't take credit for the idea, lol.
Simple & to the point. Thanks so much!
EDIT: OMG! My photoshop is sooo laggy when doing this. My kid & I can't stop laughing. I try to smudge the "paint" & a few seconds later it'll start sloooowly moving like actual paint. Any tips on how to reduce this insane lag?
Every computer is different, this process can make even the best systems lag, try one or all of the following things to improve it. 1. Pay attention to brush hardness and adjust as needed (hard brushes work best, soft brushes will slow it down) 2. Tick the Spacing off under "Brush Tip Shape" in your Brush panel. There should be no percentage in the Spacing box. 3. Start with a lower resolution canvas 72ppi and increase the resolution for print after the artwork is made for the screen.
WHT IS THE TONE USED
I’m sorry but I don’t remember the exact colors used But it was created in RGB mode.