My new ebike arrives today. I opted for a bike with mag wheels instead of spokes so the standard spoke lights won't work. I'm guessing this style affixed to the rim will. You are creative!
Hello, I'm a comp sci student and this is really cool, so I'd like to do this for my bike, but I don't know much about circuits. Are you using 18650 or 21700 cells? If so, do you have any safety features on the batteries? How do you manage the 5V voltage for the lights and 3.3 V for the arduino vs the 3.7V of the battery? I've read differing opinions online where one person said you can run the 5V lights on a 3.7V battery just fine, and another said to put two batteries in series to double the voltage and then step down the voltage for the lights and the arduino.
18650 cells in here. I used two in parallel and then boosted the voltage to 5V. This is likely NOT the best arrangement. You could probably just use one cell or two in series and then step down to 5V like you mentioned. I was prematurely optimizing for run-time. That 5V powers the Arduino, BLE module., and LEDs. The Arduino logic is at 3.3V so I also used a logic level converter to get the output to 5V to control the LEDs.
In terms of CompSci, this project hit pretty much all the areas. There's a website I made for managing the palettes: palette-library.vercel.app/wheel Arduino control for the LEDs. A smaller Arduino project for the BLE module that synced up both wheels so the iPhone app only had to talk to one wheel. The iPhone app for choosing patterns and sending it to the wheel. I ended up skipping over a lot of this as it was already feeling like a wonky enough video as it was.
I would love a video of the light holding rim construction and installation! Also - how do you deal with gyro drift? Do you still have once-per-rotation synchronization via magnetic switch or what?
I had that in this originally, but it was already pretty long. The holders are 2 3D-printed parts that are bolted together. This allows you to adjust the angle for the spokes that are on each side. It also lets you adjust it for different wheels. Those are holding a strip of thin aluminum bar that I bent around a chair. And that's what the LED strip is stuck to. I haven't had any issue with drift. Maybe it's been there, but I'm not trying to lock the image in place and haven't noticed.
@@EdLewis Thanks. Good point, since you want the pattern to (more slowly) rotate anyway, gyro drift really may not matter. It would be interesting to turn off the deliberate rotation (just cancelling the physical rotation of the wheel as sensed by the gyro), and see what happens. I'd predict that it will be stable at first and then gradually begin to rotate anyway - but I could be wrong. If you decide to make even a short video of the construction, I'd be interested. I have subscribed; you have relatively few videos but include some good ones. Thanks for sharing in any case.
@@zephsmith3499 As it is, there's already some compensation as the sensor is precise, but not accurate. This has to do with issues of the sensor not being entirely parallel with the wheel and sometimes timing with relation to how long it takes to push each frame to the LEDs. The "zero point" for each animation is different as a result. So the sensor is giving 300 dps, but it might need to be adjusted to 330 dps for calculations of how much to shift the image each frame. At best it would be very slowly drifting or maybe going slightly faster or slower at times. Which would be OK for looking weird, but useless for doing a different animation style with that since it could be facing the wrong way. Another version of this that would be good would be to use a magnetometer to always know which part of the wheel is on top. I have a few sketches of ideas of how that might work. Like light at the bottom of the wheel acting like a pool of water reacting to acceleration.
@@EdLewis Yes, that's one kind of animation that appeals to me! The magnetometer idea is interesting, but if you are referencing the earth's magnetic field, wouldn't it be hard to compensate for yaw rotation (ie: riding the bike in different compass directions)? Unless you are sitting atop one of the magnetic poles. An accelerometer could be tricky tho, trying to filter out both centripetal forces and acceleration/deceleration to get an gravity direction. It could be very interesting to experiment with tho! I will look forward to any future vids!
Great job. Can you share more details about the IMU/accelerometer implementation? Did you have to do any fancy filtering like Kalman filters or stuff like that?
No, I never saw the need to go further than to keep updating the current speed value from the accelerometer. It was giving readings at 40Hz and the speed didn't change rapidly unless you did a hard brake. I also have some visual wiggle room since the end result has a slow rotation. If I was trying to lock the visuals in place I'd likely look into that as well as using the magnetometer.
I have decided to embark on attempting to replicate your project, and was curious which gyroscope sensor you used. And for that matter, which arduino did you decide to go with? I assume this all runs fine on 5v? (which is typical for less than 100 leds on a line)
It's been a couple years so there might be better boards now. This uses an Arduino Nano 33 IoT. This and the lights are both powered off of 5V (18650 boosted to 5V). It also uses a logic level converter to convert the 3.3V logic from the Arduino to control the LEDs.
Hey I'm just checking before I follow your links. Is everything I need in those links in order to do this project myself? If all the information is there I can figure it out one way or the other.
The information is definitely NOT all here. I can get you more info if you need, but first of all, what's your comfort level for working on electronics, arduino, addressable LEDs, and 3D printing?
These rims are incredible! Would you consider selling a few sets to people who aren't skilled enough to make their own? I could send a set of bike rims and pay for your supplies and labor. I'd be much safer riding at night with LED rims. Syncing the light patterns to the RPMs was brilliant.
Thanks! It would be cool to be able to send these out to others to test out and play with although they're still paused in the prototype phase. Main issues being no charging port for the battery, not waterproof, and no way to add patterns from the phone. And then tons of things that were on the "would be cool if" list. The one good thing is that rims don't need to be shipped. These just clip on to spokes. Sizing can be taken care of on my side and then shipped out.
@@EdLewis The prototype is very impressive. Sorry, I assumed the lights were mounted directly to the rim. You could try clear heat shrink tubing wrapped around the LEDs and electronics for waterproofing, sealing any holes with clear caulk. A phone app controller and bluetooth receiver would be incredible, but that might drain the light batteries pretty quickly if the receiver was always on. Good luck with future builds, I'll be interested to see what you come up with next.
The lights are on a metal strip and that strip is attached to the spokes. This actually has a BLE module and I made an iPhone app to control the wheels. Didn’t cover it in the video since it was already long but was needed to be able to switch modes. The front wheel relays to the back wheel so both update right away.
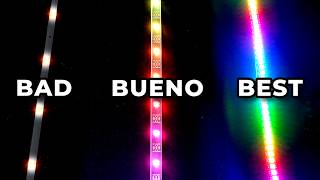
Good catch. The old clips weren't solidly held in place and neither was the LED strip between clips. These clips are in two parts and held firmly in place with bolts and nuts. These hold an aluminum strip so the effect is a lot more consistent.
@@EmAreDayviss Thanks. I didn't pursue this idea before since I really don't want to be in the business of customer service for this type of item (exposure to elements and rough wear), but doing it as JUST the controller is interesting.
Hi, recently I came up with the idea of making just such LEDs in the tire, I watched a lot of videos and as far as the idea was cool, the execution was not, and finally I found your video. Your idea is epic and I would like to apply it to my bike, but I have no idea how you connected it all. I would be very grateful if you could find the time to more or less describe what to combine with what.
I've been meaning to document this but that would be a much longer video. Ideally, I'd make a custom board to handle all of the electronics. As it is, this requires a 3D printer, some basic soldering techniques, and various specific bits of hardware.
@@EdLewis I want to add LED lights to my bike wheels and frame just like you did but I have no clue on any of this technology. Is there a kit you can sale to just add the LED’s to bikes? I know I would be interested in buying it.
@@EdLewis Your work on this is fantastic. looking to learn how to accomplish this for installation on many bikes to be used at Burning Man. Would you be willing to provide greater instructional details for a fee?
@@Diploramat Thank you! This would be amazing at Burning Man with a group of bikes. To make that happen would require redoing a lot of the work. So... a custom board to handle everything (micro, accelerometers, BLE, charging circuit) and likely a new holder to put it along the hub of the hike instead of the spokes. And then an expansion on the work already done for the iOS app. Playa-proofing it at that point shouldn't be too bad. It would be interesting and you'd need to handle the LEDs and LED holder on your own. That part is easy with some basic maker skills such as 3D-printing and soldering. Soooo... doable and interesting, but would need a commitment to buy a couple dozen controllers in the end.
@@EdLewis Thanks for the reply Ed! Its definitely a topic to be discussed further, is there a way to DM you directly? I looked here on YT but not finding anything on your main page. perhaps I missed it.


I watched your old video and you have come such a long way with your videography!
Bro, you are a machine, incredible how you install and program this. I appreciate !!
The new clip design looks very reliable. Nice wheel designer. I was just talking to someone about a need for something like that.
Great project and video, Ed!
Taking notes ✍️..... The LED lights look awesome !! At night 🌃 time..... Thanks !! For your video :)
Very cool, I am trying to do something very similar with a gyro and fast LED. Any chance you could share the esp32 code ?
Any chance you can give us more info on how you did this? I'm sure ALOT of us would like some insight on how "YOU" got it working. Thanks.
this video was so concise and perfect thank you
instead of batteries, you should look into a dynamo hub! then the lights will power by themselves when the wheels turn!
My new ebike arrives today. I opted for a bike with mag wheels instead of spokes so the standard spoke lights won't work. I'm guessing this style affixed to the rim will. You are creative!
Hello, I'm a comp sci student and this is really cool, so I'd like to do this for my bike, but I don't know much about circuits. Are you using 18650 or 21700 cells? If so, do you have any safety features on the batteries? How do you manage the 5V voltage for the lights and 3.3 V for the arduino vs the 3.7V of the battery? I've read differing opinions online where one person said you can run the 5V lights on a 3.7V battery just fine, and another said to put two batteries in series to double the voltage and then step down the voltage for the lights and the arduino.
18650 cells in here. I used two in parallel and then boosted the voltage to 5V. This is likely NOT the best arrangement. You could probably just use one cell or two in series and then step down to 5V like you mentioned. I was prematurely optimizing for run-time.
That 5V powers the Arduino, BLE module., and LEDs. The Arduino logic is at 3.3V so I also used a logic level converter to get the output to 5V to control the LEDs.
In terms of CompSci, this project hit pretty much all the areas.
There's a website I made for managing the palettes: palette-library.vercel.app/wheel
Arduino control for the LEDs.
A smaller Arduino project for the BLE module that synced up both wheels so the iPhone app only had to talk to one wheel.
The iPhone app for choosing patterns and sending it to the wheel.
I ended up skipping over a lot of this as it was already feeling like a wonky enough video as it was.
Hey yo. Do you think this could be made invisible with the 1515 rgb leds?
I would love a video of the light holding rim construction and installation!
Also - how do you deal with gyro drift? Do you still have once-per-rotation synchronization via magnetic switch or what?
I had that in this originally, but it was already pretty long. The holders are 2 3D-printed parts that are bolted together. This allows you to adjust the angle for the spokes that are on each side. It also lets you adjust it for different wheels.
Those are holding a strip of thin aluminum bar that I bent around a chair. And that's what the LED strip is stuck to.
I haven't had any issue with drift. Maybe it's been there, but I'm not trying to lock the image in place and haven't noticed.
@@EdLewis Thanks.
Good point, since you want the pattern to (more slowly) rotate anyway, gyro drift really may not matter.
It would be interesting to turn off the deliberate rotation (just cancelling the physical rotation of the wheel as sensed by the gyro), and see what happens. I'd predict that it will be stable at first and then gradually begin to rotate anyway - but I could be wrong.
If you decide to make even a short video of the construction, I'd be interested. I have subscribed; you have relatively few videos but include some good ones. Thanks for sharing in any case.
@@zephsmith3499 As it is, there's already some compensation as the sensor is precise, but not accurate. This has to do with issues of the sensor not being entirely parallel with the wheel and sometimes timing with relation to how long it takes to push each frame to the LEDs.
The "zero point" for each animation is different as a result. So the sensor is giving 300 dps, but it might need to be adjusted to 330 dps for calculations of how much to shift the image each frame.
At best it would be very slowly drifting or maybe going slightly faster or slower at times. Which would be OK for looking weird, but useless for doing a different animation style with that since it could be facing the wrong way.
Another version of this that would be good would be to use a magnetometer to always know which part of the wheel is on top. I have a few sketches of ideas of how that might work. Like light at the bottom of the wheel acting like a pool of water reacting to acceleration.
@@EdLewis Yes, that's one kind of animation that appeals to me!
The magnetometer idea is interesting, but if you are referencing the earth's magnetic field, wouldn't it be hard to compensate for yaw rotation (ie: riding the bike in different compass directions)? Unless you are sitting atop one of the magnetic poles.
An accelerometer could be tricky tho, trying to filter out both centripetal forces and acceleration/deceleration to get an gravity direction.
It could be very interesting to experiment with tho! I will look forward to any future vids!
No doubt the flame/fire algorithm is the best...
Yeah, it's definitely the most fun
It looks amazing! Could you please share your Arduino code? Would like to try to make something similar.
What a brilliant idea just wondered do you sell this as a kit az I’m interested in purchasing
Great job. Can you share more details about the IMU/accelerometer implementation?
Did you have to do any fancy filtering like Kalman filters or stuff like that?
No, I never saw the need to go further than to keep updating the current speed value from the accelerometer. It was giving readings at 40Hz and the speed didn't change rapidly unless you did a hard brake. I also have some visual wiggle room since the end result has a slow rotation. If I was trying to lock the visuals in place I'd likely look into that as well as using the magnetometer.
I have decided to embark on attempting to replicate your project, and was curious which gyroscope sensor you used. And for that matter, which arduino did you decide to go with? I assume this all runs fine on 5v? (which is typical for less than 100 leds on a line)
It's been a couple years so there might be better boards now. This uses an Arduino Nano 33 IoT. This and the lights are both powered off of 5V (18650 boosted to 5V). It also uses a logic level converter to convert the 3.3V logic from the Arduino to control the LEDs.
Perfect for a E-bike.
Hey I'm just checking before I follow your links. Is everything I need in those links in order to do this project myself? If all the information is there I can figure it out one way or the other.
The information is definitely NOT all here. I can get you more info if you need, but first of all, what's your comfort level for working on electronics, arduino, addressable LEDs, and 3D printing?
Bike Spoke LED strip clip
These rims are incredible!
Would you consider selling a few sets to people who aren't skilled enough to make their own? I could send a set of bike rims and pay for your supplies and labor.
I'd be much safer riding at night with LED rims. Syncing the light patterns to the RPMs was brilliant.
Thanks! It would be cool to be able to send these out to others to test out and play with although they're still paused in the prototype phase. Main issues being no charging port for the battery, not waterproof, and no way to add patterns from the phone. And then tons of things that were on the "would be cool if" list.
The one good thing is that rims don't need to be shipped. These just clip on to spokes. Sizing can be taken care of on my side and then shipped out.
@@EdLewis The prototype is very impressive. Sorry, I assumed the lights were mounted directly to the rim. You could try clear heat shrink tubing wrapped around the LEDs and electronics for waterproofing, sealing any holes with clear caulk.
A phone app controller and bluetooth receiver would be incredible, but that might drain the light batteries pretty quickly if the receiver was always on.
Good luck with future builds, I'll be interested to see what you come up with next.
The lights are on a metal strip and that strip is attached to the spokes.
This actually has a BLE module and I made an iPhone app to control the wheels. Didn’t cover it in the video since it was already long but was needed to be able to switch modes. The front wheel relays to the back wheel so both update right away.
Jaw dropped here
OMG!
I like the new clips in the beginning, looks like it uses less LEDs.
Good catch. The old clips weren't solidly held in place and neither was the LED strip between clips. These clips are in two parts and held firmly in place with bolts and nuts. These hold an aluminum strip so the effect is a lot more consistent.
@@EdLewis Is there a link to these new clips that you can share?
@@objectivegiant804 Were you able to get a link to the new clips? I've seen a video of the design of the original V shaped mounting brackets.
Hi could you show how to make one these controllers step by step
Can you add links to the equipment you used so that we lesser electrically inclined folks can purchase and install?
The electronics controlling it are an Arduino Nano 33 IoT and a separate bluetooth module, but still won't get you very far.
@@EdLewis ok, gotcha. Man if you packaged this up and programmed it, I’d buy a set from you.
@@EmAreDayviss Thanks. I didn't pursue this idea before since I really don't want to be in the business of customer service for this type of item (exposure to elements and rough wear), but doing it as JUST the controller is interesting.
Hi, recently I came up with the idea of making just such LEDs in the tire, I watched a lot of videos and as far as the idea was cool, the execution was not, and finally I found your video. Your idea is epic and I would like to apply it to my bike, but I have no idea how you connected it all. I would be very grateful if you could find the time to more or less describe what to combine with what.
I've been meaning to document this but that would be a much longer video. Ideally, I'd make a custom board to handle all of the electronics. As it is, this requires a 3D printer, some basic soldering techniques, and various specific bits of hardware.
@@EdLewis I want to add LED lights to my bike wheels and frame just like you did but I have no clue on any of this technology. Is there a kit you can sale to just add the LED’s to bikes? I know I would be interested in buying it.
@@EdLewis Your work on this is fantastic. looking to learn how to accomplish this for installation on many bikes to be used at Burning Man. Would you be willing to provide greater instructional details for a fee?
@@Diploramat Thank you! This would be amazing at Burning Man with a group of bikes. To make that happen would require redoing a lot of the work. So... a custom board to handle everything (micro, accelerometers, BLE, charging circuit) and likely a new holder to put it along the hub of the hike instead of the spokes. And then an expansion on the work already done for the iOS app. Playa-proofing it at that point shouldn't be too bad.
It would be interesting and you'd need to handle the LEDs and LED holder on your own. That part is easy with some basic maker skills such as 3D-printing and soldering.
Soooo... doable and interesting, but would need a commitment to buy a couple dozen controllers in the end.
@@EdLewis Thanks for the reply Ed! Its definitely a topic to be discussed further, is there a way to DM you directly? I looked here on YT but not finding anything on your main page. perhaps I missed it.
Love this thanks so much
Did you share your code on this? Would really like to implement this on my bike. I can share my bike frame led code....
I think the repo is public. I’ll have to check. It’s been a while
How to buy it
Could you please programmed this LED rgb and then sell it to me?
Great Video 🎥! I Learnt Heaps💡 🧠!
MCGA (Make 🇬🇧 Cycling 🚲 Great 🇺🇸 Again 🇦🇫!)
From New Zealand
How do you oder the lights ?
Oh, thanks, but these aren't for sale.
cant reproduce without schematic and sketch
Ed make a Kit’s To sell your make a fortune
Yas! Make a mint, bro! Your ideas are genius.
Instagram??