How To Fix A Bike Puncture - Repairing An Inner Tube

HTML-код
- Опубликовано: 15 июл 2024
- Puncturing your tyre when you're out riding can spell disaster. If you run out of tubes, or fancy saving a bit of cash, it's worth knowing how to repair a punctured tyre.
Subscribe to GCN: gcn.eu/gcnsubs
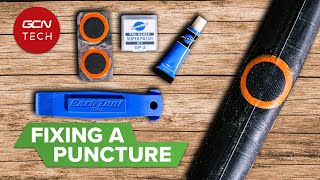
Repairing a puncture with a puncture repair kit may seem old school, but it's an important skill to have. Whether you're stuck out on a training ride, or just fancy saving your hard-earned cash, a couple of puncture repair patches can save the day.
Music: Future Loop Foundation - Coffee Culture: gcn.eu/10ATBKM
About GCN:
The Global Cycling Network puts you in the centre of the action: from the iconic summit of the Stelvio to the epic trails of Fort William, Scotland, everywhere there is pavé or dirt, world-class racing, and pro riders, we will be there bringing you all the action, essential analysis and unparalleled access every week, every month, and every year.
Welcome to the Global Cycling Network | Inside cycling
RUclips Channel - gcn.eu/gcnYT
Facebook - gcn.eu/gcnFb
Google+ - gcn.eu/gcnGPlus
Twitter - gcn.eu/gcnTW
Leave us a comment below!
Music - licensed by Cue Songs  Спорт
Спорт


Thanks for the help, im 12 years old and that was my first puncture repair on my own
it won't be the last :-D
@@AnalogAudio1 hahahahahaha lol lol lol lo lol lo lol lol lol
Well done and hope you get know how to do more jobs on your bike yourself and be self reliant and not have to pay a bikeshop to do the work there are brain surgeon's and high flying bosses of global companies that can't even fix a bicycle puncture lol
@@juliankelley3558 There are also people who misuse apostrophes in plural words. Brain surgeons do not need one.
Same dudde :))
One of the most important steps before reinstalling the repaired tube is carefully checking the inside of the tire for whatever cause the puncture. On a road bike this is often a piece of wire form a blown out car or truck tire - highway shoulders are littered with this stuff. Run your finger cautiously around the inside of the tire and you will often encounter the culprit still sticking through the tread. If you do not remove this, you will be fixing another flat almost immediately. I found this out the stupid way!
This is actually a pretty important step. I got two punctures this week because of a piece of metal remained on the tire... Arrgggh!
Who TF rides a bicycle on the highway?
@@franksmith7271
Just had a guy die here crossing the highway on, you guessed it... A bicycle.
There is a reason riding a bike on the interstate is illegal.
Crossed right in front of a semi and never seen him...
1 whoops.
Same story here lmao
Frank Smith I’m guessing the OP is from UK where a highway refers to pretty much any road. They use the term ‘motorway’ to describe what Americans would call a highway.
All these years and I never realized the plastic part peeled off...
LOL xD
Getting the plastic part off, is where I usually have difficulty. It always starts to take the patch with it.
Leave it on 😉
Easier and won't hurt 👍
@@Nelson4207 zackly, leave it on and it will act like a slick slidey buffer against the inside of the tire
Easier to leave the plastic on than risk pulling the patch back off. It ain't going to cause any problems.
When he said that snake bite punctures were common on mountain bikes I thought for a second that snakes biting people's bicycle tires was a common occurrence lmao
you gotta watch out for those snakes waiting at the bottom of the jumps!
clickhead me too lol
Thing is Luciano, Where I live (Canberra, Australia) You actually do have to watch for snakes on Stromlo
clickhead That me laugh quite hard, thank you!
johnover5 same lol
Something my dad never showed me how to do, I just went to him with a flat tyre and as if by magic half an hour later I was off again. Really useful, thanks for the invaluable info and easy to follow instruction.
My dad just told me to look at a yt tutorial and learn for yoself.
The orphan kid: you guys have dads?
Ha, as a kid I could do this, as an adult I can't lol.
Never got taught this when I was young and have been taking my bike to repair shops all this time! Thanks so much for the videos, really helpful and easy to follow. Nice to be back on two wheels!
My Brother taught me this, I must of been 11 or 12. Im now 29, my son has a flat tyre and I just wanted to make sure that what I've been doing is correct haha.
You're a very good father!
Great video, clear & precise. One addition though, to get the plastic off, fold the patch in half once it's stuck, this makes the plastic split so you can peel it from the centre of the patch rather than the sides. This will stop it wanting to peel at the edges.
I always recommend that the time while the glue is drying is most usefully spent finding the cause of the puncture, cos if you forget this step, then you'll have completely wasted your time......Having a cup of tea indeed..
These videos are so useful. With so many folks getting bikes during the pandemic, they're such great resources for those just joining the community!
A good tip on quickly looking for the cause of the puncture: Before removing the tire, use your marker to mark the spot where the valve was located. After you repair the puncture, put the inner tube on top of the tire, aligning the valve with the mark. You can then inspect the part that’s aligned with the patch. That being said, it’s also a good idea to regularly inspect the entire tire in order to preemptively remove any possible causes of future punctures. But this tip will be useful if you’ve just made an emergency roadside/trailside repair and are eager to move on already. You can do the more thorough inspection once you’re safely back home.
Clear and precise, only been riding a few weeks and despite Schwalbe puncture resistant tyres had my first flat today . Useful video. When you don’t know , you don’t know !
I am about to put on a patch over the same hole for the 3rd time. Repair kit instruction was misleading and ended up wasting 2 patches before coming to this video. Now confident about how to do it and hopefully will succeed. Thanks for the explanation!
Thank you, sir.
This video is really helpful.
I exactly followed the directions which comes with my patch kit, but it didn't work. Then I followed your direction and finally succeed thanks to your video. I appreciate!
Thank you for putting the video up. A note for everyone using the repair patches, the plastic film can be removed from the center outward by breaking the dotted split with one's nails, or tweezers :).
GNC is by far my favorite youtube subscription, another top vid. Thanks
"Or coffee if you're in the U.S." hahaha XD
@@_ilililililililil4366 Dude, 1 year later you'll look back on this comment & cringe
Hey man, make love, not war! Yea I instantly cringed when I saw it.
Good ol' Sidney Goodrich! I liked that line, too
Or vodka if you're in Russia :)
@@usernametentwo nothing cringe 'bout it, people spel colour "color" in the US. disgustaaang.
Thanks! Just got my first road bike in 25 years!! Its the same principle as when i was a "lad" but good to have a refresh! Thanks. Love the channel
Just wanted to say thanks for posting the maintenance videos. These are great. Love the channel!
I’m 29 and this is the first time my lazy ass repaired a tyre , love you for your tutorial bro , now I can go visit my mom and go prayers thank u sir x and for that I’ll pray for u :)
Thx mate! I didn't even imagine that I have to wait for the vulcanizing thing to dry first. I'm glad I watched this first! Thumbs up
I think it's supposed to be semi-dry, which can occur in as little as one minute.
I always run out of patches before I empty the tube of glue and started cutting up old innertubes and using a piece of one as a patch. Clean and sand the tube and your piece of tube patch, apply a bit of glue to both, let it dry until it's tacky, apply, reassemble the wheel and inflate to full pressure.
My glue dries out before I get a second puncture.
The Park Tool Vulcanizing Patch kit is the best in the world and super cheap also, picked mine up at local bike shop for just $2.00 and within a few minutes after locating the hole, the wheel was back on and I was riding again. Excellent value and they stay on forever and actually become part of the rubber.
Had my first flat (a bite) today, now learning how patch it!!
It finally happened---the puncture---and I found myself here. Thanks for this, really helpful!
Perfect video just what I was looking for thank you 😊
I've always left the plastic bit on, extra durability😂
I cant imagine any reason to remove it...lol..
@@88888gerald Just like people who didn't got circumcised hahahaha.
@@hypermangi8265 lmao in iner tubes case it doesnt get smegma around the patch
I had one where even days later it was trying to peel up the black patch so of course I left it
Simple straight to the point.. cheers 😊
Absolutely fantastic kit well done lad 👌👌👌
Thanks for this! Was very helpful and worked a treat.
Three useful tips. (1) I mark the position of the hole by putting a pair of wooden sprung clothes pegs about an inch either side of it. I then know that the hole is half way between them. I have put a mark on each clothes peg and if they are lined up, even a tiny and invisible hole can be accurately marked without having to try to find a pen that draws on the tube. (2) Always check for OTHER punctures before replacing the tube. If you rode through thorns or glass, there may be two or more. (3) Always thoroughly check the tyre inside in case the tip of the thorn is still there, otherwise it will make another puncture as soon as you pump the tube up again.
Yes annoying how hole position is lost before tube is dry enough for marking , maybe
make some sort of collar with small hole to slide along underwater until hole centered on puncture.
Another excellent, simple tutorial. Thanks
Thank you for sharing this video. I will be patching my first puncture tomorrow. It is a double puncture.
Exactly the same way its always been done, I just wasn't sure about the grater. Lol now I got to go fix my boys Razor E200s, good video ✌
Thanks for the help mate.
Great video. I was on the way to get my puncture repaired by a bike shop but the tyre started coming off so I could no longer walk with the bike (only back to my house).
Had a couple of these patches from years back and managed to patch the inner tube with this video without taking the wheel off :) thank you.
You're welcome, Jay - doing these jobs yourself is always way more satisfying!
Thank you for another great video thats helping a cycling n00b like me!
Very comprehensive video. Thank you u for your time and effort.
George Gilles m
Thanks for the information 👍
Great video thanks mate. Cheers.
Check for second leaks after the repair as well, the bigger leak will stop small ones showing bubbles sometimes, until the bigger on is repaired.
Great video my man
41 years old and just now getting around to learning this. Thanks.
Great tutorial, very detail , 👍
I find I manage to lose the sandpaper bit after the first use, but park tool tyre levers have a diamond pattern molded to them that will rough up the tube fairly well. Also, I use the spoke catcher end to apply force to the patch as I don't carry a spanner in my saddle bag.
Thanks for the help got a puncture for the first time super helpful coming from a 12 year old point of view
An excellent video, thanks very much mate, cheers!
I patched up my tube just a short whilst ago but due to being a tiny hole that created a very slow puncture it was a bugger to locate even with water you could just make out the bubbles. The cheap 1 pound kits do a quick and easy job i always keep one in my cycle bag just in case because mountain biking over rough terrain can create problems easily.
thank u man i finaly fix my bike to go to school thanks man ⭐⭐⭐
Yeah!!!Finally I know what does the sand paper and patch use for...thks do much..
Well done. Thanks a lot.
Usually I skrrrrrttt around my block blasting sick tunes, until I'm here watching this video... Puncture on the front wheel. In the mornin', mans gonna see where the hole is at, like those who slip their dangly in the wrong hole but she loves it haha, and need a puncture repair kit and boom solved. Now I can then skrrrrrrttt around block happily ever after.
pretty damn clear, nicely done
Great vid, thanks!!
You make it look so easy!!!!!!!!
I have always done it virtually exactly as you do , possibly leaving it a little longer to glue dry, but one issue I always have is , as you have done, lifting the cellophane disturbs the edge, and although inevitably we will pad/fingernail that edge back down, we now have an imperfect raggedy-looking job...what I have seen on other videos here, is to leave the cellophane on, there is no downside to that,re-assemble everything, they say, and with time, such as next time rim/tyre is disturbed for other tyre/tube work, THEN remove it, in good time the whole job becomes so aged dry the cellophane will then lift off without creating that flawed edge.
Good tip
I do much the same. I think the older the patches, the more prone they are to this.
Thanks for the tip
3:08 - It's critical that after you clean the area, you find 1 cat hair and position it right under the patch. Then, and only then, do you have yourself a successfully patched inner tube!
Great job
The worst thing to use for a puncture are those kits you can buy at the bike shop. The glue is good for one puncture if that. Buy your patches at Amazon or do a search on any search engine. You can buy a bunch of patches for a nominal fee. Go to an auto parts store and buy a can of vulcanizing fluid. The stuff will last for years. These can feature a brush to apply the glue. And be kind to yourself. Don't try to patch a tube in the field. Carry 1 or 2 spare powdered tubes ready for immediate use. Save the repair for home. You can get several sheets of 400 or 500 grit at a home improvement store for a few dollars and you're practically fixed for life.
Leave the clear covering over the patch on. Even with the most careful attempt, it is possible to pull the patch partially off. Also, if you want the smoothest ride with the repaired tube, leave the tire inflated to its normal size inside the tire. Prepare the surface, apply the glue and then the patch. There are two reasons for this: 1) The patch will not expand producing a pinched tube and the tire may not roll as smoothly; 2)The patch will have a reduced chance of failing because the rubber is not stretched.
Thank you so much man🙏🙏🙏🙏
One tip to make it easier to peel the plastic film off after putting the patch on, is to inflate the tube and it's easier to peel off.
Edit: pointless to even peel it, leave it on
Aryan Adibmehr
Excellent Tip, mate
You can also just leave it on. I mean, why not?
Thanks :)
Why not leave the plastic on?
Thank you
Very helpful
great clip guys... as always..... i dont know why people complain about the Wiggle ads... the money from the ads help this channel grow and im more than happy to put up with a 10-15 sec ad for that....
Cheers. Very helpful,
Ran out of patches, put on some contact glue on the hole, waited till it was surface dry and then put duct tape over, a 2x2 inch piece, still good.
Also, if you have regular contact glue you can glue on a piece of rubber cut out from an old inner tube. Other things may work as well.
i found that no matter how well i cleaned the old inner tube they never seemed to hold well as a patch maybe you had better luck
We kids used to light the vulcanizing fluid with a match for a few seconds to hasten the drying process. Worked every time and no injuries ever happened. Modern alternative might be to turn a campfire lighter flame on the patch for a few seconds, always keeping the flame in motion so as not to melt the rubber.
Very good!
i used Faber Castel TACK-IT the reusable & removable Adhesive for home, office & school
and some duct tape to fix my tube
Thanks for the video, im 29 and this helped
Best video ever.
thanks for teaching me aswell that wasmy first puncture and my first time repair at 11
Tnx bro you helped me alot
Brilliant thanks
THAT HAIR!!! 3:10
Pretty fancy sink there, Lloydie
Thanks so much guys I fixed my puncture I will make sure I will subscribe
Thank you so much, this helps me a lot.. Someone puncture my bike tire and I don't know what to do.. it's my first time experiencing puncture within 5 months of cycling
thanks a lot definitely will subscribe for more videos
Thanks, there was no instructions with my repair kit and I hadn't done one since I was a kid. I'm trying to repair a wheelbarrow tyre but it's got a decent size cut in it so I'm not confident the repair will hold.. Still, I thought it'd be worth a try at least.
Good video. It may have been old, but I couldn't get the cellophane off the back of the patch. Left it attached so I'll see how that goes.
Thanks alot!
This really helped!!!
Glad to be of assistance!
Thank you!
Thank you so mych
Your vids are class ;)
Thanks man
Thanks so much! ❤️💖🥰🥰💖❤️💖
Thanks for the help, I'm 71 years old but totally lost confidence since my last repair, about 60 years ago.
Thank you :)
i like how the marking of where the puncture was looked like a patch as well
Should of watched before I tried it. Now I owe my brother a beer lol.
This helped me fix my bike thx a lot
Thanks
Good video
thanks for this vid
thank you so much
Thanks Bro 💪
First puncture today for years, 4 I think. Thanks for another good tutorial. My choice of tea, was lemon green tea🍵
This should come in handy for my bike tour.