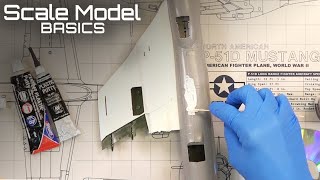
I've been a modeler for 65 years. I probably spent the first 30 years doing the wrong thing (using tube fillers and such) because everyone else was doing it. Then I started watching how professional model builders work and that opened my eyes. I now only use Mr, Hobby Dissolved Putty and Mr. Hobby primers as fillers. Put it on and wipe it off while wet. Let it dry in the joint and then reassess if a second coat is needed. Usually one application is enough so I can go straight to a final primer coat. I also add bolsters behind long joints using strip styrene pieces to give the joint greater strength. The bolsters prevent the joint from breaking open later, plus it helps to better align the parts. Sometimes I completely remove the alignment pins if they are in the wrong position for a good fit. All of this requires multiple dry fitting of the parts until the fit is perfect before I ever consider applying cement to the joint. My last line of fixing a bad joint is to add stock styrene inside a gaping joint prior to using the dissolved putty. I keep multiple thickness sheets on hand to cut custom joint fillers prior to gluing parts. I have very few fit issues using these methods, and very little cleaning up of the surface details such as rescribing panel lines.
I think for that Spitfire, if the fillets are lower than the wing surfaces, resulting in the steps, then the spreaders you mentioned for the Emily and airliners would be needed in the fuselage to slightly change the angle of the fillets to the wings. This might also have resulted in a more correct dihedral. I know you know this, I am mentioning it for the less experienced modelers out there. If the wings had been lower than the fillets, then the spreaders would have been needed in the wing roots to slightly raise the height of the upper wing. The bottom line, and you mentioned this several times, is that taking the time to fit and assemble the parts while minimizing the gaps and steps will result in almost no fillers required. This was a game changer for me when I first started doing it years ago. In fact, I rarely ever use putty anymore, having replaced it with CA glue when practical. CA glue has the benefit of being ready sooner, being a harder finish if restoration of surface detail is needed, and it does not shrink like fillers will. It does generally require sanding, thus highlighting the need for good fitting parts in the first place. Again, I know you understand this, and I mention it for others.
Some great tips and something I’m guilty of not paying enough attention to while I’m starting a build! I’ve found some of the early manufactures like Matchbox and Esci used to fit as well as Tamiya kits, there were some that were shockers of course. I really enjoy seeing how many kits you have on the go!
I’ve used lacquer based fillers from Tamiya and Mr. Hobby and water-based from Vallejo. The problem is shrinkage. In my opinion, black flexy super glue from VMS is the best filler for most jobs, hands down. Zero shrinkage, so no concerns with ghost seams 6 weeks after completing a build.
Although I don’t build aircraft, only bikes and cars, I think an overlooked part of modelling is using the best sander/file for the work, as in using a strong flat file for long straight edges, soft sponge sanders can sand unevenly, and therefore you end up chasing and correcting your own work. Another technique for things like bike front fender halves is to use a thick glue, so when pressed together a small bead of glue appears, when dry you can sand smooth for a great unseen join.
My biggest problem with fillers is getting a smooth finish. I probably need to use some finer sandpaper to finish it off, but it tends to be extremely difficult to sand. It usually looks fine until you paint it, then a dull patch appears. Sometimes it's hidden nicely by the top coats, but occasionally it shows through. I have been using UV activated glue for some joints. It is very easy to get it into the joins and you can clean most of the excess off with a damp cotton bud. It does take more than a day to dry enough to be sanded though. It stays a little bit sticky for the first day or so. I did notice on my Revell Hurricane that Tamiya putty would not stick to the hardened UV glue. I had to put primer on it before I finished it off with Tamiya. The water based putties have their uses They are good for areas where there are a lot of rivets near the join as you can clean most of it off with a cotton bud or tissue, but that then removes a bit more than you want and you have to fill it again. Sanding it off is easier than Tamiya putty, but it also gets rubbed off if you clean the parts with soapy water prior to painting.
Excellent video, you've got a fantastic collection of aircraft. It really helped to know what to look for. I have three kits in by stash to build that are this size, one a C5A and two C130's. I now feel confident to get them in my build up line. Several things have helped filling issues today, the thin glues and lots of improvement in fillers. In the " old days" there was the old Squadron Green putty which dried like wood putty. Another technique was using the old Testors tube glue, putting a good coat and one half and squeezing the parts to together, let the glue ooze out and then sand or carefully cut away. After watching this video my confidence has improved substantially. I'd love to see a video on how you prime a large kit like these. Cheers for mow
Hi there. This is a very interesting video. I agree on minimising filler, I try not to use any but sinks and ejectors, well... I have a couple of observations. In your fuselage joint problems, you could try glueing a ledge (plasticard or sprue flattened on one side) to the high side so that it forces the low side up. Alternatively, especially for chine hulls and such a set of small riblets along the length could do the same. Might be better than your sprue props. With that Spitfire, I would say getting the dihedral right (or at least equal) is more important than a small step. The error stands out when you look face on. I suspect that the real fault might have been that the gap between the wing upper surfaces was insufficient and with trial assembly filing back the vertical faces on the wing upper panels a bit might have let every thing go together better. Maybe.
On the go is a bit of a strong phrase. many of them are dormant for the time being. I actively work on a few, with another 10 to 20 getting some for of work done. Lets say i have 5 to 10 On the go. lol
Thanks for those assembly tips. There's one youtuber in particular that does really nice work, but I cringe every time he fills fuselage seams and then sands the hell out of them until all of the surface detail along the seam is gone. Then he gets in there and recreates all of the obliterated panel lines and detail. I think he actually likes to do all of the extra work that he creates for himself.
Deon, when you're talking about your models, can you please always tell us what brand they are? Especially in this kind of video where you're talking about techniques rather than about the massive array of kits you have. I may have missed it, but what brand was the Spitfire that you were saying is not a great kit? It would be really helpful for your viewers so we don't go and buy a disappointing kit when we could have bought a better one.


I've been a modeler for 65 years. I probably spent the first 30 years doing the wrong thing (using tube fillers and such) because everyone else was doing it. Then I started watching how professional model builders work and that opened my eyes. I now only use Mr, Hobby Dissolved Putty and Mr. Hobby primers as fillers. Put it on and wipe it off while wet. Let it dry in the joint and then reassess if a second coat is needed. Usually one application is enough so I can go straight to a final primer coat. I also add bolsters behind long joints using strip styrene pieces to give the joint greater strength. The bolsters prevent the joint from breaking open later, plus it helps to better align the parts. Sometimes I completely remove the alignment pins if they are in the wrong position for a good fit. All of this requires multiple dry fitting of the parts until the fit is perfect before I ever consider applying cement to the joint. My last line of fixing a bad joint is to add stock styrene inside a gaping joint prior to using the dissolved putty. I keep multiple thickness sheets on hand to cut custom joint fillers prior to gluing parts. I have very few fit issues using these methods, and very little cleaning up of the surface details such as rescribing panel lines.
I think for that Spitfire, if the fillets are lower than the wing surfaces, resulting in the steps, then the spreaders you mentioned for the Emily and airliners would be needed in the fuselage to slightly change the angle of the fillets to the wings. This might also have resulted in a more correct dihedral. I know you know this, I am mentioning it for the less experienced modelers out there. If the wings had been lower than the fillets, then the spreaders would have been needed in the wing roots to slightly raise the height of the upper wing.
The bottom line, and you mentioned this several times, is that taking the time to fit and assemble the parts while minimizing the gaps and steps will result in almost no fillers required. This was a game changer for me when I first started doing it years ago. In fact, I rarely ever use putty anymore, having replaced it with CA glue when practical. CA glue has the benefit of being ready sooner, being a harder finish if restoration of surface detail is needed, and it does not shrink like fillers will. It does generally require sanding, thus highlighting the need for good fitting parts in the first place. Again, I know you understand this, and I mention it for others.
Thanks for that. Great comment and im glad you're also doing that. Keep the good comments coming. Happy modeling
Some great tips and something I’m guilty of not paying enough attention to while I’m starting a build! I’ve found some of the early manufactures like Matchbox and Esci used to fit as well as Tamiya kits, there were some that were shockers of course. I really enjoy seeing how many kits you have on the go!
I’ve used lacquer based fillers from Tamiya and Mr. Hobby and water-based from Vallejo. The problem is shrinkage. In my opinion, black flexy super glue from VMS is the best filler for most jobs, hands down. Zero shrinkage, so no concerns with ghost seams 6 weeks after completing a build.
Although I don’t build aircraft, only bikes and cars, I think an overlooked part of modelling is using the best sander/file for the work, as in using a strong flat file for long straight edges, soft sponge sanders can sand unevenly, and therefore you end up chasing and correcting your own work. Another technique for things like bike front fender halves is to use a thick glue, so when pressed together a small bead of glue appears, when dry you can sand smooth for a great unseen join.
yes, thanks for that. I will speak on this soon. Good point
Will come in handy while learning the ins and outs of modelling after a 40+ years hiatus. Thanks for sharing.
yes - just dive right in with a few small models
My biggest problem with fillers is getting a smooth finish. I probably need to use some finer sandpaper to finish it off, but it tends to be extremely difficult to sand. It usually looks fine until you paint it, then a dull patch appears. Sometimes it's hidden nicely by the top coats, but occasionally it shows through. I have been using UV activated glue for some joints. It is very easy to get it into the joins and you can clean most of the excess off with a damp cotton bud. It does take more than a day to dry enough to be sanded though. It stays a little bit sticky for the first day or so. I did notice on my Revell Hurricane that Tamiya putty would not stick to the hardened UV glue. I had to put primer on it before I finished it off with Tamiya. The water based putties have their uses They are good for areas where there are a lot of rivets near the join as you can clean most of it off with a cotton bud or tissue, but that then removes a bit more than you want and you have to fill it again. Sanding it off is easier than Tamiya putty, but it also gets rubbed off if you clean the parts with soapy water prior to painting.
Excellent video, you've got a fantastic collection of aircraft. It really helped to know what to look for. I have three kits in by stash to build that are this size, one a C5A and two C130's. I now feel confident to get them in my build up line. Several things have helped filling issues today, the thin glues and lots of improvement in fillers. In the " old days" there was the old Squadron Green putty which dried like wood putty. Another technique was using the old Testors tube glue, putting a good coat and one half and squeezing the parts to together, let the glue ooze out and then sand or carefully cut away. After watching this video my confidence has improved substantially. I'd love to see a video on how you prime a large kit like these. Cheers for mow
ok good, and some time time soon i will do a video on large model halves glueing.
Hi there. This is a very interesting video. I agree on minimising filler, I try not to use any but sinks and ejectors, well... I have a couple of observations. In your fuselage joint problems, you could try glueing a ledge (plasticard or sprue flattened on one side) to the high side so that it forces the low side up. Alternatively, especially for chine hulls and such a set of small riblets along the length could do the same. Might be better than your sprue props.
With that Spitfire, I would say getting the dihedral right (or at least equal) is more important than a small step. The error stands out when you look face on. I suspect that the real fault might have been that the gap between the wing upper surfaces was insufficient and with trial assembly filing back the vertical faces on the wing upper panels a bit might have let every thing go together better. Maybe.
Very informative video. I'm still amazed that you have so many models on the go!
On the go is a bit of a strong phrase. many of them are dormant for the time being. I actively work on a few, with another 10 to 20 getting some for of work done. Lets say i have 5 to 10 On the go. lol
Thanks for those assembly tips. There's one youtuber in particular that does really nice work, but I cringe every time he fills fuselage seams and then sands the hell out of them until all of the surface detail along the seam is gone. Then he gets in there and recreates all of the obliterated panel lines and detail. I think he actually likes to do all of the extra work that he creates for himself.
yip, ive seen that, i cringe too. unnecessary
Deon, when you're talking about your models, can you please always tell us what brand they are? Especially in this kind of video where you're talking about techniques rather than about the massive array of kits you have. I may have missed it, but what brand was the Spitfire that you were saying is not a great kit? It would be really helpful for your viewers so we don't go and buy a disappointing kit when we could have bought a better one.