How to repair a fence post [Cheap fence fix!!!] Handyman fix (AMAZON LINK)

HTML-код
- Опубликовано: 28 сен 2024
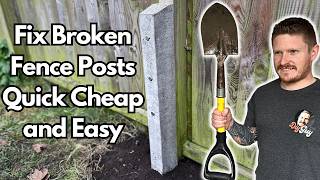
- In this video, I show you how to repair a broken fence post on a budget. I use a "C channel" made by simpson strong tie called E-Z Mend. This is a black powder coated mender plate for a 4x4 post. Your post can be set in concrete and this E-Z mender will repair that broken post like you wouldn't believe! This quick and easy repair will add years of life to your broken fence! I demonstrate with a before and after video so you can compare the two! This is a great fix for a handyman!
My Name is Matt, and I am a full time carpenter from canada eh! My goal with this channel is to share, money saving tips & tricks for everyday homeowners. Owning a home can be costly (especially if you buy an older one... lots of character they said!). I upload content weekly to save you money! Your welcome :) -please subscribe-
Please leave your comments & feed back below & don't forget to smash the thumbs up for the RUclips algorithm. Don't forget to SUBSCRIBE!!! :) THANKS!!
SUBSCRIBE! :)* / @diyfortheaverageguy
Disclaimer:
Videos produced by DIY for the average guy are provided for informational & entertainment purposes only. Everything within this video & website is for informational, educational, & entertainment purposes only. DIY for the average guy will not be responsible for any injuries or does not make any claims of the safety of the projects, techniques, or resources listed on this site and will not take responsibility of what you do with the information provided by this site. Viewers must be aware by doing projects on their homes they are doing it at their own risk and DIY for the average guy cannot be held liable if they cause any damage to their homes or property. With different rules and regulations around the world and constantly changing standards, building codes, it is the sole responsibility of the viewer to educate themselves on their local requirements before undertaking any sort of project. DIY for the average guy cannot claim liability with all applicable laws, rules, codes and regulations for a project.
------------------------------
Trippy Love by Vexento / vexento
/ vexento
Free Download / Stream: bit.ly/trippy-...
Music promoted by Audio Library • Trippy Love - Vexento ...
------------------------------
I do make a small commission on associate link sales! Thanks in advance!! :)
-AMAZON LINK - (USA)
amzn.to/3bAdKwg
AMAZON LINK (CANADA)
amzn.to/2O07SEz


Safety sandals=priceless lol
I just experienced the EZ mender.. You had no Concrete around post. I just did 2 posts w Concrete around. Tool 6 hrs & 2 trips to the store. Simpson recommends installing in pairs. I used a 1/2 bolt to tie each EZ mender together.. You had the easy install I had the very very hard install..Keep up the good work!
I have concrete around my post as well, can this go through concrete by just hammering it in?
@@ttof80biz hammer It in with a 4 to 6lbs hammer. Mini sledge hammer. If you are lucky you can break tge concrete!! I used a very large clamp to keep it close to the fence.. Good Luck. Comment back on your progress..carry on & keep up the good work.
Thanks! Sorry to hear you had a tough time miles, still worth a shot though! Did it work out? I guess you got a “work out” too? Haha
I was skeptical but i didn't have many other cheap opinions. So i tried it today. It worked, and its solid. Thanks 👏🏿👏🏿👏🏿
Glad you liked them! They are a great fix!!! :)
With the price of lumber right now, this is a lifesaver
No kidding!! Hopefully the prices drop soon... thanks for the view!
Yep, I'm doin it
Worked like a champ for me today! Thanks for the great video. Lowe's had the bracket for $17.xx Cheapest out there. In stock all over the city. Took 25 minutes., There was definitely a spot where I ran into a lot of resistance, but kept sledging along and the bracket got through it. $20 fix for a potential issue down the road. Thanks again.
Wouldn’t you run into the concrete at the bottom of the post?
" There was definitely a spot where I ran into a lot of resistance, " - Just the gas main - don't worry about it
Thank God for this Man and thank God for RUclips !
Unscrew panel each side post usually rotton so drill hole in concrete put bolt in . Then use concret building blocks and wood and car trolley jack and chain to lift it out ( saves using Jack hammer) . Now you have hole put post in and re-concrete fix panels and prop to vertical leave to set . Perminant job
Great idea didn’t know there was such an item to fix fences
This is why I have always set fence posts without concrete, and provided plenty of pea gravel and sand under and around them for drainage (but tamped in hard for strength). Concrete is stronger, and should be used for gate posts, where tiny differences can cause a latch to not catch (but even then, with gravel not concrete in the bottom, and the concrete troweled to slope away from the post). For all the other posts, the concrete can easily end up making a cup of water around the post, rotting it off at ground level in just a few seasons.
Strongly agree, and it's amazing the sloping top is not standard practice. Usually it 's a catch basin instead.
Thank you for the great vid. I tried a similar bracket and it definitely solved the problem for now. I had to get a different one that had a 4+ inch spacer to dodge the concrete all together. But then I realized this one would have worked as well. Anyway, thanks again.
Never seen them before, good demonstration video thanks
You should install E-Z mend on sides of post not face of post as video shows. Your installation on the face eliminates much of the strength of E-Z mend to resist bending due to wind forces.
On the other hand, his installation doesn't require disassembling two fence panels and then figuring out how to anchor the bottom rail through the bracket.
@@ersp1 If he doesn't do it perpendicular, the vibration/ rocking from the wind will just cause him to inevitably disassemble it anyways in the near future. Do it right the first time, and you won't need to do it again. Being lazy only creates more work.
Good enough! I did same way, it's quick and still lasting > 12 yrs now .
I noticed that the photos on the Home Depot page where they sell these shows them being installed the same way as in this video.
For my part, I'll take my chances and do it the same way also when the time comes. If I'm going to go to the trouble of disassembling my fence to put these in, I may as well just install a new post while I'm at it; the point for me is to save time and trouble in the short term - if I can cheat another few years out of my fence before I eventually rebuild it, so much the better.
Oscillating multi tool instead of saw for the win
Thanks so much!
The funny part safety sandals .
😆 but great idea!
Safety first!!! ;)
Good luck with the project!
Please subscribe!
Good job
I laughed so hard when he pushes the post after he installed the metal plate and the post is still shaking dramatically.... I was expecting it stand still after install it so I never thought it would still shake... hahaha
It's because he only installed it on one side. It's suppose to be both sides for stability.
@@mightymochi6320 Not really. It's because they are supposed to be installed on the side of the post to hold it, not to be installed in the front or in the back. He didn't install it correctly.
Nah dude “dramatically” isn’t what i would say he did.
@@mightymochi6320 Not only that but when he was driving it in to the ground to the point where it reached the existing concrete from the original post it skimmed off the concrete to the dirt hence forth no stability.Your right cheap way out.I found fence post spikes work better they go 3 to 4 feet into the ground
@@simpledrawings6679yup, put it on the wrong sides, I had a feeling he was going to do that about 15 seconds into the demo part lol
How about install another brace in the same spot at the other side of the fence? Two are better then one?
Love your work boots
That’s exactly what I am looking for. Thanks
Very nice. Many thanks!
exactly what I need, thanks DIY guy!
Most comprehensive video on this product! Quick question: how tall is the fence? Looks taller than the usual 6ft privacy fences.
It’s a 7’ fence! Thanks for watching!
This is great, but only works when post was not set by concrete, right?
This one was in concrete! I just make it look easy! Haha
@@DIYfortheaverageguy No it wasn't
Hi a good a video .what happens with parts that you cut to fit the metal brace in.Ty.
I’m going to try this.
How do you how far it needs to go in ground?
Woops. You placed the EZ Mend incorrectly. It should go on the side of the posts. It’s designed to have the strength with the edge bend so it doesn’t wiggle. You should use two. The downside to these is that in most cases you hit the concrete around the loose post.
It worked like a charm!!! :)
@@DIYfortheaverageguy yeah, except that it didn't. What we in the UK call a bodge job !!
front and back make more sense tho.
"I've got my safety sandals on...." Hahahahaha!!
Nice. Lag screws? (Lag bolts are usually threaded)
I bought those, when the channel hits the cement it stops and will not drop further. does not hold the post. You seem not to have a cement base for posts as usual in construction. Home Depot post doctor might work with its tapered spikes.
What size lag bolt was that?
Good explanation. Simple but practical. By the way, how old is your fence? At what age the fence posts will get wobbling problem?
It would be more sturdy if it was placed on the side of the post
No but they should’ve put one on each side.
(Just two)
It might last for a bit ,but;,Fence post spikes for @
20$ might have been better it worked for me a bit more $ but much sturdier. Nice sandals by the way 😃
Thanks! :)
This one has been in place for 3 years! Still solid
sold on amazon for about $99 for a 4 pk
Really cool! One issue...
Wont the metal plate hit the concrete footing when you drive it into the earth? Maybe I missed something?
I think you missed that apparently there is no concrete in the hole. Hammering that much metal in would never have been that easy were it going between post and concrete
Tks for info
I got stopped by concrete. Should I have wedged the stake to the post first, then hammered down on the lip? Seems like the concrete is always going to stop you. Any help appreciated.
Hey Jerry, that thing should wedge itself between the concrete and the wood post! In this case, you might actually need a bigger hammer! :)
I thought so. I used a hand held sledge and whacked it hard may times. I even destroyed one hitting the top after the lip lethod failed. Something isnt working.
I wonder if your post was set on a boulder... that would cause issues. This might also be why you are having issues with it... sounds like this quick fix might not work for you...
He makes me nervous wearing those sandals...😉
That's why it's a rubbish product.
If you can, place the bracket in between the panel and the post. The fence won't rock after the fix
the "new" pressure-treated wood is *Garbage*. ground contact rated fence posts now rot within a few years, and they rot at ground level where moisture and oxygen are plentiful. the rest of the post underground is usually intact.
How long do you think it will last?
How many pound you using the hammer?
They are supposed to be on the sides not the face, and two for each post. So you'd have to remove or cut away the rails to get it in. The plates don't have a lot of strength face on.
Good job !
Correct me if I'm wrong. I clicked the Amazon link and their price is $37/ pair but I can find these at Lowes for $20/pair.
Am I missing something?
I also found them yesterday at Lowe's for $20/pair.
$9 at home depot
They are available at your local hardware store! Thanks for watching & good luck with the project! make sure to watch the 1 year update I uploaded yesterday!
Is there concrete in the hole?..
But those 4by4s are installed in the cement How the metal boot goes through the cement? Thank you
The point wedges in between the old wood and the concrete ball.
What do you do if you have concrete at the base?
Hammer it harder
Do the job properly, which means concrete, not this useless thing.
How well will this work with a broken post rather than a weak one? Got a storm came through n now my fence is leaning pretty good cracked 2 posts.
This is what they are designed for! Try one out and let me know how it goes! Cheaper then replacing the fence!!
Saw these then found "Post Buddy" prefer the Post Buddy system, simpler and quicker to install. I have the same safety sandals😂😂😂
How that plate can be hammered into the concrete so easy?
I make it look easy ;) hahaha
Should have put in on the right or left side. Would be much more secure. I did it wrong the first time and it really didn't help, then I did it on the side and it was like brand new.
We talking about crack on top portion not under ground i just mad new fence after 3 weeks star crack on middle of post not below part
A vertical crack is normal once the wood dries! This post was broken in two pieces! Thanks for watching!
3:33 is where the action begins!
planning on doing this next weekend.. what size sledge is that?
A big one! Lol I don’t recall to be honest… 3lb should do it! Good luck!
Thank you!!!!
You're welcome!
How do u call the metal and where to buy it please
he's got the amazon link up there. click on "more" at the end of his description
The fence post is shaky, does it work
It worked great!! It’s been over a year since the installation & it’s still as strong as ever!! Update video to come!!!
Metal hammer + metal brace -> eye protection required against flying chips.
Safety squint!! ;) thanks for watching
You do not mention the existing concrete on the old post. I suspect it would NOT work with out breaking up the old concrete.
This was in concrete. It worked for me!!
Temporary at best. Do yourself a favor and replace those posts with galvanized line posts and paint or not. you'll never have this problem again.
I installed these 10 years ago on my fence. We had a major wind/rain storm this week. My fence is one of the few fence still standing in the neighborhood. Sure is much easier than replacing fence posts every five years.
what size of bolt that fits in the e-z mend?
I’m sorry! I don’t recall off hand! A big one! :) it was Definetly 3” long & roughly 3/8” diameter! Good luck with the project!
Such an obvious invention but I didn't know it exists
Right!! Now you know! THanks for watching!! :)
Um, suppose the post is rotted a bit higher up and weak, but the concrete at the base is intact, or nearly so. The mender sure won't go into the concrete.
It is supposed to! With a big enough hammer, it should work! If the rot is 12” above grade then your likely getting into a post change…
People who use sledge hammers while wearing shower slippers are the last persons I want to take instructions from. Does this also go for climbing ladders & using backhoes?
Or maybe you should trust me more since I am so confident that I don’t have to wear safety shoes! ;) hahaha
What size lag bolts ?
3/8"x 3.5" :)
Super ez❤❤❤
The Canada Amazon link says that this product costs $168.40 !!!
I will try update that!!!! Stay tuned & thanks for letting me know!
Safety Sandals 😂
Thank you for this! What all will I need to buy besides the ez menders?
That’s right! + the lag bolt & a few galvanized nails
Good luck with the project!! :)
$30 in Canada
Available at homedepot! 👍
Concrete spurs only job
Maybe you should have pushed on it as hard as the first time because it was still weak.
3 years later it still stands tall & strong! Cheaper then fee placing the post!
Thanks for the watch!
Yes you picked a fence post with no concrete around the base
Ours has concrete footing do this doesn't do much to support it
This one did as well! Have you put it in yet?
@@DIYfortheaverageguy Doesnt wrap around the 4x4 post so its probably out as a solution. its only like 3.8"
A 4x4 post measures 3.75” x 3.75”. I bet these would work! Let me know if you decide to try them out!
@@DIYfortheaverageguy I did, it doesnt fit
Damn... too bad. I will be uploading a second “how to fix a broken fence post”. This one will go over relocating a post & rebuilding the two panels next to it. Stay tuned! Sorry this one didn’t work for you...
Special Note: These E-Z Fence Mender DOES NOT WORK if fence post is less then 4 inch thick !! Basically this mender cannot penetrate through concrete. So if your post size is lesser than 4 inch ( mine was 3.5 inch), try something else !!!
Watson that called
Where do I get Safety Sandles??🤣🤣🤣🤣
They were limited edition!!! Hahaha
@@DIYfortheaverageguy .... Bastids!!!🤣🤣🤣
Was all in till he said about like a Canadian 😂 jk
:) I didn’t even realize I said it! Thanks for the comment eh! ;)
Dang, I was going to send to my customer, until you said 5 minutes! Ha. "Well why did it cost a hundred bucks?"
Your secret is safe with me.
Music too loud!
Before and after seems the same. There is little or no structural value on the strength of the loose fence post. Don’t waist 10 bucks.
5 minutes yeah right 😂
needs to be put in in line not on the side of post
I hope no one stubs their toe on the metal tab hanging out.
Safety Sandals lmao …,
They are 52 bucks on amazon. Not really a cheap fix.
Cheaper than a new post!! :) good luck with the project
haltura
5min ,,,,,,,, okay
Work very quickly! ;) 6 min...
cheaper and stronger to replace with a new post rather than try to fix the rotten one
$65 a pair! What a scam.
Thanks for letting me know, I will update the link. Not a scam
a fence post needs to be at least 3 ft in the ground , a bit of steel about a foot into the ground will do f%$ all !
I disagree! Watch the end of the video & you will see a side by side comparison on how much of a difference it actually makes! :)
@@DIYfortheaverageguyThat comparison was what i based my comment on! While it has made a small difference, it still wobbles way too much for a fence post. You are still getting 3-4 inches of deflection at the top of the post ! and i suspect you aren't giving it the same degree of force as in the before shot. A fence post should hardly move at all .
Decent video but a shit fix tbh.
Thank you but I disagree! Stay tuned 1 year update video will be uploaded shortly!
Should last about 2 weeks..waste of money
I have dropped a hammer on my safety sandals and I don't recommend it.
This is sound advice. :)
The fence mender can cost over 20 bucks so if your on a budget you can get some of the metal utility fence post the ones with holes in them drive a couple of them in on vanious sides of the post and then attach to the post with deck screws. Using 2 or three of those cheap metal utility post is still cheaper than the post mender.
Ty. Can you show a pic?
Can I borrow your sledgehammer?
You should install it running with the direction of the fence not facing it. It will still be weaker the way you did this. You should also do it in pairs for complete repair. It wouldn’t sway at all if completed properly. It shows on the actual piece you held up to place them perpendicular with the fence.
How do you attach the bottom fence rail through the side of the ez-mender?
@@ersp1 there are pre drilled holes
Love your safety sandals Matt 🤣
What if the post has concrete at the bottom. This cant be knocked down
Please wear safety boots when working on these projects or at least normal closed shoes
Why
I used these on a post that was in concrete. In that case I put it on the side of the post because I am not worried about left right motion. It was a lot harder to pound in between the post and the cement than in you case, but it is very solid now. The mender was $10 at Home Depot.
Thanks for the comment! Glad it worked for you!
@@DIYfortheaverageguy Also, I am pounding rebar along side the cement and adding cement to above grade. Hope it lasts at least 10 years.
Definetly won’t hurt it! :) good luck with the project!!
@@DIYfortheaverageguy hey bro were can I pick up one of those ? Thanks in advance!
Spot on. This video did it correctly ruclips.net/video/gqiydHTZdGk/видео.html
Thank you! Mom and I will be 2 old ladies fixing the fence. Thanks to you. ❣️
Good luck!!! :)
What do u call the metal and where to buy it