DIY! Repair Loose Fence Posts on Wooden Fence

HTML-код
- Опубликовано: 22 мар 2020
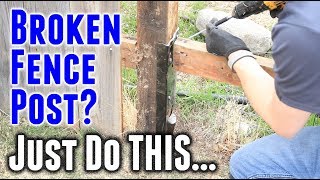
- Two posts on our six-foot cedar fence were loose due to rot where the posts enter into the concrete footings. The fence was otherwise in good condition, so repairing or replacing the posts made good economic sense. In this video, I show how I fixed this fence by installing two new posts over a four-day time period.
 Хобби
Хобби


1:15 - 2:02 - "in just 5 minutes of digging"! You, sir, have Ideal conditions! (And a nice-looking fence.)
Finally, someone is doing a project that saves money and time. I just want the HOA to leave me the hell alone, im not trying to show off to the professional fence man lol. Thank you sir.
Great fix, never thought of doing a fence repair that way here in the UK after our recent 120mph winds. Thanks.
Awesome! Thank you for sharing your repair video. Simple and brilliant! Now I know how to do it!
I was about to say put the water in first then you said it! Nice job.
Great job. Thank you. You live in a beautiful location.
Very neat and clean project. Never thought of putting brackets this way to hold the fence. I have coming project to put some new posts on my 13 years wood fence, still strong fence in Florida and want to maintain it. Some of the posts rotten and need replacement, since replacing the post requires digging out the old concrete, will not going that route and put new post just like you did next to the old ones much easier, with those brackets really don't have to ask neighbor to go to their side to screw the fence to the post from other side because I might have 5 post in my back side of the house to be posted.
Nice work Randall.
Best solution I've seen. You don't disturb the fence that way and least amount of work.. I wonder if an extra 2x4 across them will connect it better also.?
I need to do a few ..thank you.
Nice work (as always)
This guy has skills.
Good job. Your neighbor should be helping you since he shares the property line.
It's easier to put the posts on your side if it's your fence and then you don't have to ask the neighbour or have their kids climbing on the rails. You're lucky you have a nice neighbour😊
Code where I am says nice side out so posts would be on owners side
Great video thx!
Folks you don't need concrete. It will still rot in time. Use pea gravel. Will not move. Pre treat the under ground portion of the post with an oil base paint. DONE.
Or redguard or heavy duty grease!
Good job
Great idea, thank you sir!
I faced that same situation before. I poured sand into the space between the post and concrete. It shored it up solid as a rock. Make sure you have the post where you want it before you pour in the sand.
Love simple cleaver ideas. Good job.
That’s what I was thinking and then periodically you might have to add more.
Randall: Production value is very nice on your video. Also, video quality is very nice. Can I ask what type/brand camera did you use?
Thanks for the compliment! I recorded this video using an iPhone 11 Pro Max mounted on a tripod for most scenes. I assemble and edit my videos using Adobe Premiere Pro CC. Now that I have a custom configured Alienware Area-51m R2 laptop, editing 4K video is much easier and faster! Thank you for visiting my channel!
I'm trying to use the rail brackets to mount 2x4 inside the posts. What's a good way to line up the top rail inside to make it level across the fence area ?
Thank you, great video! Because you had to dig the hole with the fence already installed, you were not able to center the post in the hole. Is this an issue? Or is it ok because there is still some concrete at the rear of the post. I have the same problem because i will be digging a hole on my side of the fence so I won't be able to center the post on the new hole. Thank you for your opinion.
Good question! Often times I go by both past experience then gut feeling. In my opinion, you should dig a hole for a new post as close as possible to the loose post. Then place the new post in the hole and use a level to measure accuracy of vertical and horizontal trueness.
@@randallwingett Thank you Randall, appreciate the fast reply.
Thank you!
You’re welcome!
I mix the quickcrete dry with the soil and clay I remove, then tamp it down around post which is sitting on top of 3”of gravel. Rain and natural moisture will set the pile around the post. The mixture maintains a porous state preventing moisture from getting locked in around post.
Not disagreeing, however, that porous state of dry concrete is only good until mix eventually cures. Moisture through the seasons will seep in there. Thought about applying *creosote from base of pole to grade for preservation.
*or similar type moisture repellents
nice fix very doable for DIY project. nice thorough explanation .
at what point did you remove the support posts?
If you are referring to the metal rebar, I removed one about a week later but could not pull out the second rebar on our side of the fence. It's still stuck in the ground today! Thanks for your comment!
If u live in wet or snow country, use redguard or heavy duty greae all the way up above the water line.
My fence is falling down so I came to YT for advice. Now that I've learned a bit about how repairs are done, I don't understand why fences are built the way they are. Why use concrete, which will last for decades, to hold up a post that will last maybe 10-12 years? I end up with either multiple concrete footers all around the fence (like this guy in the video), or I have to destroy that concrete (which is still perfectly good), dig it out, then replace it with more concrete...which I'll need to destroy again when I replace the post in 10-12 years! How is this smart? Seems like it makes much more work out of something that should be simple. Seems like metal posts are a better solution, and I see how the PostMaster can be driven into dirt without digging or concrete. Why doesn't everybody switch to this method immediately?
Very good point! Follow the heard mentality is my guess.
Great point. I read that u can use pea gravel instead of concrete!?
You would think thick-walled rectangular square tube metal posts, epoxy or powder-coated to resist corrosion would be the way to go. But builders building and selling houses probably don't want that additional expense because they just need a fence "good enough" to sell the house...
And maybe even homeowners replacing a fence don't want to shell out the additional money either, so no real market for that innovation.
Just bang some timber or metal wedges or shims or even bits of old roofing slate ,between the post & concrete .No point in creating a bigger job if a bodge will do ..Time & money is better spent on using your garden for what it is really meant for .Thats sitting back relaxing & quaffing some fine bottles of real ale & munching down on some barbecue grub .👍
If post is loose not rotted, why not wedge some metal inserts between the existing post and the gaps in the concrete?
It’s not necessary to add water to Quickrete for fence post in many areas. Tamp the quickrete then cover it with dirt. The ground moisture will harden the concrete over a day or two. Here In Louisiana the soil moisture and atmospheric humidity are high enough that it will harden in a day. This method will probably not work in extremely dry, dessert like conditions.
follow Quickcrete's direction on the bag.
My loose post is up against my house wall??
Where I live, we have the back of the fence facing us.
Okay the reason the original posts failed is because the concrete was poured too shallow.
The concrete should be BELOW grade so when the ground freezes, it doesn't squirt out the concrete plug.
The old post had about an inch sticking out above grade.
Ice did that.
Go deeper, use a ten foot post and stop pouring about four to six inches below grade to lock it in.
Thinking the same. Thought the Quikcrete plug should be below grade and back fill with dirt to lock it in with quikcrete forming a t shaped foot that can’t come out/loose.
@@yewsengcheong1637 exactly. Dig below the frost line about a foot, remove the dirt(important), add 4-6 inches of gravel, 6 inches of wet concrete, set the post, and finish filling the hole to about 4 inches under grade. After the concrete sets up(24 hours), backfill the post holes with the natural top soil. The grass will grow back.
@@yewsengcheong1637 some guys make a dome or pyramid at the top so rain water runs away from the pole.
@Ray Epps Second Cousin Reggie I red one of the comments that concrete is not needed and that pea gravel is a good replacement. Also instead of wood, use metal . ??
Nice work! Would it possible to just fix the old lose post by pouring some concrete into the crack?
Interesting idea, but it would be difficult to force concrete into the thin crack. Anyway, that wasn’t an option because the posts were loose from wood rot. Thanks for your comment!
Maybe use foam?
The finish side should go towards .
neighbor
I'm not too convinced this method as most horizontal bar is not triangle but not square. It is no way to nail in. It may need lots of work to cut the bar to slot the new pole in to screw on
water first then bag!
Now you can build a gate 😂
Funny. Rather build a taller fence.
can u help me fix my fence randy ?
Don't you have to mix the cement 1st before pouring it???
No.
Ok
I love soft holes!! You did your neighbors dirty by giving them the shity side! Where im from my code makes the nice side go to the neighbors side.. I mounted the fence panels in between the posts center making the not so nice side much nicer!!
BAims: Thank you for your comment and observation! Honestly, I did not consider why the finished side of our fence faces inside rather than outside, as is the general practice. After a quick search for the fencing codes in Washington State, I did not find specific rules, other than “general practice” is to have the finished side facing outwards. Since the fence was installed years before we bought our house, I’m not going to pursue this question, especially with our neighbors.
Randall Wingett you did a very nice job on both the “fix” and the video sir! Wish you and yours all the best.. God Bless 🙏 😊
Randall Wingett i took 1x4 and sandwiched the very top and very bottom of my fence panels. That made the fence that much sturdier and also much more appealing for the neighbor’s (side). I took the 1x2 that the fence panels have on the back side of after i sandwiched the top and bottom. Took a $40 stock panel and gave it a Custom look.
This also keeps the panels from bowing or sagging. Great video and repair on loose posts.. nicely done.
The wrong side is facing him,was not done correctly.
why not just dig out the original failed concrete? additional posts look a bit naff
That would make too much sense. Everything this guy does is so poorly thought out and overly complex. Just brace the fence, dig out, break up and remove old concrete and pour new concrete.
If u handmix it in a wheelbarrow that concrete will be rock hard in 15mins.
Thanks.
You don't need those L plates all you need to do is fasten with screws from the other side waste of time and money the way it was done on the video!
On third world country a 4x4 is exactly 4in by 4 in. wood. On the west and Europe a 4x4 wood is 3.5in by 3.5in lol they forgor to do the right measurements especially in English lmao
postcrete was done wrong, so you will have problems again
Can you please explain? Thank you.
Aren't you supposed to mix the concrete about halfway through and then add more concrete and more water to make it flush?
Not only does it look like a repair, but you actually did more work trying to cheat by mixing the concrete in the hole... Just mix the concrete properly in a bucket or wheelbarrow it’s actually less work to do it right
Actually its less work and the ground moisture will make it hard and cure . You dont need to mix. The bag has it mixed already..
That’s not how Postcrete works. Water in the hole, dump in the cement. Job done. No mixing required.
@@raftonpounder6696 Sure it will get hard with ground moisture, but it will be brittle... Imagine putting concrete in a basement for a floor in power form without mixing it, yes it will eventually get hard from the ground moisture, but it will crack or break easily... it will have no strength.
@@hmtrimworks7148 millions of fences are erected using this method. That’s how the manufacturers tell you to use it!
@@raftonpounder6696 Manufactures of what… The concrete?
I have NEVER had a bag of concrete where the instructions say:
Step 1. Dig a hole
Step 2. Add water to hole
Step 3. Pour powdered Concrete in hole and you’re done
Sorta uncool building a fence with the dress side facing your own house.
For a while i said what is this kook doing it looks good though ill be using your method thanks
Post buddies are cheaper and work great.