WOW amazing 🥰who knew you can make it out of cardboard box unbelievable thank you for sharing I Love 💕 it is beautiful 🥰🥰🥰🥰🥰 can’t wait to try it 😬👌very smart idea 😊😬👌
Oh my God...that is a lot of work! Good job. As for me; I’m headed back to the furniture store. I no longer feel the need to be cheap anymore. I’ll just buy it!😁
Girrrrll, you can make anything look good if you set your mind to it. All you people think you need millions to live nice. Check her out. Very brilliant idea
I did this years ago for my daughters. They look great on queen size mattresses too. More of an Asian look. One i due, she had a twin bed & i put the box spring long ways behind the bed to the floor. I used an old comforter for cushion on the box spring. I bought material that had a ruffle look. Came out so cute, and looked very grand. The other one, i actually used a faux silk curtain panel, wrapped it around the back to the wood & cushion was an old comforter and stapled away... looks beautiful. No need for the cardboard boxes or tuffed look unless you have a lot of patience
I used U pins from the floral department to poke & make the tufts. Used pliers to twist them tightly & bend them down on the back. Then glued large crystal stones on to cover instead of buttons. Was really fast since U pins can be pointy & love the crystals. Could have glued on buttons but I like crystals. Great job. I love when our ladies can DIY. #toolbeltdivas
While people are watching gossip channels here’s a woman teaching crazy skills... the world gone mad... btw.. no protective coverage on her floor rug... she’s a pro 💪🏾😍
Make that 202... So basically 202 people clicked on something they weren't interested in in the first place🤯 so kinda shows how smart they are from the get go lol... Good job it looks like u bought it, so what more do those people want!?
You should've stapled down all the material tightly so there were no wrinkles, bumps, creases, etc, THEN put the buttons on, pulling them as tight as possible. (Hint: It would've been easier to tighten the buttons & tie them off if you put another, plain button or washer on the back.
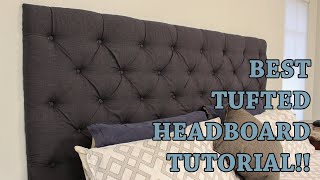
READ THIS COMMENT: Hi everyone! Thank you for watching this video! My headboard is not attached to the wall; it is propped up on the frame FYI (for all inquiring).
@@theredheadtherapist I heard of some peel and stick type hooks that fit into one another. So like the one you put on the headboard is facing down and the one on the wall is up and they fit in each other. Going to look into it myself.
I cannot believe how fast you put this awesome creation together!😃 You're very talented! I'd have never known it was a homemade DIY... if I didn't see you make with my own eyes👀 (add me as one of your new subscribers)😊
Hey there Nicolelise, I love your creative & resourceful idea. This is a great way for others to make & add their own creativity to it with different fabric, buttons, nail head, etc. I'd like to suggest that you could add each item you used in the description with links to the items. Set it up to get affiliate credit for those items. That way everyone can easily obtain the same items if they wish & you can receive profit from your creative work your sharing. Keep up the wonderful videos!
Actually it's not "fake" at all. This is a low budget way to achieve a high end product. She is NOT "infringing" on any manufacturer's pattents of production. Please ppl be careful how you use your word descriptions so you don't give or allow others to get the wrong ideas..
I love this ideal the only thing I did different is when you put the buttons on an tie in the back I used some washers on the string then tied it an hot glue it nice head board thank you for the design
great idea! just a thought... you can do the tufted much easier by using heavy duty thread or yarn, then a second button on the back, (only one time through and you can tie it off around the back button :0)
That's very clever, plus it's fairly lightweight compared to a traditional wood upholstered headboard. You could secure it using a stronger 3M locking velcro (not command strips). They're used for marine headliners and would work for this without damage to the walls.
What an intelligent & resourceful idea. You did an EXCELLENT job! I want to do one for my queen sized bed. Thanks for the inspiration & for sharing your know-how!
Fantastic idea, tho' I would like to suggest that you iron your fabric and then glue it tightly around all the sides BEFORE tufting as you would get a much smoother fit! However, what an inspiration! You must certainly have a creative mind!
I've pretty much already got the materials here, so I'll just get to work! Thanks for the inspiration! Always looking to reuse, upcycle to decorate my house! 😁
I use cardboard boxes for everything, I paint floral prints on them or cover with wallpaper. I've made Jewelry boxes dividers for my dresser drawers holders for beauty products and of course for my craft supplies and now I have to make a headboard using your technique, thank you for that great idea.
I have no clue how I stumbled across this video. I want to Say Thank you so much. We needed to upgrade to a king sized bed. I didnt want to buy a whole bedroom set. This helped me just have to get rid of my old foot board and headboard instead. I am going to make my own head board. I am so Excited thanks for this video.
Thx for the easy tutorial! I laughed watching you put the buttons in. Hot glue, duct tape, AND staples! Those buttons are going nowhere anytime soon! Loved it!
Really resourceful Lady !! Someone who thinks outside the box as they say 😎😎. Thanks for sharing. Heaps easier to transport the boxes and great for someone without a drill / drill skillls!! Fantastic.
How right you are! There's absolutely no way this old lady with arthritis could transport long, heavy pieces of anything despite my really wanting a new headboard for my double bed. I don't want to use a drill either. I think that investing in a glue gun is a good idea n I'll check out the price of a stapler like hers. There are no Walmarts here in France that sell those big boxes but I suppose that moving companies do. If I can't find her big poster boards I suppose I could do an extra layer of cardboard boxes. I'm motivated and after watching this video I see that the major obstacles are no longer a problem. This is a great project that'll keep me occupied during the worse of the Spring showers. Many thanks, Happy thoughts and Happy Spring to every one.
Great job and sooo creative! I found your video while trying to find a way to add a nice border around my daughter’s metal platform bed! I love the mattress pad and batting idea...that’s what I’ll do for a nice looking border! I don’t like the look of the metal but needed her bed elevated to fit things neatly underneath, as we have no closet in her room. New sub and I’ll be going through your vids for other gems! 👏🏽👏🏽👏🏽


I don’t know how you came up with this idea but it is nothing short of amazing!!! I LOVED this video!!! TFS! 😀👏🌸
I’m the worst @ DIY 🤦🏼♀️😞
SO SHOUT OUT TO ALL THE DIY QUEENS 👑
Me too!!
That is a really good diy! :0
You making crafting simply simple and beautiful. Thanks!😊
No point buying expensive ones when you can make one 👍
I can make anything wow
Yea right. 👍🏻😬 why buy those expensive one while you can make yourself.
So smart I always wanted to do this, but the wood would of been so heavy. This is smart cleverly done!
😯🤩Oh Yes Ma'am, I'm blown away. Time for me to get busy (Lounge Time) Can't wait for your next project🤑
WOW amazing 🥰who knew you can make it out of cardboard box unbelievable thank you for sharing I Love 💕 it is beautiful 🥰🥰🥰🥰🥰 can’t wait to try it 😬👌very smart idea 😊😬👌
An easier work astound for making the tufts stay is to use a second button on the backto hold it in place
Thanks for the idea thanks for sharing I love it and yes I'm going to try to make one for my queen size bed and use African material
Im glad that you had help with this project.
Ikr!
Oh my God...that is a lot of work! Good job. As for me; I’m headed back to the furniture store. I no longer feel the need to be cheap anymore. I’ll just buy it!😁
Duct tape, cardboard, and an imagination. Great job!
Very Nice You Did A Great Job
Thank you!
Great Job!!!!! Very Creative.
You did a great job.
Girrrrll, you can make anything look good if you set your mind to it. All you people think you need millions to live nice. Check her out. Very brilliant idea
I love it, great idea to use cardboard and foam board
It's nice but I'd loose my mind seeing on the buttons I'll use washers, screws and glue gemstones over it.
GENIUS!
Nice! Awesome!
Very nice 👍🏾
Great look, and easy!
Love it
......wait a minute...who was that.....that Step on your master piece
Lol that was me
Oh wait or it may have been my husband..you’re probably talking about him lol
nicolelise disrespectful much ? 😐
Very nice God Bless
Turned out great girlie!! 👍🏻👍🏻❤️
Thank you!
Thank You!! New Sub.!! So creative !!❤❤
Clever
Good lord that’s a lot of work
Is it secured to anything?
Hi how many boxes did you use and the size of each?
How did you secure it to the wall?
How did they attach to the wall ?
What type of fabric did you use?
Hey can you please tell me how many yards of fabric is required for this
No he didn’t walk in you shot at 10:05 🤨. Great video and new subbie.
How much fabric did you use for this?
How absolutely resourceful!!!!!! How refreshing it is to see someone who’s actually using their mind. Great job!
Lol was I the only one who laughed at how that person just walked on her project @ 1:09 💀 LOVE THIS THOUGH 💘
Blame my husband 🤦🏽♀️
I laughed too lol
That's what I thought..shame on him 😤🤪🤔🙄🙈🤷🙊😂..BUT,this video is berry cool..thx 4 the upload!
I came looking for the comments about that exact part! Lol
Me : Mom I want a tufted headboard
Mom: you know how much those cost
Me: never mind I'll do it myself ,let me get 20bucks 🤣🤣💯👌🏽
was $20 enough?
@@vivaglamnina6191 Yes!
😂🤣😂🤣
@@vivaglamnina6191 Hers is for a king size headboard. You can't find a $75 king size headboard. A full or twin wouldn't need as much
154 dislikes lol maybe a couple of low budget Furniture stores didn't like this video thumbs up for me👍
I heard that! I am going to use crochet needle for pulling buttons through
@@audreypartlow-short883 lol😁 hadn't thought of that but I'm off Friday and you've given me an idea thanks 🤗
I was going to order one NOt Thank you 🤗🤗🤗🤗🤗
Facts!!!! Love love
I enjoyed the diy gonna go surprise my wife with a purple headboard 💜💜💜
Myyalula Graham so did you make the headboard ? how did it go???
Maile G. You’re a legend
How did it cone out?
100 hubby points for you Sir!
Awe...what a sweet husband you are! She will love you forever!
Very creative. Damn, when I think back to all that cardboard I threw out, lol. I could have made a headboard.
😂😂😂😂😂😂😂😂 i said the same thing
I did this years ago for my daughters. They look great on queen size mattresses too. More of an Asian look.
One i due, she had a twin bed & i put the box spring long ways behind the bed to the floor.
I used an old comforter for cushion on the box spring. I bought material that had a ruffle look. Came out so cute, and looked very grand.
The other one, i actually used a faux silk curtain panel, wrapped it around the back to the wood & cushion was an old comforter and stapled away... looks beautiful.
No need for the cardboard boxes or tuffed look unless you have a lot of patience
Me too and I just moved 🤦🏾♀️
I'm seriously thinking about this just now
My thoughts exactly 😒😂😂😂
Awesome! I like the cardboard box for the light weight. Makes it much easier to move the location of the bed!
Granddaddy was right...you can use electrical tape for anything.😅😅 well done.
@Lashae Stillis why are you crying? Are you missing you're grandpa?
Really beautiful!! Would never guess it's a diy. Hard work paid off. Really lovely😊😊😊
thank you!
I used U pins from the floral department to poke & make the tufts. Used pliers to twist them tightly & bend them down on the back. Then glued large crystal stones on to cover instead of buttons. Was really fast since U pins can be pointy & love the crystals. Could have glued on buttons but I like crystals. Great job. I love when our ladies can DIY. #toolbeltdivas
While people are watching gossip channels here’s a woman teaching crazy skills...
the world gone mad... btw.. no protective coverage on her floor rug... she’s a pro 💪🏾😍
50 jealous people didn't like this video🤣 losers.
YOU DID ABSOLUTELY A GREAT JOB YOUNG LADY!! I'M SO IMPRESSED!
Lol! Thank you!
153 dont like it they all walking on there brains right now
If people actually just figured out that the best thing to do is pay it no attention
I love this
Make that 202... So basically 202 people clicked on something they weren't interested in in the first place🤯 so kinda shows how smart they are from the get go lol... Good job it looks like u bought it, so what more do those people want!?
Great job and this would work for students on a budget in college dorms too!! My granddaughter wants matching ones for her and her roommate.
Exactly why i’m here
You should've stapled down all the material tightly so there were no wrinkles, bumps, creases, etc, THEN put the buttons on, pulling them as tight as possible. (Hint: It would've been easier to tighten the buttons & tie them off if you put another, plain button or washer on the back.
The wrinkles is part of the headboard design.🤷♀️😊
I thought it was supposed to look like that! Seems fine to me and I sell furniture for a living.
Also a wire hanger to pull the thread through
Upholstery needle.
I’m sure we all can critique, and/ or make suggestions.. however, you did an amazing job! That was awesome! You go girl!!
You did a great job, very clever and beautiful. That was a lot of work, bravo 👏
READ THIS COMMENT:
Hi everyone! Thank you for watching this video! My headboard is not attached to the wall; it is propped up on the frame FYI (for all inquiring).
Hello and great video!!! If you were to attach it to the wall what method would you use?
Good to know
@@theredheadtherapist I heard of some peel and stick type hooks that fit into one another. So like the one you put on the headboard is facing down and the one on the wall is up and they fit in each other. Going to look into it myself.
Genius. Love it.💪💪
@@theredheadtherapist try velcro
I cannot believe how fast you put this awesome creation together!😃 You're very talented! I'd have never known it was a homemade DIY... if I didn't see you make with my own eyes👀 (add me as one of your new subscribers)😊
Yessss gf u jist saved me some serious coinage! Thanks!
i can guarantee mine would not come out like that.
You have inspired me. I am never to old to learn something new. Thank You! Beautiful job.
Hey there Nicolelise, I love your creative & resourceful idea. This is a great way for others to make & add their own creativity to it with different fabric, buttons, nail head, etc. I'd like to suggest that you could add each item you used in the description with links to the items. Set it up to get affiliate credit for those items. That way everyone can easily obtain the same items if they wish & you can receive profit from your creative work your sharing. Keep up the wonderful videos!
Thanks to you I built one with USPS shipping boxes 😊 it turned out great now I just gotta remember to get the stuff to mount it on the wall
Girl I was worried and skeptical at first...BUT YOU DID DAT SIS!...
Thank you for making this video! We used this to make our own but instead of fabric we reused some old peel and stick wall paper. It turned out great!
Interesting!
I love it !!! Thanks for vid I love to make stuff that saves me money
Just a side note, you should secure the fabric tightly to the headboard BEFORE sewing on the buttons, for a cleaner, more even tufting.
I can't believe you made a headboard out of a cardboard box!! It came out terrific no would ever know! So cleaver!!! 😀
This is called, fake it till you make it. Awesome!!!!
Actually it's not "fake" at all. This is a low budget way to achieve a high end product. She is NOT "infringing" on any manufacturer's pattents of production. Please ppl be careful how you use your word descriptions so you don't give or allow others to get the wrong ideas..
Yassssssss can't wait to try doing a paw patrol version 😍
I love this ideal the only thing I did different is when you put the buttons on an tie in the back I used some washers on the string then tied it an hot glue it nice head board thank you for the design
great idea! just a thought... you can do the tufted much easier by using heavy duty thread or yarn, then a second button on the back, (only one time through and you can tie it off around the back button :0)
Wow 😍😍😍 so sad, mine is a bunker bed 😂 but I'd still like to do it hehe thank you so much for this gorgeous 😉😊🇵🇭
Came for the headboard.. stayed for the track! I had to stop myself like oh wait, this a DIY video... I was gettin it! Nice job!! ❤️👍🏾👍🏾👍🏾
I know im over here tapping my foot 😁
That's very clever, plus it's fairly lightweight compared to a traditional wood upholstered headboard. You could secure it using a stronger 3M locking velcro (not command strips). They're used for marine headliners and would work for this without damage to the walls.
Joelle, Command makes strips for holding heavy items as well. I have used them a lot, and they hold very well.
I made 2 for my house and 1 for someone else and I am now doing it and selling it to people for cheap price
Amazing, your video is so good and strait to the point. I love it how you used simple and budget items. It's rewarding to watch videos like this.
Thank you!
Great video . Can’t wait to try!
Thank you! hope it comes out fantastic!
Me too. Great job
What an intelligent & resourceful idea. You did an EXCELLENT job! I want to do one for my queen sized bed. Thanks for the inspiration & for sharing your know-how!
I'm not crafty like this😩 This was super resourceful!
It's easy
Fantastic idea, tho' I would like to suggest that you iron your fabric and then glue it tightly around all the sides BEFORE tufting as you would get a much smoother fit! However, what an inspiration! You must certainly have a creative mind!
Thanks for the compliment & suggestion. However I wanted a more defined tuft which is why I did not staple the fabric down first. 🙂
I've pretty much already got the materials here, so I'll just get to work! Thanks for the inspiration! Always looking to reuse, upcycle to decorate my house! 😁
You are great! A suggestion: I use thimble to push the needle, it makes faster and easier the sewing.
You did a great job talking us through every step of the way, thank you! Your headboard is beautiful ❤️
Wow! You did an awesome job!! It looks amazing!!!!!!
What a great idea for staging. Its inexpensive and lightweight.
I wished I would’ve found you before I bought this king upholster 😔 very nice & talented
Omgawd Mr walking over the cardboard 🤦🏻♀️ However This came out hecka cute!!!
Great Job. Walmart should endorse your activities because I would not have shopped at Walmart for every thing-I'm cheap.
I use cardboard boxes for everything, I paint floral prints on them or cover with wallpaper. I've made Jewelry boxes dividers for my dresser drawers holders for beauty products and of course for my craft supplies and now I have to make a headboard using your technique, thank you for that great idea.
Hi, I just subscribed.I really liked your header, I look beautiful. thanks for sharing!!!! Blessings!!!
Turned out awesome.
Do you think thin wire might work for putting the buttons on?
Possibly, I haven’t tried that!
I have no clue how I stumbled across this video.
I want to Say Thank you so much.
We needed to upgrade to a king sized bed.
I didnt want to buy a whole bedroom set.
This helped me just have to get rid of my old foot board and headboard instead.
I am going to make my own head board.
I am so Excited thanks for this video.
Thx for the easy tutorial! I laughed watching you put the buttons in. Hot glue, duct tape, AND staples! Those buttons are going nowhere anytime soon! Loved it!
Good ideia I am going to make one for my grandson bed but I am using folk letter thank you so much.
Thumbs up for sticking with it and helping me further know y I would not want to try this. U deserve like n comment for ur hard work, tho.
Lots of work, but it came out beautiful! Thank you for sharing!
Yes if your poor and can't offord it just go and make one!
Really resourceful Lady !! Someone who thinks outside the box as they say 😎😎. Thanks for sharing. Heaps easier to transport the boxes and great for someone without a drill / drill skillls!! Fantastic.
How right you are! There's absolutely no way this old lady with arthritis could transport long, heavy pieces of anything despite my really wanting a new headboard for my double bed. I don't want to use a drill either. I think that investing in a glue gun is a good idea n I'll check out the price of a stapler like hers. There are no Walmarts here in France that sell those big boxes but I suppose that moving companies do. If I can't find her big poster boards I suppose I could do an extra layer of cardboard boxes. I'm motivated and after watching this video I see that the major obstacles are no longer a problem. This is a great project that'll keep me occupied during the worse of the Spring showers. Many thanks, Happy thoughts and Happy Spring to every one.
I agree with you on the arthritis lol I’d rather use boxes than wood, I’m going to invest in a glue gun and stapler as well lol
Love this idea. I think I’ll make one for one of our guest rooms tonight. Thanks for posting! ❤️
This is awesome! I came across this by accident. So glad I did. Thank you.
Great job and sooo creative! I found your video while trying to find a way to add a nice border around my daughter’s metal platform bed! I love the mattress pad and batting idea...that’s what I’ll do for a nice looking border! I don’t like the look of the metal but needed her bed elevated to fit things neatly underneath, as we have no closet in her room. New sub and I’ll be going through your vids for other gems! 👏🏽👏🏽👏🏽
Yay awesome!
New subbie Wow it came out so beautiful, you are so talented. Thank you for sharing your talent.
Thank you!!