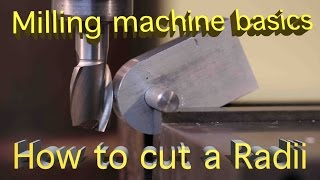
DRO how to use #4 Radius function

HTML-код
- Опубликовано: 9 фев 2025
- After publishing this video I found that my "X" axis was set in the reverse of what it should be. When the "X" axis is correctly set the #4 choice in the simple R function works as it should.


I bet you it’s the x direction is reversed. Suspect you change it. Instead of setting up for table moving direction think what direction the tool is moving(it’s stationary but to the part the tool is moving opposite the table and probably the way the dro needs for the picture to be right.
You have got bathe idea there. When the mill was delivered I found that the X axis scale had been broken. When the new one arrived I mistakenly put it on backwards. This is what I found after I started to ask questions. So for expediency I just reversed the action of the X axis and now the functions all work correctly.
Lol designated decoy Just found your channel good info on the dro functions thanks for your time
Thanks for viewing Steve.
Thanks for the humor, the DRO info was good fiber filler :)
Thanks Pine.
Harold, We all appreciate you using that expensive "Organic Free Machining Alloy" 🤪
I don’t spare any expense for my videos. Thanks for viewing.
Really like the videos ,straight to it no nonsense. Like the jokes too 🤣😎
Thanks Alan.
Well shoot Harold, this is great.
I’ve had a DRO on my big mill for three years now. I use it to move over a certain amount, up down etc.
I did use the hole pattern once and it worked slick.
I need to start playing with this thing.
It’s a DRO pros EL 4000, I think.
You have a great tool and a wonderful toy start to play with it don't let it go to waste. Thanks Jeff.
Hi Harold
great function that, i don't use dro's with all those functions but handy to know, thanks for sharing.
Kev (Mr F's W) UK
Thanks Kev.
Hello Harold,
Another very good video... Great series, thank you.
Take care.
Paul,,
Thanks Paul.
Thanks Harold. I loved the joke. Also loved the demonstration.
Thanks Terry.
@@AmateurRedneckWorkshop Designated Decoy ! I'm still laffing.
@@terrycannon570 thanks.
Hey great video Harold love your work
Thanks Troy.
Thanks Harold.
I'm just wondering if there is a mirror function on the DRO that for some reason needs to be changed when doing radius cuts. Perhaps it comes in to play on the smooth cut and was overlooked in the manual on the simple cut, or maybe it is a glitch in the software. BTW what I know about DROs wouldn't cover the bottom of a thimble.
I hope to find the answer to that. Thanks Danny.
I have the same problem when trying to understand the setting from the book. Doesnt seem to add up.
Thanks Troy.
Could you tell me how set the X axis. If table moves left from a zero setting, does the DRO indicate increasing negative readings?
Well here is the cat out of the bag. Where ever the table is setting when you press the zero X button then that point is zero X. See Mr. Greebe here. www.practicalmachinist.com/forum/threads/lathe-mill-dro-axis-directions.225890/
@@AmateurRedneckWorkshop I knew that. Now, if you move the table left, do the numbers show a negative sign with numbers increasing? The DRO my friend has can be made to change sign. I would think that is a common feature. My question was really to help clarify a possible solution for the folks who installed the scale correctly.
@@EdwardKilner If they have installed the scale correctly they don't need any solution. Pressing the period key on the keyboard as you turn on the DRO is often the way to get it into setup mode. Then the steps to reverse the X take will be obvious. I do not have a dro manual in front of me just now. You can look in the manual just as good as I can.
@@AmateurRedneckWorkshop Since I am an Electrical Engineer, I am somewhat familiar with manuals. RYFM was an order I heard a lot in my early career. I am a champion and inveterate manual reader.
My question was for other reader’s benefit, not for mine.
The DRO I have access to belongs to my friend, a mechanical engineer. I found some interesting, to him, gems in the manual and supplementary info publications.
We both enjoy helping others. We both strive for clarity. If I failed to be clear, please tell me.
@@EdwardKilner I am sorry I did not mean to be rude. I just have a lot on my mind these days. I do not remember where in the set up that you can reverse the Axis. I did look for it for a few minutes but it has been two years since I made this video and an old man forgets things. In fact for this video I had to reverse the X because when I got the replacement scale from China, I put it on backwards and it was messing up the demonstration.
I recently purchased a later model of this general type of DRO. I bought two of them, one for my mill, and one for my lathe. They're both the same model however marketed by different companies. The model is SNS-3V. Both units although purchased several months apart came with exactly the same manual. "Digital Readouts - 2V/3V Multifunction - Operation manual version 1.0)
I will point out that regarding the ARC Processing function in the manual that the instructions are pretty much exactly as Harold describes in this tutorial. However nothing could be more incorrect regarding how these models handle arcs. So the manual does NOT accurately describe how the function works in either of these similar model DROs.
It would appear that what they've done is do away with the Simple / Smooth menu selections as well as selections for "Type" numbers. Those are gone now. I had to learn the new way it works by playing with it since I have no documentation.
1) press the ARC processing button
2) enter either SEL_XY, SEL_XZ, or SEL_YZ
3) CENTER location of the center of the ARC relative to the center of the current location of the spindle
4) RAD of the ARC
5)TL_DIA - tool diameter
6) MAX_CUT - this is where things change in this model. The smaller the value of this variable, the smaller the increments in moving the spindle and the more steps will be added accordingly to the process in order to complete the cut. In essence this replaces the Simple/Smooth selection and you determine the resolution of the cuts in the ARC for yourself.
7) ST-ANG - this is another change in this model. This step and the next one set the beginning and ending angles relative to the current location of the spindle. Angle of 0 causes the coordinates of the cuts to begin to the right on the x-axis away from the center the ARC radius + 1/2(tool diameter if you are setting the ARC to cut the outside, and minus if you're cutting the inside (more below).
8) ED_ANG - where the cutter will end up at the last step. Angle of 90 will put the spindle at 12 oclock to the ARC (up and to the left of where you start)
9) RAD+TL or RAD-TL - same as normal (manual instructions, this video)
That's it! Those are all the settings with this version of the DRO.
I hope this helps someone.
Thanks Fred. The problem I had with the arc going the wrong was was solved by reversing the "X" axis. I put the scale on the table facing the wrong way.
@@AmateurRedneckWorkshop Yes, I saw your follow up video that addressed that. The manual that comes with the DRO does explain how the axis directions need to be set up properly which will apply to various functions. I had no problem with any of that.
What I go into in my comment is a newer version of the DRO where the instructions for milling an ARC don't match how you go about it in the actual DRO. They're written for DROs that are like yours where you select 'simple or smooth' and then select the type numbers 1-8. Those selections are gone now and replaced as I discussed in my long winded comment.
The reason I put my comment in this video is due to the title and the content where you're teaching people how to mill an ARC and I thought it might be most helpful here if a person gets the newer DRO version like I have, and it comes with the instruction manual like the two that I bought did, which is like yours, but wrong. I have yet to run into a video that explains the ARC function the way it works on the newer version.
Can you do an convex radius on a corner
Certainly select the R- tool. Thanks Troy.
Nowt wrong with artificial metal - the Dehavilland Mosquito bomber 'plane was mostly made of it! :)
Yes lots of airplanes were. Thanks Dudley.