Making Coffee Cup Sleeve with Leather - Leather Craft

HTML-код
- Опубликовано: 29 сен 2024
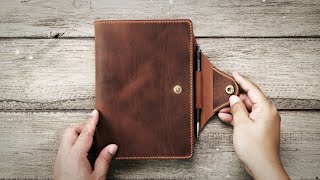
- I made a leather coffee cup sleeve at the request of a friend who loves camping.
There are so many different cup shapes that custom patterns are difficult to provide.
Instead, you can easily make it using A4 paper.
We used vegetable leather that changes to vintage as it is used.
It can be used not only as a camping cup but also as a coffee cup sleeve, so make it easily.
👍 Subscription and notification are a great help to keep this channel alive.
😝 Please understand even if I am not good at English.
💬 LEATHER
Minerva Box ( BADALASSI CARLO TANNERY, Italy )
color : Olmo, Napoli
Google search :
www.google.com...
💬 CONTACT
email : planb.leathercraft2017@gmail.com
Copyrightⓒ2022 by PLAN.B LEATHER. All Page content is property of PLAN.B LEATHER.


When you actually need maths in real life..
That's right! Mathematics is useful to know. Thank you for watcing! :)
이쁩니다
감사합니다! 행복한 주말 보내세요!! ^^
Thank you such amazing videos! I took your idea and made some leather covers for my clips just like yours. Stops from indenting leather now :). Thank you!
I'm glad you found this video helpful. Thank you for always. :)
@PlanBLeather~ I love the criss-cross style stitch you did on this coffee cup sleeve. It not only looks sophisticated, but the triple stitched beginning and ending stitches ensure the longevity of your work! Your work is inspiring to me! ~~Christy~~
I thought a lot about sewing, but it was a good choice. I am so happy to be able to inspire you!! thank you!! 🥰💯
I am so glad that I found you on RUclips. Your craft is so methodical and so simple that it's amazing 👏 Kudos to you and keep up the great work. 👍
Thank you!
I am glad to meet you too.
I will be happy to work for a long time.
Qué productos echa a las esponjas para perfilar y dejar brillantes los bordes?
I use three materials when finishing leather cross sections.
Thank you for watching.
1. Tokonole
2. Water-based Glue + water (1:1 ratio) - This mixture helps the last applied chemical to adhere well to the leather.
3. Lastly, there is “wax coat”. - This chemical provides a transparent coating. It is similar to finishing with wax. I use it for a natural finish.
I hope this explanation helps.
1. Tokonole : www.etsy.com/listing/883054026/tokonole-120g-gum-tragacanth-burnishing?ga_order=most_relevant&ga_search_type=all&ga_view_type=gallery&ga_search_query=tokonole&ref=sc_gallery-1-1&plkey=1221c867fc14bdb263710da9b961b1fa4b6be9d6%3A883054026
2. Water-based Glue: www.etsy.com/listing/776946578/craft-water-based-leather-glue-600?ga_order=most_relevant&ga_search_type=all&ga_view_type=gallery&ga_search_query=Craft+Water+Based+Leather+Glue+600&ref=sr_gallery-1-1&organic_search_click=1&variation0=1362028721
3. Wax coat : www.google.com/search?q=SEIWA+wax+coat&oq=SEIWA+wax+coat&aqs=chrome..69i57j69i64j69i60l3.453j0j4&sourceid=chrome&ie=UTF-8
video : ruclips.net/user/shortswEpxuaolR7w
HI, very nice and beatifull video.
I have some questions :
- Why did you add an extra length to the pattern ? like 0.5cm on each side ? It is determined by leather thickness ?
- What is the leather thickness you used/recommand ?
- At the end you made a double knot that seams to not be visible finally when you burn the thread, how did you do that ?
Thanks you !!
Yes, that's right.
The length varies depending on the thickness of the leather.
for that reason i did add an extra length.
At the end, just wrap it in real leather and decide on the length.
It was a slippery thread, so the knot came undone quickly.
I had no choice but to melt the thread and secure it without making a knot.
With wrong editing, it seemed like magic. I'm sorry.
Thanks for watching. please Make a great Sleeve. :)
@@plan.b thanks you very much for your answer. I will try. Have a nice day !
Hi! I love you work. Newly sub❤
By the way. How did you determine where to pivot your compass @ 1:26 ?
Two points were randomly placed on the bottom line. The distance between the two points doesn't matter. If you draw with a compass from two points, you will get a perpendicular line based on the line below. I'm so glad you subscribed. Thank you!
@@plan.b wow. Thank you so much for the reply. 😍 Most of the cup sleeves here at YT are pre patterned. But yours was step by step. Thanks you soooo much🤧
@@mjmendez72 I'm really glad that my video was helpful! You'll be able to make a sleeve that fits your cup perfectly. Thank you : )
영상미가 좋아요
감사합니다~ :) 행복한 하루 보내세요~!
👏👍🙋♂️
thank you~!😄👍😁