Screw all the negative comments. You gave us an idea of what to expect and helped us feel comfortable to tackle the job. You said you weren't a professional with all the tools. Kudos. Great video.
As a tuga I'm lucky to have had a senior doing this! Just finished my alternator and it was a bit different since I'm doing a Carina E from 94. Learned a lot
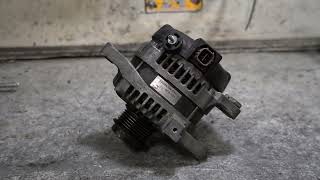
This video perfectly demonstrates why places charge nearly $100 for a rebuilt NipponDenso alternator. Rebuilding mine would likely require several hours and the purchase of new bearings. In contrast, I earn about $50 per hours at my job and therefore could essentially trade two hours of my labor for the labor of someone else who rebuilds these alternators for a living. Do not misunderstand, I enjoy working on my vehicle. It is simply a matter of efficient use of my time/efforts.
First your English is really good! My Father was in the Army and money was always an issue. On top of this we lived in many foreign countries. So Dad usually did most of the repairs on our vehicles himself. He did things in much the same way you do. To this day I use sockets and blocks of wood and such to make repairs to a lot of things. Often you do not own the tool you need and it would cost too much to buy the tool knowing you will likely not use it again for 10 or more years. Being able to think through a problem and solve it with creative use of simple tools is the brilliance of man! Last I checked the pyramids where not built with high tech tools, sky cranes and modern technology! Ancient Roman structures still stand to this day and again nothing high tech was used to build them! Technology and specialized tools are great to have but being able to think through a problem and solve it with basic things is a treasure in itself. One feels powerful when one understands his world and knows he can survive no matter what might happen! Great Video!!!
I did a similar attempt to bind the axle so I could remove the pulley but only used one screwdriver and bent the fan blades. Really wish I would have seen your video first but it came on while I was putting everything back together 🙄 good video bud.😉
Thankyou very much for taking your time to make this video. I'll be giving this a try tomorrow with my MR2, I'm not going to pay £115 for a reconditioned one from eBay. Thanks again, keep up the great work
Nice job, I like that you made some points on where to be careful so you don't screw something up. I just re-built my alternator and forgot where one part went, so I watched your video and it helped me find where that part went. Instead of using the screw drivers and bending the blades, next time save a piece of old belt. Wrap it around the pulley, grab it with a pair of channelocks and tighten the nut >works great. Thanks for the video.
Thanks Joao. Great video. Good that you showed tips on removing and fitting bearing without a press. Would have been good to have shown how to inspect and replace brushes. When doing an overhaul, it is normally standard to replace brushes, since they are subject to wear. They will eventually need replacing anyway, so best to do it during overhaul to avoid doing it later. Also, for anyone who drives in a climate where road salt is used, the fastener threads should be smeared with antiseize or grease.
Thanks for posting this, my alternator failed on my 99 Toyota when I was out of town. I had to buy one for $165, I was glad I had some tools in my truck to change it. I kept the one that failed and now I will try to get it working for a backup alternator. It may only be the brushes but your vid helped with knowing what I will expect to see once I start taking it apart.
@@dooflydetailguuy4349 It's still sitting there where I left it 6 years ago, at least it's there to fix if I need it. Best not to get rid of stock parts working or not imo. Still have my 99 I bought new, just keeps going.
If you must tap in a bearing folks it's best to hit the inner race than the larger outer race when putting onto a shaft. Tap outer race when tapping into a housing or bell end.
This looks alot easier then I thought. I've had to replace my alternator 3 times they're all rebuild models as they font make new alternators for my truck. I figured I could start rebuilding them better then what's bring sold. It's the voltage regulator that keeps going out though
I suspect the cheaper voltage regulators are made in China with very cheap components. I can be hard to know what you're even buying in terms of brand, quality both for alternators and individual components. Another possibility might be to fit a separate regulator since most regulators do the same think afaik. They vary the rotor current (fed via the brushes) based on the (stator) output voltage.
Don't use oil when pressing bearing on. It isn't needed and if the bearing seizes the rotor will spin wearing it down meaning new alternator. The Bearings are an exact precise size. Always press on the inner race with appropriate size socket wether using press or socket and hammer.
Hi, Followed your great video, replaced both bearings $43 here in New Zealand and it all went very well. Many thanks for your effort it helped me heaps. All the best for 2017. Nev.
I stripped one of the Phillips head screws so i said screw the inventor of phillips head screws, honestly worst type of screw ever!! Thanks for the video though! 😂
First, you should loosen the pulley nut before taking off the belt or any other bolts while it is still in the car. When installing the alternator, tighten the pulley nut after the belt and alternator hold down bolts are installed. If the pulley turns(and the engine) while removing or tightening the nut, use a socket on the crankshaft pulley with a breaker bar. The breaker bar will stop the engine from turning once it is against the frame. Also, you might have to tighten the belt tension some. This will help the so the fan does not get damaged.
Better way to remove the pulley nut: 1] Ignore the drive attachment (hex, torx, whatever) on the shaft 2] Wrap an old towel or such like around the pulley 3] Grip the towel 4] Use a hammer spanner (aka impact wrench) to remove the nut
You may be able to hold the pulley with a tool called a python, it's like a rubber strap that works like a spanner, this way you don't have to bend any blades to remove the bolt on the pulley. Also worth checking the model no. of your alternator on eBay, as some are selling with a surprisingly low buy it now price, maybe even cheaper than the cost of new bearings?
Nice video, I can not wait to repair my Alternator, May I ask you the codes ( letters ) of the 2 different bearings ? I want to buy bearings before I will open the alternator, thanks in advance !
Nope, usually when a bearing goes bad there is also wear on the components inside, so the damage is already done. Usually grease will not solve it, and I do not recommend it, because it will come out of the alternator and into the belts. Grease, oil and belts dont mix ;-)
bom vedeo e boa explicaçao!! tenho uma toyota hilux de 1988 e detectei que nao esta a cargar as baterias! como posso ver se o problema e do alternador ou de um rele que esta montado fora do alternador? sera que e o rele? havera forma de checar donde esta o problema de nao estar a cargar as baterias? cumprimentos desde noruega jorge
There is a lot here that you haven't done correctly. The amount of oil in the bearing housing, the bearing installation - only ever hit the outer housing of the bearing when installing, treatment of the armature in the vice and initially the removal of the pulley nut. Buy yourself a battery or air operated impact tool.
Can u tell me what to do if this alternator is getting stuck or jammed ? How to solve this issue ?? I changed front n rear bearing but still it's grinds from inner side
Hello. I need to replace the bearings in the alternator on the Toyota Rav4 2009, 3.5l, 6 cyl However, in Canada I can not buy bearings as spare parts for the alternator. If you could give me information on where to get bearing sizes and where to buy them. Regards and I am asking for helpful information
@@johnshaw5978 it's not a belt sound it was a roar that almost went to a squeal when you'd Revv up the engine. I replaces it with a new alt but I'd like to rebuild the old one so I wondered what kind of kit to buy. If I need the one that also has a new regulator.
hello and thank you so much for your vidéo !! do you know where to find the bearing dimensions and toyota code ?? i've a 3S-GE rev3 ( 175 hp) 1994 and don't find those infos... many thanks
I have a denso alternator for 04 acura TL. it has a bad rear bearing, smaller bear, near slip ring, I can't get the bearing out, I can't use bearing puller because the fan assembly has this round ring right up to the bearing. I cant insert the puller to pull the bearing. Any Idea how to get it out?
You're a lucky, becasue in Ukraine we have to make customs clearance or something like that and imported engine can cost price + shipment + at least 3-5k$ for this "clearance" so we have to import them illegaly and it cost more that in other countries.. ( that's sad. I wish i could be lucky to get 20v blacktop for 1300$ with only 40-70r miles on it) but it;s impossible.
Damn, thats steep! Well, i hope everything goes well with the importing process of this particular engine. Portugal also has a picky customs, but mostly we pay the VAT over the invoice and some additional fees that are not that high... Lets see if I am indeed lucky...
You probably stripped the nut because WD40 is a lubricant, not a penetrating fluid, and it wouldn't be used for removal of stubborn screws. You should have tried PB Blaster or Seafoam, and give it a long time to work (maybe hours), not a few moments, as implied in your video.
The only useful piece of information that you provided was what wrench to use on the nut. You casually left out how you managed to remove the bolts that fasten the alternator to the engine block. Judging by the clearance that your bottom bolt of the alternator has for the average type of socket set and then the gear to the bottom left of the alternator pully, I'd say that you had a hell of a time getting those two alternator bolts off. So how did you get the alternator off to begin with? Did you hoist the engine up or did you take apart the alternator from the pully and then proceeded to remove the last bolt underneath the alternator?? See that is the kind of useful information that people flock to RUclips for.


Screw all the negative comments. You gave us an idea of what to expect and helped us feel comfortable to tackle the job. You said you weren't a professional with all the tools. Kudos. Great video.
Agreed, we should thank him for sharing. I see the vdo very useful myself.
As a tuga I'm lucky to have had a senior doing this! Just finished my alternator and it was a bit different since I'm doing a Carina E from 94. Learned a lot
This video perfectly demonstrates why places charge nearly $100 for a rebuilt NipponDenso alternator. Rebuilding mine would likely require several hours and the purchase of new bearings. In contrast, I earn about $50 per hours at my job and therefore could essentially trade two hours of my labor for the labor of someone else who rebuilds these alternators for a living. Do not misunderstand, I enjoy working on my vehicle. It is simply a matter of efficient use of my time/efforts.
First your English is really good! My Father was in the Army and money was always an issue. On top of this we lived in many foreign countries. So Dad usually did most of the repairs on our vehicles himself. He did things in much the same way you do. To this day I use sockets and blocks of wood and such to make repairs to a lot of things. Often you do not own the tool you need and it would cost too much to buy the tool knowing you will likely not use it again for 10 or more years.
Being able to think through a problem and solve it with creative use of simple tools is the brilliance of man! Last I checked the pyramids where not built with high tech tools, sky cranes and modern technology! Ancient Roman structures still stand to this day and again nothing high tech was used to build them!
Technology and specialized tools are great to have but being able to think through a problem and solve it with basic things is a treasure in itself. One feels powerful when one understands his world and knows he can survive no matter what might happen!
Great Video!!!
English is my first language and you have a better vocabulary than me
I did a similar attempt to bind the axle so I could remove the pulley but only used one screwdriver and bent the fan blades. Really wish I would have seen your video first but it came on while I was putting everything back together 🙄 good video bud.😉
Thankyou very much for taking your time to make this video. I'll be giving this a try tomorrow with my MR2, I'm not going to pay £115 for a reconditioned one from eBay. Thanks again, keep up the great work
Nice job, I like that you made some points on where to be careful so you don't screw something up. I just re-built my alternator and forgot where one part went, so I watched your video and it helped me find where that part went. Instead of using the screw drivers and bending the blades, next time save a piece of old belt. Wrap it around the pulley, grab it with a pair of channelocks and tighten the nut >works great. Thanks for the video.
Thanks Joao. Great video. Good that you showed tips on removing and fitting bearing without a press. Would have been good to have shown how to inspect and replace brushes. When doing an overhaul, it is normally standard to replace brushes, since they are subject to wear. They will eventually need replacing anyway, so best to do it during overhaul to avoid doing it later. Also, for anyone who drives in a climate where road salt is used, the fastener threads should be smeared with antiseize or grease.
Thanks for the great video! I'm rebuilding my Denso alternator, and wasn't sure how a couple of parts went together. Now I know! Thanks so much! :)
Thanks, I am glad to help!!
Thanks for posting this, my alternator failed on my 99 Toyota when I was out of town. I had to buy one for $165, I was glad I had some tools in my truck to change it. I kept the one that failed and now I will try to get it working for a backup alternator. It may only be the brushes but your vid helped with knowing what I will expect to see once I start taking it apart.
Did it work
@@dooflydetailguuy4349 It's still sitting there where I left it 6 years ago, at least it's there to fix if I need it. Best not to get rid of stock parts working or not imo. Still have my 99 I bought new, just keeps going.
And I thought I was a procrastinator 😂
Good video very informant especially for people that don't have a lot of special tools like big garages and repair shops.
Thank you my friend, this video helped too much in rebuilding my alternator. Really appreciated.
Mahmoud Toboul Thanks! Glad I helped :-)
If you must tap in a bearing folks it's best to hit the inner race than the larger outer race when putting onto a shaft.
Tap outer race when tapping into a housing or bell end.
This looks alot easier then I thought. I've had to replace my alternator 3 times they're all rebuild models as they font make new alternators for my truck. I figured I could start rebuilding them better then what's bring sold. It's the voltage regulator that keeps going out though
I suspect the cheaper voltage regulators are made in China with very cheap components. I can be hard to know what you're even buying in terms of brand, quality both for alternators and individual components. Another possibility might be to fit a separate regulator since most regulators do the same think afaik. They vary the rotor current (fed via the brushes) based on the (stator) output voltage.
Very well done videos you make , you are a good teacher and good mechanic. Good job and Thank you
Thankyou for making this.
Better than a lot of mechanics I know.
Thanks for making this video i will try similar on my 2JZ-GE Toyota Supra
Good video. On mine some of the Phillips screws were too tight so l used my impact driver ( the kind you hit with a hammer ). They came out easy.
Don't use oil when pressing bearing on. It isn't needed and if the bearing seizes the rotor will spin wearing it down meaning new alternator. The Bearings are an exact precise size.
Always press on the inner race with appropriate size socket wether using press or socket and hammer.
Good Job and GREAT VIDEO! Helped me with my 1997 Toyota Rav4 alternator ! Thanks a lot 🤩🤩
Hi,
Followed your great video, replaced both bearings $43 here in New Zealand and it all went very well. Many thanks for your effort it helped me heaps. All the best for 2017. Nev.
Thank buddy.....ur a great blessing..... pls keep making more amakzing videos!!!! God bless.
Thank you!
Excellent video! Well done, step by step. Thanks!
V Mukal Thank you for your kind comment, Cheers!
Thanks for the video. Will be working on this project this weekend.
Excellent tutorial thankyou.
If the copper slip rings are worn does the shaft need to be replaced?
I stripped one of the Phillips head screws so i said screw the inventor of phillips head screws, honestly worst type of screw ever!! Thanks for the video though! 😂
First, you should loosen the pulley nut before taking off the belt or any other bolts while it is still in the car. When installing the alternator, tighten the pulley nut after the belt and alternator hold down bolts are installed. If the pulley turns(and the engine) while removing or tightening the nut, use a socket on the crankshaft pulley with a breaker bar. The breaker bar will stop the engine from turning once it is against the frame. Also, you might have to tighten the belt tension some. This will help the so the fan does not get damaged.
jim barber Some great ideas, Thank you! Maybe it will help other ppl that come across this video, thank you very much.
Better way to remove the pulley nut:
1] Ignore the drive attachment (hex, torx, whatever) on the shaft
2] Wrap an old towel or such like around the pulley
3] Grip the towel
4] Use a hammer spanner (aka impact wrench) to remove the nut
You may be able to hold the pulley with a tool called a python, it's like a rubber strap that works like a spanner, this way you don't have to bend any blades to remove the bolt on the pulley. Also worth checking the model no. of your alternator on eBay, as some are selling with a surprisingly low buy it now price, maybe even cheaper than the cost of new bearings?
how are the brushes? dont they need replacing sometimes? o well thanks for video.
Verynice work my favorite part
Nice video, I can not wait to repair my Alternator, May I ask you the codes ( letters ) of the 2 different bearings ? I want to buy bearings before I will open the alternator, thanks in advance !
Hi. very nice and useful video. does anyone know the indexes of these bearings? greetings
Good work 👍
Thanks for sharing such a great ...,.,.
Excelente video. Gracias.!
Gracias!
Muy buen video , en el idioma que lo veas lo entiendes , sin audio lo entiendes !!!!!
If the alternator whines when load is applied, Is that the rectifier or the diodes with the 3 wires sticking through the casing?
Did you also replace the contacts? Brushes ?
any link to the bearing puller? to remove from the casing?
Hi, Thanks for the video. Can the noisy bearing re grease or spray lithium grease?
Nope, usually when a bearing goes bad there is also wear on the components inside, so the damage is already done. Usually grease will not solve it, and I do not recommend it, because it will come out of the alternator and into the belts. Grease, oil and belts dont mix ;-)
100% amazing help.
bom vedeo e boa explicaçao!! tenho uma toyota hilux de 1988 e detectei que nao esta a cargar as baterias! como posso ver se o problema e do alternador ou de um rele que esta montado fora do alternador? sera que e o rele? havera forma de checar donde esta o problema de nao estar a cargar as baterias? cumprimentos desde noruega jorge
Many thanks and again good music.
On the back plate isn't there a little metal plate that goes on one of the three bolts on the back we're the screw goes. I got one on mine
Bom dia portuges U replaced the bearings what about the brushes diodes and voltage regulator/where to order parts from thanks
Good video my Denso alternater is smoking can worn brushes cause this thanks
There is a lot here that you haven't done correctly. The amount of oil in the bearing housing, the bearing installation - only ever hit the outer housing of the bearing when installing, treatment of the armature in the vice and initially the removal of the pulley nut. Buy yourself a battery or air operated impact tool.
Can u tell me what to do if this alternator is getting stuck or jammed ?
How to solve this issue ??
I changed front n rear bearing but still it's grinds from inner side
what is the socket size you use to push the bearing? 40mm socket? Thanks.
Thank you dear friend.
👍nice sharing my friend
Is this possible for a 4age 16v alternator from an aw11 mr2?
Hello.
I need to replace the bearings in the alternator on the Toyota Rav4 2009, 3.5l, 6 cyl
However, in Canada I can not buy bearings as spare parts for the alternator.
If you could give me information on where to get bearing sizes and where to buy them.
Regards and I am asking for helpful information
QUE VIDEO LINDO CARALHO!!
QUE ORGULHO TER SIDO FEITO POR UM PORTUGUÊS !!
I have an 05 camry the alt is whining. Does that mean bearing kit or do I need to replace the voltage regular too?
Regs don't whine. Bearings can. So can belts (slippage) although most would describe that as a squeal.
@@johnshaw5978 it's not a belt sound it was a roar that almost went to a squeal when you'd Revv up the engine. I replaces it with a new alt but I'd like to rebuild the old one so I wondered what kind of kit to buy. If I need the one that also has a new regulator.
@@johnwilkinson5718 bearings
Hello, i damaged the holding ring for the rear end bearing, would it cause any problem if I dnt use any? Thanks
Good man! 👍Thanks
where did you get teh bearings. What are the dimensions of the front and rear bearing in millimeter?
Good job man
@João Rocha da Silva: Bela obra!
Obrigado :-) Não sou profissional nesta área, mas lá me vou desenrascando...
great video
Valeu Joāo!
hello and thank you so much for your vidéo !!
do you know where to find the bearing dimensions and toyota code ??
i've a 3S-GE rev3 ( 175 hp) 1994 and don't find those infos...
many thanks
I have a denso alternator for 04 acura TL. it has a bad rear bearing, smaller bear, near slip ring, I can't get the bearing out, I can't use bearing puller because the fan assembly has this round ring right up to the bearing. I cant insert the puller to pull the bearing. Any Idea how to get it out?
excellent
after replacing bearings rotor is spining hard like something is holding him but there is nothing i check it ..is this normal
very informative
Anthony Kordenbrock
Music during assembly sounds like from Discovery's - How it's made)))
hehehe thanks Dima. BTW, I am putting the LSD rebuild on hold... I have something even better in store. It is on its way on a pallet from Japan :-D
Sounds like a 20v blacktop or GZE? are my guesses on a correct way?
Yes, something like that. Im planning a swap on my G6R. The 86 is stock and I intend to keep it that way :-)
You're a lucky, becasue in Ukraine we have to make customs clearance or something like that and imported engine can cost price + shipment + at least 3-5k$ for this "clearance" so we have to import them illegaly and it cost more that in other countries.. ( that's sad. I wish i could be lucky to get 20v blacktop for 1300$ with only 40-70r miles on it) but it;s impossible.
Damn, thats steep! Well, i hope everything goes well with the importing process of this particular engine. Portugal also has a picky customs, but mostly we pay the VAT over the invoice and some additional fees that are not that high... Lets see if I am indeed lucky...
Word of advice , purchase a electric or air operated impact tool !
Grande jogo pa. Gostei bastante!
good job
what is that funky music?
Bearings in my experience pretty rare. Usually brushes
Good Job
Thanks, I try my best! Glad you liked it :-)
Hey. You're awesome. I mean that.
You probably stripped the nut because WD40 is a lubricant, not a penetrating fluid, and it wouldn't be used for removal of stubborn screws. You should have tried PB Blaster or Seafoam, and give it a long time to work (maybe hours), not a few moments, as implied in your video.
Thanks Billy, I will try that next time :-)
Kroil is the best
sir how to get rebuild kit ?
my case odyssey 05
Good morning
thanks
Thank you.
Good video,,thnk q
No no dont put oil around a bearing it can spinn and ware out the housing. Anything you want a few drops of lock tight on the bearings.
Use a strap wrench on the pully, not the casing.
Hello sir, please can I get in touch with you?
Obrigado!
Zijn
er ringen aan de beide kant van de lagers
Porque não em português???
Hi sir congrats super dp
Good
Joao, I think you ought to clean the interior and exterior of the frame of the alternator with a sandblaSTING. iT DOESNT LOOK MUCH PROFESSIONAL¡
Yeah, don’t use the screw driver method. I broke the blades…. Now I have to get a new alternator
4:25 right after you say they come out easily the last one is a bitch to pull out
The only useful piece of information that you provided was what wrench to use on the nut. You casually left out how you managed to remove the bolts that fasten the alternator to the engine block. Judging by the clearance that your bottom bolt of the alternator has for the average type of socket set and then the gear to the bottom left of the alternator pully, I'd say that you had a hell of a time getting those two alternator bolts off. So how did you get the alternator off to begin with? Did you hoist the engine up or did you take apart the alternator from the pully and then proceeded to remove the last bolt underneath the alternator?? See that is the kind of useful information that people flock to RUclips for.
Too much oil you contaminate the winding and can cause insulation breakdown.
portimao forever)))
You mean for spec car ..mine totaky different
In Mother Country Alternator rebuild You!