You might not be an electrical engineer but you helped me in my EE senior design :) Thanks a lot for the thorough walkthrough and multiple revisions, as well as having links to the parts used!
This is a really good video. Very clearly explained, in a nice, even manner. At first I didn't think I wanted to watch a 20 minute video, but once it started, I didn't think twice about it
Appreciate you showing the simpler circuit (before the mosfet was added), most people skip that kind of stuff but it's very useful for understanding things!
@@MattInglot can i use Adriuno in place of costly PLC to manage a DIY project comprising of 4 dc outputs and 3 ac outputs (0.2 - 9 amp via ssr) and 7 dc inputs....using relay module ? (my plc ladder has 58 rungs in total )
@@anandjoshi8554 Yep. I'm not experienced with PLCs but Arduino can certainly control all this stuff. Just keep in mind that PLCs are very different than Arduino, again not experienced with them but my understanding is they are built to withstand harsh environments and be super reliable and all that.
Optocouplers are your best friend if going from digital electronics to power electronics, I'd look them 👍🏾🙂 Edit: they basically completely isolate the input signals from the output. It does that by converting electrical signals to light, then back to electrical signals. This means no voltage ot current spikes will damage low power electronics Note: With opto-couplers, you *don't* want to connect grounds or power sources to each other, otherwise you'll defeat the purpose of the chip.
When I bought my little pack of mosfets, I worked out that a relay that could handle the same current (70A) would probably cost a good bit more than the 10 I bought put together. Relays, of course, tend to have higher voltage ratings and I hear they're not too fond of PWM switching roles... 😁
To overcome the limited duty cycle of a solenoid just double the voltage capacity of the solenoid. In other words, on a 12 volt supply just use a 24 volt solenoid. As a builder of solenoid engines this video is great. Thanks a bunch.
Excellent presentation. Be careful using a solderless breadboard for this: Many are rated to 0.5 Amps, though there are some high quality ones rated to 2 Amps. As Sean Ocansey said in the comments, the next step is to use an optoisolator. Since you won't have to connect the grounds together, your sensitive Arduino electronics will be better protected from the spikey and noisy electromechanical circuit. Many of the solenoids in a pinball machine are switched on only briefly, but flippers are trickier. Since the player may hold the flipper up for an arbitrary amount of time, there's a risk of exceeding the duty cycle of the solenoid. So many (all?) pinball machines initially power the flipper at its full voltage when the player first presses the button, but then switches to a lower voltage if the player holds the button in. The full voltage gives the flipper the power to bat the ball, and the lower voltage is enough to keep the flipper up. At the lower voltage, the solenoid will generate less heat, so it can be kept on without exceeding the duty cycle.
Very educational and practical video considering that solenoids are also used in locks. Thank you for the detailed explanation and the schematic. This is a great electronics project.
The 10K from Gate to ground pulls the Gate down after the drive signal is released. if you use a resistor on the drive side, you get a potential divider. If that resistor is 10K, the Gate gets only half the drive voltage. Using 100 ohms puts the level much higher, making it turn on better. If the gate signal is being driven by a logic output, such as the Arduino, you may not _need_ either of those resistors, but it's a good idea to have them for "failsafe".
One concept that you might like to know about is opto isolation. This is where you don't want to commingle your power supplies which can keep you from blowing up your controller due to large switching currents. Use an optoisolator. Your micro turns on a LED which then turns on a light sensitive transistor in the separate circuit.
@dylans voice it depends upon what you are thinking of in terms of switching currents . If you mean external circuits that are not connected to the circuit and power supply then bypassing the power lines and shielding the board within a metal enclosure will probably work. If the anticipated noise is due to induced ground currents then the way to proceed is to insure that there are no non isolated connections to the power to the external controls and that the ground for the controller is only connected to the power supply directly.
Wow this video took off more than I expected. Schematic is now in description. If I missed any detail from the video in it someone let me know ;) It's been a while!
Hi!, just thought I'd say what a good video it is! you explain the circuit clearly and simply, not like some people that just rush through it without properly explaining. :)
Would love to know how it works out for you. If you just want to test actuations, you might actually prefer a servo. But on the other hand, solenoid could be great for really testing durability. Think people mashing buttons on an elevator! I would put some sort of soft tip on the plunger of course, and have the plunger touching the button in the depressed state so it doesnt ram into it.
Hey Matt great video!! I found this video through search and I’m looking to build a project using a sollinoid. I saw that you have a fairly new channel so I thought I’d help you out with a comment, like, and a new subscriber! Great job man!
The one thing you need to explain about Voltages is that is is basically a -potential difference-. So 12V can be the difference between 0 and 12, but also the difference between 100 and 112. Your Arduino will be fried by 100V, so to make sure that your negative side of your 12V potential difference = 0, and not some random value, you ground everything together. Hence the name common ground.
@@MattInglot will do! I have a suggestion for you though - you should make project tutorials and go really in depth with them. I’ll be starting to make some in the future when I can have my workbench spot finally, but until then, I gotta wait cause I can’t use any of my tools. People want to see things that they can make and copy. Also you can try to remake popular products!
Excellent and clear spoken diagrams explanations, without anoying music, easy to understand, many thanks for posting `! PLease explain how to retain the solenoid for 3 seconds ? Now its acting more like pulse latching
@@MattInglot On my channel I recently built a flip top tool cart. I am trying to automate the flipping of the cart. I am going to use solenoids as the locking mechanism.
I want to make A mini jackhammer out of a push pull solenoid. I don't know how to make it work like a jackhammer?? like 'Push and pull' is one cycle like a jackhammer. I have been trying to find out how for like 4 days now. is there a little pcb board that can do this or control it?
Thanks for the great explanation video. From my limited understanding, the main danger I see here, is the danger of having an issue on the arduino side that leave the digital pin on for the solenoid. (Could be a programming error, or something that crash at the wrong time) There is nothing then to shut it down and prevent it from over heating.
Awesome video! Thanks for the details. I am currently trying to learn how to wire and code something similar, except I want to reduce the current at end of stroke using the PWM outputs on my control board. Ill look around your channel! I can hopefully find something because it's a head scratcher for me using a 2 pin solenoid. Basically just hoping to hold the solenoid (and flipper bat) in its extended position without burning out the coil. Thanks again!
You can use PWM to change the strength of the magnet which would in turn affect the velocity of the plunger, and maybe more importantly, how much force it hits things with (in the case of an application like a pinball machine flipper). Don't expect any fine control over this though! If you want that, you should really be looking at a stepper motor instead. Solenoids are great when you need that little bit of very sudden (and strong) movement. But you frequently see people trying to use them in places where a stepper is the better solution (and vice versa). Why controlling velocity of a solenoid is a funny thing: The acceleration changes with how much of the plunger is within the magnetic coil vs outside of it, because then more of the plunger has a magnet acting on it, and you get exponentially more force. Acceleration determines the change in velocity. So if the acceleration gets faster and faster as more of the plunger enter the magnetic coil, the velocity also gets faster and faster as the plunger enter. Put in simpler terms, when the solenoid activates, the plunger is initially moving very slowly (relatively speaking) and by the time it plunges all the way, it's moving extremely fast. It's not a linear speed. You can see force charts for some solenoids in their datasheet. Don't think you can see acceleration or velocity normally, but it's going to be a similar idea. All the action happens towards the end of the plunge.
It seems the final schematic that you posted a link to calls for two resistors but I only see one here when you are using the arduino board. Am I missing something?
It's explained in the errata section of the video description, but tl;dr that 150ohm resistor is recommended and something I worked out after shooting the video.
Technically yes, but uhh what are we vibrating here? When I think "vibration" I think either a speaker, or a I think of a DC motor with an uncentered mass attached to it that vibrates when it spins. Solenoid will bang around until the frequency exceeds how quickly it can retract, but I'm having trouble picturing where that would be desirable.
Of course you can. Whether it's practical or not is a different question. It's going to need to be a pretty big and powerful solenoid, especially if you're hooking the weight directly to the plunger because you've got no mechanical advantage. I have no idea what your application is, but there's a good chance you would be better served by something else like a servo motor which will be a fraction of the cost and size to lift 5kg (at the disadvantage of taking a lot longer to lift the load).
I was always told that common practise was to add a fuse on the positive side, But it would work on the negative . In fact fuses on both side would be ok too. Can you tell me why you use the negative? On a vehicle I use a standard Relay as a switch, They are rated up to 30 Amps 12 volts. yet only need less than 1/2 amp to operate.
I hate to say it but it's what was convenient at the time with the layout on the breadboard/it was an afterthought. That's all. If I had to do it again I would put it on the positive side, as this would be clearer, especially on schematics. And in some cases which you choose matters (see automative wiring). Also note that this circuit is DC. In AC there is no +/- and you very much want to put the fuse on the hot side to ensure parts of the circuit before the fuse aren't live (disclaimer: don't mess with mains voltage).
@@MattInglot Thanks for the reply, Good job by the way. Just fitting a new solenoid to my RV fridge (it opens the gas valve until the main valve senses the flame, It's an aftermarket item (They don't sell the original anymore) so I'm fitting a relay and diode to bring it up to standard. Thanks for your help and Hi from France :-)
Assuming you don't need the near-instant actuation, a stepper motor would do a great job. Or even a regular motor with the right gearing. See how smart locks work on doors.
Haha! That would be interesting to try. And to compare using solenoids vs servo motors for this. I'm not really convinced that the solenoid's ability to deliver energy rapidly is very beneficial here. Compare that to a servo which would operate more slowly, but can leverage tremendous mechanical advantage.
i want to activate pin 8 via wifi. I found that the esp32 has a wifi function but i dont know how to hook it up to the arduino. Is there any simple tutorial for this?
An ESP 32 is also a micro controller, just like an Arduino. So if you want to "activate" something with ESP32, there shouldn't be a need to also involve an Arduino. Unfortunately helping you here is out of scope of the video but hopefully that clarifies things.
@@MattInglot thanks alot. I found a webserver scrip wich gives you the option to activate a pin, so i dont need any other code than that and the ciruit. But still without this video i wouldnt even think of anything like this! :)
Hey Matt! Super solid video but I was wondering why you ended up switching the MOSFET in your final iteration from the first one. Would your circuit still work with the original MOSFET?
Hey Jason I do explain that in the video. The issue is if you want to use the MOSFET with an Arduino, you need to be able to switch the gate with the 5V output of the MOSFET. So I switched in a "logic level" mosfet that is capable of being driven with a lower voltage.
I connected it the same way but its not following the code it only actuates and stays in 1 place and once i cut the connection it then only goes back can anyone help why its not following the code?????
Not very large! I've only found the small blue ones like you see in the vid. I got my big bois off Digikey. I'm sure there are other suppliers as well.
so couldn't you just use a 12v LED( light emitting Diode) instead of the rectifying diode? Since all that it is doing is stopping the voltage from back feeding. If thats possible to use an LED. Then I assume just use it like normal that when you push the button the LED will turn on, while also stopping the reverse flow of electricity?
As an experiment to see if you can catch it lighting up when power is stopped? Sure, give it a try and let us know what happens. As a practical thing? It's not something you'd want to do. Regular diodes are cheaper and actually meant for this purpose. Stuff that could be a problem with using LEDs: - LEDs have very low current limits. You could burn it out either immediately or over time. - LEDs have fairly low reverse voltage, so that could be a problem very quickly, and if you hit that threshold then you'll probably burn out the LED instantenously. - You mention a 12V LED, so that implies several LEDs in series to get 12V. I have NO idea how that affects the scenario and would love to find out. Alas I think it means nothing good :D Give it a try and let us know!
Quick question if I wanted to run a solenoid that would ring a bell like a fire alarm how would I do that? Also being able to change the Hz frequency up and down to adjust the bell hits slower or faster. A variable power supply would be used so the voltage can be increased to make the bell hits harder and louder.
What a great question. You got me so curious about this that I looked up how those old school fire alarm bells work and you're not far off with your idea. I managed to find this article: www.aplustopper.com/working-of-an-electric-bell/ It looks like these types of bells already use electromagnets to function (remember, that's really all a solenoid is...), and there are different ways of making that mechanism work. What I love about the one in that article is that it naturally creates the ringing by interrupting the circuit when it the hammer hits the bell, which allows it to retract back, which closes the circuit and activates the electromagnet, which brings the hammer back to the bell, and so on. You could very easily swing a hammer with a solenoid in a similar way. Just have the hammer pivot on something, so that when the solenoid pulls down the hammer swings and hits the bell. You could then vary the frequency with how often you pull down the solenoid (eg. fire it once a second, twice a second, etc). You are correct that you can control the strength of the hit by varying the voltage, however you don't need a variable power supply. If you're using an Arduino like in my example, just make sure you connect the solenoid to a PWM pin, then use Arduino PWM functionality to simulate the voltage change (eg. 50% PWM would effectively give you half the voltage). Note that you won't necessarily have a linear correlation between PWM frequency and volume so if you're building a volume knob or something you will have to experiment with how to map the PWM frequency to the desired volume. Keep in mind that the purpose built fire bell mechanisms like the one I linked have a very small amount of travel, which allows them to ring at a (relatively) high frequency. If you buy an off the shelf solenoid, like the ones on Amazon, those things take a (relatively) long time to plunge back up after plunging down so that will limit the frequency. That should really be it. Be sure to watch the video because that Arduino circuit is exactly what you need, and the rest is just building the mechanical piece. Good luck!
So im using a ardino to fire a solinoid 15 ms on 30ms off repetivly at the comand of a button Qestion is is it benificial to use a diode in my solinoid circuit off the mos fet and is it still desirable to ground out the mosfet gate.
Yes. You'll probably get away without the grounded gate if you have the Arduino hooked up to it, but I don't see a reason not to ground it. If you leave the diode out, you will potentially fry your Arduino.
Great video! And guess what! I'm using this info for my own pinball machine that iv'e been working on for over a year! Oh and for flippers, most pinball machines have a dual wound solenoid to provide max power at first then lower curent for the hold. this prevents long heating of the coil. I can't however find dual wound solinoids anywhere. This is one reason why I have used mechanical flippers until now. Have you run into that problem yet or found a solution?
If you are building a full size pinball machine then by far the best option would be to buy your coils from pinball parts stores since then you would get the double wind (assuming you buy coils from flippers that use this system). Another option if you can't do that is to use PWM to reduce current when the EOS switch is hit.
I'm going to try the middle circuit with a 12v 8A dc supply to power a 12v 8A solenoid, apart from changing to a bigger fuse do you think I need to change any other component on the circuit? :)
You'll want a bigger power supply than 8A for that. Breadboard won't work either, you'll need to solder or use appropriately rated connectors. Watch the gauge of your wires. Check every component to make sure it's rated (well above) 8A. If you don't need to run off 12V, this sounds like a job better suited for 24V. You would need about half the current with the right solenoid. Might make your life easier.
@@MattInglot oh nice one! Ok well probably won't go that route then. Actually I was thinking of using an airsoft lipo battery 2250mAh 11.1V and just using a 12v 8A solenoid to power it, what do you think? I mean your solenoid looks quite powerful and that's just a 12v 2A one isn't it? I just need to add some recoil to a fake rifle really.
@@KobraVR cool idea. If the battery can supply 8A then sure, I don't see why not. Having lower voltage shouldnt be a problem (just slightly weaker). You will have to experiment to see what gives you a "good recoil". I bet if you look online you will find someone has already tried something like this and you can see what works (or why it doesnt work maybe)
@@MattInglot I think im going for an 11.1v lipo battery 2250mAh 35C to power a 12v 2A solenoid. That way I think I can pretty much your 2nd circuit and components without having to worry about changing things by much. I'll have to see if the 2A solenoid is powerful enough but yours looked pretty snappy in the video. Thanks for getting back to me I'm excited to test things out! :)
@@MattInglot sorry to pick your brains a bit, if I used a 12v DC mains supply at 2A would that be OK to drive the 12V 2A solenoid? I'm a bit confused as you said for the 12v 8A solenoid I would need more than the 12V DC 8A mains to run it?
Yes FQP30N06L has a gate threshold voltage of 2.5v so you can power it with 3.3V. All of these parts have datasheets, so that's where you can get this info. Let's pretend you didn't have a part number from me that already works for your purpose though... you can find parts that meet your characteristics using the Digikey or Mouser search features. For example if you go into mosfets you can specify all sorts of characteristics to filter down to what you need (tip: you also want to filter by in-stock, and then usually sort by price). It looks intimidating at first but if you really put in what you want, you can narrow things down to much fewer options really quickly. ChatGPT can also be helpful for part numbers, but never trust anything it says without verifying against datasheets.
An LED is a diode, but it's not a diode that has the right specifications to make it an effective fly back diode. For example, most LEDs have a pretty low reverse voltage (let's say 5v). Since the flyback diode is wired in reverse, it means that reverse voltage is very important because let's say it's a 12V solenoid, you've gone far past the reverse voltage and blown up your LED. Always easier to learn by doing though and LEDs are cheap, so experiment with it, blow up a few, and see what happens!
Actually I just checked the Newton rating on my solenoid it says 5newton. Which means it can lift up 500grams(5×100grams=500g).So if my project table is like 1.5 kg(1500g) I would need minimum 1,500g÷100g/n=15Newton . I need at least 3 times stro ger solenoid to make it work properly.
hi, i bought some IRFP260Ns before watching this vid, and im having trouble getting the program to work. Im starting to worry that it might not be logic level capable, but i dont know how to find out for sure
I wanted to use these on my diy drywasher, but seems like they were too small for my project. I wanted to hang a shaker table from the solenoids and turn solenoids on and off at high frequency to create vibration, by liftingthe table up and down. But looks like the shaker table is too heavy for them to work properly. I used 6v and 12 v ,but 12v solenoid was too weak and i connected 12v source to the other 6v solenoid and it heated up very fast ,but I was able to get some motion, but my ampmeter showed 6amps. So 6×12=72 watts. This got me confused, because I thought instead using a motor hanging the table from solenoids will be more efficient ,but looks like it's not... not sure
Solenoids are great for short bursts of motion or force. Something like continuous vibration can be done of course, but feels like barking up the wrong tree. At minimum you will need a much stronger solenoid as you've found out. A big problem is that you can get much better performance out of a solenoid if it doesn't need to be continuously operating. You experienced this with your 12V to 6V solenoid experiment. If you had an application where that solenoid had to impart a lot of power but fire infrequently, using it this way would be totally legit.
hi and thank you...i'm not sure if i'm seeing this wrong, having trouble following the breadboard wiring...the flyback diode should t not be in parallel to the solenoid? also the fuse should it not be on the input rather than the output?
The diode polarity should be opposite that of the solenoid, else you basically create a short (sorry I THINK that's what you are asking). As for the fuse, take a look at the schematic posted in the description. When the fuse pops, does it create an open circuit?
First off- This video was very helpful! I am building a visual pinball controller and am using solenoids for haptic feedback. I built the circuit as you showed last night and everything worked great... with one small exception. As per your video description, there isn't a resistor between the arduino pin and the gate. I added a 100k resistor (closest I had to a 150k) and the circuit didn't seem to work. However, removing the resistor (like you have shown in the video) and everything seems to run great. How important is adding in a resistor between the arduino and the gate? Perhaps I installed it wrong or the 100k wasn't what is needed?
@@MattInglot Doh! Of course! Thanks and I will do that. One more question.. I currently do not have a fuse installed either. Can that be any 3amp fuse or something? and do I just solder wires to both ends? Sorry- I'm still a bit new to hobby electronics (I know just enough to be dangerous)
@@eric3dee You want to size it to the load. You can calculate that, or measure the current the circuit actually draws with a multimeter. Then you want a fuse that's 1.25-1.5x that. I should add (and I don't think I mentioned this in the video), that a slow blow fuse is probably your best bet to avoid the sudden inrush current from blowing it.
I have a question. I bought 12V/2A solenoid and have 8 AA batteries to provide 12V. Can I connect batteries directly to solenoid and solenoid will only pull max 2A as its designed, or will it take all the power it can causing it to overheat. Would I need to put some resistors on the batteries first or just directly 12V to solenoid would be fine?
A power source being able to supply MORE current than your load needs is not a problem. The solenoid has a certain resistance, which in turn determines how much current it will draw thanks to Ohm's law. So the load determines the current drawn, not the supply. Of course you're probably asking this because you've seen resistors being a requirement for using LEDs, because otherwise the LED WILL blow itself up very quickly. That's because diodes (including LEDs) have very little internal resistance and will happily burn themselves out immediately without a resistor to limit the current. So if you hook up your LED without a resistor, you have a load with very little resistance and hence it will draw a lot of current (again Ohm's law comes into the picture), and the LED will blow up. Your problem might be that 2A is a lot of current for a AA battery. You can actually look up datasheets for batteries and see what that looks like, but 2A seems like a lot. At the very least I would expect it to discharge quickly. THAT said, if you are only pulsing the solenoid for short periods, it may be totally fine and you may still get adequate performance.
The resistor numbers aren't particularly critical in this case. About 10K from Gate to ground pulls the Gate down after the drive signal is released, and the 100 ohm from signal to Gate is just a little protection. If the gate signal is being driven by a logic output, you may not need either of those resistors.
There are fuses that already come with leads attached, and there are also fuse holders that will fit in a breadboard. That said, the breadboard is for experimentation and testing, but if you want something more permanent you *will* want to solder everything onto perfboard.
@@MattInglot Hi, its me again. I have troubles powering solenoid with Arduino. It seems there isnt enough power. I have 12V 2A power source. I dont use resistor on pin and gate to Arduino. What would happen if I changed 10k resistor for 1k?
Great video! Love pinball machines and stuff like that. I've got a question about controlling an automotive solenoid remotely. Let me know if you have a min to answer a question
The circuit demonstrated only works with DC. You can't directly control AC with a mosfet. Your best and simplest bet if you don't need PWM control over the solenoid is to use a relay module. If done right, that will have the added benefit of isolating the two supplies. There are videos by other people on YT that demonstrate how to do this with a relay. Good luck!
@@MattInglot Thank you. I was using garbage cheap relay boards from Ebay. They backfed noise all through my setup and reset the board with each firing of the solenoids. I tried better (branded) relay boards and everything is working great now. My trees will finally get consistent water!
@@drsnooz8112 sounds like they may have been missing a flyback diode. That's also why a board, rather than just a bare relay, is important (in case anyone else is reading this). You can't just connect the Arduino directly to the relay and expect it to work reliably. There are nuances to controlling relays. Glad your plant watering system is working.
Great video. Thank you. I’m a complete newbie to arduino, but I’m working on a project that would require the solenoid to be activated by a remote control, is that something that is possible? Thank you.
Absolutely! You can control a solenoid with an Arduino, and you can send signals to an Arduino via remote control, therefore you can control a solenoid via remote control. May options for this. I believe the various Arduino kits come with an IR remote. Personally I think the nrf24l01 modules are a better option, but they are a little more advanced to get working correctly. Good luck.
Hello Matt, your video is awesome. Thank you for sharing. One thing, with this set up, do you think we can actually control the speed (force) of the solenoid?
Thanks Jean. You absolutely can, that's actually one of the benefits of this setup (as opposed to using a relay). Look up PWM - Pulse Width Modulation. This is what modern pinball machines do to allow the operator to adjust the strength of the flippers for example.
You could swap out the mosfet with a relay *module* pretty easily (the kind where it's a PCB with the relay and other components already on it and you can just hook it up directly with microcontroller). You can't swap all that just with a bare relay though, since there's a few components needed to drive a relay correctly with a microcontroller. You also still want the diode to avoid damaging anything.
Assuming you meant to write BJT. Yes you could, assuming you are using a BJT that is rated for your load and you build an appropriate circuit. You should google the differences between BJTs and MOSFETs though. You may come to the conclusion that you'd rather use the mosfet in this scenario
Thanks for the clear explanation! Would it be possible to connect the Arduino as well as the solenoid to the same power supply (in parallel), such as a simple battery holder? Because that way the voltage comes straight from the source itself, instead of going through the Arduino first, while still connecting both grounds.
I don't see why not. Give it a shot and if you run into issues go down the troubleshooting rabbit hole until you figure it out. One thing I'd wonder about is voltage drop on the battery when firing the solenoid, and needing to throw some capacitors in to counteract that. I may play around with this one day with my scope hooked up, just haven't had a chance to do it. If I do it I'll make a video. But for sure play around, have fun, see what you learn.
Yes you absolutely can, just note that the way you would hook that up will be slightly different (and ideally use one of those little relay boards so you don't need to worry about powering the relay correctly).
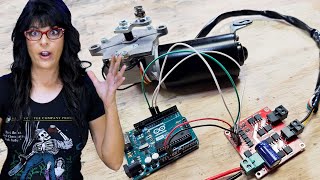
No worries, it's tricky when you don't know the name of something! This is a screw terminal, I'm just using it to connect the positive and negative wires from my power supply to the bread board. All it does.
@@jonathansiskind8315 If you search glass fuse with axial leads you should find them. Or get fuse holders which are actually the better solution for anything more permanent.
Thanks for sharing! Humbly asking: how comes you fit a 3A fuse and a solenoid that will draw 2A on a breadboard that is probably not rated for those values? (At least you didnt mention the specs).
Thanks. You want the fuse to blow as a protection measure if the load on the circuit is higher than expected, which most likely means something has shorted out and will draw all the current the power supply can put out (until the supply's own fuse blows). So if we assume that solenoid was indeed 2A, you want something higher. I eyeballed 3A because it gives the margin of error, but should still blow if the circuit has a serious fault (again almost certainly a short because something got plugged in wrong or loose). The goal is protect the power supply and possibly prevent a fire if you're using a supply that can put out way more current than you need (think those DIY ATX ones without current limiting). That said, fuses are complicated: ruclips.net/video/WG11rVcMOnY/видео.html As for the breadboard: it was there to demo only, yes I should have pointed it out. Basically you might not get full power from your solenoid if you use a breadboard because of the high resistance it has.
Hi, How could you make it to oscillate at a certain frequency (like ultrasonically) ? Would be an interesting idea to make an ultrasonic knife out of it. Thanks ! 😇🤗 Best Regards,
You can certainly use Arduino to pulse it very very quickly and have some fun figuring out how fast you can make the solenoid go. BUT... I doubt you'll get even close to ultrasonic. I looked it up and ultrasonic is considered above 20khz so let's assume you want to hit 20khz. That means that the solenoid plunger has to plunge and retract 20,000 times per second. That means each cycle of plunging and retracting has to happen in just 0.000050 seconds. That plunger needs to MOVE, and it can't move very far. It would be interesting to see how fast you could get it moving if you start playing with the variables: I would try a very strong spring, and block the plunger from moving out all the way (maybe like 10% of the normal travel distance). That way it's always mostly inside the coil (much faster acceleration), and also doesn't have to travel very far.
I wouldn't hesitate using this especially for a hobby purpose. If this is being used for commercial use then my answer is "check the manufacturer's datahsheet"


You might not be an electrical engineer but you helped me in my EE senior design :) Thanks a lot for the thorough walkthrough and multiple revisions, as well as having links to the parts used!
That makes me really happy to hear! Good work getting through your project! I'm glad the video helped.
This is a really good video. Very clearly explained, in a nice, even manner. At first I didn't think I wanted to watch a 20 minute video, but once it started, I didn't think twice about it
Thanks!
Appreciate you showing the simpler circuit (before the mosfet was added), most people skip that kind of stuff but it's very useful for understanding things!
Glad it helped!
@@MattInglot i am using three power supply 5, 12 and 24 vdc, should i connect all 0 ve /grd together, to be given to the diffrent powered dc outputs ?
@@MattInglot can i use Adriuno in place of costly PLC to manage a DIY project comprising of 4 dc outputs and 3 ac outputs (0.2 - 9 amp via ssr) and 7 dc inputs....using relay module ? (my plc ladder has 58 rungs in total )
@@anandjoshi8554 Yes absolutely. If using multiple supplies in the same circuit, tie the grounds together.
@@anandjoshi8554 Yep. I'm not experienced with PLCs but Arduino can certainly control all this stuff. Just keep in mind that PLCs are very different than Arduino, again not experienced with them but my understanding is they are built to withstand harsh environments and be super reliable and all that.
Optocouplers are your best friend if going from digital electronics to power electronics, I'd look them 👍🏾🙂
Edit: they basically completely isolate the input signals from the output. It does that by converting electrical signals to light, then back to electrical signals. This means no voltage ot current spikes will damage low power electronics
Note:
With opto-couplers, you *don't* want to connect grounds or power sources to each other, otherwise you'll defeat the purpose of the chip.
optocouples dont take much amps, because the optic part of them burns out. but they are cool.
I have to be honest man: this video is one of the best videos for describing a project for arduino! I really really have to say: Thank you man!
Wow, I always see someone using a relay for this and honestly never thought of using a MOSFET. It was a great video, you deserve more subscribers.
Thanks so much I really appreciate it! More vids are coming soon too.
When I bought my little pack of mosfets, I worked out that a relay that could handle the same current (70A) would probably cost a good bit more than the 10 I bought put together. Relays, of course, tend to have higher voltage ratings and I hear they're not too fond of PWM switching roles... 😁
You helped me in my BME senior design. Thanks for the thorough walkthrough and multiple revisions and tips. Excellent content, greetings from México!
That's really wonderful to hear! Nice work!
This is what I've been looking for! Best video on RUclips for using solenoids with Arduino. Thanks a lot!!
To overcome the limited duty cycle of a solenoid just double the voltage capacity of the solenoid. In other words, on a 12 volt supply just use a 24 volt solenoid.
As a builder of solenoid engines this video is great.
Thanks a bunch.
Thanks and great tip!
Excellent presentation.
Be careful using a solderless breadboard for this: Many are rated to 0.5 Amps, though there are some high quality ones rated to 2 Amps.
As Sean Ocansey said in the comments, the next step is to use an optoisolator. Since you won't have to connect the grounds together, your sensitive Arduino electronics will be better protected from the spikey and noisy electromechanical circuit.
Many of the solenoids in a pinball machine are switched on only briefly, but flippers are trickier. Since the player may hold the flipper up for an arbitrary amount of time, there's a risk of exceeding the duty cycle of the solenoid. So many (all?) pinball machines initially power the flipper at its full voltage when the player first presses the button, but then switches to a lower voltage if the player holds the button in. The full voltage gives the flipper the power to bat the ball, and the lower voltage is enough to keep the flipper up. At the lower voltage, the solenoid will generate less heat, so it can be kept on without exceeding the duty cycle.
Lots of great points thanks!
Thanks, this was really helpful!! Also probably the best intro on any RUclips video I've seen!
Thank you!
Very educational and practical video considering that solenoids are also used in locks. Thank you for the detailed explanation and the schematic. This is a great electronics project.
Thank you so much!
The most complete and easy to get explination I've seen,thanks
Thanks!
Hi Matt, thanks for this video. This helped me a lot with my newest project.
Finally, my issue is solved with the solenoid, all thanks to you! You got a new subscriber and lots of respect
Nicely done!
My GOSH! your presentation skills are Awesome.. Please don't ever stop what you're doing
Thank you so much!
The 10K from Gate to ground pulls the Gate down after the drive signal is released.
if you use a resistor on the drive side, you get a potential divider. If that resistor is 10K, the Gate gets only half the drive voltage. Using 100 ohms puts the level much higher, making it turn on better.
If the gate signal is being driven by a logic output, such as the Arduino, you may not _need_ either of those resistors, but it's a good idea to have them for "failsafe".
That's a great point.
One concept that you might like to know about is opto isolation. This is where you don't want to commingle your power supplies which can keep you from blowing up your controller due to large switching currents. Use an optoisolator. Your micro turns on a LED which then turns on a light sensitive transistor in the separate circuit.
100% That's a good approach too.
@dylans voice it depends upon what you are thinking of in terms of switching currents . If you mean external circuits that are not connected to the circuit and power supply then bypassing the power lines and shielding the board within a metal enclosure will probably work. If the anticipated noise is due to induced ground currents then the way to proceed is to insure that there are no non isolated connections to the power to the external controls and that the ground for the controller is only connected to the power supply directly.
@dylans voice plenty fast for this application. Look at the data sheet for the one you choose for performance data.
Good vid btw, a bit of constructive criticism, I'd try to draw diagrams or Schematics to help explain what you're doing 👍🏾
Thanks Sean. Yes that's a good idea, I hope to do this at some point.
@@MattInglot If you provide the schematics i'll subscribe to your channel :D lol
thanka for the video tho great stuff!
Wow this video took off more than I expected. Schematic is now in description. If I missed any detail from the video in it someone let me know ;) It's been a while!
Hi!, just thought I'd say what a good video it is! you explain the circuit clearly and simply, not like some people that just rush through it without properly explaining. :)
Thank you kindly! It feels risky putting up a 20 minute explanation to something that others explain in 10 so this is reassuring to hear.
Excellent video. I need to make a button pusher for a durability test. This will help if I decide to do it this way.
Would love to know how it works out for you. If you just want to test actuations, you might actually prefer a servo. But on the other hand, solenoid could be great for really testing durability. Think people mashing buttons on an elevator! I would put some sort of soft tip on the plunger of course, and have the plunger touching the button in the depressed state so it doesnt ram into it.
Hi Matt, it's a fascinating project... and you are an amazing teacher!
Thank you!
Very good explanation and demo of the circuit. Should mention that the MOSFET is a type of transistor.
Yes good point! Thank you!
Awesome easy to follow tutorial. And great humor at the very beginning😂😂
You're a hero. Got my valve working now. Thank you
Hey Matt great video!! I found this video through search and I’m looking to build a project using a sollinoid. I saw that you have a fairly new channel so I thought I’d help you out with a comment, like, and a new subscriber! Great job man!
Thanks so much that's really awesome of you. What is your project?
Thank you very much Matt. Appreciate you going through everything step by step.
Thank you :)
Thx, great tutorial that highlights important aspects that I might have missed otherwise.
Great job Matt, clear explanations, did not felt like a 20 min video.
Thanks that's really appreciated!
The one thing you need to explain about Voltages is that is is basically a -potential difference-.
So 12V can be the difference between 0 and 12, but also the difference between 100 and 112.
Your Arduino will be fried by 100V, so to make sure that your negative side of your 12V potential difference = 0, and not some random value, you ground everything together. Hence the name common ground.
It was a pleasure to watch this video and to listen to your clear explanations. Thank you!
Your channel is underrated :( you make great videos and only have a small amount of subscribers
Thanks kindly! I think it's my fault for being so slow with videos but yes please subscribe and more content will come :)
@@MattInglot will do! I have a suggestion for you though - you should make project tutorials and go really in depth with them. I’ll be starting to make some in the future when I can have my workbench spot finally, but until then, I gotta wait cause I can’t use any of my tools. People want to see things that they can make and copy. Also you can try to remake popular products!
@@realdenzity2144 Video on my dog collar light project is coming out soon. That's not too far from what you describe.
Excellent and clear spoken diagrams explanations, without anoying music, easy to understand, many thanks for posting `! PLease explain how to retain the solenoid for 3 seconds ? Now its acting more like pulse latching
This really helped me understand how apply the use of a transistor!
Awesome, I'm so glad to hear :D
This is exactly the video I needed for my project. Thanks!! 🙏
Awesome! What are you building?
@@MattInglot On my channel I recently built a flip top tool cart. I am trying to automate the flipping of the cart. I am going to use solenoids as the locking mechanism.
@@FirthFabrications Cool! That sounds like a great use for one.
I want to make A mini jackhammer out of a push pull solenoid. I don't know how to make it work like a jackhammer?? like 'Push and pull' is one cycle like a jackhammer. I have been trying to find out how for like 4 days now. is there a little pcb board that can do this or control it?
you deserve more subs my man
Thanks I appreciate it :)
Great explanation, really liked the video
Thanks so much!
I liked the video, thank you for sharing your research. Subscribed.
Thank you!
Thanks for the great explanation video.
From my limited understanding, the main danger I see here, is the danger of having an issue on the arduino side that leave the digital pin on for the solenoid. (Could be a programming error, or something that crash at the wrong time)
There is nothing then to shut it down and prevent it from over heating.
Yep. Mosfet could fail as well and cause the same issue. Something that does happen on pinball machines.
Your explanations are so clear. Thank you.
Thanks so much, glad it helped!
Awesome video! Thanks for the details. I am currently trying to learn how to wire and code something similar, except I want to reduce the current at end of stroke using the PWM outputs on my control board. Ill look around your channel! I can hopefully find something because it's a head scratcher for me using a 2 pin solenoid. Basically just hoping to hold the solenoid (and flipper bat) in its extended position without burning out the coil. Thanks again!
Excellent video, man.
Thank you!
"stop hitting yourself Arduino"
“stop hitting yourself Arduino”
Hi, mine wasn't working until i removed the resistor from 1st pin of mosfet to ground. Thanks for your help.
This is great. Do you have any video's on how to vary the velocity of the solenoid?
You can use PWM to change the strength of the magnet which would in turn affect the velocity of the plunger, and maybe more importantly, how much force it hits things with (in the case of an application like a pinball machine flipper).
Don't expect any fine control over this though! If you want that, you should really be looking at a stepper motor instead. Solenoids are great when you need that little bit of very sudden (and strong) movement. But you frequently see people trying to use them in places where a stepper is the better solution (and vice versa).
Why controlling velocity of a solenoid is a funny thing:
The acceleration changes with how much of the plunger is within the magnetic coil vs outside of it, because then more of the plunger has a magnet acting on it, and you get exponentially more force. Acceleration determines the change in velocity. So if the acceleration gets faster and faster as more of the plunger enter the magnetic coil, the velocity also gets faster and faster as the plunger enter.
Put in simpler terms, when the solenoid activates, the plunger is initially moving very slowly (relatively speaking) and by the time it plunges all the way, it's moving extremely fast. It's not a linear speed.
You can see force charts for some solenoids in their datasheet. Don't think you can see acceleration or velocity normally, but it's going to be a similar idea. All the action happens towards the end of the plunge.
It seems the final schematic that you posted a link to calls for two resistors but I only see one here when you are using the arduino board. Am I missing something?
It's explained in the errata section of the video description, but tl;dr that 150ohm resistor is recommended and something I worked out after shooting the video.
Can these solanoid used to make a vibration? Like keep on for 20ms and off for 20ms. Repeat it continuously
Technically yes, but uhh what are we vibrating here? When I think "vibration" I think either a speaker, or a I think of a DC motor with an uncentered mass attached to it that vibrates when it spins. Solenoid will bang around until the frequency exceeds how quickly it can retract, but I'm having trouble picturing where that would be desirable.
This video was insanely helpful. Thanks so much!
Very glad to hear!
Can we make a solenoid which can lift around 5kg with the same pull push solenoid but with stroke length of 150mm
Of course you can. Whether it's practical or not is a different question. It's going to need to be a pretty big and powerful solenoid, especially if you're hooking the weight directly to the plunger because you've got no mechanical advantage. I have no idea what your application is, but there's a good chance you would be better served by something else like a servo motor which will be a fraction of the cost and size to lift 5kg (at the disadvantage of taking a lot longer to lift the load).
I got the schematic. THANK YOU!!!
thanks i'm just making a replacement circuit for my safe and this is exactly what i was looking for thumbs up and you got a new subscriber.
Glad it helped!
Hello! I have a question.. I got my hands on a IRF520 module, can it do the work for me if I add a diode?
I was always told that common practise was to add a fuse on the positive side, But it would work on the negative . In fact fuses on both side would be ok too. Can you tell me why you use the negative?
On a vehicle I use a standard Relay as a switch, They are rated up to 30 Amps 12 volts. yet only need less than 1/2 amp to operate.
I hate to say it but it's what was convenient at the time with the layout on the breadboard/it was an afterthought. That's all. If I had to do it again I would put it on the positive side, as this would be clearer, especially on schematics. And in some cases which you choose matters (see automative wiring). Also note that this circuit is DC. In AC there is no +/- and you very much want to put the fuse on the hot side to ensure parts of the circuit before the fuse aren't live (disclaimer: don't mess with mains voltage).
@@MattInglot Thanks for the reply, Good job by the way. Just fitting a new solenoid to my RV fridge (it opens the gas valve until the main valve senses the flame, It's an aftermarket item (They don't sell the original anymore) so I'm fitting a relay and diode to bring it up to standard. Thanks for your help and Hi from France :-)
@@SlimTortoise awesome to hear :)
What component would you use if you want the latch to travel a much longer distance?
Assuming you don't need the near-instant actuation, a stepper motor would do a great job. Or even a regular motor with the right gearing. See how smart locks work on doors.
Please make a solenoid hole puncher. A strong enough one to make a hole in plastic aswell.
Haha! That would be interesting to try. And to compare using solenoids vs servo motors for this. I'm not really convinced that the solenoid's ability to deliver energy rapidly is very beneficial here. Compare that to a servo which would operate more slowly, but can leverage tremendous mechanical advantage.
hi.. i want to control 3 solenoid valves at the same time and connect the same to the water level indicator please help
Great tutorial mate.
Thanks so much Joshua!
Can you post a video for controlling solenoid with a wireless remote please ?
i want to activate pin 8 via wifi. I found that the esp32 has a wifi function but i dont know how to hook it up to the arduino. Is there any simple tutorial for this?
An ESP 32 is also a micro controller, just like an Arduino. So if you want to "activate" something with ESP32, there shouldn't be a need to also involve an Arduino. Unfortunately helping you here is out of scope of the video but hopefully that clarifies things.
@@MattInglot thanks alot. I found a webserver scrip wich gives you the option to activate a pin, so i dont need any other code than that and the ciruit. But still without this video i wouldnt even think of anything like this! :)
Hey Matt! Super solid video but I was wondering why you ended up switching the MOSFET in your final iteration from the first one. Would your circuit still work with the original MOSFET?
Hey Jason I do explain that in the video. The issue is if you want to use the MOSFET with an Arduino, you need to be able to switch the gate with the 5V output of the MOSFET. So I switched in a "logic level" mosfet that is capable of being driven with a lower voltage.
Please. What diode should I use for a 24 volt 2 amp solenoid? Thank you
I connected it the same way but its not following the code it only actuates and stays in 1 place and once i cut the connection it then only goes back can anyone help why its not following the code?????
Hey, what's the largest push-pull solenoid you managed to find in Aliexpress?
Not very large! I've only found the small blue ones like you see in the vid. I got my big bois off Digikey. I'm sure there are other suppliers as well.
@@MattInglot That's a boomer. Thanks for the answer.
I was just waiting for the tweezers to short something and see some sparks... :)
😂 you mean I shouldn't wave a conductive bit of metal around my project?
so couldn't you just use a 12v LED( light emitting Diode) instead of the rectifying diode?
Since all that it is doing is stopping the voltage from back feeding.
If thats possible to use an LED. Then I assume just use it like normal that when you push the button the LED will turn on, while also stopping the reverse flow of electricity?
As an experiment to see if you can catch it lighting up when power is stopped? Sure, give it a try and let us know what happens.
As a practical thing? It's not something you'd want to do. Regular diodes are cheaper and actually meant for this purpose.
Stuff that could be a problem with using LEDs:
- LEDs have very low current limits. You could burn it out either immediately or over time.
- LEDs have fairly low reverse voltage, so that could be a problem very quickly, and if you hit that threshold then you'll probably burn out the LED instantenously.
- You mention a 12V LED, so that implies several LEDs in series to get 12V. I have NO idea how that affects the scenario and would love to find out. Alas I think it means nothing good :D
Give it a try and let us know!
Quick question if I wanted to run a solenoid that would ring a bell like a fire alarm how would I do that? Also being able to change the Hz frequency up and down to adjust the bell hits slower or faster. A variable power supply would be used so the voltage can be increased to make the bell hits harder and louder.
What a great question. You got me so curious about this that I looked up how those old school fire alarm bells work and you're not far off with your idea. I managed to find this article:
www.aplustopper.com/working-of-an-electric-bell/
It looks like these types of bells already use electromagnets to function (remember, that's really all a solenoid is...), and there are different ways of making that mechanism work. What I love about the one in that article is that it naturally creates the ringing by interrupting the circuit when it the hammer hits the bell, which allows it to retract back, which closes the circuit and activates the electromagnet, which brings the hammer back to the bell, and so on.
You could very easily swing a hammer with a solenoid in a similar way. Just have the hammer pivot on something, so that when the solenoid pulls down the hammer swings and hits the bell. You could then vary the frequency with how often you pull down the solenoid (eg. fire it once a second, twice a second, etc).
You are correct that you can control the strength of the hit by varying the voltage, however you don't need a variable power supply. If you're using an Arduino like in my example, just make sure you connect the solenoid to a PWM pin, then use Arduino PWM functionality to simulate the voltage change (eg. 50% PWM would effectively give you half the voltage). Note that you won't necessarily have a linear correlation between PWM frequency and volume so if you're building a volume knob or something you will have to experiment with how to map the PWM frequency to the desired volume.
Keep in mind that the purpose built fire bell mechanisms like the one I linked have a very small amount of travel, which allows them to ring at a (relatively) high frequency. If you buy an off the shelf solenoid, like the ones on Amazon, those things take a (relatively) long time to plunge back up after plunging down so that will limit the frequency.
That should really be it. Be sure to watch the video because that Arduino circuit is exactly what you need, and the rest is just building the mechanical piece.
Good luck!
So im using a ardino to fire a solinoid 15 ms on 30ms off repetivly at the comand of a button
Qestion is is it benificial to use a diode in my solinoid circuit off the mos fet and is it still desirable to ground out the mosfet gate.
Yes. You'll probably get away without the grounded gate if you have the Arduino hooked up to it, but I don't see a reason not to ground it. If you leave the diode out, you will potentially fry your Arduino.
Great video! And guess what! I'm using this info for my own pinball machine that iv'e been working on for over a year! Oh and for flippers, most pinball machines have a dual wound solenoid to provide max power at first then lower curent for the hold. this prevents long heating of the coil. I can't however find dual wound solinoids anywhere. This is one reason why I have used mechanical flippers until now. Have you run into that problem yet or found a solution?
If you are building a full size pinball machine then by far the best option would be to buy your coils from pinball parts stores since then you would get the double wind (assuming you buy coils from flippers that use this system). Another option if you can't do that is to use PWM to reduce current when the EOS switch is hit.
I'm going to try the middle circuit with a 12v 8A dc supply to power a 12v 8A solenoid, apart from changing to a bigger fuse do you think I need to change any other component on the circuit? :)
You'll want a bigger power supply than 8A for that. Breadboard won't work either, you'll need to solder or use appropriately rated connectors. Watch the gauge of your wires. Check every component to make sure it's rated (well above) 8A.
If you don't need to run off 12V, this sounds like a job better suited for 24V. You would need about half the current with the right solenoid. Might make your life easier.
@@MattInglot oh nice one! Ok well probably won't go that route then.
Actually I was thinking of using an airsoft lipo battery 2250mAh 11.1V and just using a 12v 8A solenoid to power it, what do you think?
I mean your solenoid looks quite powerful and that's just a 12v 2A one isn't it? I just need to add some recoil to a fake rifle really.
@@KobraVR cool idea. If the battery can supply 8A then sure, I don't see why not. Having lower voltage shouldnt be a problem (just slightly weaker). You will have to experiment to see what gives you a "good recoil". I bet if you look online you will find someone has already tried something like this and you can see what works (or why it doesnt work maybe)
@@MattInglot I think im going for an 11.1v lipo battery 2250mAh 35C to power a 12v 2A solenoid. That way I think I can pretty much your 2nd circuit and components without having to worry about changing things by much. I'll have to see if the 2A solenoid is powerful enough but yours looked pretty snappy in the video.
Thanks for getting back to me I'm excited to test things out! :)
@@MattInglot sorry to pick your brains a bit, if I used a 12v DC mains supply at 2A would that be OK to drive the 12V 2A solenoid? I'm a bit confused as you said for the 12v 8A solenoid I would need more than the 12V DC 8A mains to run it?
is the mosfet also running with 3.3V ? If not: can you please recomment me a Mosefet that runs with 3.3v ?
Yes FQP30N06L has a gate threshold voltage of 2.5v so you can power it with 3.3V. All of these parts have datasheets, so that's where you can get this info. Let's pretend you didn't have a part number from me that already works for your purpose though... you can find parts that meet your characteristics using the Digikey or Mouser search features. For example if you go into mosfets you can specify all sorts of characteristics to filter down to what you need (tip: you also want to filter by in-stock, and then usually sort by price). It looks intimidating at first but if you really put in what you want, you can narrow things down to much fewer options really quickly.
ChatGPT can also be helpful for part numbers, but never trust anything it says without verifying against datasheets.
Excellent,very helpful for this noob..thank you
yoo do you know if i can use an LED instead of a diode?
An LED is a diode, but it's not a diode that has the right specifications to make it an effective fly back diode. For example, most LEDs have a pretty low reverse voltage (let's say 5v). Since the flyback diode is wired in reverse, it means that reverse voltage is very important because let's say it's a 12V solenoid, you've gone far past the reverse voltage and blown up your LED.
Always easier to learn by doing though and LEDs are cheap, so experiment with it, blow up a few, and see what happens!
Hi there I need 12v small one that pushes when I turn power off
Extremely helpful, thank you!!
Thank you I am glad it helped :D
Actually I just checked the Newton rating on my solenoid it says 5newton. Which means it can lift up 500grams(5×100grams=500g).So if my project table is like 1.5 kg(1500g) I would need minimum 1,500g÷100g/n=15Newton . I need at least 3 times stro ger solenoid to make it work properly.
Great explanation !
hi, i bought some IRFP260Ns before watching this vid, and im having trouble getting the program to work. Im starting to worry that it might not be logic level capable, but i dont know how to find out for sure
I wanted to use these on my diy drywasher, but seems like they were too small for my project. I wanted to hang a shaker table from the solenoids and turn solenoids on and off at high frequency to create vibration, by liftingthe table up and down. But looks like the shaker table is too heavy for them to work properly. I used 6v and 12 v ,but 12v solenoid was too weak and i connected 12v source to the other 6v solenoid and it heated up very fast ,but I was able to get some motion, but my ampmeter showed 6amps. So 6×12=72 watts. This got me confused, because I thought instead using a motor hanging the table from solenoids will be more efficient ,but looks like it's not... not sure
Solenoids are great for short bursts of motion or force. Something like continuous vibration can be done of course, but feels like barking up the wrong tree. At minimum you will need a much stronger solenoid as you've found out.
A big problem is that you can get much better performance out of a solenoid if it doesn't need to be continuously operating. You experienced this with your 12V to 6V solenoid experiment. If you had an application where that solenoid had to impart a lot of power but fire infrequently, using it this way would be totally legit.
@@MattInglot probably I'll just use a motor attached to the center with off balance weight to make vibration. It seems to be more efficient.
hi and thank you...i'm not sure if i'm seeing this wrong, having trouble following the breadboard wiring...the flyback diode should t not be in parallel to the solenoid? also the fuse should it not be on the input rather than the output?
The diode polarity should be opposite that of the solenoid, else you basically create a short (sorry I THINK that's what you are asking). As for the fuse, take a look at the schematic posted in the description. When the fuse pops, does it create an open circuit?
First off- This video was very helpful! I am building a visual pinball controller and am using solenoids for haptic feedback. I built the circuit as you showed last night and everything worked great... with one small exception. As per your video description, there isn't a resistor between the arduino pin and the gate. I added a 100k resistor (closest I had to a 150k) and the circuit didn't seem to work. However, removing the resistor (like you have shown in the video) and everything seems to run great. How important is adding in a resistor between the arduino and the gate? Perhaps I installed it wrong or the 100k wasn't what is needed?
Awesome! I'm glad to hear it helped you out. You want a 150 ohm resistor, not 150,000 ohm resistor. ;)
@@MattInglot Doh! Of course! Thanks and I will do that. One more question.. I currently do not have a fuse installed either. Can that be any 3amp fuse or something? and do I just solder wires to both ends? Sorry- I'm still a bit new to hobby electronics (I know just enough to be dangerous)
@@eric3dee You want to size it to the load. You can calculate that, or measure the current the circuit actually draws with a multimeter. Then you want a fuse that's 1.25-1.5x that. I should add (and I don't think I mentioned this in the video), that a slow blow fuse is probably your best bet to avoid the sudden inrush current from blowing it.
I have a question. I bought 12V/2A solenoid and have 8 AA batteries to provide 12V. Can I connect batteries directly to solenoid and solenoid will only pull max 2A as its designed, or will it take all the power it can causing it to overheat. Would I need to put some resistors on the batteries first or just directly 12V to solenoid would be fine?
A power source being able to supply MORE current than your load needs is not a problem. The solenoid has a certain resistance, which in turn determines how much current it will draw thanks to Ohm's law. So the load determines the current drawn, not the supply.
Of course you're probably asking this because you've seen resistors being a requirement for using LEDs, because otherwise the LED WILL blow itself up very quickly. That's because diodes (including LEDs) have very little internal resistance and will happily burn themselves out immediately without a resistor to limit the current. So if you hook up your LED without a resistor, you have a load with very little resistance and hence it will draw a lot of current (again Ohm's law comes into the picture), and the LED will blow up.
Your problem might be that 2A is a lot of current for a AA battery. You can actually look up datasheets for batteries and see what that looks like, but 2A seems like a lot. At the very least I would expect it to discharge quickly. THAT said, if you are only pulsing the solenoid for short periods, it may be totally fine and you may still get adequate performance.
How does one determine the size of the resistors and the type of.diode to use,. Can this design incorporate a break beam sensor
The resistor numbers aren't particularly critical in this case. About 10K from Gate to ground pulls the Gate down after the drive signal is released, and the 100 ohm from signal to Gate is just a little protection.
If the gate signal is being driven by a logic output, you may not need either of those resistors.
How to reduce solenoid load current using pwm?
Very helpful information. Thank you.
Thank you!
Hi, how did you connect the fuse ? Is soldering required? Thank you
There are fuses that already come with leads attached, and there are also fuse holders that will fit in a breadboard. That said, the breadboard is for experimentation and testing, but if you want something more permanent you *will* want to solder everything onto perfboard.
@@MattInglot Hi, its me again. I have troubles powering solenoid with Arduino. It seems there isnt enough power. I have 12V 2A power source. I dont use resistor on pin and gate to Arduino. What would happen if I changed 10k resistor for 1k?
Great video! Love pinball machines and stuff like that. I've got a question about controlling an automotive solenoid remotely. Let me know if you have a min to answer a question
Thanks. You're always welcome to ask, whether I'm the right person to answer or not we will see.
If your 2nd power supply is 24VAC vs. your Arduino's 5VDC, do you still wire the grounds together? Or will that cook your board?
The circuit demonstrated only works with DC. You can't directly control AC with a mosfet. Your best and simplest bet if you don't need PWM control over the solenoid is to use a relay module. If done right, that will have the added benefit of isolating the two supplies. There are videos by other people on YT that demonstrate how to do this with a relay. Good luck!
@@MattInglot Thank you. I was using garbage cheap relay boards from Ebay. They backfed noise all through my setup and reset the board with each firing of the solenoids. I tried better (branded) relay boards and everything is working great now. My trees will finally get consistent water!
@@drsnooz8112 sounds like they may have been missing a flyback diode. That's also why a board, rather than just a bare relay, is important (in case anyone else is reading this). You can't just connect the Arduino directly to the relay and expect it to work reliably. There are nuances to controlling relays. Glad your plant watering system is working.
Great video. Thank you. I’m a complete newbie to arduino, but I’m working on a project that would require the solenoid to be activated by a remote control, is that something that is possible? Thank you.
Absolutely! You can control a solenoid with an Arduino, and you can send signals to an Arduino via remote control, therefore you can control a solenoid via remote control. May options for this. I believe the various Arduino kits come with an IR remote. Personally I think the nrf24l01 modules are a better option, but they are a little more advanced to get working correctly. Good luck.
@@MattInglot Thanks Matt, that’s great. I’ll look into that.
Hello Matt, your video is awesome. Thank you for sharing. One thing, with this set up, do you think we can actually control the speed (force) of the solenoid?
Thanks Jean. You absolutely can, that's actually one of the benefits of this setup (as opposed to using a relay). Look up PWM - Pulse Width Modulation. This is what modern pinball machines do to allow the operator to adjust the strength of the flippers for example.
Can a relay be used in place of a diode, resistor and transistor?
You could swap out the mosfet with a relay *module* pretty easily (the kind where it's a PCB with the relay and other components already on it and you can just hook it up directly with microcontroller). You can't swap all that just with a bare relay though, since there's a few components needed to drive a relay correctly with a microcontroller.
You also still want the diode to avoid damaging anything.
@@MattInglot thanks for the advice
How did you decide what resistors to use? Was it decided arbitrarily?
Hi. Would it be possible to use a TBJ instead of MOSFET as switch in this case?
Assuming you meant to write BJT. Yes you could, assuming you are using a BJT that is rated for your load and you build an appropriate circuit. You should google the differences between BJTs and MOSFETs though. You may come to the conclusion that you'd rather use the mosfet in this scenario
Thanks for the clear explanation! Would it be possible to connect the Arduino as well as the solenoid to the same power supply (in parallel), such as a simple battery holder? Because that way the voltage comes straight from the source itself, instead of going through the Arduino first, while still connecting both grounds.
I don't see why not. Give it a shot and if you run into issues go down the troubleshooting rabbit hole until you figure it out. One thing I'd wonder about is voltage drop on the battery when firing the solenoid, and needing to throw some capacitors in to counteract that. I may play around with this one day with my scope hooked up, just haven't had a chance to do it. If I do it I'll make a video.
But for sure play around, have fun, see what you learn.
U can use a relay too.
Yes you absolutely can, just note that the way you would hook that up will be slightly different (and ideally use one of those little relay boards so you don't need to worry about powering the relay correctly).
this is an incredibly dumb question but what is that blue box thing with two screws in it that goes up to the power supply?
sorry for my stupidity
No worries, it's tricky when you don't know the name of something! This is a screw terminal, I'm just using it to connect the positive and negative wires from my power supply to the bread board. All it does.
@@MattInglot thank you so much
@@MattInglot Also, how did you get the glass fuse to fit into the breadboard? I can't seem to find any like that
@@jonathansiskind8315 If you search glass fuse with axial leads you should find them. Or get fuse holders which are actually the better solution for anything more permanent.
@@MattInglot thanks man! you're a godsend
Thanks for sharing!
Humbly asking: how comes you fit a 3A fuse and a solenoid that will draw 2A on a breadboard that is probably not rated for those values? (At least you didnt mention the specs).
Thanks. You want the fuse to blow as a protection measure if the load on the circuit is higher than expected, which most likely means something has shorted out and will draw all the current the power supply can put out (until the supply's own fuse blows). So if we assume that solenoid was indeed 2A, you want something higher. I eyeballed 3A because it gives the margin of error, but should still blow if the circuit has a serious fault (again almost certainly a short because something got plugged in wrong or loose). The goal is protect the power supply and possibly prevent a fire if you're using a supply that can put out way more current than you need (think those DIY ATX ones without current limiting).
That said, fuses are complicated: ruclips.net/video/WG11rVcMOnY/видео.html
As for the breadboard: it was there to demo only, yes I should have pointed it out. Basically you might not get full power from your solenoid if you use a breadboard because of the high resistance it has.
Hi,
How could you make it to oscillate at a certain frequency (like ultrasonically) ? Would be an interesting idea to make an ultrasonic knife out of it.
Thanks ! 😇🤗
Best Regards,
You can certainly use Arduino to pulse it very very quickly and have some fun figuring out how fast you can make the solenoid go. BUT...
I doubt you'll get even close to ultrasonic. I looked it up and ultrasonic is considered above 20khz so let's assume you want to hit 20khz. That means that the solenoid plunger has to plunge and retract 20,000 times per second. That means each cycle of plunging and retracting has to happen in just 0.000050 seconds. That plunger needs to MOVE, and it can't move very far.
It would be interesting to see how fast you could get it moving if you start playing with the variables: I would try a very strong spring, and block the plunger from moving out all the way (maybe like 10% of the normal travel distance). That way it's always mostly inside the coil (much faster acceleration), and also doesn't have to travel very far.
@@MattInglot Wow ! Hey thanks again for the in-depth explanation. 😨😊👍👏
How can i control 6 solenoids with Arduino
Will a 4.5 V 0.4 amp solenoid valve work in this setup with a 5 V power supply?
I wouldn't hesitate using this especially for a hobby purpose. If this is being used for commercial use then my answer is "check the manufacturer's datahsheet"