Mount: Custom DK Fit Kit for 4 Rhino-Rack 2500 Series Roof Rack Legs on a 2019 Honda Civic

HTML-код
- Опубликовано: 17 сен 2024
- Click for more info and reviews of this Rhino Rack Roof Rack:
www.etrailer.c...
www.etrailer.com
Don’t forget to subscribe!
/ etrailertv
Full transcript: www.etrailer.c...
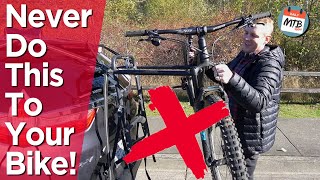
Hey everyone, it's Evangeline here at etrailer. And today we're taking a look at our Rhino-Rack roof rack system, with the 49 inch long crossbars, the towers, and the custom fit kit for your 2019 Honda Civic. So you've got your sedan, and as sleek and sporty as the sedan version is, what if you need a carry around some kayaks Or a roof box Or a roof basket Or even a roof mounted bike rack What you then need is a roof system. So this is gonna be our system from Rhino-Rack. We have the 49 inch long cross bars and we have some locking powers, plus this custom fit kit that fits right around the curves of the Honda Civic, giving you that space and the option to carry around those accessories. So we have the 49 inch long crossbars.
And that number is important, because it's a good balance of overhang but not too much overhang. For a sedan like your Civic, if you have too much overhang, you're more likely to hit your head against your crossbars when you get into the car. Here, we have pretty much the perfect length. So measuring from your tower to right before your end cap you have two and three quarter inches of overhang. These are gonna be your aluminum bars, with 165 pound weight capacity.
And you're gonna have some integrated security features. So you have metal lock cores for the tower but you have the plastic lock cores for the end caps. You can purchase metal ones separately if you wanna upgrade. But these pop off to give you access to your T track system and you can see how sleek that crossbar is. And when you wanna secure your T track accessories, you just pop that end cap back on, turn this key, and now it's secured.
Some other important measurements. One is gonna be roof height. So we're gonna measure from the top of the roof to the bottom of the crossbar. So here we have it at around three inches. And that's how much space you have for accessories that have clamps that go around the crossbar.
Three inches is pretty normal for that measurement. And next is gonna be the height added to the top of the roof. So this is gonna be where your cargo sits. So top of the roof to the top of the crossbar about four and a half inches. So if you have skis and snowboards, especially those skis with extra tall bindings, you wanna make sure there's enough clearance there. And if there's not, then that's when you can start looking at accessories that give you that extra height. So these are vortex arrow crossbars. So, compared to your traditional round or square crossbars that are super noisy on the road, these will help out with that noise. Now they have these vortex strips to help with that. The downside to the Rhino-Rack System with vortex strips, though, is you have to cut them up and if you have T track mounted accessories, cut them around your accessories. If you're planning on doing that, I recommend just getting a pack of extra vortex strips, so that you're ready. We have two keys included with your crossbar kit. And these are all keyed alike, so you use them to open up the door. And here you can see how the custom fit kit is designed to fit around the grooves of your vehicle, and just make that nice sleek line. And that way you can even slam your door on that hook without having to worry about it. So the install process may be a little confusing at first, 'cause there's different pads with different numbers. There's spare hooks. You've got your bolts, you've got your tower end caps, things like that. But I'll guide you through that process. It's actually pretty simple, if you do it the right way. So first we're gonna start with the towers and getting them onto the crossbars. I already did the rear crossbar. We're gonna do the front one together. Once you take that end cap off of your crossbar you can then just slide your tower through. Make sure to line up that square plate. Next is to figure out which one's gonna be your right side, which one's gonna be on your left side. So that's gonna be right, this is gonna be left. You're gonna have a foot plate and this needs to face out. And then you're gonna have a foot pad. So find the number that matches with the left one. So this foot pad and since the left side it's 281 you want that arrow facing the front of your vehicle. And then you have your foot plate and you want that arrow facing out or away from your vehicle. So once you figure it out, which way that is for you, just put those two together. So double checking, that's facing forward. That bottom arrow is facing out. Pop that onto your tower. Do the same thing on the other side, making sure you have the appropriate foot pad and plate. Next you're gonna measure out where the tow