How to build Luxurious EPOXY tables (beginner guide)

HTML-код
- Опубликовано: 5 фев 2025
- Online Epoxy Table Master Class... CLICK HERE...
www.diywithgre...
How you can find DIY With Greg:
Instagram - / diywithgreg
Facebook - / diywithgreg
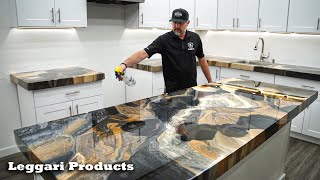
This week, we're crafting a DIY epoxy dining table from start to finish. I'll guide you step-by-step through the entire process of building a stunning epoxy river table. You’ll learn about essential tools for woodworking and carpentry, and I'll show you exactly how to use them. We'll also highlight common mistakes and how to fix them, ensuring your project turns out beautifully. Whether you're a seasoned woodworker or a beginner looking for a fun and rewarding project, this video will provide all the tips and techniques you need to succeed in creating your own epoxy resin table.
DISCLAIMER:
All my videos are for entertainment purposes only. Woodworking and Metal Working are very dangerous activities and should only be performed by trained professionals.
#woodworking #resin #epoxytable


So glad I found your channel! Wow, your work is absolutely stunning!
What a lot of work it takes to make one thing, good job
What is used for the final layer? Is it epoxy or oil? And what is the name of it? Thanks
_Thanks! Very interesting!_
Which blue color reference (RAL/NCS fan deck) did you use for your project ? Thanks !
Is that price you sold it for in USD or south african $?
I would like to know how you make it shine after sending
With the Festool polish system
Good job
Where did you get the wood??
as always sooo beautiful !
What did you use to finish the wood? To give it that lively lubricated look.
oil
Nice tune at 12.12....Artist and track if possible please?
How do you remove the bubbles that formed after it becomes solid?
You dont
And what was the sale price?🤷🏼♂️
Wooow! Amazing work! So meticulous.....! You didnt say anything about the price and how can we order it..... and how it is maintained!
Reeled me in with curiosity regarding the big ticket price but unless I missed it, was never mentioned. Sneaky. You might want to include if it's not. You can't trick people to . .
I have dout in this kind of table resistents !
BAutiful art work my question is for environemental reason à good idea?
Is it possible to do one section a color then another etc?!
Do you mean layers in different colors or side-by-side different colors? Yes to both. The former will create epoxy that cancels out colors, depending on what colors you use. Side-by-side can create beautiful patterns. A great way to do it is to put dams along the "river" to keep the colors seperated until they begin to gel, then pull the dams out to allow the epoxy to form a solid piece.
@@SwearingenTurnings thanks I’ve never done anything like this before, I wanted to do red white and blue! Also why are there different layers? Does it affect the color?
@@g.blacksheep525 Layers are generally done for two reasons: 1) To prevent overheating during the ectothermic process and 2) to make it easier for bubbles to escape before curing.
So many different things is using so who can explain for me
The liquids are important
The table is lovely, but it bothers me that your crew are not wearing the correct ppe gear.
My husband has COPD from cutting up wood without a mask.
Watch yourselves guys!
❤
Lekker
He didn’t sold it, he keep it. That’s why he didn’t mentioned the price.
Was sold 🙏🏻
Looks like clickbait
Why?
Says beginners guide??? A guide to what? You literally didn’t show anyone how to do anything you just built a table 🤦🏻♂️
The table has no depth
Limited use of material
hai bro ; thanks a lot about all you showing and doing helping the personnes hoo wants discover all your terchnique and your knowledj. i would like to start doing
my begening , i m in paris a got no space and i m from Algeria ; so can we call sure you got a contact phone number may be i can find it one day , by using whatsapp
again thank a lot bro