Samsung Galaxy A53 5G LCD Touch Screen Replacement

HTML-код
- Опубликовано: 16 июл 2024
- A repair guide on how to repair and replace a broken/cracked/not working LCD Digitizer Touch Screen Assembly Glass on Samsung Galaxy A53 5g mobile phone.
Compatible Replacement parts - bit.ly/41NddQq (USA/AU/Global)
Models SM-A536B, SM-A536B/DS, SM-A536U, SM-A536U1, SM-A5360, SM-A536E, SM-A536E/DS, SM-A536V
Tools
Heat Mat bit.ly/3WgsPcF
Portable Heat Gun|Stations bit.ly/44Y5NLp
Philips Screwdriver, Tweezer, Suction Cups, Pry Tool Plastic / Metal / Card bit.ly/3FB2r5a
Silicone Repair Mat bit.ly/3FKUc6K
Glue | Adhesive bit.ly/3Dw2X4C
Clamps & Essentials bit.ly/3Qvm3Qf
Guides you May Like
Samsung Galaxy A53 5G Teardown • Inside Samsung Galaxy ...
Redmi Note 10 5G Fingerprint Replacement • Xiaomi Redmi Note 10 5...
Huawei P30 Lite Earpiece Replacement • Huawei P30 Lite Earpie...
Google Pixel 4XL Battery Replacement • Google Pixel 4XL Batte...
If our video was helpful, you can always support (for $1.99) us by becoming a member. A Joining Member will help us to create more variety of content for the community.
RUclips Join bit.ly/3O7X5SH
Our Partners
bit.ly/2FSFTPv ( Gadgets & Accessory Store - Ships Worldwide)
bit.ly/2QRfYhP ( Phone & Tablet Replacement Parts - Ships Worldwide )
bit.ly/3afejcf ( Phone, Tablet Parts & Accessory Store in The UK )
Timestamps
00:00 Intro
00:10 Opening
00:42 Removing the Back Cover
01:58 Removing the Board Frame
02:25 Disconnecting the Battery & Main Flex
02:37 Removing the Battery
03:50 Removing Logic Board
04:14 Removing the Vibrator Motor
04:36 Removing the Earpiece
05:07 Removing the Button Flex
05:35 Removing the Speaker Cover
06:00 Removing Main flex & Touch ID Sensor Camera
06:55 Removing the Charging Board
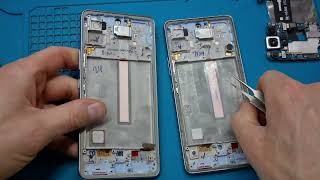
07:25 Types of screen
07:50 Selecting the New Galaxy A53 5G Screen (with frame)
08:05 Placing the vibrator motor & earpiece
08:18 placing the Button Flex
08:44 Placing the logic board
09:07 Placing the battery
09:18 Placing the Charging Board
10:14 Placing the Touch ID Sensor Camera
10:25 Placing the Main Flex
10:49 Placing the Speaker Cover
11:22 Testing
11:28 Placing the Board Frame
12:05 Closing & Back cover installation
#diyrepair #screenreplacement #a535g  Хобби
Хобби
![Samsung Galaxy A53 5G - Screen replacement [repair guide + reassembly]](http://i.ytimg.com/vi/qig65fogm4s/mqdefault.jpg)
![Samsung Galaxy A53 5G – Screen replacement [repair guide + reassembly]](/img/tr.png)


Nice clear explanation!
Thanks for your feedback 🙏
Thanks! Great guide 👍
Glad it was helpful!
how do you get the original service pack. where did you order from
Thank You:)
You're welcome!
4:39 - keep the cameras far away from the heat gun, only a few seconds of heat may damage the lens
Thanks for your feedback
Hey, I have an s536dl and I've been looking for a replacement. Seems everywhere only has A536s available. Are they the same thing? Is there something I'm missing? Thank you!
I always replace only the screen without the frame. For me it's less work moving all the little parts over with less chance of damaging the antenna wires, and all the other small components. The screen by itself is also cheaper than with the frame which is not always the highest quality (usually aftermarket). But hey, to each their own.
Thanks for your feedback bill, yeah it is easy if you can clean the edges nicely and apply good adhesive.
@@DIYGeardo - And not that disgusting gunky glue crap a lot of lazy repairman use, but professional factory precut ones, which makes subsequent repair much easier. It makes me puke every time I have to work on one which was "glued" but some idiot.
I have no signal since replacing my screen what can be done about this😢?
Original display price
Hello, I have a question. If I replace the screen assembly, will the underscreen fingerprint sensor still work?
Depend on the screen, An original or Original Refurbished will support the sensor. Other No
Price kya hai
how much would it cost to bring it in to a store in real life to repair the touchscreen
Is the lcd and the touchscreen on the same place ? I cant rapair the touch screen without fixing the lcd?
Yes, it is an assembly, Replacing only touch will be a very hard job.Need some machines.It is not worth it
🙂👍🇹🇷
Thanks
You used very low quality clove remover spray for removing battery,
Thanks for sharing your feedback
Neeexxxxt
A54 5g
which glue are guys using?
B7000/t7000
@@DIYGeardo thank you.