How To: Samsung Spider Arm Assembly and Spider Bolt DC97-12528A & DC60-40137A
US
Войти
How To: Samsung Washer Spider Arm DC97-16509C
1:01:04
Samsung Washer SPIDER ARM Replacement
18:51
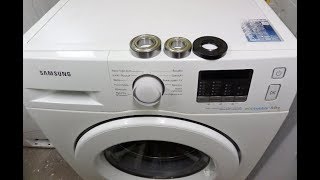
Wymiana łożysk w 8 kg pralce Samsung WF80F5E0W2W . Bearings replacement in a washing machine Samsung
38:02
Searching the Jungle for WWII Battlefields (6 Days Fishing, Kayaking & Snorkeling in Palau)
56:08
Neville, Keane & Richards DEBATE Amorim leaving Rashford & Garnacho out of Man United squad
12:21
🔴 BLOX FRUITS DRAGON UPDATE OFFICIAL COUNTDOWN!
6:13:08
How To: Samsung Spider Arm Assembly and Spider Bolt DC97-12528A & DC60-40137A
AppliancePartsPros
Подписаться
241 тыс.
Скачать
Готовим ссылку...
Просмотров 1,3 млн
0
0
Добавить в
Мой плейлист
Посмотреть позже
Поделиться
Поделиться
HTML-код
Размер видео:
1280 X 720
853 X 480
640 X 360
Показать панель управления
Автовоспроизведение
Автоповтор
Опубликовано: 17 янв 2025
Комментарии • 733
Следующие
Автовоспроизведение
1:01:04
How To: Samsung Washer Spider Arm DC97-16509C
AppliancePartsPros
Просмотров 36 тыс.
18:51
Samsung Washer SPIDER ARM Replacement
Carlos Padilla
Просмотров 116 тыс.
38:02
Wymiana łożysk w 8 kg pralce Samsung WF80F5E0W2W . Bearings replacement in a washing machine Samsung
Klixon
Просмотров 1,8 млн
56:08
Searching the Jungle for WWII Battlefields (6 Days Fishing, Kayaking & Snorkeling in Palau)
Outdoor Boys
Просмотров 3,8 млн
12:21
Neville, Keane & Richards DEBATE Amorim leaving Rashford & Garnacho out of Man United squad
Sky Sports Premier League
Просмотров 1,9 млн
6:13:08
🔴 BLOX FRUITS DRAGON UPDATE OFFICIAL COUNTDOWN!
Kitt Gaming
Просмотров 2,6 млн
17:37
Surprising Son with Dream Car on 16th Birthday
FV FAMILY
Просмотров 730 тыс.
34:35
The Best Washer EVER to Buy May not be What You Think!
Bens Appliances and Junk
Просмотров 1,6 млн
47:30
How To: Samsung Spider Arm Assembly DC97-15877B
AppliancePartsPros
Просмотров 61 тыс.
15:34
How to make a simple welding machine from spark plugs at home! Extremely easy and useful
Tips 365
Просмотров 385 тыс.
14:51
🔥 DIY: BEST Samsung FL Washer Bearing Replacement | Step by Step Guide
Jungle Explorer
Просмотров 218 тыс.
18:43
The Surprising Genius of Sewing Machines
Veritasium
Просмотров 11 млн
14:35
Washer Troubleshooting: Common Reasons Why Your Front Load Washer Is Noisy | PartSelect.com
PartSelect
Просмотров 629 тыс.
16:04
90% of Toilets Are Installed Wrong (Here’s the Right Way)
Home RenoVision DIY
Просмотров 2,7 млн
1:11:07
Samsung FlexWash teardown
Pirate TV Productions
Просмотров 13 тыс.
35:43
How To: Samsung Spider Arm Assembly DC97-17004B
AppliancePartsPros
Просмотров 46 тыс.
00:48
Вчера мы увидели, как отключился интернет
Dragon Docx
Просмотров 2 млн
01:01
How To Lure A Gorilla With Your Phone
Mark Rober
Просмотров 15 млн
1:06:35
Дедушка не в силах оживить свой убитый Пассат на пенсию
ИЛЬДАР АВТО-ПОДБОР
Просмотров 1,7 млн
34:47
😰Какое Аниме СИЛЬНЕЙШЕЕ в Майнкрафт? + Кабан
FixPlay - Майнкрафт
Просмотров 81 тыс.
00:58
Провальная Акция в Pizza Hut 🍕
Тимур Сидельников
Просмотров 144 тыс.
47:43
Страна с бесконечными деньгами. Секрет могущества США
Простая экономика
Просмотров 265 тыс.
00:42
Ксения Бородина Об Отношениях Курбана и Маруси / ВАША НАТАША
Наталья Подольская
Просмотров 62 тыс.
01:00
Roomba Balloon Roulette 😱
A4
Просмотров 708 тыс.