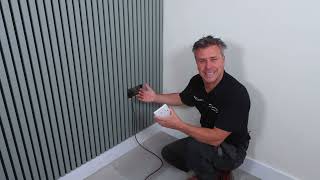
Outlet sockets on a Slatted wood feature wall!

HTML-код
- Опубликовано: 20 окт 2024
- Website! And Webshop!
www.seamm.nl
In This episode I will show you the details on the #outlets and methods for the #slatted #featurewall.
This is made from solid oak and becomes quite nice!
The previous episode shows how the slatted wood panels Iwood or Woodup are attachted to the wall with glue screws and nails. And also the two mounting methods.
The panels are an oak veneer MDF.
Instagram!
/ sebastiaanmollema
Rick Hahn
/ hahnwerke
Bart Oonk
www.instagram....
Alain Mertens
www.instagram....
Peet de Vries
www.instagram....
Music by:
Noir Et Blanc Vie
/ @noiretblancvie


Great work. Looks amazing. Do you have a link to the panels? How much do they cost?
Thanks m8!
I-wood
lijnm.com/houten-wandpanelen-latjes-whitewash
akupanel
woodupp.nl/
Absolute craftsman. It’s the little details that make such a difference
Hi All, enjoy the video! I hope these details and in-depth view provide some inspiration and helps you develop skills for this kind of projects.
Kun je niet gewoon met een gatenboor een gat boren precies achter de inbouwdoos? Eventueel ophogen met een correctierand en dan direct het stopcontact erop?
doing this next week, looks amazing! this video is very helpful
My pleasure!
Hi Sebastiaan, we really found your video helpful but I was wondering if you could explain in more detail how you work around sockets and light switches? Hope you can help...Wendy
Hi, How did you install the TV mount onto the slatted panels ? Did you drive the mount fixing screws between the vertical slats or on them ? I could do with your advice as none of your videos show how you installed the TV mount . Thanks
Nice work with the sockets but do you still have a gap looking from above, for my installation I just installed socket extenders and then 3d printed a black surrond of my design
For that TV, did you mount it directly to the wood panels or did you align the tv mount with wall studs?
Nice work 🥂
thank you my man
Very neat solution! How did you attach the reveals to the panels, though? Can't really figure that out from 2:40 and onward.. Whats the function of the screws at 2:35, for example?
thanks! The oak reveals get clamped and tightend with the screws. but a little bit of glue will also help.
Mooi werk!
Dank!
Hoi, ziet er strak uit! Waar kunnen de houten planken besteld worden?
hi! dat is bij woodupp en LijnM, we doen ook installeren, maar dat is ook mooi zelf te doen.
good job.
🤙
é madeira ou pvc ?
Hallo, mooi werk
Welke type accu tacker van Hikoki hebben jullie ?
Hi thanks hoor, het is het 15ga nagel type. Net 1x kleiner dan de constructie nagels.
I wished to see more on the instalation.
I agree on that more content would be cool to see and show. It's always tough balance to get the most suitable content for showing.
@@SebastiaanMollema not really more content, for example not to show more on working with the wall coverings, just to show how to make and install the hole coverings for the outlets. Have a nice evening.
Mooi werk! Hoe heb je de kabels net boven de grond uiteindelijk afgewerkt?
thanks, daar staat een tv meubel voor. Deze moesten in het meubel gaan voor de multimedia
@@SebastiaanMollema super! Je mag er trots op zijn.
The electric part needs some work. Not quite to the standard.
I prefer to build with Woodglut plans.
your skills and ingenuity are great but these panels are a nightmare for installation and a nightmare for maintenance --- this is what happens when inappropriate design meets the real world....🙂
What kind of maintenance does a wall panel need?