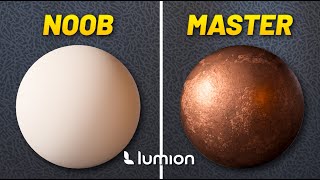
How to Make Realistic PBR Materials in Lumion

Поделиться
HTML-код
  • Опубликовано: 17 авг 2024
  • I’ll explain the different texture maps and why they are necessary to get realistic results. How to add albedo, gloss, normal, and displacement maps.
    MY LUMION COURSE
    nunosilva.pt/l...
    FREE LUMION TRAINING
    www.nunosilva....
    FREE GREECE LOWPOLY STYLIZED SCENE
    www.nunosilva....
    MY GUMROAD
    gumroad.com/nu...
    🔶 GET THE BEST PBR TEXTURES
    nunosilva.pt/p...
    MY SITE
    nunosilva.pt contact me for business inquiries
    TEXTURES
    quixel.com/
    www.poliigon.com/
    MY MEGASCANS VIDEO
    • How to use Megascans w...
    DISCLAIMER: This video was created as a partnership with Lumion.
    MY COMPUTER SPECS & GEAR
    kit.co/nunosil...
    MY SOCIALS
    INSTAGRAM: / nunosilva3d
    ARTSTATION: www.artstation...
    LINKEDIN: / nunosilvapt
    BEHANCE: www.behance.ne...
    If you have any questions, ask me in the comments below the video.
    Hey, what’s up guys, Nuno here.
    In this video, I’ll show you how to create realistic PBR materials in Lumion.
    I’ll explain the different texture maps and why they are necessary to get realistic results. And also, how to add extra detail, with displacement maps.
    This is done using Lumion rendering software for architectural visualization. It’s a great 3D render software that saves a ton of time for architects because it helps you achieve the level of detail and realism not available in any other similar software.
    Lumion is fully compatible with most 3D modeling software, including Revit, SketchUp, ArchiCAD, 3ds Max, Rhino, AutoCAD, Vectorworks, and many others.
    #realisticmaterials #pbr #lumion
  • РазвлеченияРазвлечения

Комментарии • 349

  • @NunoSilva3d
    @NunoSilva3d  4 года назад +26

    Do you have any questions about Lumion materials?

    • @redoctaves1228
      @redoctaves1228 4 года назад +4

      When is your next lumion material video tutorial coming out?

    • @NunoSilva3d
      @NunoSilva3d  4 года назад +1

      @@redoctaves1228 next week another tutorial related to Lumion.

    • @christiantolentino2592
      @christiantolentino2592 4 года назад

      Hi sir Nuno one question does this work with lumion 9?

    • @wisnusuryana1377
      @wisnusuryana1377 4 года назад +3

      @@christiantolentino2592 I don't think so my friend. Even it's not working on Lumion 10. You should have Lumion 10.3 to do it.

    • @MGilangFL
      @MGilangFL 4 года назад +2

      hello bro, what version of your lumion

  • @adollar47
    @adollar47 4 года назад +3

    Colour me mind-blown. I'm really glad my noobness helped me find your channel. Now I can finally get PBR in Lumion 🍻

  • @Blake-ln6nn
    @Blake-ln6nn 3 года назад +9

    your tutorials are so perfectly done. so clear and precise! thanks a lot!!!

    • @NunoSilva3d
      @NunoSilva3d  3 года назад

      Thank you! Glad you like them!

  • @maia3d859
    @maia3d859 3 года назад +2

    I love how normal and displace give more realism... the point is: as I aways wanna put them strong, I also need to see a reference to make sure that Im not "over". Thanks for the tips!

    • @NunoSilva3d
      @NunoSilva3d  3 года назад +1

      You don't need to! :) If you use the correct materials from Poliigon for example, they are already well calibrated.

    • @maia3d859
      @maia3d859 3 года назад

      @@NunoSilva3d oh! I got it!

    • @mitaliacharya6286
      @mitaliacharya6286 3 года назад

      @@NunoSilva3d when i downloaded free material from poliigon, none of them came with displacement maps

  • @TheEEgo
    @TheEEgo 3 года назад +4

    I really liked this software up to the point I realized that it just has more elaborate and detailed process for bump mapping...

  • @user-gd1we7ls4k
    @user-gd1we7ls4k Год назад +1

    Nuno, thank you very much for your videos! They help me a lot in my work. Information is presented in an accessible and understandable way

    • @NunoSilva3d
      @NunoSilva3d  Год назад

      Thank you! Glad you found my videos helpful.

  • @rony8306
    @rony8306 4 года назад +4

    Your channel is so cool! thank you for the tutorials Nuno.

    • @NunoSilva3d
      @NunoSilva3d  4 года назад +1

      Thank you! I'm glad my videos are helpful!

  • @samanthakumara8625
    @samanthakumara8625 2 года назад +1

    thank you for all about lumion instruction, it will help lumion beginners.

  • @jkm1611
    @jkm1611 Год назад +1

    You are amazing! Best tutorial I have seen here. Keep it up, friend!!!

  • @riyadhfilmed3d
    @riyadhfilmed3d 3 года назад

    You know what? You are one of the most underrated ,:')

  • @xXSepZXx
    @xXSepZXx 4 года назад +3

    Thanks for all your knowledge, you deserve more subs! Your work is awesome 👏🏻

    • @NunoSilva3d
      @NunoSilva3d  4 года назад +2

      Thank you for your kind feedback!

  • @germscb21
    @germscb21 4 года назад +2

    Great tutorial as always Nuno!!!

  • @eduferrarip
    @eduferrarip 2 года назад

    Boa Nuno! Obrigado por partilhar seu conhecimento com a gente!

  • @hsf396
    @hsf396 4 года назад +1

    Very Useful! Thanks Nuno Silva

  • @mohammedfarook7259
    @mohammedfarook7259 4 года назад

    Wow 😍 good tutorial keep it up looking for more tips and hacks in lumion in your upcoming videos

  • @KhDESIGNbyNolen
    @KhDESIGNbyNolen 4 года назад

    This is great tutorial. Thanks.

  • @mohamedabdallah-pe7uk
    @mohamedabdallah-pe7uk Месяц назад

    When I rescal the matrial, it starts to make rectangle lines separating the whole image

  • @Zuhern90
    @Zuhern90 4 года назад

    Amazing tutorial, you simplified the information very well,

  • @juanjosedibildoxgonzalez6021
    @juanjosedibildoxgonzalez6021 2 года назад +1

    Hello Nuno. I did exactly the same as the tutorial but maps doesn't match correctly, also when I scale them, it scales the albedo map only and it looks weird. Do yo know how to fix this? I think this issue is coming from Sketchup, but I am not really sure...

    • @NunoSilva3d
      @NunoSilva3d  2 года назад

      Hi! Without checking the project itself it's hard to tell what's wrong.

  • @Trimanonymous
    @Trimanonymous 4 года назад

    I ve shared this video with my friend!!and i translated for them!thank u for ur excellent tutorial!!! looking for your next video!!!

  • @saifaladdin633
    @saifaladdin633 2 года назад

    Waw waw waw
    What is that
    Amazing 🤩
    Many thx sir god bless you

  • @MrDavidGafas
    @MrDavidGafas 3 года назад +1

    hi Nuno, can you explain me why did you invert the normal map green channel, and how did you do it?

    • @NunoSilva3d
      @NunoSilva3d  3 года назад

      Yes, because if you don't you will have incorrect lighting on the texture. Like the wrong shadow placement.

  • @daralbunyan
    @daralbunyan 4 года назад +2

    in my lumion 10.0.1 pro i can not add displacement because the material had just two channal diffuse and normal >
    in your video i show three channal in lumion
    which version do you use
    thank you >>>>>

    • @NunoSilva3d
      @NunoSilva3d  4 года назад +1

      You need to have Lumion 10.3 to use Custom Displacement. But note that the workflow is the same, without the Displacement.

    • @daralbunyan
      @daralbunyan 4 года назад

      @@NunoSilva3d thank you

  • @isuruwijesuriya4232
    @isuruwijesuriya4232 4 года назад +2

    Damn, this is super cool and useful. Thanks a lot!!!

  • @Donquijote007
    @Donquijote007 4 года назад

    dude your tutorials are amazing , thanks!

    • @Donquijote007
      @Donquijote007 4 года назад

      also I HAVE A PROBLEM, when a paste the gloss material in the normal channels the norma turn like pink color whay?

    • @NunoSilva3d
      @NunoSilva3d  4 года назад

      Glad you like them!

    • @NunoSilva3d
      @NunoSilva3d  4 года назад

      Can you show me a screenshot of the problem you are having?

    • @Donquijote007
      @Donquijote007 4 года назад

      Nuno Silva , I fix it , thank you

  • @priyankpatel9676
    @priyankpatel9676 3 года назад

    Why did you inverted green channel for rough plaster material and not for the wood planks one???

  • @fototus7179
    @fototus7179 Год назад

    now i am in a good mood

  • @trankhuong2697
    @trankhuong2697 3 года назад

    thanks for the tuturials Nuno

  • @3darchstuffs
    @3darchstuffs 4 года назад

    Superb Tutorials. Thank you for making it. Keep it up.

  • @alexanderfeoktistov6135
    @alexanderfeoktistov6135 2 года назад

    EXPORT TARGET
    When I try to setup bridge it ask me what engine or DCC lumion aim to work with? Thank you

  • @srht5103
    @srht5103 3 года назад

    pertaining to the gloss map
    is white the reflective part?
    and black is the part that does not reflect?

  • @bdanieltube
    @bdanieltube 2 года назад

    thanks Nuno, helped a lot.

  • @AryanWirawan
    @AryanWirawan 3 года назад +1

    Great video. Thank you. Do you have video how to make the grass?

    • @NunoSilva3d
      @NunoSilva3d  3 года назад +1

      Which grass? The last part of the video? It's downloaded from Megascans.

    • @AryanWirawan
      @AryanWirawan 3 года назад

      @@NunoSilva3d Thanks

  • @josepereznavarro29
    @josepereznavarro29 2 года назад

    Thanks Nuno, good tutorial

  • @EhabTawfek
    @EhabTawfek Год назад

    omg this is really useful i hope i had the money to join your course but unfortunatelly i cant causeof im still sudent and the differece in curreny herein egypt makes it so expensive

  • @FreeFrameAnimation
    @FreeFrameAnimation 4 года назад +1

    Great tutorial 🔥🔥🔥
    Thank you 🙏

  • @Springblossom8888
    @Springblossom8888 4 года назад +1

    Thank you. It was so helpful.

    • @NunoSilva3d
      @NunoSilva3d  4 года назад

      I'm glad it was helpful! ☺️

  • @amdesizn1336
    @amdesizn1336 3 года назад

    I love your tutorial.

  • @anohneh3dhouse235
    @anohneh3dhouse235 3 года назад +1

    Idol can you please make tutorial video of realistic chrome & stainless steel textures in lumion 10

  • @sanjeevshrestha1648
    @sanjeevshrestha1648 4 года назад +2

    Awesome tutorial.

  • @sriharshavardhan9475
    @sriharshavardhan9475 4 года назад +1

    Please do a tutorial on interior render scene please. When its a small closed room like size 15' x 12' & only with few normal windows .

  • @agustinpelletlastra5877
    @agustinpelletlastra5877 4 года назад

    For a vray user this is great

  • @mahmoudgharib8900
    @mahmoudgharib8900 3 года назад

    thank you for the amazing tutorials

  • @yougarage
    @yougarage 3 года назад

    Thank you - very clear and concise.

  • @PureCAD
    @PureCAD 4 года назад

    Thanks! I really need this tutorial

  • @khairulbahariandiprawira
    @khairulbahariandiprawira 2 года назад

    Thank you! much appreciated

  • @alancooke9357
    @alancooke9357 3 года назад +4

    Damn nice. Thanks.

  • @ARDANPUTRA92
    @ARDANPUTRA92 2 года назад

    Thank you, it works perfect!

  • @donquijote6030
    @donquijote6030 3 года назад +1

    Great video. Thank you, sir!

  • @pinkpurple4189
    @pinkpurple4189 2 года назад

    why do some sites have 2 normal maps for a material?

  • @mitaliacharya6286
    @mitaliacharya6286 3 года назад +1

    Hi Nuno, can you please let me know when I download free material from poliigon, it doesn't have a displacement map in it, Please suggest how to proceed further in that case.

    • @NunoSilva3d
      @NunoSilva3d  3 года назад

      Which one are you downloading that doesn't have Displacement? Can you paste here the link?

  • @jasimmeaaljazzaf3173
    @jasimmeaaljazzaf3173 3 года назад +1

    I have an older version of lumion but I don’t need displacement ... I have one issue though, when I follow the steps and put the gloss map in the alpha Chanel and save it as targa in 32 bit as you did I still have a very reflective material!

    • @NunoSilva3d
      @NunoSilva3d  3 года назад

      Open the targa file again in Photoshop and confirm it has the alpha applied correctly.

  • @alexisbidal8304
    @alexisbidal8304 4 года назад +2

    When will we be able to see tutorials or an unreal engine 4 course on your channel. I have long wanted to learn how to use this program to create environments for my architectural projects. Greetings nuno!

    • @NunoSilva3d
      @NunoSilva3d  4 года назад +1

      I worked with Unreal Engine 4 before, but the process is not as easy and fast as Lumion. There is a big learning curve. :)

  • @cgimadesimple
    @cgimadesimple Год назад

    great video!

  • @ramonbastos1842
    @ramonbastos1842 3 года назад

    Hi! Awesome video! I have a Wrinkle map (black and white) that I want to use on my leather material. How would I do it?

  • @gustavkorompis2171
    @gustavkorompis2171 3 года назад

    What the program from beginning? Is it Lumion or other program?

  • @user-uw4eu1fl9b
    @user-uw4eu1fl9b Год назад

    Hello, my graduation project, the glass factory. What do you advise me to use from its raw materials in the final output?

    • @user-uw4eu1fl9b
      @user-uw4eu1fl9b Год назад

      I want to use something that has a shine to it

  • @brorujivanichkul3752
    @brorujivanichkul3752 3 года назад +1

    Hi​ Nuno, really​ appreciated​ your​ VDO, it's​ very​ usefull for​ people.
    I​ have​ some​ questions,
    In​ LUMION​ 11​ there​ are​ 3​ slots to​ in​ put​ Material's​ Maps
    1.​ Diffuse/Albedo
    2.​ Normal​ Map.
    3.​ Displacement​ Map.
    But​ as​ we​'ve already​ realized that​ there​ are​ more​ another usefull​ Maps​ when​ we​ generate or​ download​ from​ Website.
    My​ questions​ are​ :
    1.​ Which​ kind​ of​ Map​ must​ be​ blend​ed into​ Chanel​ Layers​ by​ Photoshop​ Into​ ALBEDO/DIFFUSER​ MAPS???
    and...
    2.Which​ kind​ of​ Map​ must be​ blend​ed into​ Chanel​s Layer​ by​ Photoshop​ In​to NORMAL​ MAPS???
    And​ what​ is​ the​ principle to​ decide​ that?
    Thank​ you​ in​ advance​ for​ your​ kind​ in​Formation.

    • @TheUsaid11
      @TheUsaid11 2 года назад

      I want to know the same! Did you get the answer??

  • @alangoncalves889
    @alangoncalves889 3 года назад +1

    Nuno, may i ask why you didn't use the roughness inside the albedo as previous tutorials??

    • @NunoSilva3d
      @NunoSilva3d  3 года назад +1

      You can either use Roughness on the Albedo or Gloss on the Normal map. Just use one of these options.

    • @alangoncalves889
      @alangoncalves889 3 года назад

      @@NunoSilva3d i've been using both since i saw in your leather tutorial. One eliminate the other?

  • @izoyt
    @izoyt 3 года назад +1

    does this displacements affects corners? doesn't seems so, still just regular box corner. how to make this on let say old brick or stone building etc?

    • @NunoSilva3d
      @NunoSilva3d  3 года назад

      Not yet. This is more of a Parallax effect. You would have to do some editing in post to have that effect.

  • @vasiltashkov594
    @vasiltashkov594 4 года назад +1

    How comes you have tree lots for placement of material textures (color, displacement and normal map) I have only normal and color...

    • @NunoSilva3d
      @NunoSilva3d  4 года назад

      You need to have Lumion 10.3 or higher.

  • @pinkpurple4189
    @pinkpurple4189 2 года назад

    so basically we have to add glossy map on alpha channel of normal map. But I've one question, which normal map should we use , GL or DX?

  • @tchanka3433
    @tchanka3433 3 года назад +1

    Thx for this tutorial. 1 question : I saw some videos were people's put the AO into the Albedo, and others put the roughness into the Albedo. Can you explain me in wich case i have to use the AO or the roughness ?

    • @NunoSilva3d
      @NunoSilva3d  3 года назад +4

      Hi Nicolas! The AO is to give some contact shadows in the Albedo. If you get a diffuse map, don't do this, because usually they already come with contact shadows. In Lumion you can either use Gloss or Roughness map. They are the same texture, just inverted. If you use Gloss, put on the alpha channel of the Normal map. If you use Roughness, put on the alpha channel of the Albedo. :)

  • @pranavprabha4025
    @pranavprabha4025 3 года назад

    Targa file saving is missing in photoshop 21. Can you show any other method to save the alpha channel?

    • @NunoSilva3d
      @NunoSilva3d  3 года назад

      I have it and you can save it as .tga. Are you sure about that? Anyway, you can save as .DDS, a nvidia plugin or as TIFF as well.

  • @Arch_HadeelMufeed
    @Arch_HadeelMufeed Год назад

    Lots of thanks ❤️❤️👏🏿

  • @Tajdesignable
    @Tajdesignable 3 года назад

    Nuno How i create the normal map and lost map, Thanks for your answer in advance

    • @NunoSilva3d
      @NunoSilva3d  3 года назад

      What do you mean by lost map?

  • @user-go2yu4hq5p
    @user-go2yu4hq5p 3 года назад

    Aquestion i am putting some material maps from online 8k resolution but when i put it on a box and raise the displacement map value the box polygons go away from each other?
    Any body have advice that could help me?

  • @GEOMARIPEREZ-um3tq
    @GEOMARIPEREZ-um3tq 10 месяцев назад

    Are you using photoshop to blemd those material?

  • @eduferrarip
    @eduferrarip 2 года назад

    Hello Nuno! How are you?! Do you reccomend changing the levels of the gloss map for it to be with more contrast, or just take as it is?

  • @kynpetalcorin7091
    @kynpetalcorin7091 3 года назад

    what if there is no albedo in the file? do i need to use ambient occlusion?

  • @yavuztul
    @yavuztul 3 года назад

    do you always put gloss inside inverted normal map, or you put just put without inverted normal map?thanks

  • @thebieniekmichal
    @thebieniekmichal 2 года назад +1

    Hello. Nice tutorial. Could you tell or show, how to do Alpha Channel trick in Affinity Photo?

    • @NunoSilva3d
      @NunoSilva3d  2 года назад

      Sorry, but I'm not using Affinity Photo, but I'm sure there's a lot of information even here on RUclips on how to do that! :)

  • @denislavangelov6051
    @denislavangelov6051 3 года назад +1

    Hey, Nuno! This is Lumion 10 or 11? Becouse i dont have 3th channel for displacement...

    • @NunoSilva3d
      @NunoSilva3d  3 года назад +1

      Lumion 10.3. Just previous versions don't have displacement maps (Lumion 10.0 has Displacement maps that ship with the product, but you cannot add your own).

    • @denislavangelov6051
      @denislavangelov6051 3 года назад

      Thanks! Lumion 10.3 are there more thinks, that lumion 10.0 does not?

  • @andretavares7293
    @andretavares7293 3 года назад +1

    Boas Nuno,
    Aquando do export...o displacement só me aparece EXR apesar eu selecionar JPG...alguma solução?
    Obrigado

    • @NunoSilva3d
      @NunoSilva3d  3 года назад

      Olá André, podes mandar o link?

  • @marialuisavario2316
    @marialuisavario2316 3 года назад +1

    Hi Nuno, thanks for the tutorial. I have a problem with Displacement map. When i load Displacement map in 8K, Lumion crashes.. why? The map in 4k works but it has low quality..Can you help me?

    • @NunoSilva3d
      @NunoSilva3d  3 года назад

      Hi Maria, maybe your graphics card doesn't have enough memory? Which gpu do you have?

    • @marialuisavario2316
      @marialuisavario2316 3 года назад

      @@NunoSilva3d GeForce GTX 1080 8 GB - AMD Ryzen 7 1800X - Processore 4,0 GHz

  • @JUNLIRAYCREATIONS
    @JUNLIRAYCREATIONS 4 года назад

    thank you sir for sharing this tips.god bless you

  • @ShomitSarkar
    @ShomitSarkar 4 года назад +1

    Nuno Silva hi, noticed one change in this version of 10.3 as against the 10 tutorial u had explained before
    This time u totally skipped using the roughness texture map which u used to put in albeido alpha channel. So is it that due to the new displacement.. The roughness is not useful anymore?

    • @NunoSilva3d
      @NunoSilva3d  4 года назад +1

      Already replied on Facebook group, but I'll leave it here as well :) that part was not clear from my part and I cannot add notes to RUclips video anymore - you can either use the Roughness in the Alpha Channel of the Albedo or use the Gloss in the Alpha Channel of the Normal map. Roughness and Gloss map are the same map, just inverted. It's just that some Software uses one, and another uses the other. :) But just use one. Either Gloss or Roughness.

  • @mujeebrahmanyousef725
    @mujeebrahmanyousef725 4 года назад +1

    hello bro, how to make in a single object with different texture maps, for example, in 3Ds max one element with different ID and assign multi sub-object material with colour variation.

    • @NunoSilva3d
      @NunoSilva3d  4 года назад

      You want to know how to make Normal Maps from a High Poly model?

  • @santiagog.salazar3269
    @santiagog.salazar3269 2 года назад

    Nuno! en tu curso hay subtítulos en español? Gracias

  • @djaybuilders7810
    @djaybuilders7810 4 года назад +1

    this is good tutorial sir keep it up

  • @FatalisArx
    @FatalisArx 3 года назад

    Nice, but still get the tiling issue ! any solutions for seamless texture in Lumion?! thx in advance

  • @ranakouzi7630
    @ranakouzi7630 3 года назад +1

    thank you so much sir!

  • @U77am
    @U77am 4 года назад +1

    Very helpful one Nuno , I just have one confusion as why would you want to add specular as an alpha on the normal file ?
    Is it save memory ?
    As in suppose if we to add it seperately would there be a difference ?

    • @NunoSilva3d
      @NunoSilva3d  4 года назад +1

      You can’t add it separately in Lumion. This is the way you have to add gloss map to your texture. :)

    • @U77am
      @U77am 4 года назад +1

      @@NunoSilva3d ah neat trick

  • @viking4765
    @viking4765 4 года назад +1

    Hello ! Sorry I'm French and I don't understand, where do you find your texture? What site? And what is the site at the very beginning please sir?
    Congratulations, it's very good

    • @NunoSilva3d
      @NunoSilva3d  4 года назад +1

      Hi. It’s Megascans textures. You can find them here www.quixel.com/megascans

    • @viking4765
      @viking4765 4 года назад

      @@NunoSilva3d thank you

  • @KooroshGhotb
    @KooroshGhotb 4 года назад +1

    Many thanks, very useful

  • @muhammadilham-gr1xf
    @muhammadilham-gr1xf 3 года назад

    THANK YOU SO MUCH!!!!

  • @faridamesbah337
    @faridamesbah337 2 года назад

    can you please show us the preset settings if it's possible ..if not..thank you so much for the video ..it's really helpfull

  • @ameninsanov8077
    @ameninsanov8077 3 года назад

    Great lesson, thanks a lot.

  • @Sasquatch..
    @Sasquatch.. 3 года назад +1

    Where do you get your textures from?

  • @Lonewolf-zl5kv
    @Lonewolf-zl5kv 4 года назад +1

    How about the displacement for edges and corners?

    • @NunoSilva3d
      @NunoSilva3d  4 года назад +1

      Yeah, apparently Lumion doesn't render those, would be nice though.

  • @jtanchao
    @jtanchao 3 года назад

    Obrigado Nuno!

  • @1986ArtC
    @1986ArtC 3 года назад

    Hullo, there is some possibility to ad to the Diffuse/Albedo/Colour mat an alpha channel with roughness/reflection/metalness map.
    I think Lumion use Specular Workflow, thus metalness should be replaced by speculatity/reflectivity map.
    I would like your opinion on the above or perhaps a short clip om using an alpha channel with diffuse maps.
    Thank you in advance.

  • @frankgrimes2679
    @frankgrimes2679 3 года назад

    You have great videos

  • @thadyjuinio9916
    @thadyjuinio9916 4 года назад

    superb tutorial, hope u post a tutorial how to use from Quixel glass stain

    • @NunoSilva3d
      @NunoSilva3d  4 года назад

      You mean surface imperfections?

    • @thadyjuinio9916
      @thadyjuinio9916 4 года назад

      @@NunoSilva3d yes, those quixel glass stain, it would be great if u can post tutorial for it.. thank u in advance,

  • @saradia9263
    @saradia9263 Год назад

    so much helpful

  • @michaelsawan5055
    @michaelsawan5055 4 года назад +1

    What is this virsion of lumion please ?! ... and lumion 8 dosent have The geometry choice ?? Right !

    • @NunoSilva3d
      @NunoSilva3d  4 года назад

      Lumion 10.3. You can add Displacement, yes. But the workflow is still the same for older versions, just without the Displacement.

  • @briansebastian7076
    @briansebastian7076 3 года назад +1

    what lumion version is this

  • @project_residential
    @project_residential 2 года назад +1

    Hi, Nuno!
    What I should do when I have both maps: Gloss and Reflection?

    • @NunoSilva3d
      @NunoSilva3d  2 года назад

      Hi! You should only use one. Gloss and Roughness are the same map, just inverted. Some apps take the gloss, others the roughness. In case of Lumion if you find just the Roughness for example, you can invert it and still apply it on the alpha channel of the normal map.

    • @project_residential
      @project_residential 2 года назад

      @@NunoSilva3d thank you!

    • @project_residential
      @project_residential 2 года назад

      In beginning I try to use Gloss as alpha-channel in Normal map, and render wasn't realistic. When I used Reflection render became much better.

  • @dsk6790
    @dsk6790 4 года назад +1

    Wow Amazing!!

  • @Trimanonymous
    @Trimanonymous 4 года назад +1

    Nuno I have a problem.what if i dont have gloss map, is there any way to make the material right?(albedo/normal/roughness/dis/except gloss)

    • @NunoSilva3d
      @NunoSilva3d  4 года назад

      You can always manually adjust the sliders in Lumion until it looks "right", but it won't be as accurate as if you had a Gloss Map. Next week I'll post a new tutorial on how you can make your own maps from scratch. :)

    • @Trimanonymous
      @Trimanonymous 4 года назад +1

      ​@@NunoSilva3d is that means there must be a accurate sliders' number,the only thing i need to do is as much as possibile to get close to it?and it wound be the same result?

    • @NunoSilva3d
      @NunoSilva3d  4 года назад

      @@Trimanonymous just pay attention to the reflection slider, above 1 is already for metallic surfaces.

    • @Trimanonymous
      @Trimanonymous 4 года назад

      @@NunoSilva3d Thank you so much for your patience!