How To Edit A Bright and Airy Look Using Lightroom Classic

HTML-код
- Опубликовано: 6 сен 2024
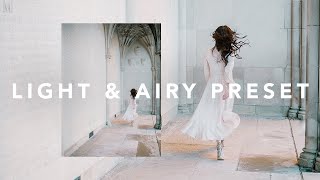
- In this Lightroom Classic tutorial, I will be showing you how you can create a bright & airy (High Key) look to your photos using a Lightroom Classic. This look works great when applying it to wedding and portrait style photos. So make sure to have a look at the pre-selected photo in the first link below to follow along. Credit to www.unspash.com
I hope this video helps and don't forget to subscribe for more awesome videos just like this :)
LINKS:
📸 Photo Link:
unsplash.com/p...
🌇 Filmmaking LUTs & Lightroom Presets Shop:
www.photograph...
🔴 Join this channel membership to get access to perks:
/ @photofeaver
🔗 Gear I Use To Film:
Canon EOS R5: prf.hn/l/A3QRDYY
Canon EOS C70: prf.hn/l/WJm00Ao
Sigma 24mm F/1.4 Art: prf.hn/l/ZYo55Gb
Rode PodMic: prf.hn/l/gxLlEL3
DJI Mavic 3 Cine: prf.hn/l/wzylbme
🟣 Video Feaver RUclips Channel:
/ @videofeaver
👕 Official Merchandise
teespring.com/...
🌐 Website
photographybyf...
📺 Instagram @photo_feaver
/ photo_feaver
📺 Get to Know Me! @James.feaver
/ james.feaver


Great explanation but honestly the before was stunning!
Love the change and really appreciate you talking us through it all. I often find my photos too dark and contrasty by default and this looks like a great way to brighten them up without just relying of upping the exposure, which of course doesn’t bring all these subtle changes.
Yes-I was disappointed that your image didn’t match the same editing style as your thumbnail.
That's exactly what I was thinking. It's not even close. Wondering if he "borrowed" those thumbnail images of a stock photo website 😂
Agree
Wow you are so detailed in explaining cant stop watching your videos best teacher 👌🏻👌🏻👌🏻👌🏻👌🏻👌🏻
Best on this topic so far!!!
Thank you!
This tutorial of yours helped me, I'm really liking these colors, it doesn't affect the skin tone
thanks! hugs from Brazil 🇧🇷🇧🇷🇧🇷
How would you apply bright and airy in a very green environment? Please make a video in this.
I'm now editing an almond blossom woman portrait and this helps a lot! Thank you
Clear and specific explanation, I could understand everything even though I am not a english native speaker, thanks a lot!
Glad to hear that! Thanks you!
Hey mate I just stumbled across your channel and I LOVE your tutorials and videos. Please keep it up!
Wow amazing
Excellent tutorial!
Your enable profile corrections isn't turned on all the way. You have to also input the make and profile of the lens.
He is editing the JPEG File
@@chhangte_anp that doesn't matter. Raw and jpeg both work. What he is doing has zero effect.
This was very helpful. Thank you!
perfect ... just what i needed... dont judme me people ... I shoot combat sports...its my first and hopefully last wedding 🤣🤣but if it aint ...thanks for the preset😆
The edited one didnt come out as the one in the thumbnail😢
control the Exposure.
Your starting point matters. If your image is in a different places with color values, then the values he provided may not help. For example, if you were providing map directions for someone to get to your house who was 1 mile (or kilometer) away from you, those directions wouldn't be the same for someone who was 3 miles away and has to cross a bridge. This is why I don't like LUTs. It is best to just learn the principles that make a photo look nice (I'm also always learning how to do this!). This way, your starting point doesn't matter because we know the style we're going for, and know to use the tools we need to get there. It can be a pain in the butt, but stick with it!
What were your camera settings to begin with? Wondering if you were neutral metering setting for your exposure? Thanks for the directions for the look. I’ll definitely be using it.
depends on location, time, light quality... too many different variations
For a second there I thought you were Gavin Hoey
People complaining about the result in the video not being the same as the thumbnail must be the same whiners from DPreview forums. Not all photos are the same and this was an approximate setting requiring some tweaking after after depending on your image so you can understand how to get there.
Very Helpful
Thank you so much
Helpful, but they don’t look like your thumb nail 😅
I have a question, I see that your white balance in Lightroom is set to 0 and I assume you are showing with RAW.
but for me what I export the image to Lightroom the values change to K and numbers instead to 0 how can I fix this
You can clearly see that his "RAW" picture is not RAW... RAW pictures dont have such colors..
for me it did not really work. does not fit my style of images
Which Lightroom version r u using?
What Kelvin you shoot in?
White balance your image. Best to do it in-camera, but can be adjusted afterwards. Daylight is usually around 5600K, indoors is usually 4000K, and some very yellow/tungsten lights are 2800K-3200K. The lower the K number, the more yellow the light is. The higher the K number, the more blue. Daylight is white/blue, and indoor is often more yellow. For example, the lights in the building I work in are 4000K, and daylight coming in through the windows is 5600K.
Excellent workflow, but I do wish you wouldn’t say “Go ahead” at every single step.
nah.
Sorry but too many go aheads spoil this one
I’m going to “go ahead” and laugh at this one lol.