your plans sound expensive so you've got a new Patreon now ;-) , just saw the jet-ski plans there. I'll support you during the time you build watersport stuff just because i love it especially the board related stuff
I’m a 67 year-old guy and you are a great inspiration to me! Because of you and your extremely helpful (and humorous) videos, I built a motorized kayak using a 70mm water jet thruster, the same 400a ESC, 56114 motor, and 4 6000maH batteries, with motor and ESC cooling. It’s a BLAST!!! And all thanks to you for pioneering the way! Thanks so much for all of the many hours of enjoyment I’ve had so far!! ❤️
@@jacobtebrake6734. He’s claiming “hrs”. So my guess is. It took 50 charge cycles. lol. Because he wasn’t my get anymore than 20 or so mins on that battery & motor combo. lol
For heat dissipation, make the bottom of the box aluminum with the fins for the board and flush with the bottom. Thermal paste as many hot components directly to the plate before bolting down. Combined with your water cooling system to pick up the slack, the bottom plate can pull double duty as heat sink and fins.
@@FollowRevolutionNine Not anywhere near the batteries, they must be allowed to heat up to a working temperature (60°c max!), there are aluminium water-cooling blocks for battery compartment. You need something practical, his water-cooling can work absolutely fine, just need some tuning.
Very cool, I used oil bearing seals on 3d printed jet drives and they work well but the seal that is not cooled by water tends to heat up and wear out. The issue i had on my electric surfboard is it was built too wide and heavy, while very stable it wasn't fast. Have you thought about using power tool batteries? I'm using 4 dewalt 9000mah batteries. Great video as usual and engineering 👏.
Power tool batteries generally are liion cells which typically can't output anywhere near as much power as a lipo, although they do have more capacity for the same size
@@H.J.B There's a new generation of lipo tool batteries, have seen them from Dewalt who seem to be very big on the advantages... might be something that becomes more standard.
@@lemagreengreen the other thing would be the cost difference compared to just buying a lipo so like unless the tool batteries are that much more valuable to you than lipos and smaller tool batts. Also the connectors on tool batteries aren't generally meant for thousands of watts
As someone who is heavy into 3D printing and the 3D printing community this might be the coolest thing I have ever seen. Congratz dude. Absolutely amazing. Even tho you didn't model everything yourself you still made the thing work.
I've never even heard of an electric surf board. This is such a cool idea and a great execution. One thing I'd add is using lightweight PLA might help waterproofing a little bit because it foams up a little filling in all the pores and holes in a 3d print. I'm surprised at just how well it works already. I hope you can get those cooling issues in order for the second impeller.
That's a good idea using LWPLA - I'd have expected that with the foaming, it would end up with more pores overall? It'd be very interesting to see the results though, and more lightness can never be a bad thing
@@roseroserose588 it's a bunch of little bubbles of air, thus creating a matrix of closed cells. The usual issue with normal prints leaking is probably from delamination of layers along their weakest axis, which I'm not sure LWPLA would improve on. The weight savings would be good, but maybe a fiberglass coating would be more watertight and strong in a final version.
What about ABS and vapor treating it in one of those huge (mostly) airtight containers with the foam seals? Most of his plastic pieces don't seem to have a huge amount of detail and the treatment would only have to penetrate a tiny bit to create an effective seal
@@elyasstephens8242 ABS is a bit of a nightmare to print - especially with something so large, but for the best results it is probably the way to go as it'll also be uv resistant and last a lot longer to boot. Without post-processing resin i think would be the most water-tight option, but then size becomes an issue again
Love the update. I made my own surfboard based on your original design but replaced the 53mm impeller with a 70mm impeller. I also simplified by going with a single drive instead of a dual drive. My biggest problem on initial testing was my buoyancy, it was more submarine than boat. I added rigid foam to the bottom and sides to also assist in stability. It worked great. I must say you make it look easy to ride but it took me the better part of a morning to just stay on it for a minute without falling off. My next improvement will be the battery compartment, to make it completely waterproof and allow the space for more batteries.
Twin drive are always easier to ride as a single prop going clockwise or counter clock wise pushes the water away from the center of the board the board will then have a tendency to drift left or right and your balance is not used to compensating for that sideways push. Whereas if you have both left and right spinning props the forces will mostly cancel each other out meaning most of the force ends up being centered behind the board making it far more natural for our balance systems to adjust to and making riding comparatively speaking a breeze. Ofc its still a skill that needs to be learned buts it is much easier to learn.
Great video as always! Love your work. 1:33 a bearing should always be inserted by hitting the OUTER ring, not the inner ring. This could damage the new bearing easily. Might not be as bad when working with plastic instead of metal but still made me wanna comment. Otherwise, very nice work
very awesome dude, looks like a whole lot of fun, I never got into surfing because the waves never lasted long enough for me to enjoy it, but this, this would be fun.
You should revisit this. I built jet pumps for drag boats and noticed the intake was very small. The bigger the intake the less chance of cavitation and dry sucking. It should be at least triple the size of the pump volume. If you look at the pump as a cup standing up and filling it with water the intake should hold a minimum of double the water volume to extract all the potential thrust.
This is very cool. 👍 A recommendation, create a stand alone propulsion system like this, but make it clamp on to what ever you want. A surf board, kayak, small boat etc, and then you will have something that is universal and more people will want it.
I have been shopping around for something exactly like you describe, that i can just mount to the side, or ideally both sides, of my sit in kayak. No way I want to deal with a huge trolling motor type pole, nor to cut any holes in my boat. Ideally I dont want to deal with any steering linkages either. With the application of differential differential thrust and a small 3d printed body (which I could modify if needed to best fit my kayak), I think all the problems are solved. I wonder how much that 3d printed metal impeller x4 costs?
@@gutrali I don't think differential thrust would have enough authority to actually turn, unless the impellers were pretty far apart from the centerline. I figure that with the distance needed for turning with differential thrust, it would end up looking more like a catamaran.
@@gutrali I don't see a reason why you couldn't print the impellers from CF nylon or polycarbonate. Also I agree with the commentor above that differential thrust wouldn't work on something as long and narrow as a kayak. A simple rudder at the back can easily be added and would work much better.
@@MrSupermugen Bearings should *ONLY* be pressed in and removed by the outer ring!!! Otherwise it can damage & mis-align the bearings internal alignment and raceway!!!🙄 PS--Best method is to find a wrench socket that *ONLY* contacts the outer ring, attach to a socket extension rod and tap into place with a deadblow hammer/mallet for proper bearing seatment!!!
Great video! How about doing that with an eFoil board? I am curious to see if there is an efficiency increase with the wings under the water compared to a jet-surfboard
72V system would solve a lot of problems. It would drop your amperage while increasing your power available. There are some very reliable and affordable 72v motors on eBay.
I have a 1981 "SurfJet"; a 2-stroke gas engine impeller based surfboard. It goes about 40km/hr if you're < 200lbs. It however, is about the size of modern day paddle boards. So, why not swap from the longboard style to a paddle board - this would allow for more components, likely even able to store the batteries inside the board itself (they're thicker than a longboard) and overall be better. Mind you, you may lose agility and response but what you lose, you gain in a much longer run time. Just my thoughts - keep the videos coming!
Well I think the point is that the surf board is nimble and responsive. I'd rather take the speed and agility over a big, heavy, slow paddle board. Age probably is a factor in preference, nonetheless
I love building things that nobody believes will work. The older you get, the less time you have to indulge your fantasies. That is a beautiful ride, and I would love to ride one. I would love even more the feeling again when you put it together and it works. It's a real Rush both inside and out. Take care and God bless. Intelligence and perseverance will get you a long ways, but I lack both.
The journey you take us on with the builds is always worthy of a like. I'm a person that likes quick closure, although your projects might have future iterations, the videos always have that 'complete journey' feeling. I'd blow more smoke up your a$$ but I think those motors might end up doing that for you haha. Thanks for the content
Create a heatsink that sits in the water and removes heat from the esc and the motor. All that cold water your displacing could be cooling the electronics!
To physically link the heat sink to the motor and the electronics and also keep everything water tight would probably be challenging. WOuldnt mind watching him try though.
@@gutrali Motor heatsinks or jackets are a thing, so there I wont see a problem. Making the base out of metal or a metal plate with heatsink fines could be bigger challenge. But with the help of the new 3D printer metal sponsor, this could all be made out of one or two pieces with some CPU paste or cooling pads.
@@gutrali Use heat pipes. You can buy them in all lengths and they are very efficient at transfering heat. I would mount all the ESCs to a copper base und use heat pipes to get the heat out underneath where they connect to a heatsink.
With housing montage only put pressure at the outer ring, and axle montage the inner ring, else you're forcing the other one down by putting pressure on the bearings. Deforming them, and you start off with a bearing with the damage you would ve had at a 1000 working hours... Vice and rubber hammer would be a massive improvement to begin with✌🏻👊🏻
I bet if you go on the site pcbway has it set up to give a quote, but last I heard their printing service isn't that expensive, even in metal. May be worth looking into if you need something sturdy. :)
02:39 - One easy way of reversing the motor direction (say in the field with no access to the software) is to just swap any two of the three motor wires. This will reverse the motor rotation.
Love it, fantastic job and super interesting! Also, have you thought about adding a bilge pump? Possibly adding an angled v shape in the back of the housing going to a little 12V pump inlet may help with the water intrusion. The natural acceleration and angle would help force all of the water down to the inlet. Again, fantastic job!
@@Vousie would you not agree that keeping the electronics away from water is a good idea? It doesn't take water very long to screw up stuff if it gets into the wrong place. I'd say the less chance of water damage the better.
I am so glad that at some point in the past, a random video of this channel got recommended to me. As I am heavily invested in other hobbies, it is truly a joy to see what you are tinkering with!
You might want to use hybrid ceramic bearings so they don’t seize up. Also replacing the ones in the motors is a good idea. I made a robotic fish and ran into this problem early on. (Worse in a pool tho)
That's super cool. Would it be hard to make this in such a way that there's no box sticking out on top? Also, with this design it might be smart to add in channels and a hard edge like wakeboards have them for carving
I mean... someone could do an old school wood surfboard kinda like an electric guitar and then fit the motor drive and impellers into the structure. If you designed the whole thing from scratch, maybe CNC cut the body, you could have very smooth transition lines and such and make it all fit cleanly. Im on the other side of the world or id offer to use my cnc to cut the guy a body, but I'm sure there's gotta be someone with a 10 foot machine in his neck of the woods that could hog him out a simple surfboard body with a hollow set up for his electronics and mechanical bits.
Very cool project, love to see how it grows! But I saw at 11:00 that you are converting DC to AC back to DC just to charge the batteries. A DC to DC charger would probably be more efficient less of a fire risk and less cables aswell! I know ISDT has a couple good ones that may work well for that matter, like the P30 :D But the project you have going is very nice!
Exactly, I charge my batteries directly from my car battery, made a simple XT60 adapter with large alligator clips, it's working great. My guess is that he knows it, many RUclipsrs do things "wrong" to generate more comments.
Great work. Stout impellers! Are they 100% infill or did you go lower to save weight? So cool PCBway can do that for us. Thanks for all the detail man! Loved the ID joke, haha.
You can't really do anything except 100% infill with metal sintering, because if you create an infill pattern the gaps will just be full of metal powder that hasn't been melted together and can't get out. Metal powder weighs the same but doesn't add any strength so it's literally useless. You can make hollow parts if you incorporate drain holes into the design so the powder can leak out when you're done but something like an infill pattern would trap it all in.
@@AlRoderick With sintering you actually could, the metal powder fdm prints you sinter in an oven afterwards. But with this laser melting you'd have to leave a hole somewhere I guess.
Observation 2) ABS has been injection molded for 50 years, i.e. Lexan headlamps replaced glass car lamps. Plastic molding requires one minute last I checked.
As an armchair engineer, I have to add that two impellers in series don't move double the water, they just move the water harder, doubling the pressure. The result for the power demand is the same (parallel or series pumps), it's gonna double. But doubling the pressure on a jet with an additional stage grants the opportunity to use smaller nozzle diameters more efficiently. Thus increasing the top speed without having to increase the motor speed. Great build by the way, impressive top speed!
bruh this is insane cool.. i will try this one time by myself. cuz i have 2 differnt boards at home don´t use them for anything since years. thanks for this inspiration


Liking the video tends to make it a little more popular so I would appreciate that very much. Working on a hydrfoil and electric jet ski next.
Dude you forgot about the discord server!!!
I was thinking about an hydrofoil while watching this video !
Electric jetski would be sick.
try electric contact grease on your xt90's should help them conduct a little more
your plans sound expensive so you've got a new Patreon now ;-) , just saw the jet-ski plans there. I'll support you during the time you build watersport stuff just because i love it especially the board related stuff
I’m a 67 year-old guy and you are a great inspiration to me! Because of you and your extremely helpful (and humorous) videos, I built a motorized kayak using a 70mm water jet thruster, the same 400a ESC, 56114 motor, and 4 6000maH batteries, with motor and ESC cooling. It’s a BLAST!!! And all thanks to you for pioneering the way! Thanks so much for all of the many hours of enjoyment I’ve had so far!! ❤️
How long of run time and what speeds are you getting ?
Thats awesome 👌
Rock on brother, nice craftsmanship
@@jacobtebrake6734. He’s claiming “hrs”.
So my guess is. It took 50 charge cycles. lol.
Because he wasn’t my get anymore than 20 or so mins on that battery & motor combo. lol
do you have any pics of your kayak cause I am planning on making my own
For heat dissipation, make the bottom of the box aluminum with the fins for the board and flush with the bottom. Thermal paste as many hot components directly to the plate before bolting down. Combined with your water cooling system to pick up the slack, the bottom plate can pull double duty as heat sink and fins.
I like this a lot. There are thermal transfer adhesives that could help so you don't get stuck using computer paste.
What about putting a chunk of dry ice into the box?
Im no expert but, i think Instead of thermalpaste he could use soldering and stainless steel.
@@FollowRevolutionNine i'd be worried about condensation inside the box from going sub ambient
@@FollowRevolutionNine Not anywhere near the batteries, they must be allowed to heat up to a working temperature (60°c max!), there are aluminium water-cooling blocks for battery compartment.
You need something practical, his water-cooling can work absolutely fine, just need some tuning.
Great work, amazing creativity! If you are our engineer, I believe our products will be stronger!
Very cool, I used oil bearing seals on 3d printed jet drives and they work well but the seal that is not cooled by water tends to heat up and wear out. The issue i had on my electric surfboard is it was built too wide and heavy, while very stable it wasn't fast. Have you thought about using power tool batteries? I'm using 4 dewalt 9000mah batteries. Great video as usual and engineering 👏.
Power tool batteries generally are liion cells which typically can't output anywhere near as much power as a lipo, although they do have more capacity for the same size
Try use fkm/viton seals, they can withstand twice us much heat ar regular NBR and are more resistant to wear
@@H.J.B There's a new generation of lipo tool batteries, have seen them from Dewalt who seem to be very big on the advantages... might be something that becomes more standard.
@@lemagreengreen the other thing would be the cost difference compared to just buying a lipo so like unless the tool batteries are that much more valuable to you than lipos and smaller tool batts. Also the connectors on tool batteries aren't generally meant for thousands of watts
This is tough😯.,.,.
ruclips.net/video/gmu5KY-ykv4/видео.html
As someone who is heavy into 3D printing and the 3D printing community this might be the coolest thing I have ever seen. Congratz dude. Absolutely amazing. Even tho you didn't model everything yourself you still made the thing work.
I've never even heard of an electric surf board. This is such a cool idea and a great execution. One thing I'd add is using lightweight PLA might help waterproofing a little bit because it foams up a little filling in all the pores and holes in a 3d print. I'm surprised at just how well it works already. I hope you can get those cooling issues in order for the second impeller.
It is!!!! So cool and sick
That's a good idea using LWPLA - I'd have expected that with the foaming, it would end up with more pores overall? It'd be very interesting to see the results though, and more lightness can never be a bad thing
@@roseroserose588 it's a bunch of little bubbles of air, thus creating a matrix of closed cells. The usual issue with normal prints leaking is probably from delamination of layers along their weakest axis, which I'm not sure LWPLA would improve on. The weight savings would be good, but maybe a fiberglass coating would be more watertight and strong in a final version.
What about ABS and vapor treating it in one of those huge (mostly) airtight containers with the foam seals? Most of his plastic pieces don't seem to have a huge amount of detail and the treatment would only have to penetrate a tiny bit to create an effective seal
@@elyasstephens8242 ABS is a bit of a nightmare to print - especially with something so large, but for the best results it is probably the way to go as it'll also be uv resistant and last a lot longer to boot.
Without post-processing resin i think would be the most water-tight option, but then size becomes an issue again
Love the update. I made my own surfboard based on your original design but replaced the 53mm impeller with a 70mm impeller. I also simplified by going with a single drive instead of a dual drive. My biggest problem on initial testing was my buoyancy, it was more submarine than boat. I added rigid foam to the bottom and sides to also assist in stability. It worked great. I must say you make it look easy to ride but it took me the better part of a morning to just stay on it for a minute without falling off.
My next improvement will be the battery compartment, to make it completely waterproof and allow the space for more batteries.
Twin drive are always easier to ride as a single prop going clockwise or counter clock wise pushes the water away from the center of the board the board will then have a tendency to drift left or right and your balance is not used to compensating for that sideways push. Whereas if you have both left and right spinning props the forces will mostly cancel each other out meaning most of the force ends up being centered behind the board making it far more natural for our balance systems to adjust to and making riding comparatively speaking a breeze. Ofc its still a skill that needs to be learned buts it is much easier to learn.
please make a video of it.
I am glad to see how nicely it worked out!
I enjoy it he way you explain what needs to be explained.
Nothing more.
These videos are easy watches and I’m not even skipping through.
Вот это проектище! Как всегда отлично! Один из лучших каналов Ютуба.
не то что у тех чуваков у академика за 800.000 рублей... вообще жесть конечно там и принцип другой но все же
@@DimaLegoFUN Цифры не главное. Круто же получилось согласись.
This is freaking awesome! Young, talented and fearless engineers like that give humanity hope.
This was awesome! Next project needs to be a E-Foil!
This is so cool.
Great video as always! Love your work.
1:33 a bearing should always be inserted by hitting the OUTER ring, not the inner ring. This could damage the new bearing easily. Might not be as bad when working with plastic instead of metal but still made me wanna comment.
Otherwise, very nice work
I can't hold my rage, lmao
The sound of those parts coming together is the best ASMR!
very awesome dude, looks like a whole lot of fun, I never got into surfing because the waves never lasted long enough for me to enjoy it, but this, this would be fun.
That's rigght
Well done Sir! Appreciate all the links provided as well. Just got a 3d printer and this is great.
can't wait for the foiling version!
You should revisit this. I built jet pumps for drag boats and noticed the intake was very small. The bigger the intake the less chance of cavitation and dry sucking. It should be at least triple the size of the pump volume. If you look at the pump as a cup standing up and filling it with water the intake should hold a minimum of double the water volume to extract all the potential thrust.
Its time to create your own E-Foil! This 3d printed impellers looks amazing!
Good design man. I LOVE seeing people using 3d printed metal parts, its the future of manufacturing. Minimal waste, maximum flexibility.
Bio deresble too
This is very cool. 👍
A recommendation, create a stand alone propulsion system like this, but make it clamp on to what ever you want. A surf board, kayak, small boat etc, and then you will have something that is universal and more people will want it.
Great idea. A universal "power pack" for anything that floats (and you want to go FAST).
I have been shopping around for something exactly like you describe, that i can just mount to the side, or ideally both sides, of my sit in kayak. No way I want to deal with a huge trolling motor type pole, nor to cut any holes in my boat. Ideally I dont want to deal with any steering linkages either. With the application of differential differential thrust and a small 3d printed body (which I could modify if needed to best fit my kayak), I think all the problems are solved. I wonder how much that 3d printed metal impeller x4 costs?
@@gutrali I don't think differential thrust would have enough authority to actually turn, unless the impellers were pretty far apart from the centerline. I figure that with the distance needed for turning with differential thrust, it would end up looking more like a catamaran.
@@gutrali I don't see a reason why you couldn't print the impellers from CF nylon or polycarbonate.
Also I agree with the commentor above that differential thrust wouldn't work on something as long and narrow as a kayak. A simple rudder at the back can easily be added and would work much better.
@@coriscotupi yeah that's what I was thinking for a kayak, one motor unit hanging off of each side
Absolutely loved this video and the fact that you're transparent in what you used.
You don't hammer in a bearing on its inner ring, you have to always push it on the outer ring or else you might damage the bearing.
It's only plastic, if the bearing was going into a Super quality metal fitting then yes.
@@MrSupermugen Bearings should *ONLY* be pressed in and removed by the outer ring!!! Otherwise it can damage & mis-align the bearings internal alignment and raceway!!!🙄
PS--Best method is to find a wrench socket that *ONLY* contacts the outer ring, attach to a socket extension rod and tap into place with a deadblow hammer/mallet for proper bearing seatment!!!
@@fookingsog cool. but its plastic, if the bearing cant stand that lateral load then your using the wrong bearing.
Plus... there plastic.... he can make a new one with 3d printing. And I don't thinks he cares since he's not going to be using it 24/7
Brilliant. What Fun. Pure Engineering Genius
“I am all alone, I have helmet, life west and ID, so it easier to identify the body. “
That had me laugh a bit to hard! 😂
You are amazing at engineering honestly
Great video! How about doing that with an eFoil board? I am curious to see if there is an efficiency increase with the wings under the water compared to a jet-surfboard
Those exist
@@reeleasy8670 so do electric surfboards, what’s your point?
what a smart chap, lovely guy too....
72V system would solve a lot of problems. It would drop your amperage while increasing your power available. There are some very reliable and affordable 72v motors on eBay.
Electric motors run less efficiently the more voltage you add but you get so much more power
So good. The board, the drone flying, raft, all of it.
I have a 1981 "SurfJet"; a 2-stroke gas engine impeller based surfboard. It goes about 40km/hr if you're < 200lbs. It however, is about the size of modern day paddle boards. So, why not swap from the longboard style to a paddle board - this would allow for more components, likely even able to store the batteries inside the board itself (they're thicker than a longboard) and overall be better. Mind you, you may lose agility and response but what you lose, you gain in a much longer run time.
Just my thoughts - keep the videos coming!
I dont think space is the biggest issue here. The batteries are over $120 a pop, thats over $160 per minute of runtime
Well I think the point is that the surf board is nimble and responsive. I'd rather take the speed and agility over a big, heavy, slow paddle board. Age probably is a factor in preference, nonetheless
I love building things that nobody believes will work. The older you get, the less time you have to indulge your fantasies. That is a beautiful ride, and I would love to ride one. I would love even more the feeling again when you put it together and it works. It's a real Rush both inside and out. Take care and God bless. Intelligence and perseverance will get you a long ways, but I lack both.
The journey you take us on with the builds is always worthy of a like. I'm a person that likes quick closure, although your projects might have future iterations, the videos always have that 'complete journey' feeling. I'd blow more smoke up your a$$ but I think those motors might end up doing that for you haha. Thanks for the content
This is great. Good work. Also thank you drone operator.
Create a heatsink that sits in the water and removes heat from the esc and the motor. All that cold water your displacing could be cooling the electronics!
Had the same idea, can’t recommend it enough.
To physically link the heat sink to the motor and the electronics and also keep everything water tight would probably be challenging. WOuldnt mind watching him try though.
@@gutrali Motor heatsinks or jackets are a thing, so there I wont see a problem. Making the base out of metal or a metal plate with heatsink fines could be bigger challenge. But with the help of the new 3D printer metal sponsor, this could all be made out of one or two pieces with some CPU paste or cooling pads.
@@gutrali Use heat pipes. You can buy them in all lengths and they are very efficient at transfering heat. I would mount all the ESCs to a copper base und use heat pipes to get the heat out underneath where they connect to a heatsink.
Polishing the impellers will help a ton. That thing moves. Great stuff.
Recycled imoelers props makebiatrers grener
Great video as always!
1:30 Just a tip: bearings should not be hammered in place. for best results, use a vice or at least a rubber hammer.
With housing montage only put pressure at the outer ring, and axle montage the inner ring, else you're forcing the other one down by putting pressure on the bearings.
Deforming them, and you start off with a bearing with the damage you would ve had at a 1000 working hours...
Vice and rubber hammer would be a massive improvement to begin with✌🏻👊🏻
That’s a really good thumbnail. It reminds me of GI Joe childhood commercials for some reason.
Absolutely love these videos, keep up the amazing work man ❤️
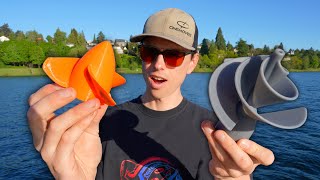
That two stage impeller design has alot of advantages for that size of an impeller, its easier to fit it on a small 3D printer for one.
The main question I think everyone wants to know is how much did you paid for 3d printed metal parts? PS this is one of the best educational builds!
I bet if you go on the site pcbway has it set up to give a quote, but last I heard their printing service isn't that expensive, even in metal. May be worth looking into if you need something sturdy. :)
@@NeoIsrafil So What You think aproximatly IT was 20 or 200$?
Sooo cool! Respect.
02:39 - One easy way of reversing the motor direction (say in the field with no access to the software) is to just swap any two of the three motor wires. This will reverse the motor rotation.
He knows that (maybe the motors are sensored)
he definitely knows that
Bro They Are sensored
Idk if ive ever subscribed to someone on the same video. My man you are nuts and I love it.
Love it, fantastic job and super interesting!
Also, have you thought about adding a bilge pump? Possibly adding an angled v shape in the back of the housing going to a little 12V pump inlet may help with the water intrusion. The natural acceleration and angle would help force all of the water down to the inlet.
Again, fantastic job!
Thought the same. Should be the easier solution that actually sealing this whole array with its different components and all different young's modulus
It has a 3 min runtime... Easy enough to just tip it out when you've finished.
@@Vousie would you not agree that keeping the electronics away from water is a good idea?
It doesn't take water very long to screw up stuff if it gets into the wrong place. I'd say the less chance of water damage the better.
I am so glad that at some point in the past, a random video of this channel got recommended to me. As I am heavily invested in other hobbies, it is truly a joy to see what you are tinkering with!
You might want to use hybrid ceramic bearings so they don’t seize up. Also replacing the ones in the motors is a good idea. I made a robotic fish and ran into this problem early on. (Worse in a pool tho)
Thank you very much man, seriously you helped a lot i started from 0 to 10.
That's super cool. Would it be hard to make this in such a way that there's no box sticking out on top? Also, with this design it might be smart to add in channels and a hard edge like wakeboards have them for carving
He could have totally put all of those components inside the board itself.
I mean... someone could do an old school wood surfboard kinda like an electric guitar and then fit the motor drive and impellers into the structure. If you designed the whole thing from scratch, maybe CNC cut the body, you could have very smooth transition lines and such and make it all fit cleanly. Im on the other side of the world or id offer to use my cnc to cut the guy a body, but I'm sure there's gotta be someone with a 10 foot machine in his neck of the woods that could hog him out a simple surfboard body with a hollow set up for his electronics and mechanical bits.
Very cool project, love to see how it grows! But I saw at 11:00 that you are converting DC to AC back to DC just to charge the batteries. A DC to DC charger would probably be more efficient less of a fire risk and less cables aswell! I know ISDT has a couple good ones that may work well for that matter, like the P30 :D But the project you have going is very nice!
Exactly, I charge my batteries directly from my car battery, made a simple XT60 adapter with large alligator clips, it's working great. My guess is that he knows it, many RUclipsrs do things "wrong" to generate more comments.
@@Eden_M Are you suggesting connecting the lipos directly to a 12v car battery without a charger?
@@Chris-du7hiHell no, use your car battery as a power supply for your smart charger, I'm using ISDT Q8 and Turnigy Mega 400x2.
He's done a great job! I appropriate so much and I wish to have one for my own!
Great work. Stout impellers! Are they 100% infill or did you go lower to save weight? So cool PCBway can do that for us.
Thanks for all the detail man! Loved the ID joke, haha.
You can't really do anything except 100% infill with metal sintering, because if you create an infill pattern the gaps will just be full of metal powder that hasn't been melted together and can't get out. Metal powder weighs the same but doesn't add any strength so it's literally useless. You can make hollow parts if you incorporate drain holes into the design so the powder can leak out when you're done but something like an infill pattern would trap it all in.
@@AlRoderick Great point, thanks for the explanation!
@@AlRoderick With sintering you actually could, the metal powder fdm prints you sinter in an oven afterwards. But with this laser melting you'd have to leave a hole somewhere I guess.
Very powerful water-powered engine
1:32 Hear the bearing scream in pain while being mounted from the wrong ring :'(
(love your videos and projects but this is just painful to watch)
This was Awesome.. Good Job. I've always dreamed of something like this. So Cool Man.
This is absolutely epic!
Very cool!!
I want to build one!
Nice work!!
Awsome now we need a single jet body board. Would have to fit the jet beneath the board somehow.
I hope I get to buy one before I leave this earth ! Great job!
This might be your billion dollar idea. Great execution, keep it up.
Observation 2) ABS has been injection molded for 50 years, i.e. Lexan headlamps replaced glass car lamps. Plastic molding requires one minute last I checked.
"...and nothing had caught on fire yet." I feel like this should be on a t-shirt. Great video.
that looks insanely fun
Good proof of concept
Lots of work, but vary cool. Nice job.👍🏻👍🏻👍🏻
Legendary BROTHER !!! JUST AWESOME !!!
"I am getting absolutely plowed"
Sounds like a great way to spend some time to me!
TNice tutorials is actually a very good and straight forward tutorial. No having ask questions or guess, no over-explaining elents, and brings
Brilliant. Looks like a ton of fun
Your boat is very nice .I love it
As an armchair engineer, I have to add that two impellers in series don't move double the water, they just move the water harder, doubling the pressure. The result for the power demand is the same (parallel or series pumps), it's gonna double. But doubling the pressure on a jet with an additional stage grants the opportunity to use smaller nozzle diameters more efficiently. Thus increasing the top speed without having to increase the motor speed.
Great build by the way, impressive top speed!
bruh this is insane cool.. i will try this one time by myself. cuz i have 2 differnt boards at home don´t use them for anything since years. thanks for this inspiration
i'm really surprised finally something not getting wrong ;)
What a great Video. Congratulations on your success. Now you have your own personal 3 min cigarette boat. Inspirational.
Thank you!
That is soo cool. Would buy when you put it to production :)
So cool man! I need to learn how to 3d print.
That is literally the coolest thing ever man! Wow! Have you thought about how it would work with a petrol motor? You may get much more range.
The problem though is power. A cheap 4-stroke engine isn’t enough. A 2-stroke engine would work, jetsurf uses them.
Thanks for this updated… i nearly rebuilded your V1
That looks like so much fun!
that surfing was really cool👌👌👌
Awesome results..
This is incredible
IN CERTAIN
Wave conditions, especially
Continuous from a Tide.
Would be Ideal.
Great Idea.
OMG, you are a genius.
AliExpress is the shop to go to build electric things these days :D Nice video
thank you for sharing this with us!!!
that was cool home made huh... very nice
how can people be so good at this
Thats sick ! Btw Camera you are holding can show your speed by the way :)
Really epic, nice work!!
Surfing is cool , I never had an interest in it ..... I now want to surf.... cool board!!!!
Thank you so much Sensei! You are a blessing!
really enjoyed it....... my blessings & best wishes to you!!!
Brilliant work.
You have some great cinematography
Very nice work. You may want to get better connectors though. They are getting hot because they are providing resistance.
🙄am jealous😂😂 Love your videos and appreciate all the HARDDD work!