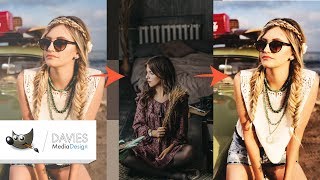
Remove Dark Circles Under Eyes Easily in GIMP
HTML-код
- Опубликовано: 11 июл 2019
- In this GIMP photo enhancement tutorial, I show you how to remove dark circles under a person's eyes (or bags) using a quick and easy method that looks natural. I use a combination of layers, layer modes, and the paintbrush tool to improve the look of tired eyes and the effects of aging in a photo.
This photo editing tutorial is perfect for beginners new to editing their photos and want to quickly improve the appearance of their photos and models.
Visit our website for more text and video tutorials:
www.daviesmediadesign.com/tut...
Enroll in Our GIMP Photo Editing Masterclass:
www.udemy.com/course/gimp-pho...
Thanks to our Diamond Level Patrons who support us on Patreon!
Ken Brewer
Dilli Contradiction
Thanks to our Gold Level Patrons who support us on Patreon!
BashMurals
commodore256
Jamie Fraser
Thanks to our Silver Level Patrons who support us on Patreon!
Stephanie Paynter
Thanks to our Bronze Level Patrons who support us on Patreon!
Matt Bryan
Support our channel and help us grow by becoming a Patron today - and get cool rewards in return:
/ daviesmediadesign
Want to make your GIMP theme look like mine? Check out this GIMP tutorial article:
www.daviesmediadesign.com/cus...
See how you can help out the GIMP Team:
www.gimp.org/develop/
Download the latest version of GIMP 2.10:
www.gimp.org/downloads/
Facebook: / daviesmediadesign
Twitter: @DaviesMediaDes
Instagram: @DaviesMediaDesign
#PhotoManipulation #Retouching


Awesome video, a quick learn and solid result, thanks!
Thanks, really simple explanation. Worked perfectly for me 👍🏽
Very useful, it work out great. Thanks.
Nice tutorial....I can see this effect being used to smooth out skin and in other applications as well. Thanks
Cool Technique. Thanks Mike. Your gimp tutorials are awesome.
Thanks!
This worked great thank you. And this was my first tutorial using Gimp.
Wow, I agree. Really very cool, easy and an efficient technique!!! This dude is awesome!!!
Seriously. He's my go-to guy for everything GIMP. So glad he's doing Inkscape tuts now too!
great tutorial, thank you very much.
You could get better results with the plugin Wavelet-Decompose. You can target only the color in the lower frequency layers, leaving the details of the skin untouched.
Thanks, just tried the wavelet-decompose method, it was so much better at keeping the face details
Great tutorial! Thank you
Great tutorial! I'm now subscribed!
Thank you! Thanks for subscribing.
very good i was thinking you where going us the blend modes, thank you
Cheers mate, very helpful indeed.
I finished mine with a feathered ellipse shaped mask around the eyes as to not sharpen the rest of the image.
Awesome, thumbs UP!
Really usefull. Thank you.
You killed it
Thanks a lot!
Great tutorial ! ... significant improvement between before and after. ... btw, what ergonomic mouse is that?
High Pass is available with a plugin, yes? It's not in my version....?
At about 2:18 you gave us a before and after, but after viewing it several times, I can detect no difference. I'm viewing the video at 1080 on a 23" 1920x1200 resolution screen. Maybe the difference got smoothed out when RUclips transcoded it.
With the brush tool when i click on an area to colour match (with the Ctrl key) the colour doesn't change and just stays as black and ideas? (im still on the corrections layer when trying to do this )
Well, it happens to me too. Can someone help?
Maybe you are trying to sample your colors from one of your transparent layers? You need to either click on the background layer with original image first or, even better, turn on the "Sampled merged" option in the Color Picker Tool options and then it won't matter which layer you will be working on as GIMP will sample whichever color happens to be under the cursor no matter which layer on the stack it is.
Rogerio Pereira da Silva this worked for me thank you
@@RogerioPereiradaSilva77 hi sir. can pl explain it with any example video. i m facing same issue
Worked for me and I have about zero experience using GIMP or PhotoShop. I had to look up a couple specific commands online, my view and layout wasn't exactly what was in the video (clean install). Read all the comments for the other helpful hints.
what was the whole point of high pass layer? you didn't use it at all.
it sharpens the image. he did use it
Will this work for a brused eye?
for some reason this isn't working for me. I did everything up to the point of painting under the eyes, when i try to select color it gets only black, so i had to switch to the original layer to get the color and back to the corrections layer, afterwards i can't get any painting done under the eyes, i click yet nothing happens. any help? i retraced my steps 3 times, did exactly as the video.
change the layer (select background layer). Had the same problem, found the solution in the other comments
Go to the Color Selector tool, and enable Sample Merge.
Love this tutorial! It's funny, though. You look at the bags and shadows and think 'How can I decrease them and make things look better?' I look at the bags and think, 'Hmm ... let's intensify this effect and get him to look more like a zombie.' 😁😂🤣
This technique didn't work for me at all. I followed all the steps and my subject appeared very bad and weird after applying all the effects of the video.
Even on the video it's looking very bad.
@@mapron1 Yeah. Why not just use the heal tool in one step.
@@madi4481 I already wrote custom filter in C++ and using segmentation network in our company image processing framework since then lol :D (fr)
3:35
Or he could wear make-up, basically the same.