Easily Create Realistic Mockup in Photoshop | Mockup Design Photoshop Tutorial

HTML-код
- Опубликовано: 7 фев 2025
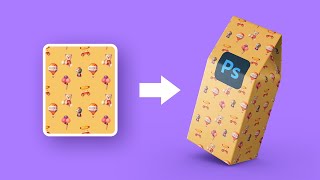
- How to Create Realistic Mockups in Photoshop, Learn how to easily design realistic mockup in photoshop. In this advanced photoshop tutorial, I will show you how to create mockup in photoshop with how to add realistic shine or add highlight to mockup in photoshop. We will also learn how to use warp option in round objects or curve objects in photoshop. Also I will show you how to change mockup background color in photoshop using powerful blending mode.
If you enjoyed this video, please leave a LIKE and SUBSCRIBE for more videos.
▶ FOLLOW me on Instagram:
/ webflippy
________________________________________
► More Recent Photoshop Tutorials:
Trick to Create Custom Light Rays Brushes in Photoshop | Create Custom Sun Rays Brushes
• Trick to Create Custom...
Black Tone Preset - Photoshop Tutorial | Black Moody Color Grading in Photoshop
• Black Tone Preset - Ph...
Remove Background of Transparent Objects in Photoshop (Easy)
• Remove Background of T...
High-End Skin Retouching with Mixer Brush Tool in Photoshop | Photoshop Tutorial (Easy)
• High-End Skin Retouchi...
Realistic Blend Effect in Photoshop | Photoshop Tutorial
• Realistic Blend Effect...
Simple Trick to Align Smile in Photoshop
• Simple Trick to Align ...
Glow Light Effect - Photoshop Tutorial | Light Glow Effect
• Glow Light Effect - Ph...
Powerful Way to Add Background Texture in Photoshop (Easy)
• Powerful Way to Add Ba...
Negatives Photos to Positives Photos in Photoshop
• Negatives Photos to Po...
High-End Skin Softening + Dodge & Burn in Photoshop
• High-End Skin Softenin...
How to Add Wrap Text Effect in Photoshop
• How to Add Warp Text E...
How To Auto Blend Layers in Photoshop | Photoshop Tutorial
• How To Auto Blend Laye...
Turn BLACK Metal into Any Color in Photoshop - Even WHITE or GOLD
• Turn BLACK Metal into ...
Turn White into Any Color in Photoshop (Easy)
• Turn White into Any Co...
Create Magic Hand Effect in Photoshop
• Create Magic Hand Effe...
How To Add Color To Water with Shine in Photoshop
• How To Add Color To Wa...
Face Stretch Effect in Photoshop (Easy)
• Face Stretch Effect in...
Long Exposure Effect in Photoshop (Easy)
• Long Exposure Effect i...
________________________________________
► Download Sample Images:
Photo by Mediamodifier- www.pexels.com...
Image by yayang art from Pixabay- pixabay.com/ve...
Image by yayang art from Pixabay- pixabay.com/ve...
Image by yayang art from Pixabay- pixabay.com/ve...
► Let's Be Friends:
Facebook: / webflippy
Twitter: / webflippy


Looks great! Simple and easy to understand☺️
That's for what I opened youtube and my favorite creator made video on it 😍😍😍
Lucky 🌟
I'm glad you like it and thank you so much for your love and support, keep supporting 😊😍
@@WebflippyOfficialPage sure! The real thanks is to you for making such awesome contents
🤗🤗🤗
this is the most simple and to the point tutorial that i need. those other videos makes thing complicated with their VA's
wow so good
Question: When you when to load selection, and changed the channel to "center can selection" etc. Those selections (whole can and center can) were something you did off-camera correct?
same question
tutorial that skips parts of the process. great
lmao right "I already made the selection to save" wtf the tutorial's already 8:00 then
Actually, the mock up gets WAY more realistic (on a can) when u would use the 'cylinder' projection option, instead of the standard 'warp', as it was demonstrated here.
Thanks for sharing with others bro
3:42 you did not explain why how and for what you made that selection for beginners. You used a pen tool or what was the process? Needed to explain that on how the selection was so accurate.
Best tutorials I found on youtube, hope your channels grows further, ty
Great tutorial
Thank you!
great idea! great prepare!! very good tutuorial !! your let people learn a lot !!😀😃😁you are great
Thank you so much 🙏❤️
Nice 🔥
Thanks bro! 😍
Nice video🎥
Thank you 😊
Creativity and inspiration , I really like your work.
Awesome 😎
Thanks 🤗
thank you bro
in time. thanks alot
You're welcome! 😊🙏
Thanks a lot! Great tutorial. Easy and to the point. Helped a lot!
Thanks for sharing this tutorial amazing
Glad you liked it!
Thank you !
thank you so much! simple and easy to follow
you have already made the selection now what should i do to continue making it if i have made any selection
I face the same problem
مبدع تهانية لك 😊😍😍 amazing
Que buen tutorial!!! busqué un montón para realizar este efecto. }genial!!! Gracias. Saludos. Carlos de Argentina
Классно 👍. Многому научился благодаря вам 😎💪👍
awesome
thanks for coming back Paji ❤️
😊😍
Thank you so much for the support 🥰
I disliked you must show us the selection no skipping
Yes mostly RUclipsrs do such a thing
But he did save my time, selection is very basic
rials are awesome
so good. thanks
Amazing tutorial, Thank you for this🥰
You’re welcome 😊
load selection does not work in group layer
same
Same here 😒
hos do you create the selection?
great work😍
amazing ps tuts,thank you
Amazing tutorial, thank you
You're very welcome!
Amazing
excelente, la mejor mezcla de efectos, muchas gracias
Thank You...this was really helpful.
what app was used?
It's amazing. Thank so much ! !
Your tutorials are awesome
Glad you like them!
you did a great job thanks for sharing
Amazing, good. Thank you!
how do you make the selection first??
This is the part that disappointed me
Thank you.
dear i cant find can in my load slection please help me ....
also i wont to learn grafic designing plz help
hello, what to do if my selection load greyed out ? cannot be click
when my photoshop is in CM, how do i do it ?
Bro iam not getting can middle can selection toll.. I got only rectangular 1trancparancy
Thank you , its very fantasic 💙
этот туториал спас мне жизнь хахах... СПАСИБО
THANKS
Where I should pick these kind of pictures?
what do i do if i press CONTROL+T and i doesnt do anything
😘
Thank you! 😊
Hi guys 😁
فنان
Please tell me the free mockup sites for cans.
I have this same image, so I did everything the same as you did, but after going into selection-load selection there is only one option showing ( box transparency ) so it's selecting the whole rectangle instead of a can, So what should I do now??
hey brother, you find solution for this?
you must select with the pen tool and save the path. then you can load the selection from the file you saved the path
👍
i can't local selection, helpppp
u lost me at the loading selection part, that should have been broken down more on my opinion
photoshop used version
Hey ,I would like to know something.. I am a beginner just started learning ps.. whenever I place an image over another image , apply mask and use brush to erase the parts which I don't want idk why the outline of that image are not erased they can be clearly shown in that picture.. pls help me out with this .. :)
I don't understand you properly but if what i think you're asking is correct then i'll say, to have you image clip propely and neatly over your selectin, it's best you have your selection as a group then have your activities inside the group.
why skip the select load part :(
Hi! :) 1) Do selection of your can. 2) When you have selected then click on "select" --> "save selection" --> name it. 3) So now u can use "load selection". I hope it helped. :)
@@alexandravesela1175 thank youuuu
why cant we just type "wrap this can C:\Users\Downloads\can with this C:\Users\Downloads\design1" and not complicate things like this
WHY DO YOU CREATE A GROUP?
Dislike for skipping important parts of the video
lame bs the image is not bending
Amazing
Amazing tutorial
Glad you liked it and thank you! 😊😍
Thank you.