BMW M2 F87 installation of CARBON FIBER DIFFUSER

HTML-код
- Опубликовано: 1 авг 2024
- In this video I remove my stock plastic diffuser and replace it with carbon fiber M Performance style one. Thank you for watching, remember to give this video a like and subscribe if you are new to my channel.
Discounts:
AutoID - 5% off use code FAMILYDRIVER5
BlueSpark - 5% off FAMILYDRIVER
Parts:
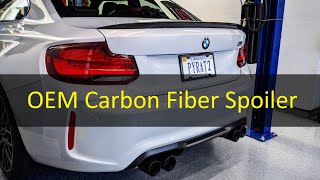
AutoID - black grills, M-mirrors, black badge and carbon CS style spoiler.
F&J AutoWerkes - Carbon M-style exhaust tips
Automotive Passion - Carbon Arch Guards
Exhaust - Bob Williams Modified Exhaust on Facebook
Carbon Diffuse  Авто/Мото


Thanks so much for sharing. I live the way you show it, with some struggle and pain, not like most of other youtuber who made it looks too easier by skipping those painful parts. Thanks again, I will use yours as a guide to instal mine now.
Not a problem. I’m glad you found it helpful.
All the clips!! Overengineered to the max. Looks good!
That looks a LOT better!
Thanks for vlogging this. I’d heard removing the original was a pain and you had to be quite firm and ignore the worrying noises. You shown that’s true but not something to stop you doing at home. Look forward to seeing the boot spoiler installation in your next video. Cheers, Kevin.
Yes, as you can see in the video the removal of an original diffuser was a bit of pain but I don’t think you can damage anything. No scratches from the pry tools.
I’ll be doing mine this weekend as my M performance diffuser was delivered today thanks for video
Not a problem and good luck 🤞
@@MDrives I’m a little worried to be fair as never done anything like it before
@@robrocks34 just take your time.
Looks very nice 🙂
Perfekt Video -. Thank you so much 👍🏻
Glad it was helpful. Regards
Very informative vid, Im just about to get one is that one from AutoID?
What diffuser was it you bought? There are quite a few online ranging from £300 to £1000+ yours looks great
It was a second-hand one but it's a cheap Chinese one.
From my point of view those clips are unbelievable. I tried to remove my diffuser b4 watching this video w/o any special tools and I guess it's not possible for the clips in the middle. My advice: Get urself those plastic tools b4 u start... and even with this tools in the video it looks like the one who designed this was out of his mind.
Haha, I agree. The tools really helped!
Yesterday I got myself similar tools in Germany from Baumarkt "matador 0843" for EUR 14.95, so 2day I was able to change the diffuser on my M2C successfully 😊 It really looks much better this way. Thanks for the demonstration in ur video, so I had an idea, what I was missing. Enjoy ur day. Best wishes.
Assume those plastic tools don’t scratch the paint work despite the amount of dirt trapped by the old diffuser? Want to do mine but petrified of scratching it getting it off
Wash it with a pressure washer first to remove a dirt. The tools are made of plastic and you only push them in between the bumper and diffuser so even if some micro scratches are created in the process they will never be visible once the diffuser is in place.
Please don't listen to this guy, before you even put any type of pry tool in there Make sure you put two or three pieces of frog tape or painters tape along that whole edge to protect the bumper skirt above it. And he also did not use the other diffuser pieces because he has no idea what he's doing. You must use them because they secure the diffuser in tighter, you never leave those out.
I’ve got a genuine m performance carbon lip spoiler if you are interested. Not asking the world for it either.
Thank you but I already installed CS style spoiler.
When you remove your OEM spoiler. Lots of people will say using fishing wire or dental floss but it’s a battle as they snap too much. Get yourself some ribbon (arts and craft) is so so much stronger and much easier to work with and won’t damage your car.
@@thatfoglightguy4794 all done already. I used fishing line and then caramel wheel to remove the tape.