Wooden Lamp DIY || Anyone can crate at home easily with just normal tools

HTML-код
- Опубликовано: 19 сен 2024
- DIY WOODEN LAMP
Title: DIY Wooden Lamp Tutorial - Create a Stunning Wooden Lamp from Scratch
Introduction: In this step-by-step DIY tutorial, we will guide you through the process of creating a beautiful wooden lamp from scratch. With this simple yet elegant design, you can add a touch of warmth and sophistication to any room. Whether you're a seasoned woodworker or a beginner, this project is perfect for unleashing your creativity and showcasing your woodworking skills. Let's get started!
Step 1: Gather the Materials To begin, collect all the materials you will need for this project, including sturdy and attractive wood, a lamp kit, various tools such as a saw, drill, chisel, sandpaper, wood glue, clamps, and a suitable finish of your choice.
Step 2: Design and Plan Devote some time to sketching or digitally designing your lamp. Consider the shape, size, and placement of the parts. A well-thought-out design will help you achieve the desired aesthetic for your wooden lamp.
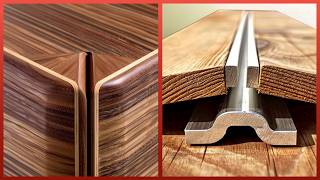
Step 3: Prepare the Wood Using a table saw or a handheld circular saw, carefully cut your chosen wood into the required pieces according to your design. Smooth any rough edges using sandpaper, ensuring a polished finish.
Step 4: Drilling Holes Drill a hole through the center of your lamp base, with dimensions suitable for the lamp cord. This hole will allow the cord to pass through and connect to the lamp kit components.
Step 5: Lamp Kit Assembly Carefully follow the instructions provided with your lamp kit to assemble the socket, cord, switch, and plug. If needed, use a soldering iron to securely connect the wires to ensure proper functioning.
Step 6: Attach and Secure the Lamp Kit Thread the lamp cord through the drilled hole in the lamp base. Position the socket into a predrilled hole on the top surface of the base. Apply wood glue to secure the socket, and clamp it in place until the glue dries.
Step 7: Finishing Touches Thoroughly sand the entire wooden surface to create a smooth finish. Apply a suitable finish, such as stain or varnish, to enhance the natural beauty of the wood while providing protection. Follow the instructions provided by the finish manufacturer.
Step 8: Test and Enjoy Insert a light bulb into the socket, plug in your wooden lamp, and bask in the warm glow it exudes. Ensure that everything works smoothly before finding the perfect spot to showcase your handmade wooden lamp.
Conclusion: With just a few materials and a bit of creative flair, you can craft a stunning wooden lamp that adds a touch of elegance to any living space. Follow this step-by-step tutorial and enjoy the rewarding experience of creating a functional and visually appealing piece to brighten up your home. Don't forget to share your DIY wooden lamp journey by leaving a comment or uploading pictures of your finished creation! Happy woodworking!
here is the links of our social handle.pls follow us for more future updates.
www.instagram....
www.instagram....
#viral #woodworking #youtube #diy #howto #hobby #design #art #craft #education #lamp
#light #diylampideas #diylamp #decoration #learning #creative #subscribe