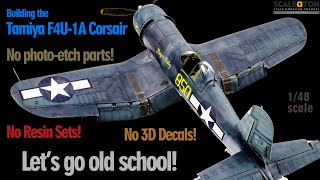
Tamiya 1/48 Corsair full build.

HTML-код
- Опубликовано: 7 апр 2021
- The Crafting Well website and Facebook page
www.thecraftingwell.uk/shop
/ thecraftingwell
The Warts and All Facebook group.
/ 542105536135600
My Modelling World Facebook page
/ mymodellingworld  Хобби
Хобби


![#175 [aircraft plasticmodels]TAMIYA 1/48 CORSAIR assembly to finish! タミヤ 1/48 コルセア 組み立てから仕上げまで!](/img/1.gif)
Vous êtes un MAÎTRE Monsieur ! superbe maquette ! Un chef d'oeuvre. Greetings from Belgium ! 😱👍👍👍👋👋
Merci, monsieur, et merci de votre visite.
Very much enjoyed watching your build process and particularly like your take on the Corsair ... Cheers
thanks mate and thank you for stopping by.
It was nice to be able to refer to the necessary assembly video.
Thank you for sharing a great video.👍👍👍👍
Have a good day. 💪😊💪
Cheers Mate and thank you for takin gthe time to watch and comment.
Great video ! Heating up the etch , have to try that ! Thank You ! hope you have a great/safe weekend ! Tony
Cheers Tony yes it makes it easier to bend just be careful doing it so not to over do it and don’t do it on coloured etch I did that ages ago and burnt of all the paint lol.
Thank you for sharing your knowledge, I'm building this kit now, thumbs up.
Thank you mate I hope you enjoy the build.
Wow,that’s great,far better than anything I can do
Thanks buddy.
That is one well-worn Corsair....such an amazing build! Your attention to detail is excellent.....beaut paint scheme and weathering techniques. Great tip using tamiya tape to remove and reposition the stencils on the aircraft. Thank you!
Thank you very much Robbo for the great comments.
@@Mymodellingworld You are most welcome!
Love the build mate. Trying new techniques and different methods is all part of the fun pal, every day is a school day. Stay safe buddy & keep the builds coming😁😉👍
Cheers Dave yep it’s all a learning curve
great model and great build
Thank you Rodrigo.
Sir, that was a outstanding build of a very iconic WWII aircraft, and one of my favourite, you have yourself another subscrber, keep safe and well in this crazy covid world.
Thank you kind Sir and thank you for the sub.
Wow that’s great,far better than anything I can do
Sorry only just seen your comment.
Thank you and my apologies again
Great build there mate, i was waiting for someone to try the tri colour scheme to see how it would turn out looks mint 😎
Cheers mate and thanks for stopping by buddy.
A very realistic, grungy look. I think you might have your outboard flap segments cris-crossed. In other words, you've got the right on the left and vice versa. They look misaligned.
Thanks mate. Yes I noticed a few days after the video myself
Excellent build.
Thanks mate.
Looks like you have come a long way since I first found your channel (the Hasegawa Zero): stencils, painted masks, chipping, weathering. I have noticed when you spray your base colours that it looks like your paint is too thick from the spatter I see outside of your spray pattern. You may want to try to thin your paint even more, 50/50 or 60/40 and set your pressure to about 10-15 psi. I use lacquers, so the ratios may be different for your paints, but I know my paint is thinned enough when it leaves only a faint pigment stain on the cup when I tip the A/B to the side. For painting markings, I thin the paint even more 75/25 and lower the pressure to about 10 psi. This way you slowly build up opacity without having to spray excessively thick paint layers (creating ridges) and you reduce the chance of seepage under the mask to zero.
I had to learn this over the past year since getting back in the hobby, but once I got comfortable thinning my paint down more than I thought was necessary, the surface finish on the model became smoother and there were no runs. This is especially true with metallic paints (I use Mr Color C and SM series paints), where I thin it down 80/20 and sprayed over a gloss black paint (I use GX2).
Hope you may find this useful and looking forward to your next build.
Hi thanks for the reply. For this build I used Vallejo model air so just used them straight from the bottle just for ease as I had the set for pacific theatre navel aircraft. And to this day I’ve never had a issue where the paint builds up that much that I get ridges. I can only use acrylic paint in my work space as it’s just of my bedroom so I don’t want to stick the house out. If I have any rough paint I just polish it so it’s nice and smooth as I have ultra fine glass paper through my work as a fibre optic instructor/engineer.
Again thanks for stopping by.
Would anyone know: was the USS Enterprise (CV-6) U.S. Navy Yorktown-class aircraft carrier the first U.S. naval vessel to place in operational service the Corsair? I think it was the F4U-2 night fighter variant. My uncertainty stems from the date of the occurrence.
I’m sorry mate I’ve no idea.
What kind of colors did you use? Its a great model
Thank you. They were from the Vallejo model air set WW2 US pacific navy fighters. I can’t remember the paint numbers but I’m sure I added them in the video.
@@Mymodellingworld Thanks for the answer. I'll get the colors then.
No problem thanks again for stopping by
That Air Wars colors, what brand is that
Hi Lawrence they are made by Vallejo they do a whole range in sets like this WW2 and modern colours