Это видео недоступно.
Сожалеем об этом.
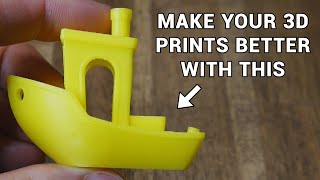
CURA - Quality Printing Without a Cooling Fan!

HTML-код
- Опубликовано: 2 май 2019
- Chuck shows you how to get quality 3D Prints without a Cooling Fan in this episode of Filament Friday. It is often assumed that printing PLA requires a cooling fan to get good quality prints. Chuck shows you how to get better 3D prints with settings in Cura Slicer that eliminates the need for a filament cooling fan.
End Screens aren't showing up due to a RUclips bug so here are the links:
Cura Tips and Tricks Video: bit.ly/2Vb2yRn
Creality Ender 3: bit.ly/2JekEuD
Patreon: / elproducts
Marvin File: www.thingivers...
Bridge Test: www.thingivers...
My Cura Profiles:
www.chepclub.c...
Creality Ender 3:
From Banggood : bit.ly/2wfD5Ia
From : amzn.to/2VoA4zV
Note:
As an Amazon Associate, I earn from qualifying purchases.
CHEP CUBE Test Print: www.thingivers...
Filament Friday Tool Kit: amzn.to/2MOR00X
Filament Friday Filament: amzn.to/2rgz3Ma
Temperature Meter Used in Videos: amzn.to/2JpUJOC
Screwdriver set used in Videos: amzn.to/2PbWocM
Creality Ender 3/CR-10 Parts:
-----------
PTFE Coupling: amzn.to/2BJDog1
Capricorn Tubing: amzn.to/2nI2ipS
CR10/Ender3 Silicon Heater Block Cover: amzn.to/2PaxJ89
CR10/Creality Ender 3 Nozzles: amzn.to/2JF3Ii8
Solder Sleeve Kit: amzn.to/2Pqqngm
Creality Ender 3 Fan Set (24v): amzn.to/38u9aOl
CR-10 Fan Set (12v): amzn.to/2PrcCxK
T-Nuts Kit: amzn.to/2LsQZg8
Screw Kit: amzn.to/2Va8uGK
Creality Ender 3:
From Banggood : bit.ly/2wfD5Ia
From : : amzn.to/2VoA4zV
Creality Ender 3 Pro:
From Banggood.com: bit.ly/2DBG0AI
From .com: amzn.to/2QUjRUL
CR10 Mini
From Banggood : bit.ly/2u5XNJk
From .com : amzn.to/2l8B7mX
CR-10:
From Banggood : bit.ly/2udpwaj
From : amzn.to/2s899uZ
CR-10S Pro (Banggood) $569.99 USA Warehouse:
www.banggood.c...
CR-10S Pro ( ) $629.99 Prime:
amzn.to/2U3BTBz
CR-10S Pro () $599.99:
bit.ly/2GCxWR4
CR-10S
From Banggood : bit.ly/2jQgZVY
From : amzn.to/2Rqv7aN
Buy a Prusa 3D MK2 or MK3 : bit.ly/2M88JjJ
SeeMeCNC Artemis: bit.ly/2OxRNnU
Geeetech A10:
From Banggood: bit.ly/2PfgC8u
From : amzn.to/2SsVzxD
Geeetech A20:
: amzn.to/2s8p6B7
A10M
: amzn.to/2FqK2Nj
A20M
Banggood: bit.ly/2PyKwpd
: amzn.to/2DJahNg
********* Cura Profiles Download Links: *******
Best (0.12) : thangs.com/fil...
Good (0.20) : thangs.com/fil...
Extra Fast (0.28) : thangs.com/fil...
Hyper Fast (0.32) : thangs.com/fil...
TPU thangs.com/fil...
**** Support the Channel *****************
EBAY USA: ebay.to/1wtxfiU
EBAY UK: ebay.eu/2qdC5iy
EBAY Canada: bit.ly/2qdGRwh
Banggood:
www.banggood.c...
:
www..com?lkid=19506489
Support the Channel here and Shop at MatterHackers.com and you automatically donate to the channel at no cost to you:
bit.ly/1Ugcijp
Buy thru this link to Slice Engineering for the Best Hot Ends:
bit.ly/3yuyuze
Financial Support through Patreon:
/ elproducts
Direct Donations:
paypal.me/elproducts
****************************************************
Filament Friday Sticker:
Send Self Addressed Stamped Envelope to:
Electronic Products
PO Box 251
Milford, MI 48381
****************************************************
Filament Friday Playlist:
goo.gl/yJLNhr
Chuck's Arduino Book:
amzn.to/3tA31JP
Chuck's Website:
www.elproducts.com
Intro animation by Pablo Licari based on Filament Friday Logo by Brian Carter.


CHEP I think people have this tendency to jump on certain things like cooling as, "Oh! Yes! This is going to solve ALL of my problems! All I have to do is use this magical fan duct and everything will work out perfectly!" Which is what I really love about this video: The slicer is really where a lot of the 'magic' happens.
Sure, for some things cooling the part is probably going to be important. But it's not going to be a magical one-stop cure-all for every problem.
Thank you! You completely understand the point of my video.
@@FilamentFriday Just getting started watching your Cura videos right now. Thanks!
On one hand we can have the fang with all variants: stock, dual, powerful, for more accurate and specific part cooling, on the other hand there are the Cura settings about temperature, speed and what not.. One can drive a car with only one hand, a bit carefully though, or even have a driver-less car if you use ready made settings and profiles, but mastering all, i.e. using both hands, and use the auto-pilot only when you rest :) is better, we learning to use both hands here for sure!
@@dxnvideoHD the current state of 3D printing reminds me a lot of when I was first starting out with computers: It's not really ready for the average home user. It still takes a lot of tinkering and a willingness to learn a lot of new things.
For myself, I like it better that way. Far too soon the giant corporations will move in and try to idiot-proof everything. And then we'll have the Windows-10 of 3D printing: A very expensive toy that is designed to keep you dependent on some giant corporation while providing you with the least possible value. Everything will have DMCA restrictions and you won't be able to print something because the printers will be designed to only print DMCA-compliant files.
Mark my words. This will be the future if the corporations move into this space. And they will move in. Because there is a lot of money to be made. It will be corporatized and end-users will be trained to fear anything that doesn't come from the corporations.
@@MyName-tb9oz Tried to print a Crystal Ball in transparent PET-G to see the future myself, it doesn't turn out as clear as I expected, however I saw that we'll have Mc3DPrint at some point all over the places but still some will have their way to enjoy their hobby and try some special ingredients at home :)
I don't think you're making the right comparison though, the default Minimum Layer Time in cura is 3 seconds, if you bump that up to 10 seconds it doesn't matter if you have a cooling fan or not as it will have longer time to cool because it's printing so much slower. You're removing the speed advantage of the fan by slowing down both tests. I would run those tests again comparing 3 second Minimum Layer Time with a fan on (which is what most people use by default) with the 10 second Minimum Layer Time with the fan off and compare the time and quality of those results. Right not you're essentially essentially comparing driving a car vs riding a bike except the car is limited to the top speed of the bike.
exactly this!
I want to print fast, and on smaller parts you absolutely need a fan to print fast and can't rely on passive cooling (100-200mm/s)
you absolutely see the difference if you go above your sluggish speeds, I can too print fanless with a long layer time in a cold environment, but my room is most of the time 23°c and I print fast and hot, fan makes a world of difference on overhangs, supports and quality
ich kann mich da nur anschließen. bei einer slicer Einstellung die in Zeitlupe ist mag das wohl sein dass es kein Unterschied macht. aber bei normal Geschwindigkeit oder auch schneller ist der Lüfter unverzichtbar.
You should make videos on printing with TPU and how to use supports that don't fuse to your work.
I have done some TPU related videos but mostly focused on the Extruder. TPU sticks too well. I try not to use supports with TPU. You almost have to plan on clipping the support off not breaking it off.
Chuck Hellebuyck- literally THE Cura master
Maybe this just means your cooling fan duct is so bad that it doesn't make a difference...
Or so good that it even works when it isn't supposed to
There is more to consider on why using cooling ducts is important.
The testing seen in the video only speaks to part of the reasons for using them.
In addition, the object printed was bulky for a small print.
Miniatures figures like those used in Dungeons and Dragons have thin arms and legs and the nozzle doesnt leave the print area for very long. The cooling duct can certainly help put more air on the part and lessen the likelihood of heat penetration to previously printed layers.
I've found that ducts also provide further bridge distances with less supports. Again, this wasnt tested here.
While I applaud the efforts in testing I would say they are inconclusive based on aspects.not tested.
Thanks for all the help CHEP! I have been watching your videos from the day I got my Ender 3 and I always finish the video learning something important. You have helped to improve my printing quality by a lot, and in fact, I learned what Cura was from you!
Is slow print speeds not just a huge and needless compromise? Would be interested in seeing the prints with a fan at100% that were not slowed down to 10mm/s and if you could still tell the difference?
This is what I came here to say. You can always allow down the print if you don't have adequate cooling, or you can print as fast as your cooling allows. I wouldn't expect much improvement with this slow of a print speed.
Do a test between this speed with cooling and faster printing with cooling and see if there is any loss of quality. Then decide what you time is worth.
@@davidwillmore He prints at 50mm which isnt super fast but the usual ender speed is 60mm so not that much slower
I share the profile. Try it and let me know.
@@Insane_Kane Look at the graph and see that he is not getting near 50 mm/s because of the cooling slowdown. With better cooling, he wouldn't need that slowdown.
Can't even begin to tell you how much I used all your videos to get started in 3d printing. What a resource. Thank you
Nice video I had a broken fan on 1 of my AnyCubic mega I found it was basically just as good as with the fan untill I used a higher temp for better layer adhesion . So at 190c to 210 not much difference but at 215 to - 230 the fan is needed to make it look good.
Fast.
Precise.
Strong.
Pick 2.
You supply very usefull information on a regular basis delivered quite well. Thank you Chep
Chep, you are what community is about; helping where you can and sharing openly. Thank you!!!
Something to note: while the objects might look the same, printing without a fan typically produces stronger prints. Also, the temperature you're printing at makes a huge difference and some materials would not print okay unless you enable your fan or fine tune the other settings.
Thank you Chuck! i have not bothered with a fan and i get good prints, love your videos, have a nice weekend!.
Superb comparison Chuck, A few days ago I would have been surprised by your results, but I have been getting the hang of a 0.8mm nozzle and discovered that a much higher nozzle temp is needed, in my case 235c for PLA to enable the filament to get melted quickly enough, I even tried it with minimal fan speed, to increase layer adhesion, and it worked with no drooping or sagging. I did still suffer from some layer de-lamination, perhaps due to needing no fan at all. I'll experiment further
Isn't the whole idea of the Bridge Test to see how far your system can go without Supports?
I work in plastic process and just recently got a 3D Printer. Made me one of those Hero Me fan ducts, and installed it. I am now noticing a ton of shrink in my parts and edges are peeling, it didn't seem as pronounced before I done this "upgrade". I see some guys with dual 5015 fans and I am just thinking wow that is alot of cooling for this small scale hot end. I am going to do a test with the current Hero Me setup, printing the same duct over again to see the difference.
In my line of work we use thermoformers, and third motion and the cooling of the molds and temperature of the plastic is very important. The scale of the project is much larger, and we use huge water cooled molds and top/bottom ovens from 700-1000* in oven to the 60* mold. Shrink is a big issue for us, and the amount of engineering it takes to compensate for that shrink is insane and I don't feel like that will be possible in 3D printing for a hobbyist. Obviously I know that PP is different from PLA, but it does seem both materials have quite high shrink factors.
Anyway, thanks for the video about fans I have to learn some more about this Ender 3. I have been printing for about a month and I still haven't been able to get what I am comfortable with calling "great" quality. I have had some okay prints, but this thing just doesn't like me very well. It's always having to be re-leveled and I have tried tuning a lot; big thanks to the calibration squares for bed leveling though; with those squares and the mesh bed leveling activated it does make it easier.
I am sold on to Cura now. Awesome. Thanks, Chuck, really appreciate your hard work in making such quality content for all of us 3d printing nerds :-)
You might want to investigate the effect of fan, no-fan in vase mode. In vase mode the effects are more substantial in layer adherence and by varying the filament temp you can make the inside/outside walls almost perfectly flat and significantly stronger.
Thank you for all of the great videos! I always look forward to them when I get back home on Fridays!!
Wonderful video!!! Your experiments are really helpful to the community!
Something you need to realise is that the design of the fan duct on the ender3/cr10 makes it so that the hotend fan ALSO cools the part, which is why you can get away with no cooling on these.
Id be curious to know if the air from the hot end was diverted so it wasn't blowing on the part if the results would be the same
If the cooling fan pointed right at the print made no difference then how could air deflected and not directed at the print make a difference?
@@FilamentFriday I was thinking of seeing if there was no airflow around the part at all if there was a difference in printing. Just wondering if the hot end fan was causing both tests to turn out the same
Prior to my profile the prints weren’t as good. I expected a direct fan to do more but the settings had a bigger positive effect.
Chuck you're worshipped in the Ender-3 Facebook support group. Your videos are my go-to.
Thanks. Didn’t know I was even mentioned. I don’t Facebook much.
@@FilamentFriday Oh dude, you're very well known in the Ender 3 community. It's actually quite smart that you market to a niche since a lot of people use the ender-3 and your videos are curated to a specific set of printers/slicer, so it makes you and very few other RUclipsrs like Edge of Tech the go-to for CR-10/E3 troubleshooting.
If you want to get your name out there, I highly encourage you to start a Facebook Business page (or whatever they're called). Facebook, I think more so than Reddit, is a huge hub for support groups. For example, the Ender 3 group I'm in (which is just 1 group of many for the E3 community) has roughly 30k members. It would be another medium for you to get the word out and even sell your products.. and hey it's free to create a fan page. I can even help spread the word in the community quite quickly to have people navigate to your page. Might as well do you a solid since you've provided us with awesome content.
I think if you're printing that slow it doesn't matter, but if you print at 100+ you'll have issues without a cooling fan
Very good Chep! I'm planning a challenging piece and all of your 'considerations' are really helping with my planning.
That support coming away clean made my jaw drop. You're a wizard.
HOLY CRAP! My jaw hit the floor when I saw your video!. Specially when the way the bridge separated itself from the supports! I am going to try that on my next prints! I wish I could give you 100 thumbs up!
Chep, I've been using your CURA profiles on my new Ender 3 and have been getting fantastic results!! Thanks for sharing!
Thanks for the feedback.
I feel you are a bit off the ball here. Try printing a 45 degree overhang without cooling at a decent speed. Or a model like a Benchy. Look at the bow after print...
I can confirm that printing slow will negate the need for a fan to achieve accuracy in the resulting parts, however, to achieve speed without sacrificing accuracy a decent fan with a decent duct design is needed.
But you get much better layer adhesion this way. Ok, maybe for PLA use the fan, but for PETG and any other material it’s huge no no. I print PETG almost exclusively and without any fan at all. Great for functional parts. I don’t print shits like characters and costume parts as I don’t see a point to do so unless you are little child or low IQ person. But to each his own.
Got to check out your video on supports. Thanks Chuck !
You didn't prove that you don't need a fan, you proved the stock fan is as good as not having one at all. ;-)
Actually I proved that if you get the settings right and let the slicer determine when to slow down or speed up, you get better prints. Adding a better fan is something I am working on as a next step.
@@FilamentFriday You did indeed! Perfect for ABS too!
@@FilamentFriday TBH. You proved that IF you turn your printer down, you can get decent results. But at what time cost, compared to a similar result with the part fan on, and with a higher print speed.
Neither did you show witch overhangs that is possible with and without part fan.
And last but not least. Chris Riley have a point about the hot end fan, acting as part fan on the Ender-3.
Great stuff chuck! I printed a bullseye and it is a brilliant improvement! Keep it up
Hey! 🖖😊
@@MCsCreations hi!
I'm a new subscriber and I can already tell that I will be here for a long time enjoying your videos. Keep up the good work!!
Welcome to Filament Friday
You sir need to do a video series or a play list of all the settings and what they do. The myriad of available settings confuse the beans out of me, but when you explain them and show a practical example its clear as day. So far you are the only one to do slow down and explain this. I will be seeking out your profiles for Cura and trying them out as a base start point.
On a side note why does your Cura look different then the version I have? I too have version 4, but I don't see the layer speed option to see the layers in color as shown in this video.
ruclips.net/p/PLRFPlUhDTTlm0AqW9EGhxglCt_OKvAwxI
"Why should I depend on a fan when I can accomplish the same thing with supports? "
1. It must be nice to have free filament.
2. Cooling allows faster printing for a given quality, and a higher peak quality. If there's no difference, it might be time to check the performance of the fan/duct setup.
The problem is the stock ender is not really able to print "without print cooling", as a ton of air blows over the print from the hotend cooling.
When I experimented printing fanless with HeroMe duct which doesn't leak that air there nearly as much, it was practically unusable with PLA - overhangs were horrible, bridges would tear off at ends failing badly (even when supported) and even flat top layers over infill wouldn't work well, bulging unless made rather thick.
Could do some stuff with PETG, but not much either, again flat top layers over infill were quite messy during the first and second top layer printing.
@@MediaDog1 One might want no fan when printing ABS, where the HeroMe is a significant upgrade as well. I'd say that compared to stock, it simply gives you more of what you tell it to do - more directed air or almost no air.
Anyway the reason I tried what fanless does is the stock blower died and I needed to do a thing or two before my Sunon 5015 arrived ;-) (which I already ordered and had the duct for it ready as I saw the stock fan rattling increasingly).
The HeroMe is a great compact design and seeing the internal duct structure I really knew a lot of thought and probably CFM went into it :-) Thanks!
Hey Chuck,
sometimes you have to relay on the cooling fan because the bridging area is in the model itselves and there is no way to remove supports, but you need that hole.... I prit a lot with supports but ony supports from the bed upwards. I hate supports in the model going from one printed area to the nex... it ruins at least one surface...
Yep, it’s not a complete solution just making the point that get the settings right first.
One thing that the dual fan did for me is that my temp towers come out absolutely identical from 190C to 230C.. i don't have to think about temps because of sagging.
This works for slow printing, but for me, I print fast. My typical print speed is 150mm/s for PLA and minimum layer time of only 5 seconds. The fan duct makes a HUGE difference in quality. Stock Ender 3 fan is weak, and the duct (if you can even call it a duct lol) is of poor design. Replaced with a proper CFD analyzed duct by Hangtight on Thingiverse and a 5015 fan. No comparison.
Ny next step is to test a whole new cooling system now that I have the settings in place. But on a small print even 5 seconds of Minimum Layer Time will slow it down a lot from 150 mm/s.
Man am i glad your here to prove these "self proclaimed print nerds" wrong! So many people get sucked into modding the fan duct when like you say (and ive found it myself,even with TPU) The stock creality fan duct is just fine-and yea, why would you try doing huge bridges without supports???. Great video chuck👍
Wow what an eye opener. Thank you!
You continue to crush it, to e and tine again. Great work CHEP!!
Holy CHEP! I think you just solved my printing problems! Even the abbreviated discussion of your supports is more than I ever knew...thank you!
Glad I could help.
This will help me with my rebuild as my new hot end does not have a fan yet, so I will be able to print slower for now and still print good parts to add to my printer, and then increase the speed once parts are added.
for general pla settings you are right. maybe other materials it differs.
Would love to print with pla, but i am just not savvy or confidant soldering the fan mod onto my ctc. Its good to know that i can use PLA if i slow down the layer speed so it has a chance to set before the next layer for improved quality.
BTW i am completely new to this ,before my father passed he said for me to have his CTC duel 3d printer so now im trying to find out all the info i need. And this cooling situation has thrown a bit of a spanner in the works for PLA.
This type of fans don't focus at the tip of the nozzle but under the extruder. Just as a bowl with water under the nozzle and see how your fan is set. Good luck 😊👍
What a great tutorial. I've been using the Magic2.0 profile on my CR10s Pro with really great results. I'd never considered before that the part cooling fan wasn't absolutely necessary. Coincidentally it's also the fan that I find most annoying even when running at lower speeds on this printer (although I've never tried turning down below 50%). I'm going give this same experiment a try and see how it goes. Looking forward to quieter prints. Thanks for the education on Cura cooling settings as well!
This was VERY informative, thank you. I have a Qidi X-Max and it comes with a 2nd high-temp extruder, sans part cooling fan, for higher temp filaments. I have been struggling to get overhangs to print well with CF PETG, and have thought I needed more direct cooling at the print head. But now I will look to really try to dial in the slicer settings. The new tree support settings are interesting. The issue I think with direct cooling at the nozzle is that the higher temp filaments like CF PETG will lose layer adhesion strength just to get overhangs/bridges to look good.
Have you considered that printing with a hotter filament might help with layer adhesion and the fan is used so it can print at a higher temperature without warping. Printing at a lower temp might print as well aesthetically without a fan but the layers might be weaker.
Thanks for another great video and for going over the support settings. I have also printed and tested many of the options out there to upgrade the fan, but I have not seen any really improvement. Those big fans make you think you have a 747 airplane printing ready to take off.
Your videos have helped me a lot in my first week with my ender 3. Thanks. BTW, your print tool kit is currently unavailable on Amazon.
More coming in 3 weeks.
Awesome video. I've been doing a lot of fanless printing lately. I'm definitely going to use some of these tips for my next print!
You're starting to grow on my, Chuck! Good stuff.
This video doesn't make any sense without disclosing the print head temperature.
As I understand it, the cooling fan is for >200C PHT to remove the excess heat from the media to reduce part warping, because the entire part stays closer to a single temp.
So the tiny marvin keychain print never really gets the system into the domain to test part fan ability, unless you print at temperatures near the surface of the sun.
No
Good video! While the results may depend on PLA flavor or even on printer, for sure this channel will skyrocket. Keep up the good work!
Ender 3 stock hotend fan has a lot of air leakage to act like a part cooling fan :D
But a direct fan made no difference so I don’t see how deflected air would do much.
This was tested and confirmed in another video.
Amazing supports! Couldn’t ask for anything better. Thanks!
Thank you for your hard work and information for the community it is appreciated!
First test. I tried to print a single wall test cube. first try failed to stick to bed. I then tried using the first layer width to 120%. 2nd attempt failed. I just tried a 3rd attempt with Fan off. SUCCESS. So to my original post we need a way to totally turn off the fan on any layer or group of layers in CURA. Everyones is going to get different result based on your particular setup, but we need this option. It should not be an all or nothing type of issue.
0:08 New printer, new design, nozzle kept clogging, so I replaced it. Nozzle still clogging, even at 240c with PLA. I noticed it was only at the tip, almost like a cap of plastic was forming. Turned fans off, prints perfectly now. Even bumped it up to 90mms, still perfect. I've never thought of not using a fan, but I'm going to experiment now with no fan more
Your issues have nothing to do with your fan. It's clear just from what you wrote.
You should not have to shut off your fan just to get filament to come out of your nozzle. Even with the fans at 100%. Maybe your heat settings are off. Maybe you're using a funky filament that needs more heat.
Intersting stuff, thanks for sharing Chuck.
amazing video Chep! very interesting results!
Very good video Thank you for sharing your knowledge
Love your information! Clear and concise and very well done. New Subscriber here. Keep up the great work! I'm not a noob, but I have a lot to learn about printing in different settings.
That very much depends on the filament! I have a PLA that needs a high printing temperature to fuse together nicely but stays gooey down to a much lower temperature. This definitely needs cooling for strong and clean prints.
Thank you, Chep! I'm using a DaVinci Pro with no cooling fan. This will really help me.
This is the best 3D printing Channel.
It's a good demonstration, but it's really only applicable at larger layer heights and where fine detail is not so important. I can see good applications for more functional prints where this could lead to better layer adhesion. For those of us who print miniatures and scenery however, printing at 0.08 layer height (at 45mm/s, since we need to go slow for quality, but not too slow) with very fine details, we have to consider the thermal capacity of the print itself. Having a hot end dumping heat into very thin layers is a recipe for terrible quality; even the stock fan and duct are inadequate in this situation.
45mm/s seems fast for tiny detail prints. I often use a 0.2 nozzle and 25-30mm/s for tiny prints. Have you tried raising the minimum print time to give it more time to cool?
If you don’t want the layer to be affected try the Lift Head as it will move the nozzle away while it waits. You get some stringing but at those heights that should be minor.
I don't really need to, since I have a 5015 blower (petsfang duct). The problem with printing at lower speeds is that the print head dwells a longer over the part which creates a problem with heat being dumped into the part. This isn't so much of a problem with a blower fan, but then I've not really noticed any benefit to slowing it down. There is also acceleration to consider. I've set all my accelerations to 300 (based on the fat dragon games profile watch?v=AqEWl51s9Rw) and a jerk of 5 which solves most of the quality problems associated with speed and it probably never gets up to full speed most of the time anyway.
I know it contradicts what you've shown in this video, but in my testing without fan, with stock fan and with blower fan and duct, I rapidly came to the conclusion that decent part cooling is one of the most important improvements you can make when fine printing.
Chep, you are great.
Could not that just mean the fan or duct is not doing much on this particulat setup? Can a better fan or duct could result in a more noticable difference? Especially on that 100mm bridge test?
any videos for printing with Green PETG? Having a difficult timing dialing the settings in.
The Ender 3 Hotend fan is very leaky, even with no part cooling fan you get part cooling. If you I change the hot end you have to have some cooling. I changed to a E3D V6 and wondered why my ABS prints were all horrible (before was using 0% fan) after setting the fan to 18% the issues went away. I never use 100% fan though, too much air is a bad thing.
Have you concidered the posibility that your result are what they are becouse the fan is so weak that it doesent make a difference. If you do the same test with a sunon maglev 5015 blower, would the result be different? Mabey even the layers would look smoother?
I'll be honest, I had the bullseye, and didn't see one bit of difference with single or dual fan. Just made maintenance a hell of a lot harder. I ended up removing it.
Always straight to the point. Thanks man 👉🏻
And I learned something new! Concise and to the point. Thank you!!
I used Chucks magic 2.0 profile (with a few minor tweaks) on my first print ever a couple days ago and the results were a flawless benchy! The first print is supposed to be a benchy, right? This is a hobby I'm definitely going to enjoy.
Thanks Chuck!
Remember to check with each model if "outer walls first" is good or not. If it is a "pyramid", ie the model is wider at the bottom, then "outer walls first" is by far the best. But if it is "upside down pyramid", that option in the slicer settings may even cause a failed print. That is the one thing in that Magic 2.0 profile that you as a user has to think about. Generally, leaving that option unchecked (off) is safest way to go.
Thanks for the feedback and yes, you have to print the Daniel Noree Benchy to say you’ve officially started 3D printing ;)
👍👍😎👍👍. Just found your channel and so impressed I immediately subscribed. Really appreciate you teaching style. Incredibly easy to follow and extremely useful and pertinent information. Thank you.
Chuck Love the video! after watching all you CURA videos I'm going to get off my butt and install it I think it might be time to put S3D to bed! it just seems you can do a lot more with it (and i'm NOT paying for the S3D Upgrade if they ever get around to putting it out) Thanks for all you do!
I seen in a couple of the fan duct upgrade videos that on the creality printers the fan that is cooling the hotend also escapes to the bottom essentially making it partially a parts cooling fan. Do you think this is a possibility?
The way I found out my parts fan was broken was because all my benchys since it broke come out with sagged front hull. It was perfect before that. This is with the "magic 0.20" profile.
You done it again man. Can't wait to try it out and see.
Omg, i didnt know that :)
Thank you Chep !
PLA needs to be cooled, but if you cool it too fast it will warp. You can get good results if you lower the speed or disable the cooler fan and lower your print rate. When you lower the print rate you are giving enough time to slowly cool every layer, just consider that it depends on the printing part dimensions, I recomend this when your filament is too soft and you are getting warps even if you have good adhesion to the bed.
Thanks for doing this, I have seen so many videos changes the ducts. I have never had an issues with my ender 3 so Im leaving it alone.
Thanks for all you do. I don't have a 3d printer yet, but without your videos, I would be totally lost when I do eventually get one. When I make my purchase, I will make sure you click through one of your affiliate links!
Thanks
Thanks! I didn't know about the "support roof" settings and will try them out - printing the bridge right now on my Wanhao. However, I have to disagree with regards to the fan - I have observed different results on my printer... But I agree that it is not the holy grail to fix a bad print.
Well, I agree with most of the comments. I used for a long time Simplify3D. I am fairly new to CURA. To get a print to stick I need around 40-60c bed temp and no fan. I am surprised that you can get a long "bridge" object to print with out supports at all. In theory I would think the filament would need some support to lay down on. I guess not. It looks like in Cura you can have the fan on or fan off. But not have the fan completely off for X layers and then turn the fan on at X layer, etc. This option is really needed in CURA. I can perform the above on Simplify3D.
Nice, however try Petg and results are different than with pla
Hey Chuck, Great video. I ordered my first printer, a Geeetech A20. Will your Cura 4.0 profiles work with the A20?
Yes. It should but I found my A20 over extrudes and I haven’t completely figured out why. You might have to lower the flowrate of my profile.
tried this, my no fan test turned out as expected, sadly melty. Running my fans at 25% and it turned out perfect (Your profile but with fans.) For reference: Elegoo Saturn 2s, Dual 5015 fans.
Now I’m learning something. Thank you
This is really amazing that actually we don't need the cooling fan. But I want to ask you: If we turn off the cooling fan, doesn't it affect the electronics fan also? If it does, ain't it risky for the electronics?
Yes, I showed in a previous video how to move the electronics fan to the hotend fan to keep electronics cool at all times.
NO the electronic fan is connected to a different connection on the board.
You noticed that the fan, that is cooling the mainboard, is using the same signal as the part cooling fan?
If the part colling fan is not running, the fan for the mainboard won´t be running either on the Ender3.
I talk about this and show a fix in this video:
HERO ME FAN DUCT and Fixing the Cooling Fans on ENDER 3 ruclips.net/video/QvyesgYLwQk/видео.html
Fixed
Does this work equally well for PETG or Nylon?
Thank you for this video, i dont have the extra fan so i wanted to know if i really need one.
Thank you, I'm waiting for an adapter board for my printer because my fans for the filament are not working. I'm sad that I can't use my printer. It's been a pain just trying to get the right part from the company. So I'm going to try it anyway