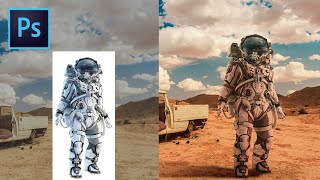
How to Blend Two Images in Photopea [Photopea Tutorial]

HTML-код
- Опубликовано: 14 ноя 2021
- In this video, i’m going to show you how to blend two images in Photopea, for a fun composite idea to try in this Photopea tutorial.
------------------------------------------------------------------------------------------------------------------------------
Software I also recommend:
Topaz Gigapixel - amazing software for upscaling to much higher resolutions without sacrificing quality. It's a perfect partner to Photopea in my opinion. Check it out here:
topazlabs.com/ref/1862/
(affiliate link)
--------------------------------
Download the images used here:
Swimmer: unsplash.com/photos/W5-VHLhmgaA
Road: unsplash.com/photos/oxQ0egaQMfU
--------------------------------
❗Subscribe now to never miss a thing: bit.ly/2NlLtBc
Thank you so much for checking out the video. I really appreciate any like, sub or comment as it will help this new channel to grow and allow me to continue putting out quality, regular content.  Хобби
Хобби


I hope you all enjoy this new tutorial! I spent a lot longer editing this one than I normally would to make sure there was a consistent pace, and also to add a lot more on screen indicators, zooms and keyboard shortcut info to hopefully improve the viewing experience and make things just a bit more polished. Let me know what you think - i'd love to hear your feedback in the comments below!
can please help me im viral youtuber ik this video going help me in future but I'm been tryin find a video where can learn u know how dont see all time but in thumbnail how people make a red circle in photo for something to stick out in the thumbnail do you have video teaching that
Best tutorial I have ever seen on RUclips. Clear video, actual step-by-step guidance of all the moves that need to be done. Excellent work! The rest of RUclips can come to you for a reference on how a tutorial SHOULD look like.
Thank you for the kind comments - I really appreciate it!
@@photopeapro I am using photo pea in mobile.i have a problem I can't split the littel triangle in layer style blending option please tell me how to do that in mobile
@@arpitasarma2275 There is a small keyboard icon in the bottom of the left tool bar (under the foreground/background colour swatch). If you click this, some option appear to mimic certain keys being held down. Click on the 'Alt' option, then you should be able to split the triangle. But it is very tricky! I just tried it on my phone, and it took me quite a few tries to get the triangle to split, as they are so small on the phone screen, but it will work with perseverance. Just remember to unselect the Alt option once you are done. Hope this helps!
@@photopeapro thank you so much❤️❤️❤️❤️
@@arpitasarma2275 you are welcome :)
This was awesome! I learned a lot from this cool project.
I did enjoy indeed , great work again !!
Beautiful image. How would you move the shadow, so it matches where the sun is? Could you do another video please?
Great Video! Can you please make more videos on creating thumbnails using PhotoPea? Also the shortcut keys you gave during the video was very helpful.
Glad you enjoyed it! Yes to the thumbnails... it's been on my list for a while, but I will definitely be on to it soon. Because there are so many styles of thumbnails, it might end up being a kind of mini series of several videos in the end.
Such a helpful video. Thank you so much
You're welcome!
I wish I saw this video a month ago 😭😭 this covers everything In one video
Great Helpful Tutorial 👍
Thank you! 👍
Great ,Thanks alot for this curses !!!
You're welcome
I like your videos.
We need more videos about photopea pleaase
How can you make one image sit on top of another as it the first image is on the ground/surface and is not floating?
Thanks
How do u drag the image in?
Cool !
Thanks :)
Thanks!
No problem!
how can you BLEND 2 images in video format to have a DAYTIME RENDER to NIGHT TIME RENDER
6 SECOND TRANSITION
How do i decrease the size of the second image? Everytime i zoom out the 1st imagine, the sec one zooms out aswell. I'm an absolute beginner
Whilst you have the layer selected in the layers panel, press Ctrl+T (or Cmd+T f you are on a Mac) to being up the transform box around the image. Then you can drag the corners of the box in, and move around as you need to. Hope that helps!
@@photopeapro thank you for finding your time replying to this. Although i already found out how to do it haha. It has been an incredible help watching your tutorials. I'm a pencil artist and learning editing to apply surreal elements in my drawings.
@@moditb3247 Great to hear you got it all sorted! I love the thought of adding digital elements to traditional art methods. You can get super creative!
i just subscribed to your youtube channel. so far your work is amazing on photopea.. im trying to learn and wondering if you have a discord or a twitch. it would be awesome to be able to watch live and you answer peoples questions how to do certain things. Thank you for your videos. if you would like other video ideas please feel free to reach out to me. again AWESOME work!!!
How to insert an image into another one
Now iron man comicbook
7:35
It's Jason Voorhees from the original Friday the 13th!
James 1 verse 19
Wherefore, my beloved brethren, let every man be swift b to hear, slow to speak, slow to wrath:
thank you this helped me out alot. God bless you and the others and have a great day and night
why dotn you explain how you are able to make the cut out at 41 sec? dont assume your viewsers undetand wht you are doing okay be clear
okay it says slect the L or lasso methid
still cant follow as of 159min in spite i did all you showed
te kanker moeilijk