⚡️How To Anodize Aluminum Parts Easily In The Home Shop - MSFN

HTML-код
- Опубликовано: 22 июл 2024
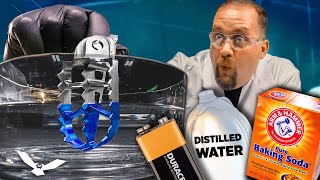
- How To Anodize Aluminum Parts Easily In The Home Shop Using a 12 Volt Battery Charger and Readily Available Anodizing Supplies (Battery Acid, Black Dye, etc.) That Can Be Sourced Locally. It Is a Step-By-Step Video Showing The Entire Process Start To Finish. The Part was Turned On The Lathe And Is 6061 T6 Aluminum. If You Have Any Questions Please Drop Me a Comment. Please subscribe and click the notifications “bell” to get notified of newly released videos. A thumbs up and your comments are always appreciated! Thanks for Watching!
Support:
Please Consider Supporting MSFN To Help Pay For Supplies Needed For Future Video Projects, Even a Small Donation Goes a Long Way!
www.paypal.me/MSFN (Paypal Only)
goo.gl/1nmBdi (Paypal, Credit/Debit Card)
Business Inquiries:
email: makinsumthinfromnuthin@gmail.com
RUclips: / makinsumthi. .
Twitter: / msfn_on_youtube
Instagram: / msfn_youtube
Instructables: www.instructables.com/member/M...
--------
Royalty Free Music Courtesy of Apple, Inc.  Хобби
Хобби


Thanks this is working great for me. I added a neutralizing step after it comes out of the acid bath, just before it goes in the dye bath.
Excellent!, glad its working out for you! ~ Richard
What did you use for the neutralizing step?
I used baking soda and distilled water.
@@MrFishguy60 This step what give benefit ?
@@ByTraxxas1994 Neutralizing the part in a bath of baking soda water assures that the part is free of any residual acid that may contaminate the dye bath and or leave spots on the part. I have also added a de smut bath to this process.
An extremely clear and concise method shown on this process! I will keep this video for my reference when attempting my first anodizing - thank you very much!
TY!!!!!
Very well paced and easy to follow instructions, thanks for the video.
Richard, I never knew how anodizing was accomplished. Great demonstration video.
Thanks MP, as long as the part is clean, thats 80% of the battle
This is the best anodizing tutorial on RUclips, very well explained. Thanks for posting this.
Thanks!!!!! :)
Finally an anodizing process I can follow. Well done Richard, thank you.
Thanks Glenn, I tried to make every step clear so people could try it for themselves...many videos I had watched left out so much so tried to cover everything ~ Richard
Outstanding.
Straight to the point, clear valuable information.
Holy dang, as someone who's only ever anodized titanium I gotta say that looks like one heck of an involved process, comparatively!!! The ease of manufacturing ones own aluminum parts is obviously a very important factor too, though. Very nicely presented!!!
Thanks, yes titanium is much simpler but I turn out aluminum parts with the lathe :)
Titanium costs more.
LEO no shit, Sherlock.
@@thomasegan456 Yea yea
Very interesting 😁👍🏻
Thanks for Watching! :)
Well done Richard. Very informative and to the point.
Thank you, I appreciate ya :)
very easy to be done, you explained it very well.thank you.Richard.
Thanks Ray.. Its not difficult, goes fast when not filming it :)
Always something cool cooking in Richard's shop. Thanks for sharing!
Sometimes.....but not always :)
This video gave me the encouragement to give anodizing at home a try and now I'm happy that I did. Thanks for the info and encouragement.
My first attempt was a failure with my parts only taking enough dye to make them look dirty.
In my second attempt I used PB Blaster to thoroughly degrease, followed by a 10 minute soak in hot detergent water, followed by a deoxidizing soak in hot trisodium phosphate solution for 15 minutes, a distilled water rinse and then into the anodizing bath.
Based on Caswell's LCD (Low Current Density) anodizing process I intentionally kept my battery charger current below 2 amps for 90 minutes, in a solution which was cold to begin and didn't rise much during the anodizing. A quick rinse in distilled water and then into my 120-140º dyeing solution (2 qts distilled water to 1 bottle black Rit dye) for 15 minutes followed by a seal in boiling water for 10 minutes.
After polishing with a cloth, my home made parts now look deep black and professionally coated and I'm a bit stunned at how good they look.
I'm also eyeballing the disposable aluminum cookware at the grocery store as single use anodizing vessels since they already have the cathodes built in.
Thats excellent! Always glad to hear people giving it a try and succeeding :) I may have gone overboard a bit on the clean, clean, clean aspect but it is really quite important! ~ Congrats Sir
Richard, A video that I have saved to my favorites so I can easily go back to it, Also new subscriber.
Hope you find it useful, thanks for watching and subscription :)
New subscriber I appreciate all the detail temperature I think I’m gonna give it a try myself I saved your video to go along to make sure it comes out great. Thank you.
Thanks for making this informative detailed guide. I have been searching for ever for goblin green gimbal stick ends for my radio transmitter and now I'll just make my own.
Nice, hope it works out for you :)
I have a question I hope you may be able to answer. Is it possible to remove the dye from a piece and re anodize it another color. I am having trouble finding my components in bare material and want to sand them....is this possible ir is it a one and done process. Thanks
Yes, totally doable :) Mix 1/2 tablespoon of 100% lye crystals(Drain Cleaner) in 1 cup of water, mix till dissolved and drop your parts in, it will remove the existing color, takes an hour or less ~ Rich
Great video, well done Richard
Thank you for posting this. I have always wondered how the process was done but it sounded all mysterious and scary the way it was explained to me before....you know, the "dangerous chemicals" and expensive equipment blah blah blah. This process is simple and done with common sense not dangerous at all. I have most of the things needed to do this right now in my home. You earned my like and gained a new sub too!!
Its rather simple, common sense prevails here. Its fun to do and I may have over-complicated the demonstration but it was shot from the aspect of the viewer having never done it before so I tried to explain everything. Once done a few times it goes quite quickly! :)
Simple and worthy
Thanks for sharing knowledge
Thanks :)
Thanks for your efforts,just learning and this was most helpful.
Great video and a very clear tutorial. Thanks!
Thanks SB! 😊
Amazing video!! Excellent work!!
I'm a mechanical engineering student who spends a lot of time in the garage, right up my alley. Great work and right to the point, no lack of preparation, explained everything efficiently. My man!
Thanks!!
Looking pretty righteous! Thumbs up for that.
Thank you! Cheers!
This gives me some ideas for my jewelry designs. Thanks!
awesome¡
Nice continuity!
Good Job Richard Thats Quite A Prosess , I like the black...
Thanks Stephen, glad you liked it
Excellent info!
exact details of each part would help me up alot in setting something like this up myself.
Cool. Thanks for sharing
Great video man! Lots of steps but you definitely made it seem doable for a beginner.
It goes MUCH quicker when you arent filming the process. I tried to to break it down into small steps in the video so if someone wanted to try it I am not skipping by steps too quickly...The prep time should take about 15 min
Thank you for a very helpfull and well laid out Video.
You can use rtv sealant as a masking to prevent certain areas from being anodized. It's important to let the rtv to fully cure before starting the anodize process. You csn also use rubber plugs to mask threads and holes.
I heard nail polish works good too, great tips....thanks Russ!
Thank you Richard for posting this great tutorial. Looks like it did a really fine job on your part. Perhaps you wanted to do a scratch test...? See if it holds good and at the same time check the depth of the anodizing.
I did a scratch test on the practice part shown when I tested my chemicals prior to the customer part, should have filmed that. No issues. Dont know how to check anodizing depth...would be good info to know. Thanks for the kind words Pierre ~ Richard
Awesome video details
Thank you for this, appreciated
YW, thank you for watching & good luck!
Interesting, well presented and an excellent result.
Thanks Ian, the customer will be pleased I'm sure. Thx for watching
A college professor teaching chemistry said always add acid, and think of the triple AAA logo. Good video. Spokane Valley, WA
A good professor! :)
Chemistry teacher had a rhyme to keep you safe, " Do as you otter add acid to water."
@@paulstaney325 lol that is what I say for swimming pools, do as you oughta add the acid to the wata
I always think of the restaurant A&W say it quickly it sounds like A in W
I like it!
That was a really neat process, I may try it soon. Great lesson that a Geezer like me can understand, Thanks Richard. Oh, new to your channel.
Thanks!
Sweet. Going to have to give this a try.
Its fun :)
Great video. Thanks!
Thanks Richard, this taught me to anodize. One thing, the current does not flow between the two cathodes. If flows from the +positive anode terminal (the part now) to the cathode (your nicely machined aluminum one). This is the direction of "conventional current flow" as in all engineering books. The electron flow itself is from the -negative cathode to the +positive anode or part, thus the part is anodized. All the rest though is 100%.
Thanks for watching, & thanks for the info!
Wouldn't it still in theory flow between both cathodes and the anode? Thus making the same effect of more surface area being anodized which is what he's trying to say I think
You are one of the most chronically under subbed you-tubers ever. Love your channel.
Thanks!!!! Thanks for watching & Happy Holidays! 😊🎉
Makin Sumthin From Nuthin Same to you. My kids and I built a paint can forge using you’re refractory recipe. So far so good.
Excellent!! 🤗🤗🤗
Very interesting , i'm planning to something like this to my bicycle wheels
well done !
thanks!
yea, this all looks super easy...
Thanks for this video. I think I am brave enough now to anodize my own AR lowers to the color of my choice.
Do a few trial runs with something approx the same size. Surface area is also a factor on big parts
Did you ever do the lower? I have a 9mm lower to do. Couldn't find a black one.
thanx for the video, it's nice summary. For those interested in more details, for instance how much current to apply (4.5 amps per sq foot of surface area) check out caswells anodizing manual
👍🏼
Love da thermometer holders
:-)
Awesome
you deserve 1000 likes
😊
Thanks much and many blessings. I once had two dogs named Something and Nothing. Nothing was the mother, so I got Something from Nothing!
Ha! Thank You for watching and commenting on the video ~ Richard
I haven't worked with this process myself but I seen some of the process at work years ago. The the dye used was Sandoz product and the sealer was nickel acetate. I hear Rit brand dyes work for coloring aliminum too with decent results. Very nice video :)
Its a cool process! 😎
@mixedflix9147 - I'm rite dying a belt with an aluminum belt buckle black-are you saying that if I put the aluminum bucks in the dye bath while dying the belt,it will turn the buckle black also..I'm trying to find a way to dye the buckle black also..I can't take buckle off..thanks!
Interesting video, well explained and shot. Thanks.
It goes pretty quickly once everything is all set up.
Awesome video with extremely easy and simple steps to follow.by watching this video I'm going to save about $150 by being able to not only change color of my rc parts but also make them look new again.granted itll take some time to do but in my opinion knowledge is power not to mention I'll be able to do any other aluminum parts I may want done myself.thanks for video.
Nice! As you can see....no hi-tech equipment needed. Do a practice piece first to get the hang of it...its not hard 😊
@@MakinSumthinFromNuthin definitely intended on doing a practice piece first.i have one question about doing anodizing and hoping you maybe able to answer.can you polish the aluminum piece prior to doing any of the anodizing steps to possibly have part have a chrome type look so to speak when part is finished?doing most of the parts in black but gonna do a few in a graphite color and would like it to have bright shine to it if that's possible just so it stands out a bit and maybe looks better with all the stainless screws I'll be using not to mention some of the other parts thatll just be polished aluminum.
The surface finish must be 100% uniform prior to anodizing. If you are going to wet sand to a fine finish it is a must. Anodizing brings out the flaws in poorly prepared aluminum, it doesnt "hide flaws"
Awesome,that's what I was hoping to hear.thanks
Thanks a lot for your tutorial video.I'm very interested in plating.
nice vid..informative
Thanks! 😊
Love that bud. I have never done it but now I have the ways and means to make it happen. I assume for clear finish I would just not use the dye or is there something chemically needed in it.Over the years I have found parts that are anodized are extremely reliable as far as finish. Thanks a bunch eh !
Thanks Dean....Yep, just skip the dye and go right to the hot water. Its a pretty painless process, just gotta make sure the part is clean :)
Interesting...great job
Thank you! Cheers!
Glad it is easy for you guys in the US to source sulphuric acid readily.
Here in Australia, virtually the only way for a man on the street to get some is to buy a battery and tip it out!
I tried a few years ago to do some anodising, and gave up trying to sulphuric acid.
I was considered either a terrorist or sicko that wanted to throw it in someone's face. Same story from numerous outlets.
Friggin Nanny State :-(
Good news is swimming pool acid is almost the same formula, which you can get easily.
I tried it and had success, but the times/currents were a little bit different.
It was dry acid, sodium bisulfate en.wikipedia.org/wiki/Sodium_bisulfate
Thats ridiculous, glad you found a solution. Thanks for sharing ~ Richard
There was a blog post I just read discussing using that same chemical, maybe it'll help you? www.observationsblog.com/sciencetechnologyexperiments/anodizing-and-dying-aluminum-without-battery-acid
I was thinking of giving that method a try myself.
When I was much younger I worked at a plant called cardinal aluminum. We made the trim pieces that go around bath tubs and such. We had giant tanks of chemicals that big ranks of parts went in to anodized them. I anodized every piece of chrome on my 68 cougar. Well all that was aluminum anyhow. It turned out awesome. Was a royal blue, almost like the transparent blue tint. ((I miss that car))
A friend of mine had a 68 cougar, he let me borrow it a lot. I think I owe him a set of tires :)
XR7 I believe
Makin Sumthin From Nuthin cyclone k code car. 429 in it.
Makin Sumthin From Nuthin lol min be would slap melt the tires. Out was a special order car. Me and a buddy bought it at an auction in Indiana. I have 475 dollars for it and drove it back to Kentucky. Got it home and recovered a framing square and drywall s8 crews was all that was holding the seat up. The whole floor pan was gone.
High quality repair right there! LOL
Niiicce
I have seen this done using a base instead of an acid... I assume the results are the same .... good video sir...
Thanks!
Just wanted to be that guy who asks the same question: What is the cathode made from? However, you answered it already, thanks!
i missed were he talks about what the cathode are made of.
Thanks Richard, good, solid information! I wonder if other acids would work? Like HCl (pool acid) instead of H2SO4, (battery acid). Or other acids depending on concentration. My sense is the reaction is more temperature driven than concentration driven. Hmmm- will have to read up on this! Thanks again, great simple process!
SAA, (sulphuric acid anodization) is a proven, time tested method and works well. I dont know about other chemicals and methods Dave ~ Richard
I'd be reluctant to mess around with anything with Chlorine in it (the Cl in HCL). It's really nasty stuff in it's gaseous form. The gas that is created in the SAA process is hydrogen, and is flammable, but it probably won't kill you if you inhale it. Chlorine gas is a completely different matter. Pool acid may also have other things in it that could bubble out when you turn on the power, and could mess up the anodizing process. Unless you've got a degree in chemistry, ad-libbing with chemicals is a bad idea.
Excellent! Just what I need to anodise the oil pump cover on my Buick/Rover 215 😁 - wonder if this will be as durable as the factory anodising? 🤔 Well, anything is better than untreated alloy, plus I won't be needing dye.. Hehe
Good luck, should work fine :)
Please Consider Supporting MSFN To Help Pay For Supplies Needed For Future Video Projects, Even a Small Donation Goes a Long Way!
www.paypal.me/MSFN (Paypal Only)
goo.gl/1nmBdi (Paypal, Credit/Debit Card)
Makin Sumthin From Nuthin sericoat
Sericoat
Thanks for the informative video. I followed your steps buy came up with a less than desirable product. It looks like an oil spill but not solid black like I was aiming for. What did I do wrong?
Most likely part not clean enough
I bought a bunch of that exact brake cleaner at advanced auto today, buy one get one free, pretty good deal.
Ha....yep, stuff works good :)
Would this be considered "bright dip" or "type 2" anodizing?
What ratio would you recommend for a good royal blue color? Also, will the powder rit dye work as well? I was told that they use the powder dyes to make the liquid dyes.
Thanks in advance. Great, informative video. :)
I have never done blue so dont know. Have never tried the powder either so I wasnt much help at all! Just experiment
Great video Richard. Have you tried some of the other colors, such as the reds , blues , & golds that have that rich candy color after it's been done. You see it a lot on show cars on the steel branded fuel lines and coolant line fittings. Just wondering if it came out with the rich candy color. Thanks for the informative videos , and easy to learn and follow instructions.
The only color I have had customers ask for is black thus far, I havent done much playing around and experimenting with colors. You need a blue part made? Lol
Anthony N lx
The candy effect will come more from how smoothly sanded and prepped you have it. If you make it shiny as chrome before it'll come out that way with about any color. Ive used grocery store food coloring, rit, tie dye kits, even squeezed out the tubes in sharpies and have got some amazing reds, yellows, blues, greens, even black. It's all about the sanding prep, don't etch in lye if u want candy shiny, temp/time, and concentration of the dye bath.
Lol. Not at this point. I work with a buddy of mine in a full restoration shop from time to time when he gets in a bind or behind. We do old cars such as 60 models camaros , mustangs and so on. We use them fittings a lot. I just wish I had taken pictures of all the parts I had made on the lathe that we have used on them. It would have been cool to go to the car shows and been able to say look I made that part on your car. He's won several best in shows and first places with the cars we have done. But to answer your question I see a lot of anodize parts. However we have never tried to diy our on stuff.
Thats really cool stuff, if only parts could talk....i dont do a lot of anodizing but its cool to be able to...give it a try
I got so much I would like to anodize.
Almost the first comment...:-)
Gotta be quick! :)
Hey Richard, can you leave it bare without dyeing it? Nice Job. I've often thought of doing that but thought you had to have a whole bunch of chemicals to do it. Thanks for sharing your knowledge. Best Wishes N Blessings. Keith Noneya
Sure, just skip the dye bath....will give you a hard, durable and scratch resistant surface. Its kinda like case hardening for aluminum
Interesting process. I wonder if there is another way without electricity.
So watching the process, and the different temperatures of the various chemical vats... I now have to Back Plan this so I can perform all tasks AND have enough time to clean the kitchen stove and air out the house before my wife comes home from shopping. Guessing there should be some sort of "Warning Label" for failing in this...
Thanks good video. Has anyone tried using Synthetic RIT Dyemore Dye? I've had great results with the regular RIT but am wondering if the synthetic is different? I couldn't find anything about it online.
I haven't tried it
How I set the parameter in anodizing different tank like sulphuric,nitric,caustic,sealing.with dm or normal water ...
So if I have a part that was already anodized and just wanted to redye it do I still have to go through the whole process? Thanks
Hi Sir,
I need to self-plating some details on my car with aluminum color. Can you tell me how to apply plating?
Such as acid solution, volt DC...? ... Thank you for sharing information.
I have no clue on how to do a process like that, sorry
Looks to be some process, I wonder if benefits of Anodising outweigh effort and resource required. I am just re-painting my Alu mast from sailboat. I am almost tempted to re-build it out of carbon fibre.
I cant answer that for you. Its fun to do tho! :)
@@MakinSumthinFromNuthin fair enough, I can relate to spending good time on fun projects :)
Yes, by far. Sulfuric acid is like $10-20 a bottle and I'm willing to bet there's plenty of scrap aluminum around the house to use, other than that $10 at a thrift store for a couple Pyrex dishes and candle warmer. So if $30 is worth it to you then yes.. Plus anodizing protects the aluminum (or titanium) surface like 10 fold more than any paint or coating will ever do. Plus, I guarantee you'll start anodizing all the stuff you can find once you start, it's kind of addictive. Always wear PPE, especially with hot acids
Cool. Thanks for responding. I just subscribed to your channel. I look forward to checking out your videos.
I just grabbed three different colors of the synthetic RIT Dyemore dyes. Sapphires Blue, Daffodil yellow and racing red. I'm about to find out here in a few minutes if it works. I'm really hoping it does because I like the colors. Thanks again.
I have never used the synthetic....please post the results! ~ Richard
@@MakinSumthinFromNuthin OK I'll will upload my results. They seem to be working pretty well. The Daffodil and Racing Red worked great.
@@MakinSumthinFromNuthin here's how my first attempt turned out. I posted it on my channel ruclips.net/video/w3GqUsKfK30/видео.html
Really nice work! 🎉
So you used fabric die ?Is it water based or?
Very nice looking part indeed.Could you do the coloring and anodizing in a same pot at once ?
Yes, it is fabric dye. The anodizing is a separate process than the dyeing and cannot be done at the same time. The part can be made any colored desired except for white
can you skip to a dye bath if you use parts that were chemicaly stripped with hydrochloric acid based rust remover? i want to go from yellow anodized to black.
dunno, but I would say no
I absolutely love this video. It gets to the points without a bunch of nonsense.
I cant wait to try this out.
Where do you get the aluminum wire and the aluminum you used for the cathode?
The wire came from an electrician friend who had a 3 foot piece laying around, the wire had like 18 strands of what you saw me using in it. The cathode material was cut out from a discarded road sign I found
You could try Amazon.com but you will be at the mercy of not being able to get specs on materials in some situations.
Wondering if you can reblacken aluminum grille in the middle of a stovetop? This might not be good for heating and cooking on?
I am not sure I understand......grille?
Richard, I’m thinking about anodizing the aluminum frame of my paramotor trike which has larger parts. How would you scale up your process for 3x3x24 angle or a 48 inch tube? Do the parts have to hang free the solution without anything touching
Them? Thanks, Jim
Hi Jim, I have no experience with large stuff, I generally just anodize small items as was shown here. The acid solution ratios would be the same but I believe the voltages used and anodize time would vary from what was shown here. The plates the negative charge is hooked to would most likely need to be scaled up as well.
I am no expert at anodizing, you may need to ask someone more knowledgable than myself or research the voltage and time aspect on the internet a bit. You cant hurt the aluminum so experimentation could also be your best friend. The parts would need to be fully suspended and not touch anything....or each other. ~ Richard
At the cost to make a bath that large, you would most likely just outsource to a reputable company who is already setup. Unfortunately I am running into the same sort of issue with my powder coating setup. I do ATV parts and builds, and would like to have an oven large enough to do a frame, but the cost is pretty high to buy/build one. So, unless I plan to do multiple frames, possibly for customers per say, to recover some of the investment, I'm probably going to just have a shop do it.
@Jim I have used a piece of rain gutter, for electrolysis rust removal, I can’t think of a reason it wouldn’t work for anodizing.
good video and i love the black finish! but i thought the bottle said royal blue? how does it turn out black?
I used black dye for this project, I also bought blue 😊
you can protect threads with silicone pull plugs, most are rated for 250 fahrenheit +
Thanks for all the info. Can you please link some of the stuff you used in the description? I am having trouble replicating your process and would like to mimic exactly what you have done.
Is this okay with motorcycle engine parts, the heat?
Good video what material did you use for the cathode and diode
Aluminum, it was pieces cut from a street sign I found
Great video. I always wanted to have a go but I have cats and I think the mix of acid and curiosity may not be a good one. I take mine to a local company. They have huge heated acid tanks 40' long and 6' deep. I once asked the guy operating the part lowering hoist what would happen if you accidentally fell in and he said - "We would push you under". I think he meant that would be the kindest thing to do!! Uuuuhh. Since then I have taken all my stuff there, but I only go in the office now :-)
LOL, good story. Its a handy thing to be able to do,. While talking with my customer about that part he said he was going to color the inside with black magic marker...I told him I could anodize it....he was ecstatic and paid extra for the service
Cats(and dogs) can in be locked out. But you may need to be prepared to explain to Animal Control why your cats sounded louder like a they were being skinned alive and apologize for being upsetting the neighbors.
I have dogs that carry the on pitifully when I leave the house. Never mind that I only walked to the mailbox at the end of the drive.
do you have to "charge" your electrolyte solution? With zinc plating, you ring a cathode and anode in the solution without a part to get zinc ions to be suspended in the solution. same for this process?
Not to my knowledge. Maybe plating is different process altogether
Can this be done to die cast metal?
Do the cathodes need to be of a particular hardness or quality or does the process of anodizing make the finish more durable than what is being anodized ?
cathodes can be any junk aluminum, make sure its clean and a large surface area
how would you recommend masking sections to apply a different color? I was thinking this might be a great way to make jewelry out of old soda cans (after melting down and casting), but while I was watching, it occurred to me that I might need multiple colors at some point, unless you think that's not possible?
not sure, I never tried doing that
@@MakinSumthinFromNuthin okay, no biggie =) thanks for the reply
did you use Royal Blue? to Anodize this part. i use Rit Day Black and it turned out brown.
I used RIT Black