Question to The Panel Company and any experienced bathroom installation pros in the comment section! ! I have a shower over a bath. My 10mm depth panels will be coming down from the ceiling & meeting sone original 1950s tiles (white normal sized then narrow black ones at the top) that are above two sides of the bath, I love the tiles so don't want to remove. The tiles are just UNDER 10mm depth and I guess with the panel adhesive the panel will be a couple of mms proud of the tiles. What edging trim would you recommend for the bottom length of the cladding panel please?
Shower panels were not joined together properly. Very thin gap in middle of two. Is there anything I can do to stop it from lecking?Other than taking down the panels down and starting again.? Help!
Hi, great vid! I’m going to be cladding my ceiling very soon but I’m not sure the best way to finish the edges. Would you recommend coving, the retro fit or end caps?
I did intend to use end caps because I can screw them into my wall tiles but your video has confused me as to the best option. The other options require an alternative method of fixing, don’t they?
Hi mate, You said no to bother with Silicone as mould will appear over time, another guy from your company put silicone on while fuitting on another video??
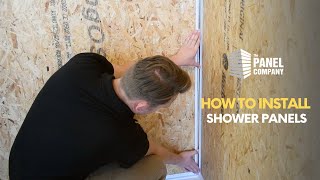
Hi mate so am doing my bathroom first time ever to do this can you give me some useful starting tip and would you do the ceiling first before the walls thanks
There is no right or wrong answer for this however, i would personally recommend doing your walls first. If you do your ceiling first you have to be careful moving your wall panels around the room and fitting them to be careful not to take a chunk out your new ceiling! Depending on which side you start when fitting your first ceiling and wall panel ensure you cut the tongue or the groove off so the first panel fits flush with the wall or the trim.
Can you explain how the external corner trim is actually used . The trim Can't be screwed to the corner and will it be strong enough with silicone alone? Thanks.
Hi Farhat - The external corner gets fitted to the internal corner first prior to panel installation with a line of silicone on the back of the trim to fix to the wall surface if existing tiles OR pink grip (an instant grab adhesive) - if installing onto a porous surface such as plasterboard. This keeps the trim in place whilst the panels get slotted into this trim, and then it is the adhesive on the back of the panels that keeps everything in place whilst all of the adhesive sets in. Hope this helps, if you have any further questions please do get in touch. The Panel Company.
I am planning on cladding the kitchen walls; no wall cupboards just base units - I was going to use the end trim on top of the granite worktop but having watched the video I understand that this may not be such a good idea - would you recommend a different trim or clear silicone sealant?
Hi Monica, In this case, the only trim that would be suitable would be an End Cap. However like mentioned in the video when used in this format it can build up dirt. So this is a more personal choice. Your other option of course would be to use silicone which will be perfectly fine. I would recommend a higher-grade silicone. and use the strip out smooth out tool to prevent any mold: www.panelcompany.co.uk/collections/adhesive-and-sealant
Hi guys. Which trim would you recommend I use for an internal corner that's incorporating the ceiling? Is there a trim that would let me slide in the panels like 3 way, two walls and a ceiling or would I need to mitre the corner in? Many thanks
Good Question! There is a few ways. The First way is if your wall to ceiling corner is 90 Degrees then you could use an internal corner otherwise we would probably recommend Coving. The alternative is to stick them as close together as you can without trims and apply a thin bede of white silicone.
Hi, Is there a special trim to finish the last internal corner off? I'm about to purchase materials to do my bathroom but unsure how I would fit the last panel as the trim would already be in place
There is no special trim other than the internal, The internal corner has quite a big recess in it. This means you can cut the board slightly extra so you able to manoeuvre it into the trim.
With only about 5mm you have a few options. Option 1: use a coving trim around the top which is about 8mm. Option 2 raise the panels and use the skirting to cover the gap. Option 3: Drop the ceiling and use the extra space for the likes of sunk in spotlights or speakers.
Hi Panel Co. Have my delivered panels from you now. Can I just ask, for the end trims, do I stick these on first before applying the panel to the wall? If I don't I imagine I won't get it behind the stuck panel. If this is the case, what do you stick the end trims on with? Thanks
Hi Samuel - Yes you are quite right - you would need to install the end cap trim first or if possible slotted into the panel first and then onto the wall - you would need to apply silicone inside the trim firstly ready for the panel to be slotted in for this method - if you need to install the trim first we recommend a line of silicone running along the back of the trim and then apply to the wall. Any further questions please do get in touch.
@@ThePanelCompany thanks appreciate that and similarly if you are doing a U shape install I guess you can only put on one corner trim as the 2nd one will have to be on the back panel as you slot it in otherwise the board won’t flex to get in both corner trims?
@@creativechimp03 Yes that is correct one internal corner should be fixed to the wall and then the second already fixed to the the panel you are putting on that back wall, and you negotiate getting the trim and the panel onto the back wall - whilst fixing the panel into the internal corner trim already fixed to the wall. This can be quite tricky to manoeuvre however it can be done!
Hi Jonathan - You can yes however the walls / inset shelves behind where panels would be installed should be water tanked prior to installation, you would also need to use the external corner trim on installation so that panels could be connected at all angles, and the mitre cuts would need to be very precise, so that the shower niche is water tight. Any further questions please do get in touch, The Panel Company.
Hi Alex - Yes that is no problem at all > all of our panels come with a tongue & groove interlocking system that provides a flush finish. On installation we always recommend a tiny bead of silicone inside the joins to ensure extra water tightness, any excess adhesive that seeps through to face of panel should be removed instantly. You may find this guide for T&G panels of interest > www.panelcompany.co.uk/blogs/news/a-guide-to-tongue-and-groove-wall-panels Most people install this way without the h-join trim - this trim is either used for overall look (which is personal choice) or for when someone becomes un-stuck with measurements etc. Any further questions get in touch!
Hi James - Yes however you would just have to butt up either trim to each other rather than them interlocking, the best way to do this would be either to use the two sharp ends that are pre-cut (how the trims come) - or create a clean sharp straight cut yourself when cutting the trims. Any further questions please do get in touch.
@@ThePanelCompany thanks for your reply:) yes my back panel wall is 10mm and the side ones are 8mm, is there an internal corner trim that will fit both?
Hi, If your talking about the clad seal strip we have covered that in another video. The quadrant can also be used to sit between the bottom of the panel and the floor.
Victoria plumbing are expensive for even basic stuff. And. Their delivery service is shocking, can't even track your order. These moulding/ trim's are half the price elsewhere.


About to do my bathroom and buying from you guys! Never put up panelling, and im not a great DIYer. So your videos have really helped, so thank you!
When the manager volunteers you to be the face of the company. This guy looks like i feel at work.
Love your delivery 🤣
Brilliant, thank you. Will try mine with some of your instructions
That's Great, Let us know how it goes!
Cheers! I needed this
Help with out of plum internal corners. Would I fit the trim to the board then to the wall ?
Question to The Panel Company and any experienced bathroom installation pros in the comment section!
! I have a shower over a bath. My 10mm depth panels will be coming down from the ceiling & meeting sone original 1950s tiles (white normal sized then narrow black ones at the top) that are above two sides of the bath, I love the tiles so don't want to remove.
The tiles are just UNDER 10mm depth and I guess with the panel adhesive the panel will be a couple of mms proud of the tiles.
What edging trim would you recommend for the bottom length of the cladding panel please?
How would you finish a board against a shower enclosure wall mounted upright? Many thanks for the video 👍
Thnx mate
How do u do a ceiling that drops at one end to 45' degree
Your welcome, If you need any help don't hesitate to get in touch.
many thanks 👍
Your Welcome if you need anymore help, don't hesitate to get in touch!
Shower panels were not joined together properly. Very thin gap in middle of two. Is there anything I can do to stop it from lecking?Other than taking down the panels down and starting again.? Help!
How would you secure the trims to ceramic tiles if I was to adhesive direct onto tiles in a bathroom
When you use a internal corner trim the top trim doesnt cover the end if your only going half way up the wall, how is this finished normally?
useful info. what is the correct trim to use ( if any ) where a panel comes off / meets the edge of a bath please ? Thank you
Hi Craig, That would be a cladseal strip.
Hi, great vid! I’m going to be cladding my ceiling very soon but I’m not sure the best way to finish the edges. Would you recommend coving, the retro fit or end caps?
I did intend to use end caps because I can screw them into my wall tiles but your video has confused me as to the best option. The other options require an alternative method of fixing, don’t they?
How do you make a meat finish where 2 ends meet? For example the horizontal and vertical corners
Hi mate, You said no to bother with Silicone as mould will appear over time, another guy from your company put silicone on while fuitting on another video??
Hi the h trim on joining together on the roof i see it goes underneath but how do you join the panels side by side and then fit under the h panel ?
Hi mate so am doing my bathroom first time ever to do this can you give me some useful starting tip and would you do the ceiling first before the walls thanks
There is no right or wrong answer for this however, i would personally recommend doing your walls first. If you do your ceiling first you have to be careful moving your wall panels around the room and fitting them to be careful not to take a chunk out your new ceiling!
Depending on which side you start when fitting your first ceiling and wall panel ensure you cut the tongue or the groove off so the first panel fits flush with the wall or the trim.
Good video thanks, but you didn't say the different between 5mm and 10mm trim
Can you explain how the external corner trim is actually used . The trim Can't be screwed to the corner and will it be strong enough with silicone alone? Thanks.
Hi Farhat - The external corner gets fitted to the internal corner first prior to panel installation with a line of silicone on the back of the trim to fix to the wall surface if existing tiles OR pink grip (an instant grab adhesive) - if installing onto a porous surface such as plasterboard. This keeps the trim in place whilst the panels get slotted into this trim, and then it is the adhesive on the back of the panels that keeps everything in place whilst all of the adhesive sets in. Hope this helps, if you have any further questions please do get in touch.
The Panel Company.
@@ThePanelCompany brilliant thanks.
I am planning on cladding the kitchen walls; no wall cupboards just base units - I was going to use the end trim on top of the granite worktop but having watched the video I understand that this may not be such a good idea - would you recommend a different trim or clear silicone sealant?
Hi Monica, In this case, the only trim that would be suitable would be an End Cap. However like mentioned in the video when used in this format it can build up dirt. So this is a more personal choice. Your other option of course would be to use silicone which will be perfectly fine. I would recommend a higher-grade silicone. and use the strip out smooth out tool to prevent any mold: www.panelcompany.co.uk/collections/adhesive-and-sealant
Hi guys.
Which trim would you recommend I use for an internal corner that's incorporating the ceiling?
Is there a trim that would let me slide in the panels like 3 way, two walls and a ceiling or would I need to mitre the corner in?
Many thanks
Good Question! There is a few ways. The First way is if your wall to ceiling corner is 90 Degrees then you could use an internal corner otherwise we would probably recommend Coving. The alternative is to stick them as close together as you can without trims and apply a thin bede of white silicone.
Hi, Is there a special trim to finish the last internal corner off? I'm about to purchase materials to do my bathroom but unsure how I would fit the last panel as the trim would already be in place
There is no special trim other than the internal, The internal corner has quite a big recess in it. This means you can cut the board slightly extra so you able to manoeuvre it into the trim.
If your wall height is 2405 and panel is 2400 what would you use to bridge the gap between wall and ceiling?
if you want to know more, follow my channel, we have a smart ceiling skyight panel that can simulate natural sunlight and blue sky
With only about 5mm you have a few options. Option 1: use a coving trim around the top which is about 8mm. Option 2 raise the panels and use the skirting to cover the gap. Option 3: Drop the ceiling and use the extra space for the likes of sunk in spotlights or speakers.
Hi Panel Co. Have my delivered panels from you now. Can I just ask, for the end trims, do I stick these on first before applying the panel to the wall? If I don't I imagine I won't get it behind the stuck panel. If this is the case, what do you stick the end trims on with? Thanks
Hi Samuel - Yes you are quite right - you would need to install the end cap trim first or if possible slotted into the panel first and then onto the wall - you would need to apply silicone inside the trim firstly ready for the panel to be slotted in for this method - if you need to install the trim first we recommend a line of silicone running along the back of the trim and then apply to the wall. Any further questions please do get in touch.
@@ThePanelCompany thanks appreciate that and similarly if you are doing a U shape install I guess you can only put on one corner trim as the 2nd one will have to be on the back panel as you slot it in otherwise the board won’t flex to get in both corner trims?
@@creativechimp03 Yes that is correct one internal corner should be fixed to the wall and then the second already fixed to the the panel you are putting on that back wall, and you negotiate getting the trim and the panel onto the back wall - whilst fixing the panel into the internal corner trim already fixed to the wall. This can be quite tricky to manoeuvre however it can be done!
@@ThePanelCompany thank you appreciate that.
Are you able to include a shower niche with shower wall panels?
Hi Jonathan - You can yes however the walls / inset shelves behind where panels would be installed should be water tanked prior to installation, you would also need to use the external corner trim on installation so that panels could be connected at all angles, and the mitre cuts would need to be very precise, so that the shower niche is water tight. Any further questions please do get in touch,
The Panel Company.
Can you panel a shower longer than 1m without H trims? (So the panels looks continuous)
Hi Alex - Yes that is no problem at all > all of our panels come with a tongue & groove interlocking system that provides a flush finish. On installation we always recommend a tiny bead of silicone inside the joins to ensure extra water tightness, any excess adhesive that seeps through to face of panel should be removed instantly. You may find this guide for T&G panels of interest >
www.panelcompany.co.uk/blogs/news/a-guide-to-tongue-and-groove-wall-panels
Most people install this way without the h-join trim - this trim is either used for overall look (which is personal choice) or for when someone becomes un-stuck with measurements etc.
Any further questions get in touch!
Yes
we can
Yes.
if you know more, follow my channel, we have a smart ceiling skyight panel that can simulate natural sunlight and blue sky
Can the coving lengths be joined? if so what is the best method for a joint-free look?
Hi James - Yes however you would just have to butt up either trim to each other rather than them interlocking, the best way to do this would be either to use the two sharp ends that are pre-cut (how the trims come) - or create a clean sharp straight cut yourself when cutting the trims. Any further questions please do get in touch.
Yes.
if you know more, follow my channel, we have a smart ceiling skyight panel that can simulate natural sunlight and blue sky
Can I use coving for an internal corner in a shower?
Potentially yes, but we wouldn't be able to recommend it. is there a reason you can't use the internal corner ?
@@ThePanelCompany thanks for your reply:) yes my back panel wall is 10mm and the side ones are 8mm, is there an internal corner trim that will fit both?
What does trim stand for?
Hi David, trims are a category of products used for visual and functional purposes, such as sealing edges
This trim for which thichness of panel?
The trim depths are to be equal to the panel depth. 8mm end cap for an 8mm panel 10mm internal for a 10mm panel etc etc..
How can I do business with you
Hi bro, you missed the bottom beed.
Hi, If your talking about the clad seal strip we have covered that in another video. The quadrant can also be used to sit between the bottom of the panel and the floor.
@@ThePanelCompany can you share that video link
@@MN-qc1mw ruclips.net/video/ZVZAQYaRxPc/видео.html
Victoria plumbing are expensive for even basic stuff. And. Their delivery service is shocking, can't even track your order. These moulding/ trim's are half the price elsewhere.
Sorry we are are a bit confused. We are not even victoria plumb ? We also monitor our prices daily to ensure we are the most competitive.