Homemade SMD Pick and Place Machine - complete cycle

HTML-код
- Опубликовано: 11 июл 2014
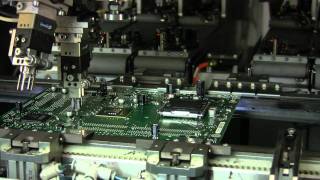
- A complete cycle with solder paste dispensing, placement, reflow soldering.
There are still some issues regarding placement accuracy of the small parts. The bridges at the 0.65mm pitch part were expected.
More details on my website: www.vbesmens.de  Наука
Наука


![Prusa MK3s Pick and Place Extension [3D printed] 👌](http://i.ytimg.com/vi/Mx4swtSQmE0/mqdefault.jpg)


![My New Pick & Place Machine [Liteplacer]](/img/1.gif)
HOMEMADE??? That looks pretty damn pro in my book.
how the hell does some one build this in there home wow there brains must be amazing.
I thought the same
@@nicholasantony7665 how do people design them in the first place? Or 3d printers and cnc machines?
But yeah, its incredible stuff!
@@LittleRainGames It is quite simple. The biggest problem is control of machine like this.
Almost every part of this machine is easily purchasable, and even cheap - stepper motors, transmission, belts, controllers for motors, guides...
he live sin a machine shop,! thats logical
You bring HOMEMADE a whole new level, sir! Respect
Very professionally made machine! I love the way it manipulates with IC's. Keep up the good work.
That is quite a piece of engineering. I was expecting a modified 3D printer picking from a tray or something.
Incredible!
that's an incredible machine, I can't imagine how many hours you spent on that! congratulations.
With great support from Volker, I finalized my machine in Jun/July 2014.
It´s not an easy project and it´s not cheap.
I already made hundreds of PCB´s with thousands of components placed.
The machine is running perfect.
Once again Volker, Thanks, Thanks,Thanks
How much did it cost to make it?
sir,,,its good to hear that u made thousands of pcb's,,,,,but kindly tell us the price of the machine,,,,we r from poor country,,,,,
Who is Volker 🤔
To be frankly I can't believe this is a homemade machine :)
It's extremely cool!
очень круто! ;-) yep, very cool pnp machine!
Hacía tiempo que no veía algo tan espectacular. Enhorabuena por tu trabajo.
Tutorials would be awesome! BTE that perfectly illustrates my idea for my stockless online shop
The scanning part is the best. Awesome vid so satisfying to watch!
Wow. I was getting ready to turn my Shapeoko 2 into a PnP, but now I have to add all the features I see here. Very, very nice!
you made it on your own , that's damn impressive !!!!
You have an amazing machine! I run a 3 machine Universal Fuzion SMT line for a living and the only difference between mine and yours is speed, and $250K per machine. With equipment like that you need a simple screen printer to apply your solder paste. Great machine!!!
+Mike Endersbe
Could you explain what a screen printer is?
Solder paste printing process involves a metal screen that you lay on top of the PCB, with tiny cutouts at just the right locations, then the solder paste is uniformly applied to the area which then fills-in the holes where the solder must go on the board. So instead of the 1st process shown in video where the paste at each solder joint is applied individually, all solder joints would get the paste in one step with the printing process thereby reducing the cycle time drastically and boosting your production output :).
ruclips.net/video/3UtFCX5MdCc/видео.html
omg the tool change is awesome
i wonder how suction head held at all...
Klasse Projekt. Hut ab.
Macht richtig Spaß der Maschine zuzuschauen.
You made a wonderfull work and you share it on your website for free. You have all my respect for that, you are amazing !
I just received this on my recommandation and I find it amazing ! Great job !
Unfortunally your last video (this one) is 4 years ago, are you going to make more video to show your talent ?
You are genius ! Respect
Ok this is great, always loved the idea of this being part of an electronics workshop, I've never seen an inexpensive version of one, it may run at a few hundred times slower speed but its not for mass manufacturing anyways...so cool!!
Actually it does not run that slow... most pro machines only have ability to pick 10 components at once (10 nozzles) and also cameras directly on head to align components while travelling, but travel speed can be sped up only until physics permit it - weight of component, suction of nozzle etc makes a huge part in it.
Dear VBsProjects, great video, we are also working on a opensource pick and place machine.
This is an awesome build ! Thanks for sharing !
Amazing machine, really. If you add small pillars underneath the board, about 10 to 20 on correct points, such supports will prevent the PCB from bending every time each component being placed on board.
That's incredible. Great Job! I wanna build the same.
I have wanted to make one of these for a long time now... haven't had a project that needed on until recently.
a couple friends told me I'm stupid for wanting to make one. but this so shows it can be done.
if your willing to, I'd love to have a chat about some of your design aspects :)
Outstanding work! Wish you all best
Amazing! Cool editing too :)
Im crying watching this :'( What an insane homemade assembly machine!!!
AWESOME ! your professionalism is on display and is very impressive.
It is now 4 years later than you posted this video.
Can you post a update on how it is working now ?
The setting the zero for the IC's was brilliant.
Others mentioned that doing every other pad for solder might help with the bridging.
I do not know the issues, but thought that backing off the pad in alignment with the pad might have any solder paste trails fall into the board, and that going from pad to pad may be faster, but the solder trails would fall onto the adjoining pad.
Opo opponya kop Oppo oko Poo OOO
Ini masih
Karena e kok Lo seng Lo
Ini adalah kondisi Popo
Absolutely undeniably cool. I want to know more about the xy axis alignment.
Great work. And making it open source, Thumbs UP!
Habe ja schon sei einiges gesehen, was pick'n'place betrifft. 2014 veröffentlicht, wow, ist ja schon ne Weile her. Auf Deiner Homepage scheint der Automat nicht weiterentwickelt - trotzdem eine excellente Arbeit, die sicher viel Zeit beanspruchte und offenbar derzeit sein Bestimmungswerk verrichtet. Ich selbst besitze zwei Automaten von Autotronik, ok das sind Industriemaschinen, weiss wo die Probleme bei Bestückern so sind.
Ich muss ganz ehrlich sagen, Respekt vor so einem beeindruckenden Stückwerk - hast das echt komplett selbst entwickelt? Grandios!
Mittlerweile gibts ja aus China kleine Bestücker für n Appel und n Ei - so etwa 4000 Euro. Mehrfach habe ich überlegt, ob für Einzelprojekte, die ich gerade im LED Bereich habe, ein einziges Gerät angeschafft wird und dann tagein, tagaus nur am rödeln ist. das was Du hier zeigst sieht sehr solide aus, hast schon Einsatzerfahrung? Ist denn eine Produktion des Gerätes geplant? Oder doch nur ein schnuckeliges Einzelstück? Was sehr schade wäre...Es gibt mit Sicherheit einen Markt für so ein Schmuckstück, wenn es sich nachhaltig produzieren liese.
Jedenfalls meine Neugier ist geweckt - planst da noch mehr in der Richtung - oder wars das?
Absoluter Daumen hoch!!!!
Beautiful work !
What an amazing machine! Thanks for sharing! Any chance you'll put up more videos of it on action?
Stein-Erik Dahle There will be some more videos in the future. I am currently very busy with other stuff. So please be patient.
Im looking forward to that!
hey awesome too good i love it!! i wonder how you could came up with something like this, well done man keep it up !!
Impressive! Very nice work!
Best of the best. Greatest work! Like it
GREAT looking machine !
You are an iron man. Awesome. Gonna start my journey building one. Deadline. One year. Thanks for the inspiration.
very cool machine, nicely built!
I have always wanted to buy a 3D printer.. couldn't afford one since in my country everything in 10x the original price.. so i built my own. This video is inspiring
I think you could have some reasonable wins if you sorted the paste dispensing points by their X and Y coordinates. Since it doesn't have to pick anything up, that would likely be the most efficient way.
You are fully right - Another thing on the software ToDo list :-)
also, did you ever sort out the moves for bringing a part over the alignment camera? seems like there were some easy wins there: combine the separate x and y moves into one diagonal move, and run that initial part rotation during the move instead of while stationary over the camera before it activates. i'm also curious about the pauses between each move in general, is that to prevent vibrations from from one move messing with the subsequent move? it seems like most of the Z move (aside from the bottom few mm) would be pretty insensitive to vibration so i wonder if it's necessary between xy and z moves. i'd be curious if you could even start the z move slightly before the xy move ends, as long as xy is has come to a stop for the last [part height + max part height + some margin] of z travel (and leave enough time for any vibrations to dissipate before contact). i imagine that latter part would be a fair bit harder to implement though!
@@spambot7110 There's actually a reason why it doesn't rotate while moving with bigger parts. They are much more likely to fall off. Notice also how the speed of the motors is reduced when carrying larger parts. I think before inspection it's intentionally avoiding going over the PCB in case it does fall off or fail inspection. If it fell off during movement over the PCB that could knock other parts out of alignment and be a mess for the operator.
wow... brilliant engineering!
Great Job, beautiful machine & Free Sharing ! Great Again
Awesome project. Did you make it by yourself? One of the best I ever seen.
This is incredible, you are a genius
Very impressive!
Hi, it is a fantastic machine you have put together! I am interested to know how successful have you found the paste dispensing if you include the place and reflow process? Your needle size seems spot on for the parts you show but the pcb has some far smaller pitch parts than that needle could print for. How do you deal with that?
Awesome job man!
Thank you for sharing this cool video! 🐻🖐🏻
Congratulations.
Good machine..
Seriously amazing stuff
Great job, amazing!
You need carrier support the pcb not to be flex. Anyway, its amazing DIY. Next stage is the oven?
Just beautiful!
great job man. congrats
Awesome project. Why do we make effort to have the pnp dispensing paste? The silk screen method is quite fast and precise. Even if my pnp could dispense paste i'd still use the silk screen i think.
Very impressive. We should all envy you.
Just amazing !
thanks bro amazing work...
Its so pretty! How much did it cost to build? I would love to build one some day.
cool man it's truly a marvelous machine
excelent, can i using eagle project or proteus, or only altium can using this machine ?
Your paste dispenser seems to work really well. Does the temperature of the paste matter?
Legend!!!!! Great feat of achievement 👍
That is really cool. What are the LEDs doing to the components when the arm moves it over them? Do they heat up the contacts to help place them against the solder paste?
I LOVE it im so ecited to make one like this so how it cost for u bro
I'm did't imaginne that this machine can mading at home!!!! It will be a helpfull if you share how to design it in detail ... thank you very much.
great work
Great job .. I wonder what type of motors are you using in X Y Z .. they are very smooth and fast .. Is it a servo motors or stepper.
And could you please tell me the name of the cam or write the link cause I wanna buy one :)
Amazing. You are very good.
great invention
Wow. That's quite amazing. In a way, it reminds me of the LASER machines I used to operate at my old work.
Very wonderful . How much it cost
And what is the model
wow! I feel like I want to hire you for my project!
Great machine design and build. What did it cost to prototype? And did you 3D model the design?If so, what 3D modelling program did you use? Perhaps designing and fabricating a solder paste stencil would be a better solution to 0.65mm pitch (and all other) devices.
Unbelievably coool.
Do you use servos or microspepping with encoders?
This is a fucking beautiful thing you have built
Edit, I thought they were steppers, project page says servos
Awesome machine :-)
This machine is ffing awesome.
good job! how long did that take you to make?
Does the rapid displacement of the gantry not vibrate the pcb and displace the SMD's?
ich überlege grade ob es möglich wäre das mit mach3 zu steuern, und statt der kamera eine konische schablone macht, welche beim hineinfahren das bauteil grade schiebt, könnte man diese maschine nichz als kleinserie bauen ? habe die chinesischen geseghen, die arbeiten nur vom Gurt, aber deine nimmt auch das offene Magazin
Could anyone tell me how that "dispensing needle x-y alignment" thing work? First time I've seen that one. What kind of sensor are those lights?
This.Is.Amazing.
Hello. I'll build a semi-automatic P&P machine and I've a question:
Wath is the right vacuum ratio for the pump and does it have to be regulated (in kpa)? (it's welcome if you have some references)
can you explain to me what the lights do? I would like to build one myself.
I had no idea pick and place machines could also place solder paste. We screen them by hand with laser-cut stencils. Definitely a lot faster and more accurate.
Which is faster and more accurate?
This one is a home-made one, the regular P&P machines can work much faster.
Plus, you won't need the laser-cut stencils, solder paste locations can be easily exported from the board files.
Plus, you don't need humans ;D to some extent.
Ah, I thought that machine was working at it's max speed. I suppose with the added ability to place, it's better than placing by hand. I both screen and place by hand, it is exhausting when you have to make more than 6 panels of something.
@@SirBrittanicvs Stencils are better than this method for volume. However, one off this method is very much more preferable and very much cheaper. I have read in other comments that he should use a sort routine of all the XY coordinates to greatly speed up the process instead of processing the corrdinates in order of their creation by the program. In addition, turning the sensor on before the arm arrives and putting in a small delay once it arrives would help speed up alignment. Finally, I read that staggering the solder blobs would prevent bridging. All in all, this is a fantastic device! Leave it to the internet to come up with even more radical solutions to making it faster.
On the stencil front, you can actually make automatic stencils...I thought of a way using an inkjet printer. You take the pad layer, export it to some software which inverts the image so most of it is black except the pad. Then you print it out onto an aluminum sheet. Then, you dunk it in acid. The exposed metal will etch away leaving a perfect pad stencil. Then you use the vacuum assembly to place the stencil over the board, and then use the standard drag method to get all the pads. This would of course, eliminate the resolution issue entirely, but is considerably more complicated to incorporate into an automated procedure. However, if both processes were managed by a master controller routine, with the separate operations modularized and performed in sequential order, indicating to the master controller that the process was complete, then the next phase, placement, could begin. Like a 4 bit (00 01 10 11) signal, which would only take up 2 GPIO pins to indicate to the master controller what cycle to do next. Initialize, stencil, placement, and one more for something I probably didn't consider. IDK what setup he has though so...
That's Awesome! but why wouldn't you screen print the paste?
Wow.. this is... Homemade... I'm speechless
Excellent work Volker.
For the small pitch device, how about staggering the paste spots ? This might avoid the bridging you are experiencing.
Very nice. Our compliments to Volker.
Hi Bob,
a great idea. I will try that. The dot size limitation is currently limited by the ball size of the solder paste. I will try and get paste with smaller dots some day.
VBsProjects Just have it move a little higher before moving to the next pad. Nice work.
+VBsProjects a fux pre tratament on board dont fix theses bridges?
Yu know fux is nerver too much :P
+Bob Beattie
For more refer to www.szsmtfly.com
Email:s4@smtfly.com
Skype:live:s4_174
whatsapp: +86 13823571046
Reply ·
like a rock star!
Wonderful
Great project! I have a question, how does the effector know where to place the SMD? Is everything hard coded such that the coordinate of the SMD is known and the effecetor just travels to that specific location?
Every new PCB comes with its own set rules. God level precision needed here.
woow ,, pretty impressive
The PCB needs support underneath. It is flexing on each solder hit. Not really a problem but maybe put some foam underneath it so it has some give but is flexing less.
Awesome! Really cool.
What is the software do you use for it? I mean to generate gcode.
That's pretty damn impressive. How much did it cost in materials?
OMG it is superb.
How does that quick change system work? Are you using air pressure?
Respekt! Deutsche Wertarbeit. Hast Du die Firmware für das Maschinchen insbesondere die Ausrichtungs-Einheit selber erarbeitet?
Ich möchte bald so was ähnliches produzieren. Kannst Du mir für die Steuerung Literatur empfehlen, so dass ich das Rad nicht komplett neu erfinden muss? Am liebsten währe mir auf Basis von AVR Microcontroller. Da habe ich schon Erfahrungen sammeln mit anderen Projekten können.
Für eine Antwort währe ich sehr dankbar.
Hello, would you like the structural schematic of the machine?