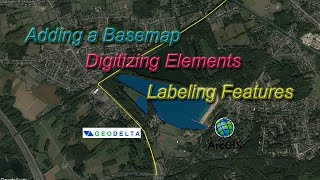
How to digitize a map in ArcGIS - Map digitization in ArcGIS

HTML-код
- Опубликовано: 14 сен 2020
- #Digitization #ArcGIS
Georeferencing and Digitizing Image/Map
Introduction
There is a great deal of geographic data available in formats that can not be
immediately integrated with other GIS data. In order to use these types of data in
GIS it is necessary to align it with existing geographically referenced data, this
process is also called georeferencing. Georeferencing is also a necessary step in
the digitizing process. Digitizing in GIS is the process of “tracing”, in a
geographically correct way, information from images/maps. The process of
georeferencing relies on the coordination of points on the scanned image (data to
be georeferenced) with points on a geographically referenced data (data to which
the image will be georeferenced). By “linking” points on the image with those
same locations in the geographically referenced data you will create a polynomial
transformation that converts the location of the entire image to the correct
geographic location. We can call the linked points on each data layer control
points.
The selection of control points is important. Some guidelines:
• They should be easy to confirm as representing the same geographic
location (street intersection, political boundary, landmark, etc.).
• They should be spread across the image to be registered, one suggestion is
to select a control point near each of the corners of the image and few
throughout the interior will often work well.
• Good overlap between the two dataset is also important.
• Make sure you are clicking as close as possible to the same geographic
location, zooming in can help in this process.
As you add points the complexity of the transformation that is possible increases.
This is not always a good thing, 1st, 2nd, and 3rd order polynomials can be
calculated, usually a 1st or 2nd order transformation is all that is necessary. In
order to complete a 1st order transformation you need a minimum of three
control points, for a 2nd order you need a minimum of six control points, and for a
3rd order you will need a minimum of ten points. A 1st order transformation will
shift, scale, and rotate your image while 2nd and 3rd order transformations will
bend and curve straight lines, which might be necessary, but is rare.
Data:
Three file will be used in this training module, NYStreet.shp, ManhattenCensus.shp, and
Manhattan.sid. The latter is a raster image of the same type as jpeg, gif, tiff, etc.; it’s just
a digital picture at this point. The first file is a shapefile that contains the street map for
the entire state of NY; the second is a layer that contains only the census tracts and
extent for Manhattan, which will be useful for zooming to and initially coordinating the
image. The first thing you are going to do is “Clip” the part of the street map that
intersects Manhattan. The street layer will be used for setting control points.
Digitization of a map in ArcGIS is explained with screen recording and a voice over. For digitization in ArcGIS we need a map (that is to be digitized) and a basic knowledge of ArcGIS. The first step is to georeference the map which is explained in part of this series
The main task of digitization is explained in this part of tutorial.
This video answers following questions with recorded screen demo
How to create shape files for digitization?
How to digitize a map using polygon and polyline shape files?
How to categorize polygons?
How auto complete polygon works?
How to digitize a thrust fault with hanging wall to north?
How to digitize a thrust fault with hanging wall to south?
How to assign different colors to polygons?
How to assign different patterns to polygons?
How to assign different symbols to polygons?
The last part of the video series is about finalizing the map in Layout view.
Subscribe this channel for more latest videos.
For digitization first create shape files. Then click editor, start editing, trace polygons, stop and save edits, go to attribute table of shape files add field, start editing to type descriptions of polygons, polylines etc. Then go to properties of shapefiles, then symbology to categories, select field, click add all values, assign colors to polgons. Watch full demo in video.
Video link: • How to digitize a map ...
Channel Link: / @explore48
Other inportant playlists: / geologicalfieldworkgfw


The part 3 of this video is not available on your your RUclips channel.
Can you help out. Thank you.
The video is helpful