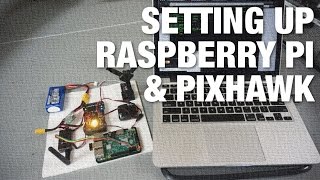
Connecting Raspberry pi with Pixhawk | Get Started to run your Python code | Step by Step Guide

Поделиться
HTML-код
  • Опубликовано: 20 авг 2024
  • Very easy and basic guide to setup communication between Raspberry pi and Pixhawk flight controller. Follow the official ardupilot documentation for reference for better understanding .
    In next videos we will see how we can write our first python script using drone kit to autonomously takeoff and land, use computer vision and more.
    ardupilot doc:
    ardupilot.org/...
    rpi UART doc: www.raspberryp....
    -----------------------------------------------------------------------------------------------------------------------------
    Buy this amazing drone courses
    1. Drone Programming Primer:
    dojofordrones....
    2. How to Build a Raspberry Pi Drone:
    dojofordrones....
    3. Drone Delivery and Precision Landing:
    dojofordrones....
    ---------------------------------------------------------------------------------------------------------------------------------------------
    For daily updates, you can catch me up on
    Instagram: www.instagram....
    Telegram group - t.me/joinchat/...
    Instagram Droid - ...
    Twitter- In...
    For more videos subscribe to the channel....

Комментарии • 252

  • @grabitgo2724
    @grabitgo2724 3 года назад +1

    Hello sir,
    Are there any prerequisites or settings before following this video or I can simply jump to the tutorial as you've shown with pixhawk & r.pi ?

    • @PankajMali
      @PankajMali  3 года назад

      Yes you need to do some settings in pixhawk parameters
      Connect pixhawk to mission planner and get into config/tuning >> full parameter list
      And then change below two setting values
      SERIAL2_PROTOCOL = 2 (the default) to enable MAVLink 2 on the serial port.
      SERIAL2_BAUD = 921 so the flight controller can communicate with the RPi at 921600 baud.
      LOG_BACKEND_TYPE = 3 if you are using APSync to stream the dataflash log files to the RPi( optional so leave as it is to default)

    • @grabitgo2724
      @grabitgo2724 3 года назад +1

      @@PankajMali Thank you for the detailed response!
      Can I find these settings exactly on QGroundcontrol? Basically I'm using QGC..
      And what about the OS, means which OS should be flashed into the rpi through SD card before doing all stuffs?

    • @PankajMali
      @PankajMali  3 года назад

      Follow this link if using QGC
      dev.px4.io/master/en/companion_computer/pixhawk_companion.html
      Install raspbian buster stretch desktop

    • @grabitgo2724
      @grabitgo2724 3 года назад +1

      @@PankajMali okay thanks..

    • @sarangchahakar1519
      @sarangchahakar1519 3 года назад +1

      @@PankajMali Hey Pankaj, I am following this video for pixhawk and raspi setup and as mentioned in the above comment by you I connected pixhawk to mission planner and got into config and then into full parameter list but I cannot see any option of SERIAL2_PROTOCOL or SERIAL2_BAUD or LOG_BACKEND_TYPE. Can you suggest what might be the issue?

  • @PranshuTople
    @PranshuTople 3 года назад +3

    Was waiting for this video from soo long.... Nice job 👍

    • @PankajMali
      @PankajMali  3 года назад

      Thank you very much ❣❣

  • @jaideepambar4368
    @jaideepambar4368 3 года назад +1

    Thank a lot for the video
    This is exactly where I was stuck, your detailed video helped me , cheers mate keep up the good work👌👌

    • @PankajMali
      @PankajMali  3 года назад

      Hope it helped you, keep building 🤘🤘

  • @636_utsawdastalukdar5
    @636_utsawdastalukdar5 3 года назад

    best video on establishing connection between pixhawk and rp3

    • @PankajMali
      @PankajMali  3 года назад

      Thank you....hope it helped you ❣

  • @kayboku7281
    @kayboku7281 3 года назад +1

    ha timing! Ive just spent the last week trying to figure this out too! Trying to figure out the port of uart=1 and dev/ttys0 took me ages! NIce video I wish I had seen it last week! :)

    • @kayboku7281
      @kayboku7281 3 года назад +1

      i was installing mavlink-router, is there any advantage of mavlink-proxy? Or is it pretty much the same thing?

    • @PankajMali
      @PankajMali  3 года назад +1

      Good to see that you got it ❣❣keep building

    • @PankajMali
      @PankajMali  3 года назад

      Yeah mavlink router and mavproxy are bit different as mavproxy is command line interface gcs and mavlink routing helps is routing connection string from serial , tcp, udp to the end connection

  • @bosebabu88
    @bosebabu88 Год назад +1

    Very useful! Appreciate your effort

    • @PankajMali
      @PankajMali  Год назад

      Hello BB ,
      I'm glad it helped you ☺

  • @AfshAd
    @AfshAd 3 года назад +1

    Beautifully explained 🔥🔥

  • @pythonking_stem1527
    @pythonking_stem1527 9 месяцев назад +1

    Hello sir, I need to collect some telemetry data from drone ( data logging from pixhawk using sd card and sd card reader. Can you make a video please)
    I am interested to collect load current, voltage, position, orientation and control inputs

  • @teamudaan9783
    @teamudaan9783 3 года назад +1

    Tysm your guidelines was very usefull

  • @nagammanagamma289
    @nagammanagamma289 Год назад +2

    Good explanation 👌
    Sir please upload video to build drone from scratch using apm 2.8 flight controller with raspberry pi sir plzz

    • @nagammanagamma289
      @nagammanagamma289 Год назад +1

      When ever If possible plz upload sir tqsm in advance sir 🙌

  • @supanovaninja
    @supanovaninja 3 года назад +1

    Awesome stuff. I am inspired to work on something similar. Keep up the good work!

  • @pythonking_stem1527
    @pythonking_stem1527 9 месяцев назад +1

    Hello Sir, very interesting video. I am interested in collecting the load current, and battery voltage along with telemetry data. I want to use it for battery usage estimation. Have you ever done such experiments?

  • @Badhousegaming463
    @Badhousegaming463 3 года назад +1

    Great job

  • @arunsv.1115
    @arunsv.1115 3 года назад +1

    suprb.. i will try this raspberry pie..

    • @PankajMali
      @PankajMali  3 года назад

      Hello ak47
      Good luck with that ❣❣

  • @maharashtrapolice7761
    @maharashtrapolice7761 3 года назад +1

    🔥🔥🔥🔥🔥🔥 kdkkk

  • @emres.8006
    @emres.8006 3 года назад +1

    Thank bro

  • @morya6278
    @morya6278 3 года назад +1

    Thank you so much 😊

  • @Badhousegaming463
    @Badhousegaming463 3 года назад +1

    Nice explain

  • @crazythings6358
    @crazythings6358 5 месяцев назад +1

    In what time the rasberrypi gives commands to the pixhawk. How to put codes in the rasberrypi.

    • @PankajMali
      @PankajMali  5 месяцев назад

      Hello,
      Its immediate once you start the code, you can find detailed video : ruclips.net/video/LqtGI_iaqj0/видео.htmlsi=EruMwqTMzJaOTTN3

  • @sumukhkumark3473
    @sumukhkumark3473 2 года назад +1

    Awesome Video ! I have a question how to connect Ardupilot to Raspi and run code

  • @mikeb5556
    @mikeb5556 9 месяцев назад +1

    Why do people put music background on technical videos i do not know?... but good content.

    • @PankajMali
      @PankajMali  9 месяцев назад

      Yeah background music is not required i have stopped adding music on my new videos.
      Thank you

  • @prateekun7439
    @prateekun7439 3 года назад +1

    Gud work 👍

  • @pushpendrachandravanshi3233
    @pushpendrachandravanshi3233 2 года назад +2

    Hello Sir,
    1. What the telemetry module exactly do, I mean what if we don't incude it ??
    2. Here you have talked about ip address of raspberry pi, I think IP addresss are of networks and not of devices ??

    • @PankajMali
      @PankajMali  Год назад +1

      Hello,
      1.Basically telemetry allows the communication between ground control station and aircraft or any system with bi- directinal data transfer .
      2. Yes, you are correct ip address are of network but they are assigned to a particular device .

  • @santhoshmamidisetti
    @santhoshmamidisetti 9 месяцев назад +1

    I am also trying to make something like that Pankaj jii , could you please provide me with the drone 3d parts files and specifications (like the battery needed to power all motors and raspberry, motor rating , esc , total flight time , rc and all. that would really be my starting point, thanks a lot

    • @PankajMali
      @PankajMali  9 месяцев назад

      Hii, probably I'll update with this in next video and also design files for your reference .

  • @egk7543
    @egk7543 2 года назад +1

    Hello sir,
    I have always the same problem, i can't download wxgtk4.0

    • @PankajMali
      @PankajMali  2 года назад

      Can you please elaborate your error .......are you working with python2 or python3?

  • @minhnhan5040
    @minhnhan5040 2 месяца назад +1

    Hello sir,
    May I ask if you installed Raspbian OS or Ubuntu into the RPi? I encountered the error "command not found" when keying in "sudo raspi-config" into my Ubuntu RPi? Thank you very much for your help sir :)

    • @PankajMali
      @PankajMali  2 месяца назад

      Hello,
      It depends on the requirements, if you want to use ros for your project then you xan go with ubuntu or else for this setup raspbian is fine .
      Can you please elaborate on your error

  • @BTEEEVANSH
    @BTEEEVANSH Год назад +1

    Bro I have APM 2.8 and RPI 3A and not able to give power to RPI using APM ,please guide me if possible then please send the circuit diagram also

    • @PankajMali
      @PankajMali  Год назад

      Hi,
      Please refer this link
      www.instructables.com/Autonomous-Line-Follower-Drone-With-Raspberry-Pi/?amp_page=true

  • @myesil3330
    @myesil3330 3 года назад +1

    Merhaba güzel kurulum ellerinize sağlık olsun. Pixhawk 3d yazıcı ile baskısı yapılmış kırmızı olanın stl dosyası ni paylaşabilirmisiniz?

  • @umakantadas5186
    @umakantadas5186 9 месяцев назад +2

    where did you get the connector for connecting rpi to pixhawk ?

    • @PankajMali
      @PankajMali  9 месяцев назад

      Hello ,
      I got the connector from robu.in

    • @umakantadas5186
      @umakantadas5186 9 месяцев назад

      @@PankajMali can you share the product link please. I have searched and could not find it

  • @pungmk928
    @pungmk928 Год назад +1

    Hello again, I hava a question, is your raspberry Pi running Rpi OS or Rpi OS Lite or Ubuntu? and which version specifically?

    • @PankajMali
      @PankajMali  Год назад

      As of now its rpi os ( buster)

  • @pratikgauns5091
    @pratikgauns5091 3 года назад +1

    Sir, can you please make a video on actual practical uses of raspberry pie connected to pixhawk.

    • @PankajMali
      @PankajMali  3 года назад +1

      Hello pratik
      Yeah we will go towards implementation of actual applications once this basics get completed, all this basic setup you will require while using ROS
      Next video is on opencv for drones

  • @ishwartupe7358
    @ishwartupe7358 3 года назад +1

    im stuck at waiting for the heartbeat from /dev/ttyAMO and after that it is showing only mav> please help me with this

    • @PankajMali
      @PankajMali  3 года назад

      Can you give me more details on what baud rate did you set and other settings

    • @ishwartupe7358
      @ishwartupe7358 3 года назад +1

      @@PankajMali problem solved i have just use /dev/tty/AMA0

    • @PankajMali
      @PankajMali  3 года назад

      Great 👍

    • @ishwartupe7358
      @ishwartupe7358 3 года назад

      @@PankajMali Is there any data of ardupilot is stored in raspberry pi??

  • @mohamedelsayedmahmoudelsay3211
    @mohamedelsayedmahmoudelsay3211 2 года назад +1

    Nice Work, may i ask you about the maximum distance range of Raspberry's Wifi and The ground computer since you used Raspberry as access point to connect it with Ground computer via SSH.

    • @PankajMali
      @PankajMali  2 года назад +1

      Hello mohamed,
      Thank you, the range with rpi wifi is around 25-30m. Once the command is given to execute tit will carry on the execution even the copter goes out of range.

  • @cemjecermarquez2429
    @cemjecermarquez2429 Год назад +1

    can you make a video where you setup the ardupilot firmware on the pixhawk 2.4.8? or maybe just comment here how you did it thanks..

    • @PankajMali
      @PankajMali  Год назад

      Yeah sure .... i can share you my parameter list file so that you can compair the changes i did

  • @shashank.m.rdronepiolet4712
    @shashank.m.rdronepiolet4712 3 года назад +1

    Extraordinary explanation good job can share cad files of the frame

    • @PankajMali
      @PankajMali  3 года назад

      Thank you , dm on Instagram

  • @prajaktabankar1293
    @prajaktabankar1293 3 года назад +1

    Kdk🎉🎉🎉

  • @Doodleland594
    @Doodleland594 3 года назад +1

    Hi...In this video you said for Raspberry pi 3 ttyAM0 is used.
    I have raspberry pi 4.
    Can you please tell me which tty I should use their ?

    • @PankajMali
      @PankajMali  3 года назад

      Hello iqra
      Yes you can connect your rpi4 in Serial0 port

  • @abhijitbaruah2207
    @abhijitbaruah2207 2 года назад +1

    When I run command it shows no collaboration

    • @PankajMali
      @PankajMali  2 года назад

      Hello abhijit,
      Can you please elaborate your issue

  • @duanebowman9595
    @duanebowman9595 3 года назад +1

    I would like to know why I should/need to put a Pi on my PX4? What will it give me that the PX4 gives me? Thank You

    • @PankajMali
      @PankajMali  3 года назад

      Hello Duane
      Hope you are doing well
      Here pixhawk is the flight controller with all the primary sensor setup required to keep you vehicle stable. Here you upload the firmware and go ahead
      What if you need to do some extra computation like running a code or adding few more sensors like some lidar or any according to your apllication.
      Pixhawk is limited with its operational capability its designed for the specific tasks not more than a micro controller
      So if you want to do this extra processing then you need a computer onboard, so that you can run your codes on the computer and send send the mavlink messages to the pixhawk via serial communication, its bi directional communication
      You can actually implement real time apllication which uses AI/machine learning algorithms.

    • @duanebowman9595
      @duanebowman9595 3 года назад +1

      @@PankajMali Thank You!! you are the first one to give a answer ! and a good one!! So mow you get a sub

    • @PankajMali
      @PankajMali  3 года назад

      Thank you very much, i really appreciate it❣

  • @danielnainggolan8796
    @danielnainggolan8796 3 года назад +1

    Halo The Drone Dojo..
    I have a problem when the run syntax "mavproxy.py --master=/dev/ttyAMA0"
    When i run the syntax, the command is error " link 1 down"..
    Can you help me to solve the problem..
    Thank you..

    • @PankajMali
      @PankajMali  3 года назад

      Can you please provide me more details , so that we can steo by step cross check eaxctly where the error is

  • @mustafakendiguzel468
    @mustafakendiguzel468 3 года назад +1

    İts givin me error Mav >Link 1 down what did wrong brother ?

    • @PankajMali
      @PankajMali  2 года назад

      Check tx rx pins , baudrate

  • @16harshwardhan14
    @16harshwardhan14 2 года назад +1

    Can we connect raspberry pi to dji naza m lite flight controller instead of pixhawk

    • @PankajMali
      @PankajMali  2 года назад

      No we cannot connect as far as i know mainly bcoz its doesnt have any ports for uart or spi.
      As in pixhawk mavlink is used ...one has to figure out the communication protocol used

    • @16harshwardhan14
      @16harshwardhan14 2 года назад +1

      @@PankajMali then to which flight controller i can connect the raspberry pi instead of pixhawk

    • @PankajMali
      @PankajMali  2 года назад

      You can use naze 32 or cc3d flight controllers, these fc's are pretty old and outdated . You need to install the arducopter firmware on this fc and do the setup or any flight controller where you can upload arducopter firmware

  • @karatugba
    @karatugba 2 года назад +1

    I am always confusing about onboard and offboard topic... Could you answer it ? For instance, If I connect my any NVIDIA Jetson to my pixhawk though the UART, what will we say about it? On board or opposite?

    • @PankajMali
      @PankajMali  2 года назад +1

      Hi tugba kara,
      On-board means you have the jetson connected to pixhawk on the drone itself and then you take off .

    • @karatugba
      @karatugba 2 года назад +1

      @@PankajMali I really appreciate for that, finally it comes up the result, thanks a lot!
      Have a nice day :)

  • @hiteshthapaa
    @hiteshthapaa Год назад +1

    For powering the raspberry pi from the pixhawk's telem2 ports, will the rpi get enough power ?

    • @PankajMali
      @PankajMali  Год назад +1

      Till now i have tried both the ways
      1. Power from pixhawk to rpi
      2. Power from external power module to rpi
      Both worked fine ....few people faced some issues as found in some forum discussions but i didn't face any .

    • @hiteshthapaa
      @hiteshthapaa Год назад +1

      @@PankajMali thanks but i think powering externally would be better using buck converters

    • @PankajMali
      @PankajMali  Год назад

      Yes , you are correct it's always better to be on the safer side

  • @kawsarfarooq1539
    @kawsarfarooq1539 3 года назад +1

    Hi Pankaj
    In the initial , i connected my Rpi4 to the monitor and i gave the 5v to it through adopter. How about Pixhawk, Do i need to connect it to laptop or i can just simply connect it with battery because i already setup everything of mission planner for pixhwak in my laptop before connecting Rpi.

    • @PankajMali
      @PankajMali  3 года назад +1

      You can power it via battery from power module to pixhawk and when you want to test your drone out in the fields you can power rpi via separate 5v BEC or also power rpi from the telemetry 2 port vcc and gnd.

  • @deltavcreations1862
    @deltavcreations1862 3 года назад +1

    Hi
    I have a question or maybe a clarification.
    I been seeing everywhere,whenever RPI and Pix are connected - it is suggested to do over Telem1/2 to RPI seriial Pins or use a FTDI connector to a RPI USB.
    What should happen if we connect it directly from Pixhawk USB to RPI USB?
    I tried that connection and it still works atleast for reading Flight data using Dronekit. Just wanted to know , why it is recommened to connect over telem port!
    Thanks in advance !

    • @PankajMali
      @PankajMali  3 года назад +1

      Yes you are correct we mainly use telemetry 1/2 to setup communication with raspberry pi or any companion computer.
      As pixhawk has 5 serial ports among which tele2 and tele1 are used for mavlink messages and this serial ports have flow control over data .
      And if you connect to the micro usb port (serial 0) of pixhawk , which is mainly preferred for connecting ground control station to pixhawk then you will get the mavlink messages and you will be able to communicate properly but only when your aircraft is stationary.
      This should not be connected in flight because the flight code assumes that if it is receiving power through this port that it is stationary .

    • @deltavcreations1862
      @deltavcreations1862 3 года назад

      @@PankajMali thank you! Appreciate it :)

  • @an_inch_to_death444
    @an_inch_to_death444 2 года назад +1

    Hello, i would like to ask what to substitute in wxgtk4.0? it doesn't work for me, i always get the error 'package wxgtk4.0 has no installation candidate'. Thank you for replying.

    • @PankajMali
      @PankajMali  2 года назад

      Hello ,
      Kindly update and upgrade and then run this commands
      sudo apt-get update -y
      sudo apt-get install -y python-wxgtk4.0
      ' -y ' flag is for silently installing without any questioning

    • @an_inch_to_death444
      @an_inch_to_death444 2 года назад

      @@PankajMali hello sir, thank you for replying
      I seem to have a problem with the solution you gave: i installed wxgtk4.0 with the -y flag but it still displays that package wxgtk4.0 has no installation candidate
      Thanks

  • @gggg0002
    @gggg0002 Год назад +1

    Hi mr. Pankaj, I have some questions about coding RP4 with PixHawk. We are trying to making a VTOL UAV and it has a simple task that it will change servo angle at the determined location and altitude. So, I want write a code for RP4 that will get this mission. How can I do that, can u help me? I am an amateur on RP4. Do you have some simple examples about that? :)

    • @PankajMali
      @PankajMali  Год назад +1

      Hello gggg ,
      If you are concerned only about vtol autonomous mission using Pixhawk autopilot then you can just refer the ardupilot documentation.
      You dont have to add rpi to perform this autonomous mission ....if you want to have some more computation or task than auto mission then rpi will make a point.
      Please refere the documentation:
      ardupilot.org/plane/docs/quadplane-auto-mode.html

  • @moulisagar3439
    @moulisagar3439 7 дней назад +1

    bruh from where did you bought that drone frame ?

    • @PankajMali
      @PankajMali  7 дней назад

      Its custom designed and built

  • @Hazar-bt6nf
    @Hazar-bt6nf 4 месяца назад +1

    can't we use serial0 to connect raspberry pi and pixhawk?

    • @PankajMali
      @PankajMali  4 месяца назад

      It depends on the board you are using like rpi3/4/5, jetson nano and their serial communication architecture. You can just check the port being used by ls /dev/tty* when you connect your hardware to rpi

    • @Hazar-bt6nf
      @Hazar-bt6nf 4 месяца назад

      So, ttyAMA0 is not mandatory, we may use another like serial0. @@PankajMali

  • @kawsarfarooq1539
    @kawsarfarooq1539 3 года назад +1

    Really appreciated sir
    Could you please explain how can I setup/configure) my RC Transmitter(remote) with it. I am using Flysky FS-i6 remote and FS-iA6B receiver.

    • @PankajMali
      @PankajMali  3 года назад +1

      Hello farooq,
      You don't need to specially configure your tx to get running with companion computer, you must have a drone ready with pixhawk which has your tx caliberated via mission planner /qgc and that's it you can start setting up the connections with rpi

    • @kawsarfarooq1539
      @kawsarfarooq1539 3 года назад +1

      @@PankajMali Thank you boss, lemme try

  • @dgb5820
    @dgb5820 3 года назад +1

    Are you doing anything with object recognition using Pi with Pixhawk cube

  • @sarangchahakar1519
    @sarangchahakar1519 3 года назад +1

    Hey Pankaj. My connection was working fine I was able to communicate pixhawk with raspi. But by mistake I pressed 'ctrl+z' on raspi command window and now again it shows me 'MAV> link 1 down' and I cannot get back to setting up their communication. can you please help?

    • @PankajMali
      @PankajMali  3 года назад

      Ok so tell me are you still running the mavproxy.py command as root user like after running "sudo -s" command ?

    • @sarangchahakar1519
      @sarangchahakar1519 3 года назад

      @@PankajMali Yes
      But still the error MAV>link 1 down persist

  • @singhdhananjay89
    @singhdhananjay89 2 года назад +1

    Nice video Pankaj
    just need your help, which cable you are using to connect the RaspberryPi 4 and Pixhawk2.4.8? I am assuming its female 6 pin dupont to df13 connector.
    From were i can get the cable to connect my raspberrypi with pixhawk.

    • @PankajMali
      @PankajMali  2 года назад

      Hello dhananjay,
      The cable that is used is df13 6pin which goes straight to the telemetry port on the pixhawk and at the rpi end you can connect the futaba cable or female jumper wire .
      You need to replace rhe other end.

    • @singhdhananjay89
      @singhdhananjay89 2 года назад

      @@PankajMali Thanks for the suggestion, I will try your idea!

  • @garapatianushadevi3427
    @garapatianushadevi3427 2 года назад +1

    Hi,
    I am new to drones. Does it work with PX4 autopilot Stack as well? (Not Ardupilot)

    • @PankajMali
      @PankajMali  2 года назад

      Yes it works with px4 stack also

  • @shiveshgaur9245
    @shiveshgaur9245 2 года назад +1

    Any possibility to fly Pixhawk drone autonomously without using GPS in an enclosed area.(Area of the arena will be known but no GPS signals will be available)

    • @PankajMali
      @PankajMali  2 года назад

      Yes its possible
      You can go with arruco marker array or you can go with slam navigatio
      Using depth camera isn't recommended as its results vary according to the light in the surrounding.

    • @shiveshgaur9245
      @shiveshgaur9245 2 года назад +1

      @@PankajMali Thanks. Can I have your contact?

    • @PankajMali
      @PankajMali  2 года назад

      You can catch me up on Instagram @punky_pankaj

  • @yazlmbilgisi4440
    @yazlmbilgisi4440 2 года назад +1

    Hello sir
    I have a few questions :)
    1-Can I connect my rspi4 on Pixhawk Cube ?
    2-How do I object tracking on RaspberryPi using Python-Opencv ?

    • @eternalxpectator
      @eternalxpectator Год назад

      hi there. were you sucessfull on that connection? i keep receiving mav>line down no matter what i try... it you were sucessfull please help me.

    • @PankajMali
      @PankajMali  Год назад

      Yes you can connect rpi4 to pixhawk cube .
      Follow the camera calibration video where the aruco detection code is tetsed ...similarly use tvec and rvec vectors in opencv to track the object and send the object x y errors with respect to the camera lens to pixhawk via mavlink messages

  • @nidalfayad3689
    @nidalfayad3689 3 года назад +1

    Hello, kindly is it possible to use RPi A+ model instead of B+ ?

    • @PankajMali
      @PankajMali  3 года назад +1

      Hi nidal
      Yes it is absolutely possible to use RPI A+ model ....its just the matter with the amount of RAM it holds in comparison with B/B+, but will work fine .

  • @ishwartupe7358
    @ishwartupe7358 3 года назад +1

    Is there any data of ardupilot is stored in raspberry pi??

    • @PankajMali
      @PankajMali  3 года назад

      No data is stored on this of ardupilot ,if you want to get telemetry logs on your pi then you can get it.

  • @nagammanagamma289
    @nagammanagamma289 Год назад +1

    Which version of raspberry pi ur using sir and also where we can get that raspberry pi online with cheaper price

    • @PankajMali
      @PankajMali  Год назад +1

      Hello nagamaa,
      In this video it's rpi 3b.
      You can check robu.in for rpi

    • @nagammanagamma289
      @nagammanagamma289 Год назад +1

      @@PankajMali tqsm sir continue to upload more videos about drone sir🙏

    • @PankajMali
      @PankajMali  Год назад +1

      @@nagammanagamma289 sure

    • @nagammanagamma289
      @nagammanagamma289 Год назад +1

      @@PankajMali tqsm sir♥️

  • @arfataskeen1151
    @arfataskeen1151 3 года назад +1

    Hello Sir, Can I follow the same video for connecting raspberry pi 3 to APM 2.8, instead of pixhawk?

  •  3 года назад +1

    Thanks for sharing!!
    Do you have the specs for the drone? Or a way or plans to build it?
    Thanks for sharing :)

    • @PankajMali
      @PankajMali  3 года назад

      Yes i will share all the details shortly

  • @Aashutoshkumar-xu1zy
    @Aashutoshkumar-xu1zy 2 месяца назад +1

    Sir is pixhawk is needed for raspberrypi, can I use Apm2.8 instead of Pixhawk?

    • @PankajMali
      @PankajMali  2 месяца назад +1

      Yes you can use apm2.8 instead of pixhawk . Try to get piixhawk as apm is pretty old now with less flash memory

    • @Aashutoshkumar-xu1zy
      @Aashutoshkumar-xu1zy 2 месяца назад

      I mean for a try I can use APM2.8 after getting successful I will replace it from pixhwak

    • @Aashutoshkumar-xu1zy
      @Aashutoshkumar-xu1zy 2 месяца назад +1

      And sir please make a video gesture controlled and person tracking or face tracking drone using raspberrypi and camera module

    • @PankajMali
      @PankajMali  2 месяца назад +1

      I have build gesture control using nvidia nx xavier and a usb web camera, I'll publish the video soon .
      I'll try to see if i can make my model and trained data lighter to support rpi.

    • @PankajMali
      @PankajMali  2 месяца назад +1

      Yes you can use but you need to find right firmware version and latest mission planner doesnt support apm board so check archives for older version.
      Check this fir more details : discuss.ardupilot.org/t/apm-2-8-is-it-supported/82880

  • @TurBull4nc3
    @TurBull4nc3 3 года назад +1

    hi
    i have a question,
    How do i control the drone movement through raspberry pi via Pixhawk?

    • @PankajMali
      @PankajMali  3 года назад +1

      After this process of setting the communication between the rpi and pixhawk, next thing you can do is install dronekit and required python dependencies as dronekit provide powerful API support for drone application development you can write python script to control your drone
      Check dronekit documentation for the API examples that you can use and control the drone autonomously or even you can control it via you keyboard (not recommended)
      You can also check the very basic example of how the process takes place in my other video

    • @TurBull4nc3
      @TurBull4nc3 3 года назад +1

      @@PankajMali i have error installing dronekit sitl on my raspberry pi as it doesnt support ARM.. How do i install?

    • @PankajMali
      @PankajMali  3 года назад

      Yes you are correct you can't install sitl simply you can build your code rpi and install dronekit-sitl on your local machine connecting both to same network.
      So now you can run your script on rpi and connect it to sitl on your local machine along with mission planner or what ever simulator you want to use

    • @TurBull4nc3
      @TurBull4nc3 3 года назад +1

      @@PankajMali how do i setup a local machine? I am kinde rushing to finish up my final year project due next week

    • @PankajMali
      @PankajMali  3 года назад

      Local machine is your laptop where i prefer ubuntu ,you can even use windows for dronekit-sitl
      1. Launch dronekit sitl in 1st terminal
      2. Launch mavproxy in second terminal which will send tcp messages to stil and udp connection (like udp connection on mission planner )
      3. Launch mission n connect with udp port (optional )
      4.run your python script on raspberry with connection string like 127.0.0.1:14550
      Raspberry and your unbuntu/windows machine should be connected to same network (router)/mobile hotspot.
      Refer dronekit documentation
      Hope it helps you, good luck with your project 👍

  • @ashwanisrivastava5291
    @ashwanisrivastava5291 3 года назад +1

    Is it necessary to connect rc remote with the drone for the first time?? Because i haven't bought it and no plans to use it in future(I also haven't calibrated the radio channel)

    • @ashwanisrivastava5291
      @ashwanisrivastava5291 3 года назад +1

      Can you provide me the solution?

    • @PankajMali
      @PankajMali  3 года назад

      If its just limited for checking whether the system is communicating then its ok to not have the radio connected, but when it comes to actually getting the system for demonstration in the field then you need the radio connected or else you will end you with error( like the fc wont be able to able to send mavlink messages to the rpi on the currents status of the radio ) and won't take off.
      Even though you are having the autonomous missions you need a radio to be connected

    • @ashwanisrivastava5291
      @ashwanisrivastava5291 3 года назад +1

      So its like your drone to work you should have rc remote connected to the drone but what about beyond line of sight drones how do they manage to fly?

    • @PankajMali
      @PankajMali  3 года назад

      When you plan for BVLOS fligts ,you need to turn off failsafe in auto/guided mode in the full parameter list ,so that when the vehicle goes out of the rc range still it will continue to carry on its mission.

    • @ashwanisrivastava5291
      @ashwanisrivastava5291 3 года назад +1

      @@PankajMali i don't want to configure rc controller and still want to control the drone. Is it possible?

  • @rajendradas2805
    @rajendradas2805 3 года назад +1

    Hii sir can we use resbiry pi for tracking features

    • @PankajMali
      @PankajMali  3 года назад

      Hello rajendra,
      Yes you can use rpi for tracking features

    • @rajendradas2805
      @rajendradas2805 3 года назад

      @@PankajMali ok please can you help me for this
      Please reply me in whatsapp
      Pls sir

    • @rajendradas2805
      @rajendradas2805 3 года назад +1

      Please give me your contact no
      I want to talk with you

    • @PankajMali
      @PankajMali  3 года назад

      You can catch me up on instagram @punky_pankaj

  • @teamudaan9783
    @teamudaan9783 3 года назад +1

    Hey ty for the video can i know how to do those missionplanner settings i have missionplanner version 1.3.74

    • @PankajMali
      @PankajMali  3 года назад +1

      Get in to mission planner and then on the home page , you will see config/tunning option
      Config/tunning 》》full parameter list
      On this page in the right-side search box is present search below parameters and set the values
      SERIAL2_PROTOCOL=2 (to set telemetry 2 port for serial communication )
      SERIAL2_BAUD=921 ( if you follow this video then set 921 if you are using raspbian jessie then set 57)
      LOG_BACKEND_TYPE = keep it default dont change as for now .

    • @PankajMali
      @PankajMali  3 года назад +1

      Hope this helps you 👍👍

    • @teamudaan9783
      @teamudaan9783 3 года назад +1

      Ty for ur reply bt when i search im not getting it should i connect raspi to mission planner physically and do connections? And to which ports

    • @PankajMali
      @PankajMali  3 года назад +2

      Ok no worries, please follow the procedure below
      1. Connect pixhawk to you computer via usb
      2.open mission planner and you will see a drop down menu and you see your flight controller in the options so select that and hit the connect button in top right corner.
      3.no need to connect raspberry pi now
      4.go in config > full paramater list and then search those parameters and set them
      5.after changing dont forget to save parameters to fc but hitting the save button
      6. Now you are good to go ...diconnect fc and get started with rpi setup but connecting rpi gpio to telemetry 2 port on pixhawk and follow the process as in video👍

    • @teamudaan9783
      @teamudaan9783 3 года назад +1

      @@PankajMali tysm i ll try this it was veryusefull

  • @joemusya2529
    @joemusya2529 3 года назад

    Hello sir, is it possible to connect my raspberry pi to the ground station say for instance mission planner. And be able to upload missions remotely.

    • @PankajMali
      @PankajMali  3 года назад

      Yes you can upload missions remotely in both the conditions
      1. When you just want to have waypoint mission in AUTO mode, you can upload mossions via telemetry connected to pixhawk ( witu direct link or also via internet)
      2.you can upload python scripts on your rpi remotely, in such a way that your script will call the way points stored in you pixhawk fc and take action according what you want the drone to do at particular waypoint.

  • @teamudaan9783
    @teamudaan9783 3 года назад +1

    Could you help me out in connecting missionplanner through TCP or UDP?

    • @PankajMali
      @PankajMali  3 года назад +1

      You dont have to use tcp and udp ports now, just connect pixhawk and a new device will show up in the list , you will get a sound notification when you connect pixhawk to computer .....if not then check if you have drivers installed for the usb ...usually drivers are installed automatically while installing mission planner

    • @teamudaan9783
      @teamudaan9783 3 года назад +1

      @@PankajMali i have changed those ports by connecting it through usb and followed the video i got everything correct bt i want to monitor it using missionplanner frn long range not using telemetry bt using internet . Could u help me with this?

    • @PankajMali
      @PankajMali  3 года назад +1

      @@teamudaan9783 thats great !! ... to give internet access to your rpi you can use 4g hat for that or you can use and portable wireless router with sim on the drone and connect it to rpi via wifi
      And then once your rpi gets access to internet
      You can use udp port to connect and pass commands remotely to flight controller
      Video on adding internet access to your drone will be out and cover the setup with both 4g hat and wireless router

    • @PankajMali
      @PankajMali  3 года назад +1

      techship.com/faq/ you can refer this for now

    • @teamudaan9783
      @teamudaan9783 3 года назад +1

      @@PankajMali tysm i ll go through it

  • @sudarshanpoudyal5089
    @sudarshanpoudyal5089 3 года назад

    Where can i buy pixhawk px4 flight controller....

    • @PankajMali
      @PankajMali  3 года назад

      amzn.to/3iHsgoX buy from here

  • @arindamsingha8659
    @arindamsingha8659 Год назад +1

    Where did you buy this UAV model?

    • @PankajMali
      @PankajMali  Год назад

      Hello arindam,
      I have designed and built it on my own with carbon fiber and 3d printed parts.

    • @arindamsingha8659
      @arindamsingha8659 Год назад

      @@PankajMali omg!! mind-blowing great, I thought you have bought it from somewhere... Could you please suggest where can I get a reliable quadrotor model as you have made...

    • @arindamsingha8659
      @arindamsingha8659 Год назад

      @@PankajMali Also send you a request on LinkedIn, please accept...

  • @vitoroliveira8381
    @vitoroliveira8381 2 года назад +1

    why are you using python 2

    • @PankajMali
      @PankajMali  2 года назад

      You can go with python 3 also... have tested the setup with python3

  • @carlosjarquin5540
    @carlosjarquin5540 3 года назад +1

    Can I use Python 3.7?

    • @PankajMali
      @PankajMali  3 года назад +1

      Yes you can use but its very much limited only to some packages so it's better to go with python 2.7

    • @carlosjarquin5540
      @carlosjarquin5540 3 года назад +1

      @@PankajMali thanks for the explanation, I'll try with the 2.7!

    • @PankajMali
      @PankajMali  3 года назад +1

      Yeah good luck

  • @alparslangazimemis
    @alparslangazimemis 3 года назад

    Hello Sir,
    Firstly thank you for video. I want to ask a question. I need to connect the pi and pixhawk together and in this system, the pi has to have camera because pi has to recognize the red area. After pi recognize the red area, that system will drop the balls. Servo motors must run for the ball to drop. How can i connect the servos of this system? Should it connect to pi or pixhawk? which one? Thank you very much in advance.
    Sincerely.

    • @PankajMali
      @PankajMali  3 года назад

      Hello alparslan
      Nice question,
      You follow this video to set up the connection between you rpi and pixhawk once done, check next video where you will get to know how to run your python scripts on the real vehicle.
      Lastly check the lastest video where you will find gazebo simulation and demonstration on real vehicle, where the pi camera detects a aruco marker and run the land command to make the copter land.
      Check the python script on my git
      In your case the copter will detect the red area and instead of landing it will drop a ball.
      To drop a ball, you can attach a servo and to control a servo, plug it into an empty channel on the pixhawk and use mission planner to set that channel as a servo channel. Using dronekit you can send mavlink messages to pixhawk.
      Hope it helps you

    • @alparslangazimemis
      @alparslangazimemis 3 года назад

      ​@@PankajMaliThank you so much for your informations.

  • @umeshjadhav3326
    @umeshjadhav3326 3 года назад

    With the full raspberry pi os + recommended software, wt will be it's size on sd card? For full os package should I get the 16gb or 32gb sd card, as I want at least 4gb of memory should remained on sd card.

    • @PankajMali
      @PankajMali  3 года назад +1

      Yes ....you can go with 16gb and still have 4gb reserved but i would recommend to get 32gb as in future you might need it if you are planning on up-gradation on your projects, to be on safer side go with 32gb.

    • @umeshjadhav3326
      @umeshjadhav3326 3 года назад

      32gb or 16gb.....???

    • @PankajMali
      @PankajMali  3 года назад

      32gb

  • @andresrocha9579
    @andresrocha9579 3 года назад

    Hi Pankaj, have you tryed the navio2 fligth controller with raspberrypi?

  • @user-hz3po7xe8w
    @user-hz3po7xe8w 2 года назад +1

    Hello, how can I contact you?

    • @PankajMali
      @PankajMali  2 года назад

      You can catch me up in Instagram @punky_pankaj

  • @manishjadhav8666
    @manishjadhav8666 3 года назад +1

    👍👍

  • @antonyshani9705
    @antonyshani9705 4 месяца назад +1

    Sir can you please provide your contact info🙏. I have some doubt to clear and i need some help for my project

    • @PankajMali
      @PankajMali  4 месяца назад

      Hi, you can catch me up on instagram @punky_pankaj

  • @electronicseverywhere204
    @electronicseverywhere204 3 года назад

    Waiting for heartbeat from /dev/ttyMA0. Is showing
    What is problem

  • @RANJODH_BHALOOR
    @RANJODH_BHALOOR 3 года назад +1

    Good bro..plz contact no chahi a aapka bro

    • @PankajMali
      @PankajMali  3 года назад

      Thank you
      Instagram @punky_pankaj

  • @speedbreaker7444
    @speedbreaker7444 3 года назад +1

    Hi, bro please respond to my mail

    • @PankajMali
      @PankajMali  3 года назад

      You can catch me on Instagram @punky_pankaj

  • @shubhampatil3904
    @shubhampatil3904 3 года назад +2

    Hawaa

  • @abdaleali609
    @abdaleali609 Месяц назад +1

    Where can i reach you bro i want you to help me some thing i was trying to build even if you charge me some money i am ok with that.

    • @PankajMali
      @PankajMali  Месяц назад

      You can catch me up on instagram @punky_pankaj