Это видео недоступно.
Сожалеем об этом.

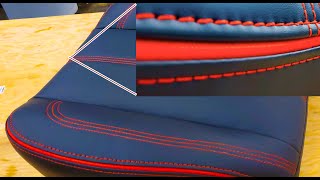
How to Make a Pleated Seat Cover for a Motorcycle

Поделиться
HTML-код
  • Опубликовано: 15 авг 2024
  • In this video we will be recovering a motorcycle seat with a pleated vinyl fabric cover. Step by step instructions include; patterning, how to sew pleats in your vinyl fabric, how to make boxing and then how to staple the cover to the seat. After watching this video you too should be able to make your own pleated or channeled seat covers. You can find the foam with fabric backing and all the other supplies including the marine vinyl fabric from Sailrite.
    Order supplies from: www.sailrite.com
    How to Make a Pleated Seat Cover Chapters:
    • Patterning Scrim Foam & Fabric -- 0:27 min
    • Sewing Pleats -- 3:04 min
    • Installing Boxing -- 5:12 min
    • Topstitching -- 10:17 min
    • Stapling Cover to Seat -- 11:28 min
    • Materials List -- 13:20 min
    MATERIALS LIST:
    Fabric Backed Sew Foam - www.sailrite.c...
    Marine Vinyl Fabric from Sailrite - www.sailrite.c...
    V-92 Polyester Thread from Sailrite - www.sailrite.c...
    TOOLS LIST:
    Sewing Machine, Paper, Marker, Scissors, Yard Stick
    3M Super 77 Spray Adhesive - www.sailrite.c...
    Tape Measure 120 Inch - www.sailrite.c...
    Sailrite® Short Nose Upholstery Staple Gun - www.sailrite.c...
    Staples (SS) - www.sailrite.c...

Комментарии • 246

  • @mr_tbot
    @mr_tbot 18 дней назад

    Finding this video 10 years later. With me measuring and cutting and my wife’s sewing skills, we were able to knock this out in an afternoon. This video is amazing! Saving it for future project bikes.

    • @SailriteDIY
      @SailriteDIY  14 дней назад

      Wow, it’s incredible how timeless some videos can be! Glad to hear you both tackled the project together, teamwork makes the dream work!

  • @icbiwoop
    @icbiwoop 9 лет назад +59

    Just used this video to make a new seat cover for my boyfriend's 1973 Yamaha 125. It came out beautifully! Instead of foam I used batting, and I used spray adhesive to add ripstop fabric to the back to prevent the stitches from pulling through. I still have enough vinyl left over to make another whole cover, and all the materials only cost about $20. Definitely an upgrade from the original seat (which was about 50% duct tape after 41 years!). Thank you!

    • @SailriteDIY
      @SailriteDIY  9 лет назад +3

      Excellent! Glad we could help. If you have any questions regarding our many videos or products at: www.sailrite.com let us know.

    • @danishkhan-yk8id
      @danishkhan-yk8id 5 лет назад

      Heather Perkins nice

    • @sheikahmedunnisa7743
      @sheikahmedunnisa7743 3 года назад

      Nice

  • @buckmajor
    @buckmajor 4 года назад +2

    Amazing! My sewing skills has only just kicked off lol. One day I will be a master sewer.

  • @patkcorcoran
    @patkcorcoran 5 лет назад +2

    Unreal talent, I can only dream I have the sewing skills.

  • @TakeThefinger
    @TakeThefinger 8 лет назад +14

    INCREDIBLE and very explanatory!!! Thank you for sharing your knowledge.

    • @SailriteDIY
      @SailriteDIY  8 лет назад +1

      +TakeThefinger Thanks for your positive comment.

  • @thirstybike
    @thirstybike 2 года назад

    What an excellent instructional video! Good detail and clarity on the steps.

  • @kickstart9853
    @kickstart9853 10 лет назад

    I sewed one by hand after watching this. Took a weekend and the result was pretty good. A sewing machine would have been much faster a easier. for about 40$ though I have a good seat cover and I learned a new trick. Thanks for the video and formula

  • @1234hellinthepacfic
    @1234hellinthepacfic 9 лет назад

    Hi eric I live in the U.K. I am going to embark on making a seat cover for my bobber I am currently building, I use to work in a naval base in what was called a sailloft on a sewing machine so I am going to have a go you have inspired me eric many thanks , I will send you a picture when I've finished.
    Regards, Kevin Norley , Plymouth, U.K.

    • @SailriteDIY
      @SailriteDIY  9 лет назад

      Kevin,
      Excellent! I can't wait to see the photos. Send them to eric@sailrite.com

  • @kraven4444
    @kraven4444 4 года назад +1

    Looks good. Don't forget with a pneumatic stapler you'll also need a compressor. There are also Electric ones that should have similar results.

  • @gabor222
    @gabor222 8 лет назад +2

    It's so easy when you have the right tools for it. I have done several seats with a sewing machine that was not designed to sew so thick materials (it was a pain) and I have done a few without any sewing machine. I have never used any glue for the foam just marked the different layers at the same locations so I could keep them aligned.

    • @SailriteDIY
      @SailriteDIY  8 лет назад

      +Gábor Lipcsei Very true! Thanks for your comments.

    • @JuisSekasi
      @JuisSekasi 8 лет назад

      I have made 2 two seat covers using very old foot powered seving machine.

  • @Zzzzzzzzz678
    @Zzzzzzzzz678 9 месяцев назад

    Amazing quality, thats the first time I know those types of seats are called pleated seats

    • @SailriteDIY
      @SailriteDIY  9 месяцев назад +1

      You learn something new every day! Now you can impress your friends with your knowledge of pleated seats.

  • @popvision8857
    @popvision8857 6 лет назад

    i am teaching myself to sew (clothes). your videos are so good that they make me thirsty to learn anything (sewn or not). ...and your work is so very neat. thanks

    • @SailriteDIY
      @SailriteDIY  6 лет назад

      Thanks for the positive comments. I hope your sewing projects go well.

  • @dyingforpie6879
    @dyingforpie6879 2 года назад

    Im 7 years late but awesome video- im getting ready to try my first seat recover thanks

  • @Pete-eb4ec
    @Pete-eb4ec 2 месяца назад

    I've made seat covers for my Honda GoldWing. The only problem with imitating the original one is the stitching. The saddle will act like a sponge in the rain because of the tiny stitch holes and you know how it feels when sitting on a wet sponge.

  • @craftrunner
    @craftrunner 7 лет назад

    Great Video, I am going to cover my 5 motorcycle seats, just bought a Pfaff 1245 machine, can't wait to get started. many thanks for making your video. Cheers From NZ

    • @SailriteDIY
      @SailriteDIY  7 лет назад

      You are welcome! I hope they come out great!

  • @davidfaletti2627
    @davidfaletti2627 10 лет назад

    Well done. A very good instructional video. Clear and concise.

  • @peggyt1243
    @peggyt1243 9 лет назад +4

    Thank you. The video was very informative and easy to understand. The final result looks impressive.

    • @SailriteDIY
      @SailriteDIY  9 лет назад +2

      Glad you liked it, let us know if you have questions about any of our products or videos at www.sailrite.com we are happy to help!

  • @moranasprowler
    @moranasprowler 6 лет назад

    that foam looks so much better thing than just regular sponge. That was great vid. I sew but automotive upholstery are every once in a while challenges ( as needed ). I will surely use some of your tricks. Thanks

  • @thesergeant3524
    @thesergeant3524 10 лет назад +10

    I'm really enjoying these new videos you're doing Eric. The production quality is very, very high. The explanations and voiceovers are excellent and the project choices have been really good for beginners/intermediates. Whenever anyone asks me for "tutorial videos" I immediately refer them to your channel. There isn't anyone else on youtube that's doing it better than you guys. Keep it up and thank you!

    • @SailriteDIY
      @SailriteDIY  10 лет назад

      Thanks for the positive comments!

  • @Glauco1933
    @Glauco1933 3 года назад

    Excellent demo, thank you. Very Profesional 👍

  • @Lengsel7
    @Lengsel7 6 лет назад

    Hey, no problem. All you need to do a cover like in this video (with the same quality stitch and to not possibly break your machine), is a ($2000+) heavy-duty, fully commercial sewing machine with a walking foot, like the one shown in the video, and be trained on it enough not to ruin your materials. Simple.

  • @jakescorpion1
    @jakescorpion1 Год назад

    Beautiful

  • @darwinbernhart
    @darwinbernhart 10 лет назад

    I've watched many of your videos and used many of the techniques. Great job. I have an upholstery shop in Alberta Canada and have bought several of your products as well.
    Let me tell you of an easier way to join boxing thats dead accurate and much easier.
    first lay one end down and mark where the center line is that you want your seam . add your seam allowance and cut it off. Then simply lay the other side of the boxing over the first end double your seam allowance ,which in this case would be one inch and cut it off.The trick here is when you lay over, eyeballing an inch is chancy , however if you tick a mark at a half inch (which is naturally what you're looking at as seam) and then another tick a half inch away from that you'll have the perfect one inch. Do this top and bottom and with out a ruler or straight edge you'll cut and sew a perfectly centered seam every time.

    • @SailriteDIY
      @SailriteDIY  10 лет назад

      Excellent! We will try this in an upcoming video. Thanks for the tip!!!!

  • @randallrun
    @randallrun 3 года назад

    Fantastically done video! You make it look so easy!
    But I will try... VERY much looking forward to my LSV-1 sometime in the next few months!!

  • @robtait3401
    @robtait3401 4 года назад

    Thank you very much for making this video

  • @codelicious6590
    @codelicious6590 6 лет назад

    Very exhaustive and clear as a bell! Thank you!

  • @canvasguy
    @canvasguy 6 лет назад

    I love that sewing machine,will get one,i am in the boat canvas industry....

  • @GorantheGuru
    @GorantheGuru 2 месяца назад

    Thank you very good video. Best regards Göran.

  • @markolson7877
    @markolson7877 3 года назад

    Truly an excellent video

  • @pedromartinez1165
    @pedromartinez1165 5 лет назад

    Thank you for this very nicely put video. I want to do a DIY and fix my very old 86 civic seats. I'm learning leather stitch, yeap from youtube university, and your video was crucial to learn about the 1/8 inch seam measure - THANK YOU
    Semper Fi

  • @allanwells4886
    @allanwells4886 10 лет назад +3

    Great stuff! Guess who would like to recover the torn seat on his son's Yamaha 250cc Virago!

  • @DoubleAughtGarage
    @DoubleAughtGarage 9 лет назад

    Excellent video. Thanks for sharing!

  • @scttlffn
    @scttlffn 6 лет назад

    This little video if first rate. Thanks!

  • @aryanalasvandian1579
    @aryanalasvandian1579 2 года назад

    Nice and useful, Thanks

  • @syahril.r8620
    @syahril.r8620 3 года назад

    Thx for the lesson, sensei!

  • @tomthompson7400
    @tomthompson7400 5 лет назад

    great video ,,, looks so easy when you watch some one else go round the corners

  • @takeawaykitty.
    @takeawaykitty. 4 года назад

    Good video all details are explained in great detail I'm excited to try this and prepared to make a few horrific seat cover trying to achieve my goal lol glad I bought a ton of extra materials

  • @BillySBC
    @BillySBC 8 месяцев назад

    What I learned from this is you better know a whole lot about sewing before trying to do something like this.

    • @SailriteDIY
      @SailriteDIY  8 месяцев назад

      Haha, trust me, I learned that the hard way too! Sewing can be a real challenge, but it's all about trial and error. Just be prepared for a few wonky stitches along the way!

  • @JeremyShay
    @JeremyShay 9 лет назад

    The seat looks like it is from a Tomos moped, not motorcycle. Super excited to try out this technique. Thanks for the video!

    • @SailriteDIY
      @SailriteDIY  9 лет назад

      We found this seat in someones garage, so it may be from a Tomos Moped, who knows. It was useful for this video.

  • @schummiehugo
    @schummiehugo 6 лет назад

    tank you... ferry clear !

  • @xavsmash
    @xavsmash 6 лет назад

    Fantastic work. Thank you !!

  • @bigrickshaberdashery2759
    @bigrickshaberdashery2759 Год назад

    nice job

  • @natalieholeman146
    @natalieholeman146 7 лет назад

    Thank you. Very detailed. Hopefully I can follow this.

    • @SailriteDIY
      @SailriteDIY  7 лет назад

      You can do it. Let us know if you have any questions along the way.

  • @javiercazorlabarrero9552
    @javiercazorlabarrero9552 5 лет назад

    Great job

  • @chinashorts1491
    @chinashorts1491 3 года назад

    Nice tutorial!

  • @Finke.
    @Finke. 7 лет назад

    Excellent tutorial

  • @Lavatronn
    @Lavatronn 5 лет назад

    Very great video! Thinking about doing this to my seat

  • @sigma_kappa
    @sigma_kappa 5 лет назад

    Thanks

  • @boarhog1979
    @boarhog1979 5 лет назад

    the back stitch should be done on the inside of the 1/2" . This way you will not put a million holes in the vinyl as well you will not see the backstitch joint. This would not apply with a french seam though. I have sewn many miles and this is routine. The band on the seat should be cut concave on the seat corners slightly to draw in the material so it will fit much better around the corners too

    • @SailriteDIY
      @SailriteDIY  5 лет назад

      Great suggestions! I will do this in the future. Thanks a million.

  • @rafaellucero5098
    @rafaellucero5098 6 лет назад

    What a deep voice

  • @alfonsoplanellsanchez3762
    @alfonsoplanellsanchez3762 4 года назад

    Very good work very ilustrativo súper profesional congratulations 🏈🃏😁🏉⚽👍

  • @bbrown87609
    @bbrown87609 10 лет назад

    Wow looks great!!!!!!!

  • @johnpaulsikora1
    @johnpaulsikora1 5 лет назад +1

    Skills!!!

  • @lisashelly6638
    @lisashelly6638 5 лет назад

    Great Video !!

  • @jaimereyes7480
    @jaimereyes7480 3 года назад

    Angela makes it look very easy. Excellent job

  • @kickstart9853
    @kickstart9853 10 лет назад

    fantastic. going to try it!

    • @SailriteDIY
      @SailriteDIY  10 лет назад

      Great! Let us know how it comes out. If you have questions, just ask. You will find a lot of great products for this and other projects at www.sailrite.com

  • @TylerNewberry
    @TylerNewberry 7 лет назад

    Thank you for sharing this great info!

  • @samhutson7966
    @samhutson7966 Год назад +1

    What does it cost for a sailrite polo shirt with ultrafeed LZS-1, below the sailrite logo?!? XL SHORT SLEEVE?

  • @DONphantasmo
    @DONphantasmo 8 лет назад

    another great video. wonderful job. And yes, I had a few Tomos mopeds, and I did recognize the seat. Good job Aimlessmoto, keen eye

  • @mitrarasouli
    @mitrarasouli 7 лет назад

    your videos are awsome.
    thank you for sharing

  • @uchihahikaku1630
    @uchihahikaku1630 7 лет назад

    Beautiful....

  • @user-je5bz4wg4x
    @user-je5bz4wg4x 5 лет назад

    Thanks a lot

  • @PabloMartinez-is5wf
    @PabloMartinez-is5wf 4 года назад

    nice tutorial, thank you so much!

  • @raelemara
    @raelemara 4 года назад

    Muito bom. Gostei muito. Vou fazer pra minha bicicleta motorizada.

  • @user-ro3fr9qz2g
    @user-ro3fr9qz2g 7 лет назад

    Great video!

  • @InetteMotoBiker
    @InetteMotoBiker 8 лет назад

    Great video, very well explained.

  • @daansteegmans
    @daansteegmans 9 лет назад

    great video!

  • @shajahanlegal8996
    @shajahanlegal8996 5 лет назад

    Thank you!

  • @jameshisself9324
    @jameshisself9324 9 месяцев назад

    Great instructional and materials list video. While I do applaud the skills and craftsmanship of the lady doing the work, the end product shown has an 'overstuffed' look that is generally undesirable for motorcycle seats although far too common. I would be very interested to see the techniques used to avoid this.

    • @SailriteDIY
      @SailriteDIY  9 месяцев назад +1

      Thank you for your feedback! I appreciate your kind words about the instructional video. I understand your concern about the "overstuffed" look, and I'll definitely take it into consideration for future videos.

  • @muhammadkunhi.a8669
    @muhammadkunhi.a8669 3 года назад

    Cycle seats are more model this very simple old model..note effective

  • @muhammadsaputra9686
    @muhammadsaputra9686 7 лет назад

    good job ... -i like this

    • @SailriteDIY
      @SailriteDIY  7 лет назад

      Great! Thanks for the positive comment.

  • @izetbytyqi5697
    @izetbytyqi5697 8 лет назад

    Very nice

    • @SailriteDIY
      @SailriteDIY  8 лет назад

      +izet bytyqi We are glad you liked it. Let us know if you have questions.

  • @rspolymersaligarh8776
    @rspolymersaligarh8776 Год назад

    Nice

  • @dagostfrancois7761
    @dagostfrancois7761 8 лет назад

    merci pour la demo très bien

  • @snm6004
    @snm6004 9 лет назад +2

    Very very good job
    Thank you for vdo.

    • @SailriteDIY
      @SailriteDIY  9 лет назад

      You are welcome! Glad you liked it.

  • @amazonasselva1
    @amazonasselva1 9 лет назад

    Thanks!!! Great job !!

  • @altops4490
    @altops4490 7 лет назад

    Never sew were your top thread is from the (stock thread)bobbin, as top thread from the spool is better for top thread, looks and finishing, also sewing were you finish material is face down risks damage from the machine. I alway try to make the primary stich shorter than the top stitch length.@13:48 we can see the tension on the bobbin thread wasn't tight enough to pull the top thread below sight and shows up on the finished work as incorrect stitch. Over all fair to nice work.

  • @PAKMOTOVLOG
    @PAKMOTOVLOG 6 лет назад

    nice one...

  • @dariomaximiliano7276
    @dariomaximiliano7276 9 лет назад

    Tx Pal! Very usefull.

  • @billrussell7672
    @billrussell7672 5 лет назад

    I have a yammy 400 and now I will fix it myself

  • @paulosk40ment70
    @paulosk40ment70 7 лет назад

    muito bom . Bem trabalhado.

  • @Snikern
    @Snikern 7 лет назад

    nice nice gonna use this on my old honda mt5

  • @TheWoodWerker
    @TheWoodWerker 6 лет назад

    Wow! Very comprehensive Video presentation! Thanks for Sharing! I’m proud to be a subscriber! Have A Super Week!.....Gus

  • @tuesdayk7605
    @tuesdayk7605 9 лет назад +2

    Are there any special needles or feet attachments that you need for your sewing machine in order to do the quilting.

    • @SailriteDIY
      @SailriteDIY  9 лет назад +1

      The Sailrite Ultrafeed sewing machines do not have a drop down feed dog and the upper walking foot does must always come in contact with the feed dog, so it is not a good machine for quilting, sorry.

  • @TroyDGunderson
    @TroyDGunderson 9 лет назад +9

    Should have removed old cover first. Bad edges will cut through the new cover.

  • @66Gordo
    @66Gordo 7 лет назад

    How is the best way to re-install the new finished cover on a steel seat pan with robots as opposed to staples? is there a method to do to get it even and stretched tight?

  • @schlossknecht
    @schlossknecht 10 лет назад

    Great!

  • @kiwikingi1
    @kiwikingi1 7 лет назад +1

    great vid

    • @SailriteDIY
      @SailriteDIY  7 лет назад

      Thanks! As always let us know if you have questions about the process or the supplies from Sailrite.

  • @bqderek9699
    @bqderek9699 6 лет назад

    PU gel pad which can be inserted into your motorcycle seat for comfort sitting.

  • @syednadeem1340
    @syednadeem1340 4 года назад +1

    Good i m purfasnal poshas meker yuo good

  • @jerrywhidby5259
    @jerrywhidby5259 7 лет назад

    This guy's voice reminds me so much of Brian Posehn.

  • @Fabrizio_Marengo_Fai_da_Te_DIY
    @Fabrizio_Marengo_Fai_da_Te_DIY 10 лет назад

    Nice video!!!!

  • @Jkirk3279
    @Jkirk3279 6 лет назад

    This was GREAT!
    I have a question.
    Have you seen a stapler that would work in tight spaces, with no more than 2" height to work with?
    I've run across this situation twice recently when rebuilding large boat seats with recessed cushions.
    There's no convenient way to staple down the "pulls" which keep the vinyl taut.
    When I get out to the edge there's no more room for our Senco stapler.

    • @SailriteDIY
      @SailriteDIY  6 лет назад

      Will this one work: www.sailrite.com/EZE-TC-08-Long-Nose-Staple-Gun

  • @jaimereyes7480
    @jaimereyes7480 3 года назад

    What should I expect to pay go have a cover made? Small seat similar to the one in the video

    • @SailriteDIY
      @SailriteDIY  3 года назад +1

      Most canvas shops charge about $65 per hour. It might take about two hours for them to complete this job.

    • @jaimereyes7480
      @jaimereyes7480 3 года назад

      @@SailriteDIY I think I'm gonna give it a shot using your video. I have little experience sewing from middle school 😂. I ordered some vinyl, now just need to find a used sewing machine.

  • @AimlessMoto
    @AimlessMoto 8 лет назад +13

    It took me the ENTIRE video, but I finally realize that seat is off a Tomos moped. Hah.

    • @SailriteDIY
      @SailriteDIY  8 лет назад +1

      Yep, your guessed it.

    • @zakkantz7779
      @zakkantz7779 6 лет назад

      i have two tomos targas so i sat there like no yeah then i went out to the garage and check now I'm here

  • @frankcrawford416
    @frankcrawford416 8 лет назад

    Thank you for the very well done and informative video.

  • @BonoMeArse
    @BonoMeArse 5 лет назад

    Good informative video..good commentary...too many video's on here with no commentary...PITA..

  • @Ticdaniel
    @Ticdaniel 3 года назад

    How do you do when the seat bottom is in steel, not plastic/wood. Thanks

    • @SailriteDIY
      @SailriteDIY  3 года назад

      Those types of seats usually have triangular prongs built into the metal that grip the fabric cover. Does your steel bottom plate have those prongs?

  • @redneckarmyvet9003
    @redneckarmyvet9003 9 лет назад

    I am assuming that using thinner foam behind the pleating makes the pleats not look so tall and round?

    • @SailriteDIY
      @SailriteDIY  9 лет назад

      The thinner foam "Polyurethane Foam With Fabric Backing" is what gives the top vinyl fabric the pleated look. Without sewing into the foam the fabric would only show stitch lines and not the rounded pleats.

  • @pippolacoste8547
    @pippolacoste8547 9 лет назад

    Beautiful, thank you so much for sharing all this. I have an old (1923) Singer sewing machine that pulls much heavier fabric than my new(ish) Neff, it's amazing what that old tractor can do. I'll give it a try with vinyl, the seat of my new motorbike got a nasty tear and I'll take the chance to completely re-do the seat (I didn't like it anyway!). Cafe-racer, here I'm coming!
    Question: what is the best thread that can be used with a home sewing machine for stitching vinyl? The thicker needle I have is a 110 for leather.

    • @1979augistine
      @1979augistine Год назад

      Make sure the thread is sun rated black crown is amazing thread